There is something about gothic clay candle holders that makes a room feel instantly more interesting.
Dark arches, crooked towers, tiny bats and moon shapes can turn an ordinary piece of clay into decor that feels moody without becoming too scary.
And honestly, you don’t need a pottery wheel to make them.
With air-dry clay, kids and beginners can pinch, roll, press and build these little pieces by hand.
For safety, these projects are designed around battery-powered LED tealights, not real flames. So grab some clay and lets make something wonderfully weird!
Safety first: Use non-toxic air-dry clay intended for children’s crafts.
These projects are decorative holders for battery-powered LED tealights. Do not put real candles, flames or hot bulbs inside air-dry clay pieces.
Air-dry clay is generally not fireproof or heatproof. Children should also have adult supervision during crafting.
Choose Your Air Dry Clay Type
Regular Air Dry Clay | Cornstarch Clay | Homemade Clay
Affiliate Disclaimer: Some of the links in this post may be affiliate links, which means I may earn a small commission if you choose to make a purchase through them – at no extra cost to you. I only share products that genuinely fit this project and can help make your ceramic mug clay craft process easier and smoother. Your support helps keep ideas like this coming.
1. Crooked Gothic Arch Candle Holder
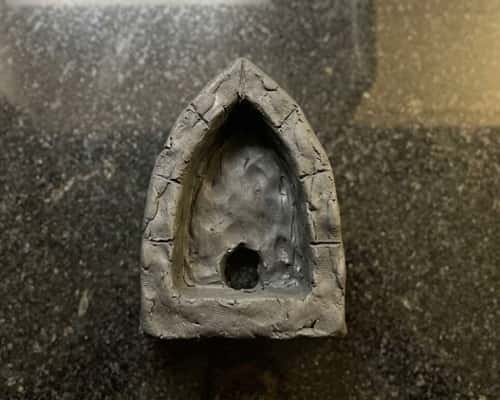
Want something that looks like a tiny piece of an abandoned castle?
This is probably the easiest way to get that gothic pottery appearance without making the project complicated.
What you’ll need
- Non-toxic air-dry clay
- Rolling pin or smooth bottle
- Blunt craft stick
- Small LED tealight
- Acrylic paint
- Paintbrush
How to make it
Step 1: Roll a thick slab of clay about 8–10 mm thick.
Step 2: Cut two matching rectangular side pieces. These will become the walls.
Step 3: Make a slightly wider rectangular piece for the back.
Step 4: Create a pointed arch from another slab. Think of a tall doorway rather than a perfect semicircle.
Step 5: Cut an opening in the middle of the arch. Make the opening large enough for the LED tealight to be seen, but keep plenty of clay around it.
Step 6: Score and lightly dampen the edges where the pieces meet.
Step 7: Press the pieces together and blend the joints with your fingertip.
Step 8: Add tiny cracks, stone lines and uneven edges using a blunt craft stick.
Let the structure dry completely. Paint it charcoal, black or deep grey.
That slightly crooked shape is the charm. Perfect symmetry would actually make it look less handmade.
2. Skull Face Clay Candle Holder
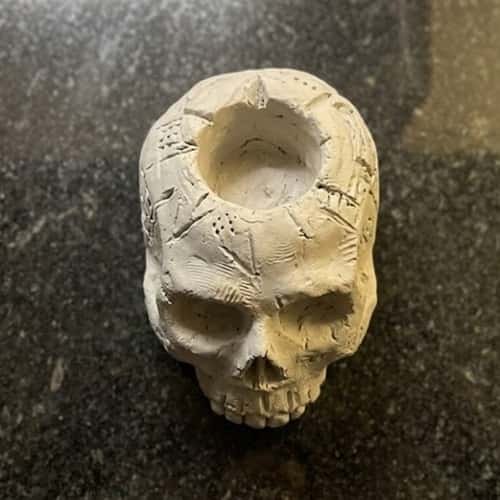
A skull can be surprisingly simple when you treat it as decoration rather than trying to sculpt a realistic skull.
Steps
Step 1: Form a short, thick clay cylinder.
Step 2: Flatten the bottom so it sits securely.
Step 3: Create a shallow circular opening at the top for the LED tealight.
Step 4: Make two small flattened clay circles for the eye sockets.
Step 5: Add a tiny triangular nose.
Step 6: Press several short lines into the lower face to suggest teeth.
Step 7: Attach the details while the clay is still soft.
Step 8: Add a few intentionally uneven cracks around the skull.
Dry thoroughly, then paint it bone-white with slightly darker grey details.
It becomes a clay candle holder with a sculptural personality.
3. Black Rose Gothic Clay Holder

Black roses instantly give you that dark romantic feeling.
Make the base
Start with a small cylindrical or rounded clay holder.
Step 1: Shape the body first.
Step 2: Flatten the bottom.
Step 3: Create the LED opening at the top.
Step 4: Roll a very thin strip of clay.
Step 5: Curl one end inward.
Step 6: Keep wrapping the strip around itself to form a simple rose.
Step 7: Pinch the outer edge of a few petals.
Step 8: Attach the rose to the front of the holder.
Don’t make every petal identical. Handmade roses looks much more convincing when they are a little uneven.
Paint the whole piece black, then lightly brush grey over the raised petals.
4. Moon Phase Clay Candle Holder
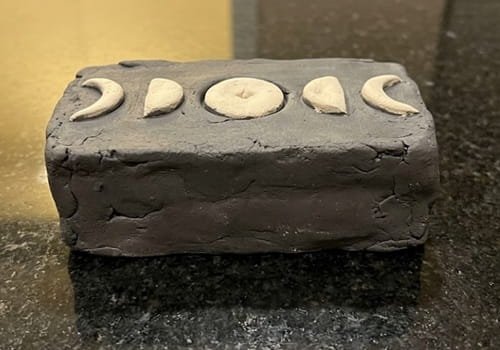
This one is calmer.
Instead of scary Halloween imagery, use the moon phases to create a mystical decor piece.
Instructions
Step 1: Make a short rectangular clay block.
Step 2: Round the corners with your fingers.
Step 3: Create a shallow opening on the top for the LED light.
Step 4: Roll thin clay into small circles.
Step 5: Flatten some circles completely.
Step 6: Turn others into crescent shapes by pressing away part of the clay.
Step 7: Arrange the shapes in a line across the front.
Step 8: Press them gently into place.
Paint the holder deep charcoal and the moon shapes a muted cream.
5. Little Bat Wing Holder
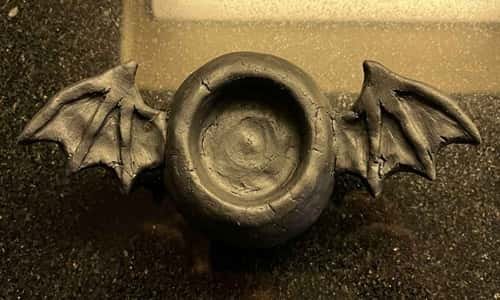
Bats are perfect for a playful gothic theme.
Steps
Step 1: Make a small round clay holder.
Step 2: Flatten the base.
Step 3: Create a shallow top opening for an LED tealight.
Step 4: Flatten two separate clay pieces.
Step 5: Cut simple wing shapes with a blunt craft stick.
Step 6: Give each wing three rounded points.
Step 7: Press the wings against the sides.
Step 8: Add a tiny raised bat body in the center.
Paint it black after drying.
Simple? Yes. But it has plenty of personality.
6. Tiny Coffin-Shaped LED Holder
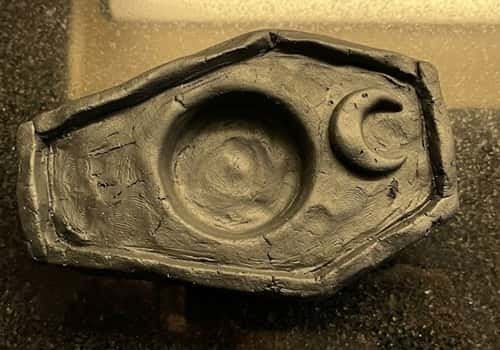
This one has a very different silhouette.
How to make it
Step 1: Roll clay into a thick slab.
Step 2: Cut a simple coffin outline with a blunt craft stick.
Step 3: Build a second matching outline if you want raised sides.
Step 4: Attach narrow clay strips around the perimeter.
Step 5: Leave the top open.
Step 6: Add a small cross, moon or star on the front.
Step 7: Smooth the joins carefully.
Step 8: Let the entire piece dry before painting.
Use black, charcoal or deep purple.
The holder is more decorative than functional pottery, but that is part of the fun.
7. Mini Gothic Cathedral Holder
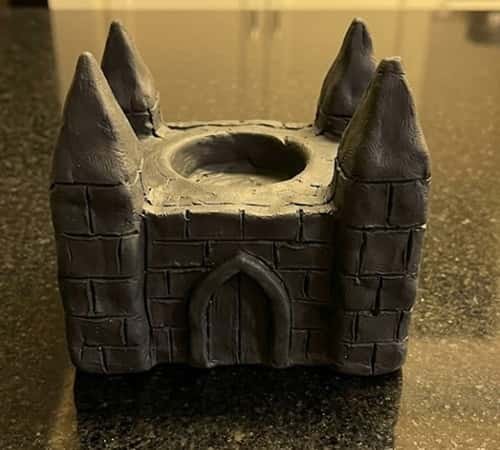
Okay, this one sounds difficult.
It isn’t.
Think of it as building a tiny castle from clay pieces.
Step 1: Make four thick clay walls.
Step 2: Create a pointed arch opening in the front.
Step 3: Attach the side walls.
Step 4: Add a narrow roof or triangular top.
Step 5: Make two tiny towers.
Step 6: Add simple vertical grooves to imitate stonework.
Step 7: Create tiny pointed windows.
Step 8: Attach everything while the clay is still workable.
Keep the details chunky. Tiny fragile pieces aren’t suitable for little fingers.
This is where a simple clay craft starts feeling like a miniature clay sculpture.
8. Spiderweb Clay Candle Holder
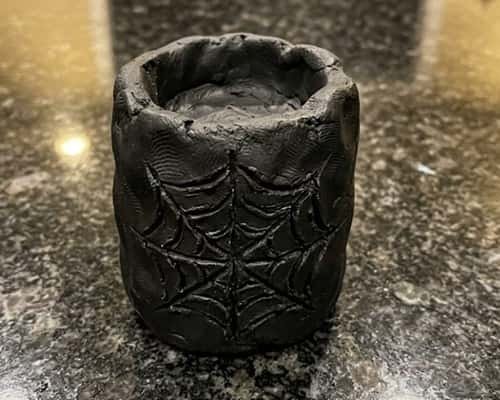
A spiderweb pattern can be created without sculpting a spider at all.
Steps
Step 1: Build a short cylindrical holder.
Step 2: Flatten the bottom.
Step 3: Make the LED opening.
Step 4: Roll very thin clay ropes.
Step 5: Place four or five strips across the front.
Step 6: Add curved strips between them to form a loose web.
Step 7: Press each intersection gently.
Step 8: Allow it to dry completely.
Paint the holder black and lightly highlight the web with grey.
9. Gothic Window Clay Holder

This is one of the easiest diy clay candle holders to customize.
Steps
Step 1: Form a thick rectangular block.
Step 2: Cut a tall pointed-arch window into the front.
Step 3: Keep enough clay around the opening so the holder stays strong.
Step 4: Add two narrow clay strips vertically.
Step 5: Add one horizontal strip.
Step 6: Press the strips into the window.
Step 7: Add small cracks around the frame.
Step 8: Dry and paint.
A tiny LED light behind the opening can make the window appear to glow.
10. Thorn-Wrapped Gothic Pot
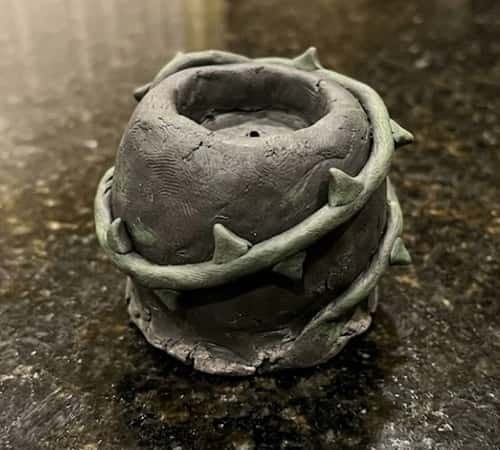
What if the candle holder looked like it had grown around the light?
Make the thorns rounded and chunky so children can handle them safely.
Step 1: Create a small rounded holder.
Step 2: Make a shallow opening at the top.
Step 3: Roll a long thin clay rope.
Step 4: Wrap it loosely around the outside.
Step 5: Add small rounded triangular bumps along the rope.
Step 6: Press the rope against the holder.
Step 7: Blend a few attachment points.
Step 8: Dry and paint the entire piece dark green, black or charcoal.
This gives you a gothic garden feeling without needing complicated ceramics techniques.
11. Gargoyle Face Clay Holder
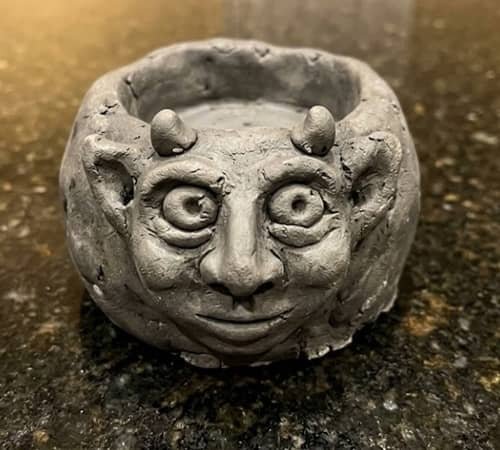
Don’t try to sculpt a realistic gargoyle.
Make a funny one.
Steps
Step 1: Make a small rounded clay container.
Step 2: Create a top opening for the LED tealight.
Step 3: Add two chunky clay eyes.
Step 4: Add a wide nose.
Step 5: Make two small ears or horns.
Step 6: Add a simple mouth.
Step 7: Press shallow lines into the forehead.
Step 8: Let everything dry before painting.
Grey works especially well here. A little dry-brushed black around the details gives it an old-stone appearance.
12. Gothic Rose Window Holder
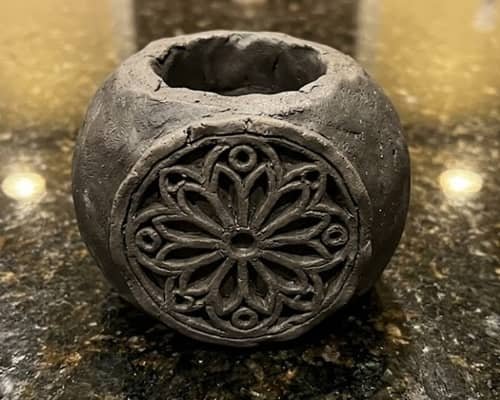
This design takes inspiration from the circular rose windows seen in old Gothic architecture.
How to make it
Step 1: Build a short rectangular or cylindrical holder.
Step 2: Make a large circular clay disk.
Step 3: Cut a simple flower-like pattern into the disk.
Step 4: Keep the pattern chunky rather than creating thin fragile sections.
Step 5: Attach the disk to the front.
Step 6: Add a few raised clay lines around the circle.
Step 7: Create the LED opening behind the design.
Step 8: Dry thoroughly before painting.
Try muted purple, charcoal and dusty grey for a darker architectural effect.
13. Bonus: Melted-Looking Wax Drip Clay Holder
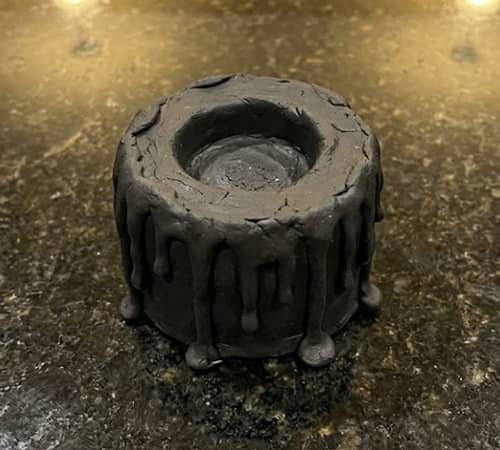
This final idea is intentionally weird.
Instead of sculpting another gothic symbol, make the holder itself look like an old candle that has been frozen halfway through melting.
Steps
Step 1: Form a thick cylindrical holder.
Step 2: Flatten the base.
Step 3: Create a top opening for the LED tealight.
Step 4: Roll thin clay ropes.
Step 5: Place them around the rim.
Step 6: Let some ropes hang down the sides.
Step 7: Flatten the ends so they look like drips.
Step 8: Add tiny cracks and rough marks.
Paint it ivory, grey or black.
This is one of those creative crafts where the imperfections actually improve the final appearance.
Final Thoughts
The easiest way to make gothic decor feel expensive isn’t adding more decoration.
It is choosing one strong shape and repeating its visual language.
Pointed arches, moon curves, roses, rough stone marks and uneven edges can make a simple lump of clay feel architectural.
That is also why air dry clay crafts are so useful for experimenting.
You can prototype a shape cheaply before investing in proper clay ceramics or fired pottery.
If you’re interested in selling crafts, try developing a recognizable mini collection instead of making every piece completely different.
Three related holders in the same finish can look far more intentional than ten unrelated designs.
And remember, the handmade irregularities are not defects her – they’re part of the gothic character.





