Halloween is one of my favorite times for small creative projects because even the simplest shapes can become something spooky.
These Halloween clay magnet craft ideas are designed for kids who love squishing, rolling and shaping clay into tiny decorations.
I’ve kept the designs beginner-friendly, with simple tools and easy-to-find supplies.
You can use air dry clay, lightweight modeling clay or another kid-friendly clay suited to your project.
The finished magnets can brighten up the refrigerator, a magnetic board or a family craft display. And honestly, making a whole little Halloween collection is half the fun.
A quick safety note: For children, I recommend doing the clay shaping together and having an adult handle the final magnet attachment. Loose magnets can be dangerous if swallowed, so use a securely attached, child-safe magnetic backing and keep finished magnets away from babies, toddlers and pets.
Choose Your Air Dry Clay Type
Regular Air Dry Clay | Cornstarch Clay | Homemade Clay
Affiliate Disclaimer: Some of the links in this post may be affiliate links, which means I may earn a small commission if you choose to make a purchase through them – at no extra cost to you. I only share products that genuinely fit this project and can help make your ceramic mug clay craft process easier and smoother. Your support helps keep ideas like this coming.
1. Spooky Ghost Clay Magnet
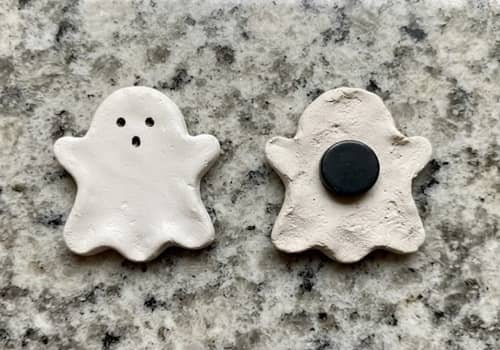
Let’s start with the easiest one.
Roll a small piece of white air dry clay into a smooth ball. Flatten it gently with your fingers, then pull the lower part outward to create a wavy ghost-shaped bottom.
You don’t need perfect symmetry here. In fact, a slightly crooked ghost looks much more handmade.
Use a blunt clay tool or the rounded end of a pencil to make two small eye holes. Add a tiny open mouth underneath. If you want a friendlier ghost, make the mouth into a small oval instead.
Let the clay dry completely according to the clay manufacturer’s instructions.
Once dry, an adult can attach the magnetic backing securely to the rear.
Why kids like it: There are almost no complicated shapes, making this a great first clay activity.
2. Mini Pumpkin Face Magnet
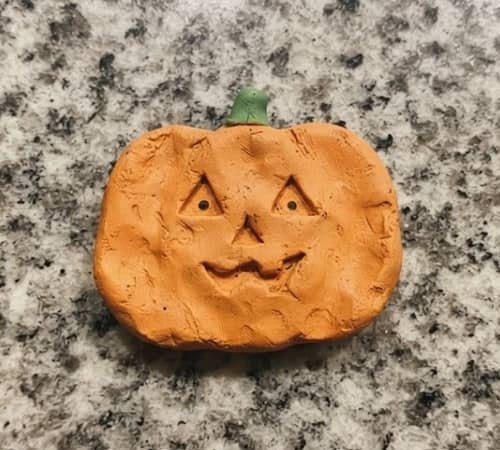
Pumpkins are practically made for clay.
Take orange clay and roll it into a small ball. Press it slightly so it looks squat rather than perfectly round. Use a blunt tool to press several vertical grooves from the top toward the bottom.
For the face, kids can choose their own expression.
Try triangle eyes and a tiny smile. Or make one eye larger than the other for a silly pumpkin.
Add a tiny brown or green clay stem on top. Press it gently into place before drying.
Want more personality? Add two tiny green leaves beside the stem.
3. Black Cat Halloween Magnet
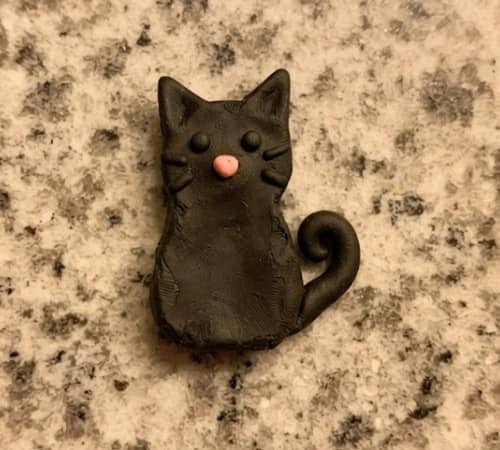
This one is especially cute if your child loves cats.
Start with black clay and make a small oval body. Pinch two pointed ears from the top. You can make the cat’s face very simple.
Press two tiny eye shapes into the front. Add a little pink clay triangle for the nose if you want some contrast.
For whiskers, I would avoid thin wire or sharp materials for a kids’ project. Just score three short lines on each side using a blunt tool.
Make the tail separately and attach it to the side. A curled tail gives the magnet more character.
The cat doesn’t need to look realistic. A wonky little cat can be cuter.
4. Friendly Frankenstein Magnet
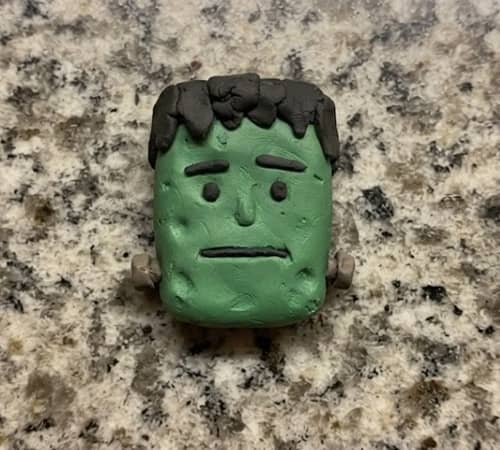
Frankenstein doesn’t have to be scary.
Roll green clay into a small rectangle with rounded corners. Flatten the front slightly.
Add two tiny eyes and a straight mouth. Then make small black clay strips for the hair.
For the classic Frankenstein look, add two tiny dark clay circles or flattened dots on either side of the head to represent the neck bolts.
Don’t make the bolts sharp or protruding. Flatten everything securely into the clay.
A little unevenness actually makes this project better because it gives Frankenstein that homemade monster feel.
5. Tiny Clay Witch Hat Magnet
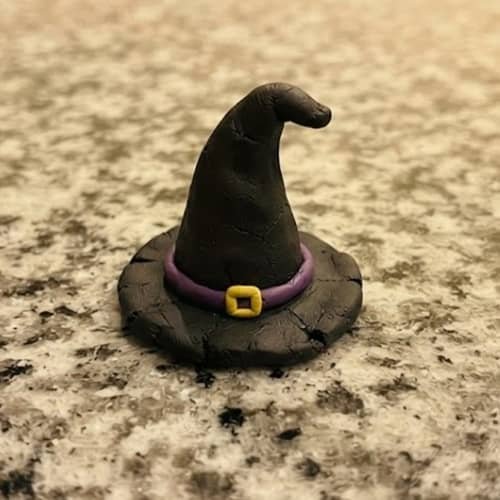
This one uses surprisingly little clay.
Take black clay and roll a small cone. Flatten the bottom so it can sit against the refrigerator.
Make a thin strip of purple, orange or green clay and wrap it around the base of the cone.
For the buckle, flatten a tiny piece of yellow clay and press a simple square shape into the band.
You can also bend the tip of the hat slightly sideways.
And that’s it.
This is one of those easy DIY clay projects where changing one tiny detail completely changes the personality of the finished piece.
6. Creepy Eyeball Magnet
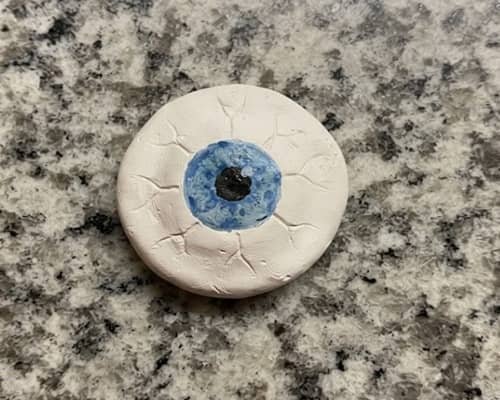
Kids who enjoy slightly spooky crafts will probably pick this one first.
Make a small white clay ball and flatten it just a little.
Add a colored iris in the center. Blue, green and purple all work nicely.
Place a small black clay circle inside the iris.
For extra detail, score a few very thin lines around the iris using a blunt clay tool.
Don’t use sharp pins or needles for the detailing.
Let the eyeball dry completely before attaching the magnetic backing.
It looks wonderfully weird when the iris isn’t perfectly centered.
7. Little Clay Bat Magnet
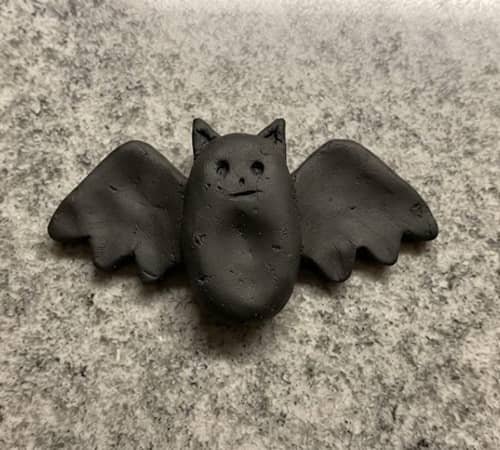
Start with a small oval of black clay for the bat’s body.
Flatten it slightly.
Then make two simple wing shapes separately. Each wing can look like a rounded triangle with two or three shallow notches.
Attach the wings firmly to the body.
Add two tiny ears and a simple face.
Don’t worry if the wings are not identical. Handmade bats look better when they aren’t machine-perfect.
For younger children, you can even skip the face details and let the silhouette do all the work.
8. Cute Mummy Clay Magnet
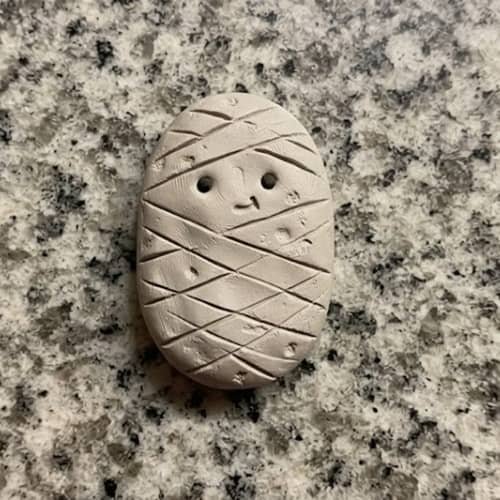
A mummy is basically a tiny clay character wrapped in imaginary bandages.
Shape a small white or pale gray oval body.
Instead of adding actual string or fabric, use a blunt clay tool to draw horizontal and diagonal bandage lines across the surface.
Leave two small spaces for the eyes.
Add black clay dots inside them.
For a funny expression, make one eye slightly higher than the other.
This becomes a really nice clay activity because kids can experiment with different wrapping patterns without worrying about precision.
9. Tiny Haunted House Magnet
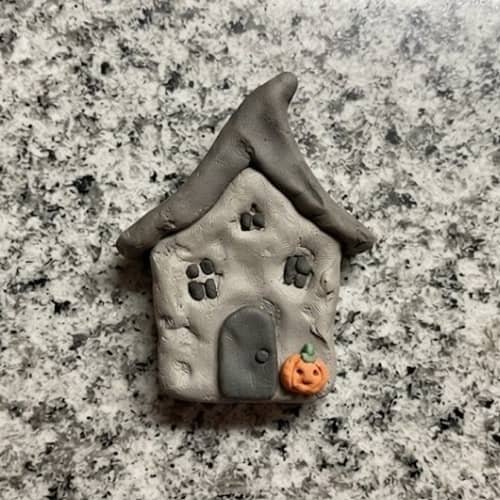
Ready for something slightly more challenging?
Create a small rectangle of gray or brown clay.
Shape the top into a simple pointed roof. You can make the roof separately and press it onto the house.
Add a tiny door and two windows.
For the spooky effect, make the windows black and slightly uneven.
A tiny orange moon or pumpkin can be added beside the house, but keep it attached to the clay design rather than adding loose pieces.
This one works particularly well as part of a collection of Halloween decorations.
10. Candy Corn Clay Magnet
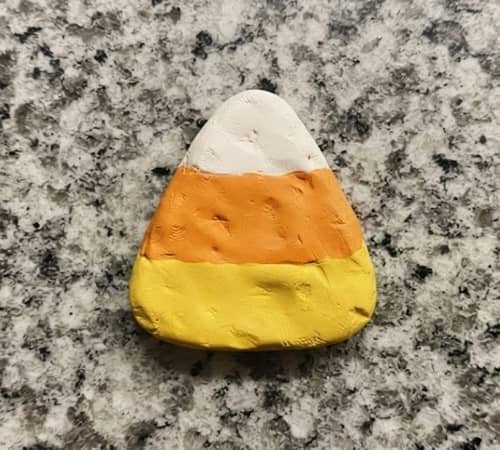
Candy corn is perfect for kids who are still learning basic clay shapes.
Divide the clay into three colors: yellow, orange and white.
Roll each color into a small flattened strip.
Stack the strips carefully, then gently press them together.
Cut or shape the combined piece into a small triangle with rounded corners.
Don’t make the triangle too thin. A slightly chunky piece will be easier for little fingers to handle.
This is also a fun way to introduce kids to layering colors.
11. Friendly Pumpkin Monster Magnet
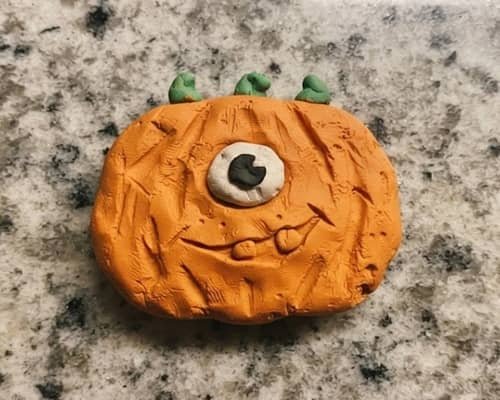
Now let’s get a little creative.
Make a small orange pumpkin using the same basic ball-and-groove method.
But instead of a normal pumpkin face, give it one big eye and a funny crooked mouth.
Add two tiny green clay horns or leafy bumps on top.
The key is not making it too complicated.
Kids can invent their own monster face, which makes this one of my favorite cute clay crafts for halloween.
12. Spider Web Clay Magnet
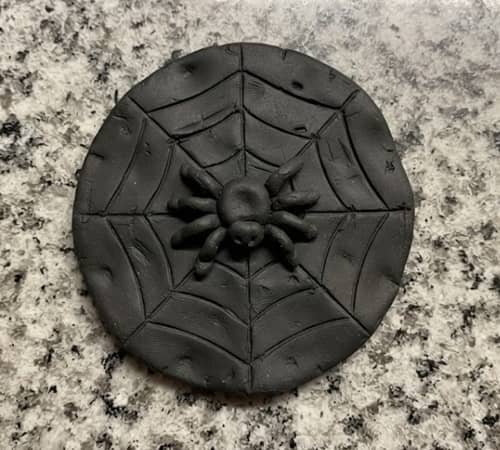
This design is different because the web becomes part of the shape.
Flatten a small piece of black clay into a rough circular disk.
Use a blunt clay tool to press several lines radiating from the center.
Then add curved connecting lines between them.
Don’t worry about making a mathematically perfect web.
Add a small black spider body in the middle with four simple legs on each side. Keep the legs thick and clay-based rather than using wire.
This is a great little clay sculpture project for older kids who want more detail.
13. Halloween Potion Bottle Magnet
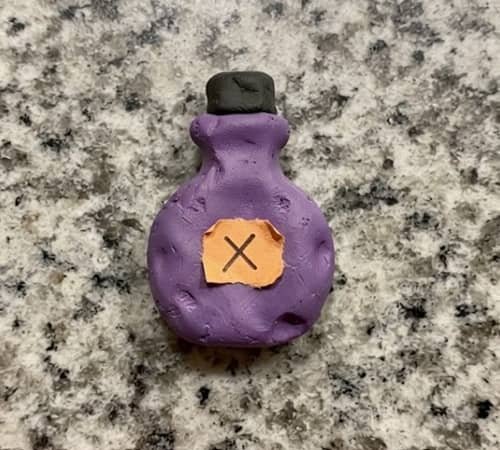
This is my wildcard idea.
Instead of making a Halloween character, make a tiny potion bottle.
Shape purple or green clay into a small bottle with a rounded body and narrow neck.
Add a tiny black clay cap.
For the label, flatten a very small piece of white or orange clay and press it onto the bottle.
You can make a simple dot, star or crooked “X” on the label instead of trying to write tiny words.
That keeps the project suitable for little fingers.
How To Turn These Into Proper Halloween Clay Magnets
There is one important part that shouldn’t be rushed… the magnet attachment.
First, allow the clay to dry completely. If you attach a magnet while the clay is still soft or damp, the backing can shift or fall away later.
Once the piece is fully hardened, an adult should attach the magnetic backing according to the adhesive manufacturer’s directions.
I prefer a securely bonded magnetic sheet or an appropriately sized craft magnet rather than making complicated holes through the clay.
For children’s projects, magnet safety matters more than decoration. Never give loose magnets to young children.
Keep unfinished magnets, detached magnets and completed pieces away from toddlers and pets.
If the project is going to be handled frequently, check the attachment from time to time. A loose magnet should be removed immediately.
Final Thoughts
What I really like about these magnets is that they teach more than just Halloween crafting. Kids are quietly practicing hand strength, shape recognition, color mixing, symmetry and small-movement control while they play.
Air dry clay is especially useful because children can move from simple rolling and flattening into genuine little pieces of clay sculpture as their confidence grows.
You can even photograph their magnets before they are attached and create a yearly “Halloween craft collection” to compare.
And don’t throw away the imperfect ones. Those wonky pumpkins and crooked ghosts often show the most personality.
The best clay craft isn’t always the neatest one; sometimes the messy version is the one kids remember.





