Halloween crafts become much more interesting when you move beyond paper cutouts and turn soft clay into tiny objects kids can actually shape, decorate, and keep.
These Halloween clay pottery ideas are designed around simple hand-building techniques rather than complicated ceramics equipment.
Think miniature pots, spooky dishes, tiny holders, and playful clay sculpture projects with plenty of room for fingerprints and imperfections.
Want something that feels handmade rather than factory-perfect? That is exactly the point here.
These projects work well for family diy clay projects, classroom clay activities, or even small handmade pieces for selling crafts.
Kid-safety note: Use air-dry clay labeled non-toxic and intended for children’s crafts. Adult supervision is still recommended. Avoid sharp sculpting tools, wire, glaze chemicals, ovens and kilns. Kids can do the shaping with their fingers, craft sticks and other blunt household tools.
Choose Your Air Dry Clay Type
Regular Air Dry Clay | Cornstarch Clay | Homemade Clay
Affiliate Disclaimer: Some of the links in this post may be affiliate links, which means I may earn a small commission if you choose to make a purchase through them – at no extra cost to you. I only share products that genuinely fit this project and can help make your ceramic mug clay craft process easier and smoother. Your support helps keep ideas like this coming.
1. Wonky Pumpkin Pinch Pot
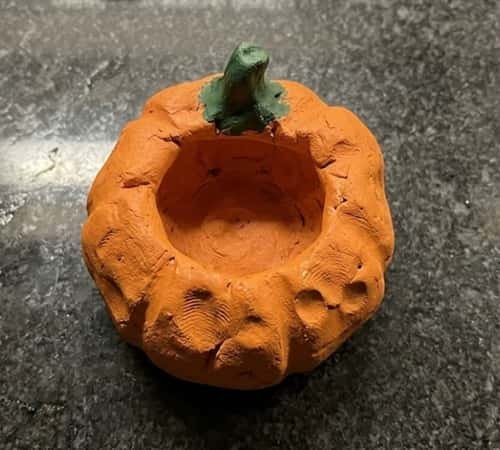
This is where I would start with younger kids.
Instead of making a perfectly symmetrical pumpkin bowl, let the little fingers create a slightly lumpy one. Those uneven sides actually make it look more charming.
What you’ll need
- Non-toxic air-dry clay
- Orange acrylic paint
- Green acrylic paint
- A blunt craft stick
- Small cup of water
- Paintbrush
- Parchment or a non-stick craft surface
How to make it
Step 1: Take a ball of orange clay roughly the size of a small orange.
Step 2: Push your thumb gently into the center. Keep turning the clay while pressing your thumb outward.
Step 3: Continue pinching around the inside until you have a little bowl. Keep the bottom thicker than the walls so it doesn’t become fragile.
Step 4: Pinch eight or nine shallow grooves vertically around the outside. Don’t worry about making them identical.
Step 5: Use your thumb to slightly flatten the bottom so the pot sits without rocking.
Step 6: Make a tiny green clay stem. Press it gently onto the top edge.
Step 7: Leave it to dry according to the clay manufacturer’s instructions. Once completely dry, paint it orange and add green to the stem.
Step 8: For an extra Halloween touch, paint two tiny black triangle eyes and a crooked smile.
The result is basically a pumpkin and pinch pot having a Halloween party together.
2. Little Bat Wing Trinket Dish
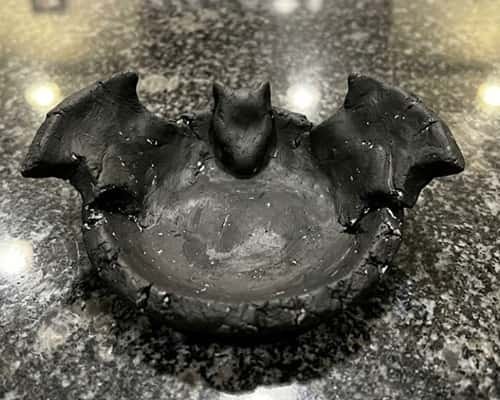
This one looks complicated but it really isn’t.
The trick is to make a simple shallow dish and add two clay wings around the outside.
Materials
- Black or dark-colored air-dry clay
- Small rolling pin or smooth bottle
- Blunt craft stick
- Acrylic paint
- Water
- Paintbrush
Steps
Step 1: Roll a piece of clay approximately 5 mm thick.
Step 2: Cut a rough oval or circle using a blunt craft stick.
Step 3: Lift the edges slightly with your fingers.
Step 4: Create two small bat wings from separate pieces of clay. Flatten each piece and pinch three rounded points into the outer edge.
Step 5: Press the wings against opposite sides of the dish.
Step 6: Blend the joining areas gently with a wet fingertip. You don’t need to make the join invisible.
Step 7: Add a tiny clay bat body in the center.
Step 8: Dry completely before painting.
I would keep the finished dish unglazed. The raw clay texture gives it that homemade Halloween look.
3. Ghost Face Mini Flower Pot
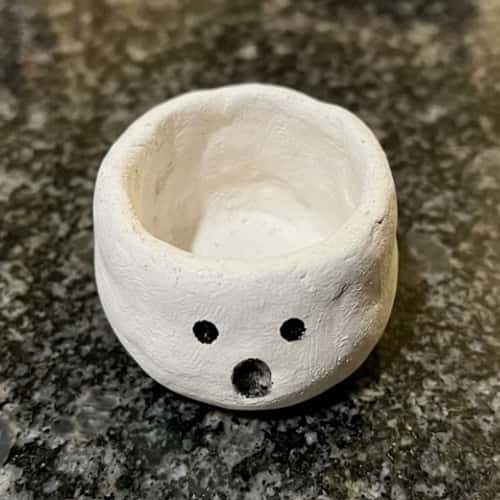
Here is one of my favorite small vase ideas for Halloween because the decoration is incredibly simple.
Make a tiny rounded pot first. Then turn it into a ghost.
Making the pot
Step 1: Roll clay into a thick ball.
Step 2: Push your thumb into the center.
Step 3: Slowly pinch the walls outward while rotating the clay.
Step 4: Keep the rim reasonably thick. Thin rims can crack more easily.
Step 5: Smooth the outside lightly with a damp fingertip.
Step 6: Leave the little pot to firm up slightly before decorating.
Step 7: Add two tiny black clay circles for eyes and one oval mouth.
Step 8: Once dry, paint the whole pot white and repaint the face details if necessary.
For a plant, use a tiny faux flower or dried craft stem rather than filling the pot with water. Air-dry clay isn’t automatically waterproof.
4. Mini Witch Hat Planter
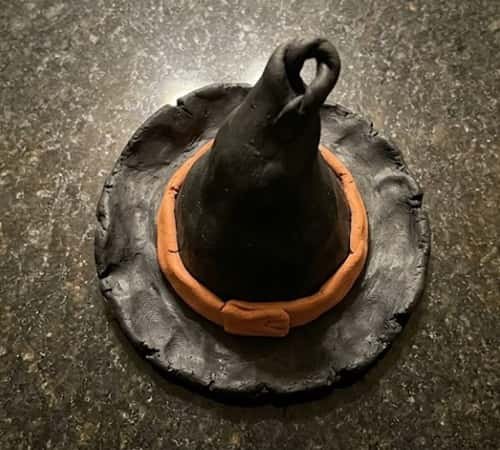
This turns a basic clay container into something that looks completely different.
Instructions
Step 1: Use the same method from Idea #1 to create a tiny pinch pot.
Step 2: Flatten another piece of clay into a thin circle.
Step 3: Place the circle underneath the pot as a wider base.
Step 4: Roll another piece into a cone.
Step 5: Curve the tip slightly sideways so it resembles a floppy witch hat.
Step 6: Attach the cone to the center of the base.
Step 7: Add a thin clay strip around the hat.
Step 8: Paint everything black after drying. Add a purple or orange band.
The little irregularities are what make this Halloween clay craft look handmade.
5. Spooky Eyeball Clay Bowl
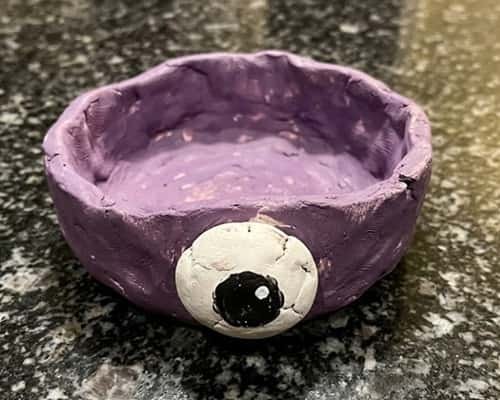
Kids usually love this one because it feels a little silly rather than scary.
How to make it
Step 1: Create a shallow pinch bowl.
Step 2: Smooth the rim with your finger.
Step 3: Make one large white clay ball.
Step 4: Flatten it slightly.
Step 5: Add a smaller colored clay circle in the center.
Step 6: Place a tiny black circle inside that.
Step 7: Press the eyeball onto the front of the bowl.
Step 8: Dry everything thoroughly.
Paint the bowl purple, black or orange. Leave the eyeball white.
It can hold lightweight trinkets, erasers or tiny craft supplies.
6. Friendly Monster Pencil Pot
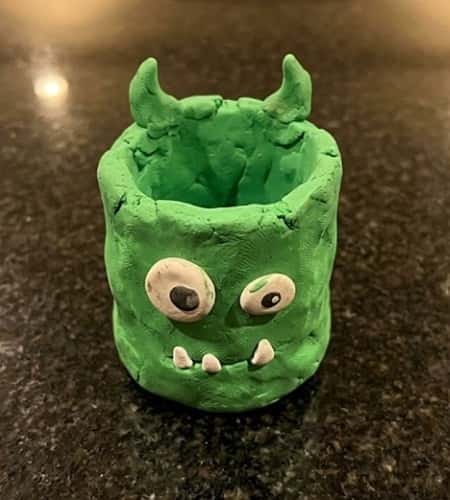
Not every Halloween project needs to be creepy.
Make a tiny monster container with an intentionally goofy expression.
Step 1: Build a short cylindrical clay pot.
Step 2: Keep the base thick.
Step 3: Add two small clay eyes.
Step 4: Give one eye a different size. Yes, deliberately.
Step 5: Add three tiny clay teeth along the rim.
Step 6: Make two small horns.
Step 7: Attach everything before the clay becomes completely dry.
Step 8: Paint the monster green, purple or orange.
Use it for crayons, pencils or paintbrushes.
7. Crescent Moon Clay Incense-Style Dish
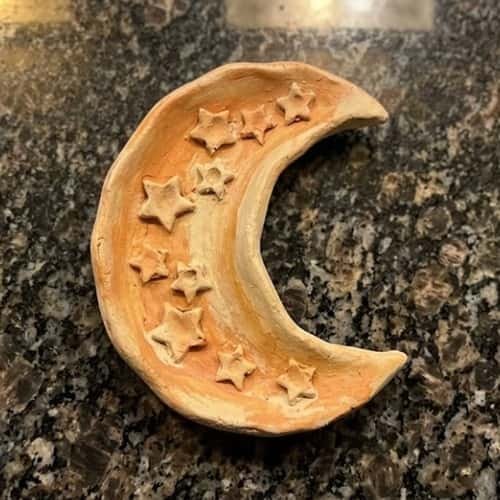
For a completely different shape, try a moon.
For kids, keep it as a decorative dish rather than an incense holder. That keeps the project simple and avoids heat.
Step 1: Roll clay into a slab.
Step 2: Use a blunt craft stick to sketch a crescent shape.
Step 3: Carefully cut around it.
Step 4: Smooth the edges with a damp finger.
Step 5: Add tiny clay stars.
Step 6: Press the stars gently onto the surface.
Step 7: Let everything dry completely.
Step 8: Paint the moon yellow, cream or orange.
A dark blue background isn’t needed. The moon itself is enough.
8. Frankenstein Monster Mug – Decorative Version
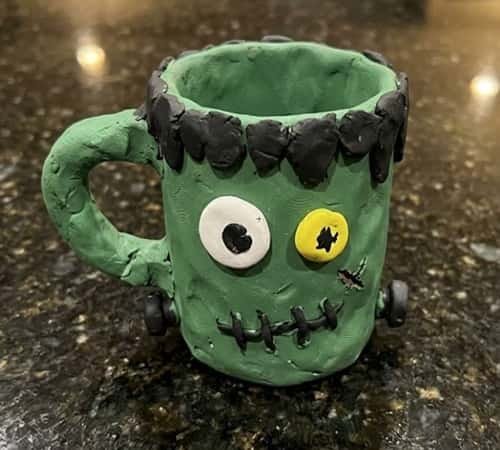
This looks like pottery but doesn’t require a pottery wheel.
Make it a decorative mug for holding lightweight craft supplies rather than something used for drinking.
Step 1: Make a thick clay cylinder.
Step 2: Flatten the bottom.
Step 3: Shape the sides using your palms.
Step 4: Create a chunky clay handle separately.
Step 5: Press the handle onto both sides of the body.
Step 6: Add Frankenstein’s hair as small flattened clay pieces.
Step 7: Add two eyes and a simple stitched mouth.
Step 8: Let it dry completely before painting.
Don’t add a glossy food-safe coating unless you’re using a suitable pottery material and proper ceramic firing process.
9. Tiny Pumpkin Lantern – No Flame
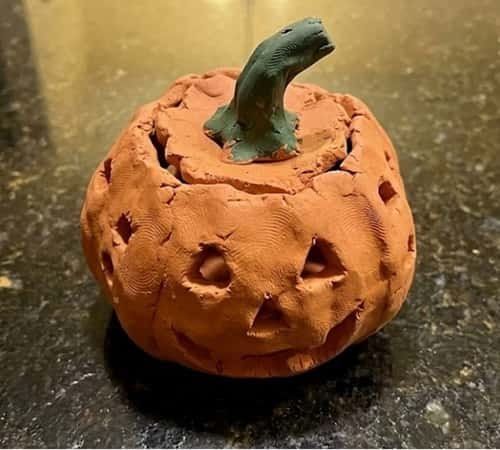
Here’s a safer twist on the classic Halloween lantern.
Instead of a candle, make the clay pumpkin into a decorative cover for a battery-powered LED light used only with adult supervision.
Step 1: Make a hollow pumpkin using a pinch-pot technique.
Step 2: Join the opening carefully if making a closed pumpkin form.
Step 3: Add vertical grooves.
Step 4: Make tiny holes using a blunt craft stick.
Step 5: Create a small clay stem.
Step 6: Attach the stem.
Step 7: Allow the pumpkin to dry completely.
Step 8: Paint it orange.
Keep any light source cool and battery-powered. Never put a real flame inside air-dry clay.
10. Skull Coin Dish
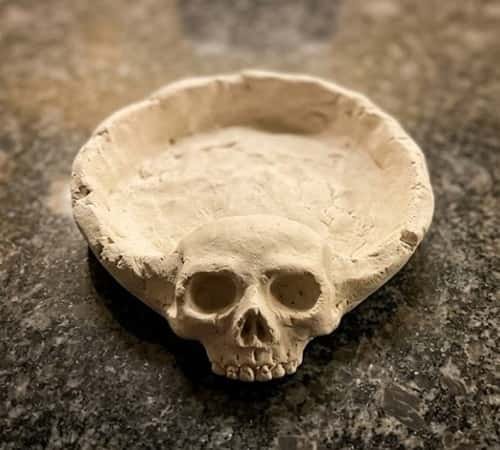
A skull doesn’t have to be complicated.
Think of this as a shallow oval dish with a simple raised skull face.
Step 1: Flatten clay into an oval.
Step 2: Bend the edges upward.
Step 3: Smooth the rim.
Step 4: Make two hollow eye shapes using clay circles and remove the centers with a blunt tool.
Step 5: Add a tiny nose shape.
Step 6: Make a few short vertical lines for teeth.
Step 7: Attach the face pieces carefully.
Step 8: Paint it white, grey or bone-colored.
The slightly wonky face will actually make it look more handmade.
11. Black Cat Paw Trinket Pot
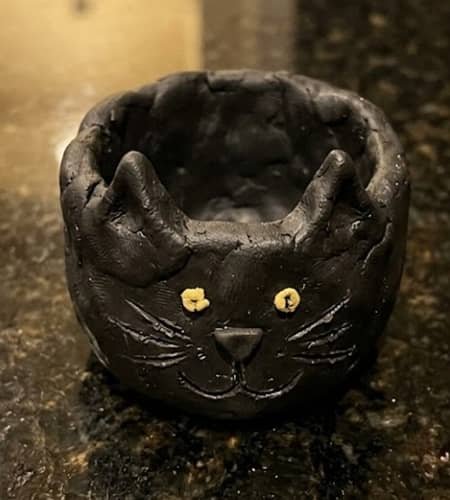
This one works beautifully as a cute Halloween project.
Steps
Step 1: Form a small round pinch pot.
Step 2: Slightly flatten the front.
Step 3: Create two pointed cat ears from small clay triangles.
Step 4: Attach the ears.
Step 5: Add tiny clay eyes.
Step 6: Make a small triangular nose.
Step 7: Add three short whisker lines on each side.
Step 8: Paint the pot black and the eyes yellow.
Don’t make the face too perfect. Kids’ crafts should look like kids actually made them.
12. Haunted House Mini Clay Pot
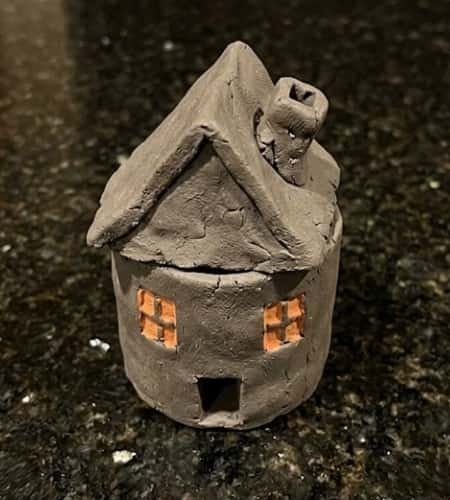
Let’s finish with something that combines several techniques.
This tiny haunted house can become a decorative pot, pencil holder or little Halloween display piece.
Step 1: Make a basic cylindrical pot.
Step 2: Flatten the bottom so it stands firmly.
Step 3: Build a triangular roof from a separate piece of clay.
Step 4: Add a tiny rectangular door.
Step 5: Make two small windows.
Step 6: Add a crooked chimney.
Step 7: Press everything onto the pot while the clay is still workable.
Step 8: After drying, paint the house dark grey or black. Add orange windows and a brown door.
For older kids, this can become a fun clay sculpture exercise because they can invent their own crooked roof, windows and tiny architectural details.
Final Thoughts
The interesting thing about these projects isn’t really Halloween. It is hand-building.
Kids learn that one lump of clay can become a bowl, pot, sculpture or tiny piece of pretend architecture simply by changing how they pinch, press and join it.
That makes these useful clay activities beyond October too. If you’re experimenting with selling crafts, don’t chase perfect symmetry either.
A recognizable handmade personality can become part of the product.
Photograph the fingerprints, slightly crooked shapes and raw texture honestly.
That is often what tells the buyer, “A person actually made this.” And honestly, that little human touch is worth keeping.





