January has a very different mood from December.
The Christmas decorations are packed away, the house feels a little bare, and suddenly I want small handmade pieces that make winter feel cozy without screaming “holiday.”
That’s where January clay crafts come in. I love making clay pieces that aren’t just fun to create but actually have a place around the home.
Think snowy textures, tiny winter animals, candle accents, organizers and handmade wall pieces.
These january clay craft projects are beginner-friendly, inexpensive and easy to customize.
And honestly, a few of them could even turn into selling crafts if you give them a polished finish.
Choose Your Air Dry Clay Type
Regular Air Dry Clay | Cornstarch Clay | Homemade Clay
Affiliate Disclaimer: Some of the links in this post may be affiliate links, which means I may earn a small commission if you choose to make a purchase through them – at no extra cost to you. I only share products that genuinely fit this project and can help make your ceramic mug clay craft process easier and smoother. Your support helps keep ideas like this coming.
1. Mini Snowy Mountain Candle Tray
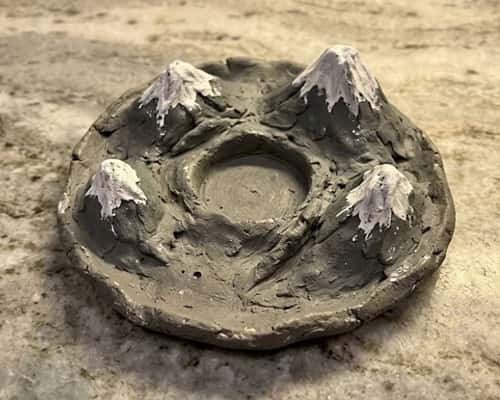
This is one of those clay craft projects that looks much more complicated than it really is.
Start with a block of air dry clay and knead it until it becomes soft and flexible.
Roll it to around 6 mm thick. Cut an irregular oval or rounded rectangle for the base.
Don’t make it perfectly symmetrical. The slightly uneven edge gives it a handmade pottery feel.
For the mountains, pinch small triangular pieces of clay and attach three or four of them toward the back of the tray. Blend their bottoms into the base using a damp fingertip.
Let everything dry completely.
Once dry, paint the mountains in muted gray or dusty blue. Add off-white paint along the peaks to imitate snow. Keep some of the rough clay texture visible.
Finally, paint the tray itself in warm white or pale beige.
Use it beneath a small candle, jewelry, keys or even a tiny winter ornament.
2. January Snowflake Trinket Dish
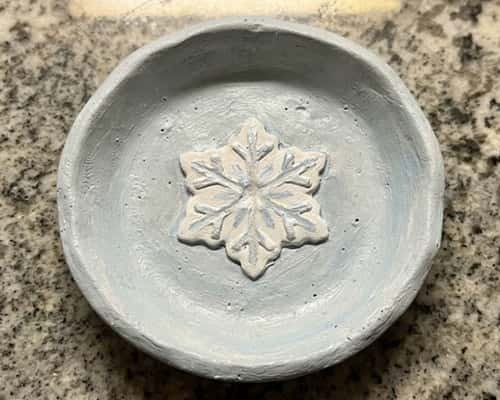
Snowflakes don’t have to disappear when Christmas is over.
Roll white or pale blue air dry clay into a flat slab about 5 mm thick. Place a small bowl upside down on the clay and cut around it to create a circular base.
Now comes the fun part.
Use a toothpick or clay tool to draw simple branching snowflake lines.
Don’t try to make a mathematically perfect snowflake. A slightly uneven design actually looks more handmade.
Gently press the edges upward with your fingertips to create a shallow dish.
Once dry, paint the entire dish a soft winter blue. Add white highlights over the raised snowflake lines. A tiny amount of silver paint around the edges can give it a frosty finish.
This works beautifully beside a bed for rings or on an entryway table for keys.
3. Tiny Clay Mug Cozy Plaque
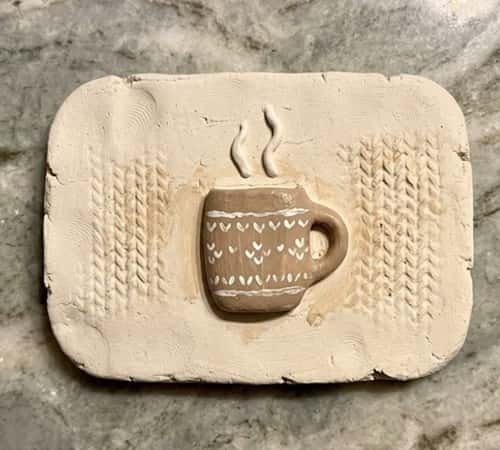
Instead of making a functional clay sleeve that could crack from heat, I’d turn the idea of a mug cozy into decorative wall art.
Roll clay into a small rectangular plaque. Round the corners and create a slightly raised miniature mug shape in the center.
Add two tiny steam lines above the mug.
For texture, press a piece of knitted fabric lightly against the clay before it dries.
Remove it carefully. You’ll get a cozy sweater-like pattern without having to sculpt every stitch.
Paint the plaque cream, beige or dusty brown. Give the mug a contrasting color.
Punch two small holes near the top while the clay is still soft so you can hang it later.
This little piece fits perfectly into a January kitchen display.
And yes, it would make a cute handmade gift too.
4. Clay Winter Blues Wall Tile
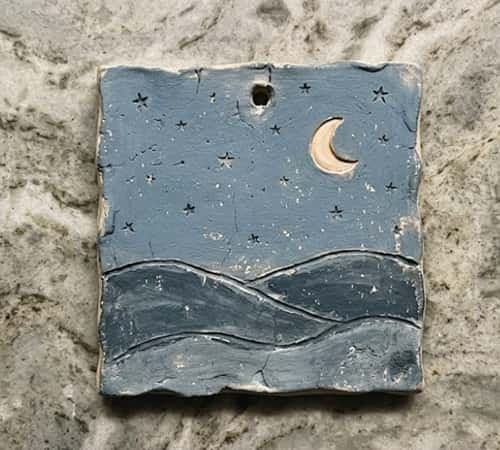
January can sometimes bring the winter blues, so why not turn that feeling into something pretty?
Make a square or rectangular clay tile around 7 mm thick. Keep the edges imperfect.
Before it dries, create a simple abstract winter landscape. Use a rounded sculpting tool to carve low hills, a crescent moon and a few tiny stars.
You don’t need complicated sculpting skills here.
Once completely dry, paint the background dusty blue. Use darker blue for the hills and cream for the moon. Add tiny white dots as stars.
For an aged handmade appearance, lightly sand only the raised areas after painting. Then add a very thin coat of matte sealer.
Attach a small hanging loop at the back.
The finished piece works as standalone clay decor, especially on a small gallery wall.
5. Snowball Toss Game Markers
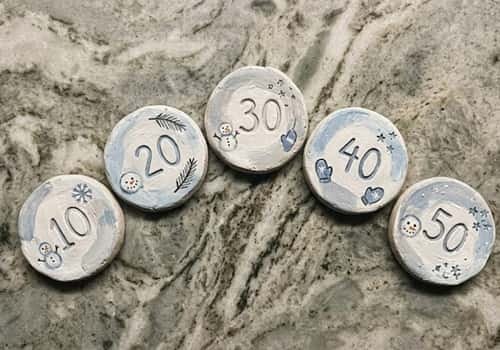
Here’s where january crafts for kids can become something the entire family actually uses.
Instead of making a complete snowball toss game from clay, create reusable clay scoring markers.
Roll small balls of white air dry clay and flatten each one slightly. Make different sizes and paint numbers from 10 to 50 on them.
For extra personality, sculpt tiny snow faces onto a few markers. Give one a crooked smile. Another can have tiny raised eyebrows.
After drying, seal them with a matte finish.
Place the markers around a basket during an indoor snowball toss game. Kids can aim soft fabric or paper snowballs toward the different scores.
When the game is finished, keep the markers in a small winter-themed bowl.
So the craft doubles as both an activity and decor.
6. Mini Clay January Calendar Tile
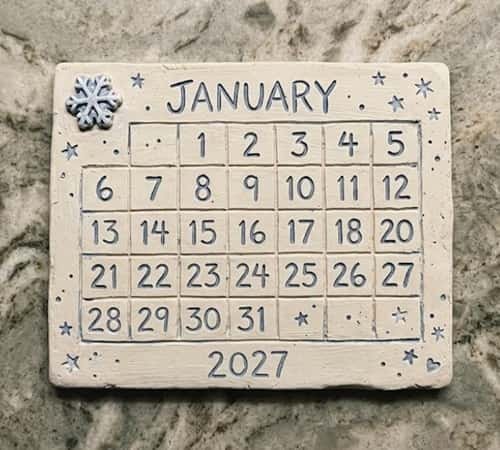
A January calendar doesn’t have to look like office stationery.
Create a thin rectangular clay tile. Smooth the surface but leave a little natural texture.
Using a pencil or blunt clay tool, lightly mark a simple January calendar grid while the clay is still workable.
Don’t press too deeply.
Add a small raised snowflake, mitten or tiny winter branch in one corner. Let the tile dry completely before painting.
Use an off-white base with muted blue numbers and a darker border.
You can either make a new tile every January or use the same blank tile with a removable mini calendar attached over it.
This is one of my favorite diy clay craft ideas because it has an actual purpose beyond looking cute.
7. Clay Icicle Ornament Garland
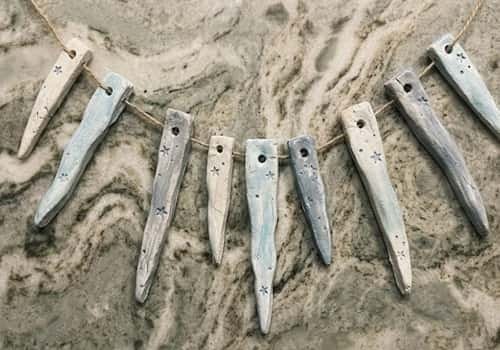
Icicle ornaments are usually associated with Christmas trees, but the shape works beautifully as January decor.
Roll thin pieces of air dry clay between your fingers to create tapered icicle shapes. Make some long, some short and a few slightly curved.
Insert tiny holes near the wider end before the clay dries.
Once hardened, paint them in different shades of white, pale gray and icy blue.
Don’t completely cover every surface. Leaving small areas of raw clay visible makes the pieces look more handmade.
Thread them onto simple string and hang them across a shelf, window or empty wall.
You can also make individual pieces for a winter-themed tree that stays up after Christmas.
8. Clay Nature Collage Plaque
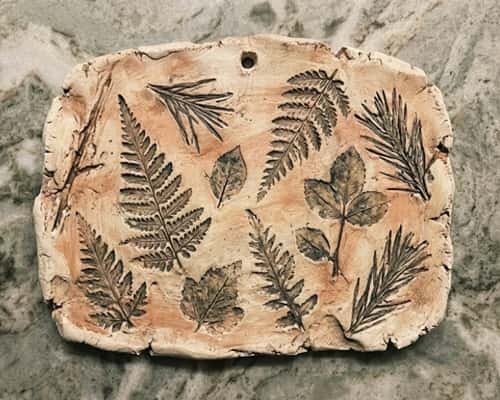
This one is especially good if you want a craft that feels more earthy than snowy.
Roll a large clay slab around 8 mm thick. Before it dries, press small leaves, fern pieces or textured natural objects gently into the surface.
Remove them carefully.
The impressions become your nature collage.
You don’t need to preserve the actual leaves inside the clay. The goal is simply to capture their texture.
Once dry, paint the plaque in warm cream or muted terracotta. Then brush a darker shade lightly across the textured sections so the impressions become more visible.
Add a small hanging loop.
The result feels like a handmade pottery fragment collected from a winter walk.
9. Mini Clay Snowman Bookend
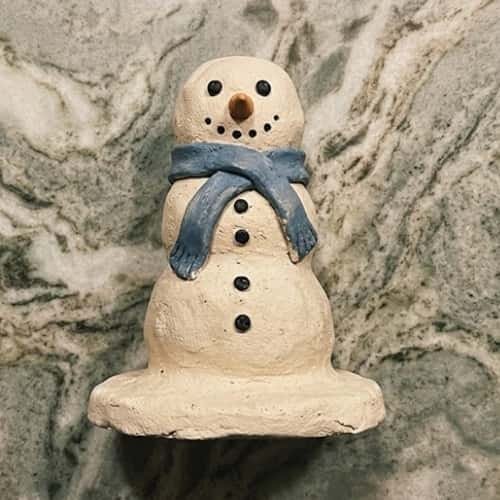
Forget the traditional round snowman.
For this clay sculpture, make a chunky little snowman that sits flat against a shelf.
Create three flattened snowman sections and stack them vertically. Press the pieces together firmly and blend the joins.
Give him a tiny clay scarf, carrot nose and simple button details.
The important trick is the base.
Make the bottom section much wider and flatter than the upper sections so the sculpture doesn’t easily tip over. If you want it to hold lightweight books, make the base even thicker.
Paint the body warm white rather than bright white. Add slightly uneven black eyes and buttons.
That imperfect face is what makes it charming.
10. Clay Snowy House Shadow Box Insert
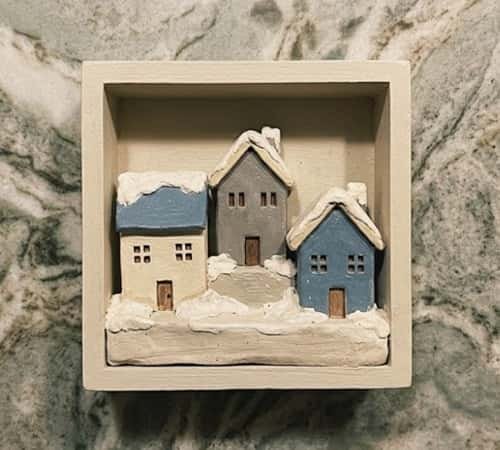
This idea borrows the cozy feeling of shadow boxes without requiring an elaborate frame.
Make three or four tiny house shapes from clay. Keep the buildings simple… rectangular walls, triangular roofs and tiny windows.
Create a few raised snow layers along the rooftops.
After drying, paint the houses cream, gray and dusty blue. Add white snow to the roofs.
Arrange them inside a shallow wooden frame or shadow box.
For extra depth, make the front house slightly larger and the background houses smaller.
This creates a miniature winter street scene.
It’s also a surprisingly good option for selling crafts, because customers can personalize the houses with initials, house numbers or family names.
11. Rustic Clay Wooden Snowman Sign
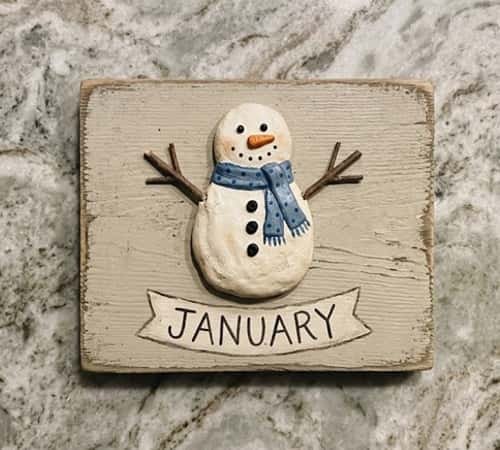
Here’s a fun combination of clay and another material.
Make a small snowman from air dry clay and allow it to dry completely. Meanwhile, prepare a small wooden plaque as the background.
Paint the wooden plaque in a weathered cream or muted gray.
Attach the clay snowman to the center using a suitable craft adhesive once both surfaces are completely dry.
Add a tiny clay scarf and a small painted January message such as “Hello Winter.”
Keep the lettering slightly imperfect.
The contrast between the smooth wooden surface and rough clay sculpture gives this piece much more character than an entirely clay sign.
12. January Moon Phase Clay Wall Decor
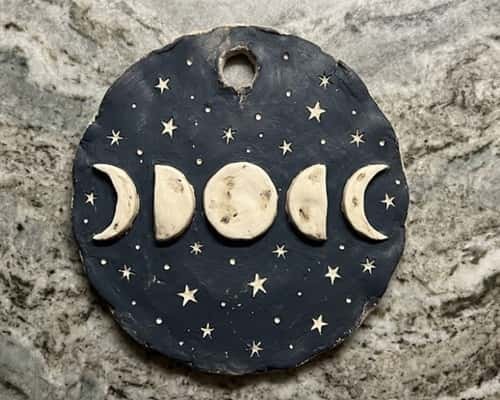
Let’s finish with something a little more unusual.
Roll a large circular clay slab, roughly 8 mm thick. Use a round container or cookie cutter to get a clean outer shape.
Now create a simple sequence of moon phases across the center.
For each phase, press or carve a curved shape into the clay. Keep the spacing fairly even but don’t obsess over perfection.
Add tiny stars around the moons using the blunt end of a clay tool.
Once dry, paint the background deep navy or charcoal. Paint the moons a warm cream.
Use a dry brush with a lighter color over the raised texture. This gives the surface a slightly aged pottery look.
Attach a hanging loop at the back.
This diy clay sculpture works particularly well in bedrooms, reading corners or quiet little spaces where you want January decor without obvious seasonal symbols.
Final Thoughts
What makes these january clay crafts interesting is that they don’t need to be packed away when January ends.
A mountain tray becomes everyday tabletop decor. A nature plaque can stay on the wall all year.
Even the snow-inspired pieces can work as part of a neutral winter display.
If you’re making air dry clay crafts with children, keep the designs simple and let them experiment with texture instead of chasing perfection.
If you’re making pieces for selling crafts, focus on personalization, useful shapes and coordinated color palettes.
The strongest clay decor often isn’t the most complicated piece. It’s the one that gives someone a reason to keep it.





