If you have been looking for a jellyfish paper craft that’s easy enough for little hands but still looks surprisingly adorable, you’re in the right place.
I love projects that don’t need expensive supplies or complicated templates.
This one checks every box. It mixes simple cutting, folding, layering, and a little creativity into one colorful paper craft that feels relaxing to make.
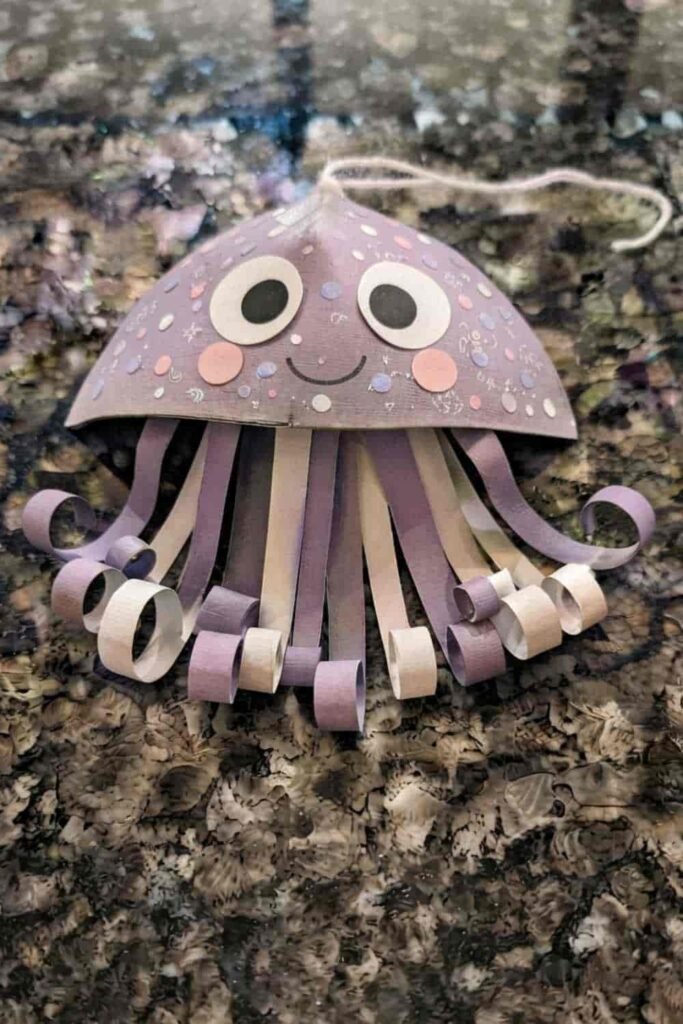
Want to turn ordinary colored paper into a floating sea creature? Let’s do it.
This beginner-friendly kids craft also works beautifully for ocean units, classroom activities, rainy afternoons, or an aquatic theme party.
Supplies Needed To Make Jellyfish Paper Craft
- 2 sheets of colored construction paper or cardstock
- White paper scraps
- Black marker
- Pencil
- Scissors
- Craft glue
- Ruler
- Small round object (about 10-12 cm wide) to trace
- Optional: crayons or colored pencils for shading
Difficulty: Beginner
Time: Around 30 to 40 minutes
Step 1: Create the Jellyfish Dome
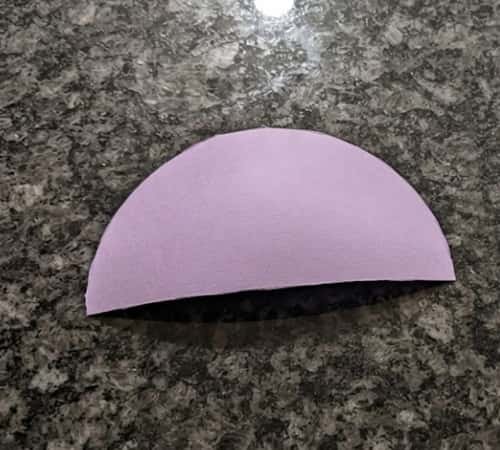
Choose your favorite color first. Bright pink, lavender, turquoise, coral, or even soft blue all look wonderful.
Trace a circle using a bowl or large cup onto your colored paper. Cut it out carefully. Now fold the circle exactly in half.
Keep the fold soft instead of pressing it extremely hard because we’ll gently open it again later.
Open the paper back up. You’ll notice the fold line running straight through the middle.
Now that you have two equal half circles, cut straight along that fold.
Only one half circle is needed for this project. Save the second one for another kids DIY project later.
Curl the rounded edge slightly by gently pulling it across the edge of a table or ruler.
This tiny curve gives the jellyfish body a soft 3D look instead of appearing completely flat. Funny how one little trick changes everything, isn’t it?
It dont need to be perfectly curved. Small imperfections actually make handmade crafts look charming.
Step 2: Give the Body Some Dimension
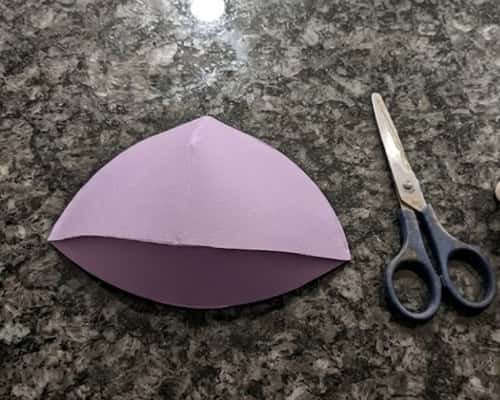
Lay the half circle flat.
Apply a very thin line of glue along one straight edge only.
Bring both straight corners together just enough to overlap by about 1 cm. Hold them together for about thirty seconds.
Now your flat paper instantly becomes a shallow cone.
That little overlap creates the rounded jellyfish bell that gives this project far more character than a flat cutout.
Take a second and look at it from different angles. See how it already resembles a floating jellyfish? Kids usually gets excited at this point because the project suddenly comes alive.
If you’d like, lightly shade the lower edge using a colored pencil that’s one shade darker than your paper.
The gentle gradient makes the dome appear even more realistic without making it difficult.
Step 3: Make Curly Tentacles
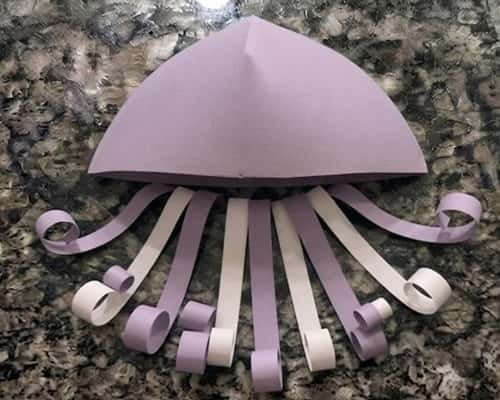
Take another sheet of colored paper. You can use the same color or mix two colors together.
Using your ruler, draw strips about 1 cm wide.
Cut around 14 to 18 strips with different lengths. Some should be long while others stay shorter. Nature rarely makes everything identical.
Now comes the fun part.
Wrap each strip around a pencil and gently slide it off. The paper naturally curls into spring-like tentacles.
Mix loose curls with tighter curls. Add one or two slightly wavy strips without curling them completely.
Those tiny differences give movement, almost like the jellyfish is drifting through the ocean.
You could even add a couple of thinner strips cut from white paper to imitate delicate underwater strands. That’s a neat little twist you don’t often see in many paper arts and crafts tutorials.
Step 4: Attach the Tentacles
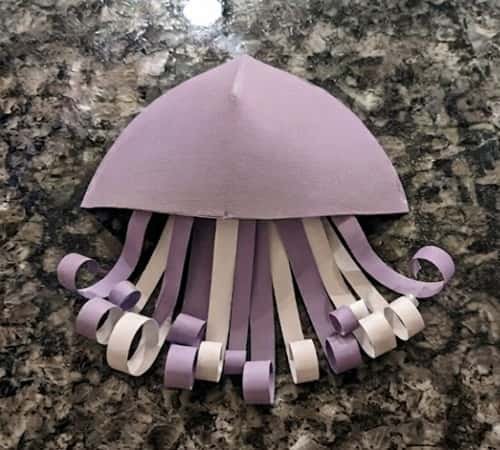
Flip the dome upside down.
Starting from one side, glue each curled strip inside the curved opening.
Alternate the lengths as you go.
Place a shorter strip.
Then a longer one.
Then medium.
Repeat until the opening feels nicely filled without looking overcrowded.
Before the glue dries completely, gently spread the tentacles using your fingers so they naturally fan outward.
Don’t flatten them.
Let them overlap.
Real jellyfish tentacles float in every direction instead of hanging like perfectly straight ribbons.
I almost always adjusts one or two curls after gluing because they never stay exactly where I planned.
Step 5: Add the Face and Gentle Details
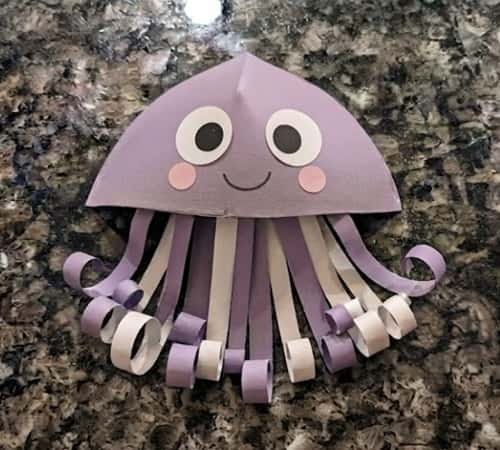
Cut two medium white circles.
Glue them near the front of the dome.
Draw smaller black circles inside for pupils.
Use a marker to draw a tiny smiling mouth.
Keep the expression simple.
Less really works better here.
Want something extra?
Cut two tiny pink paper circles for rosy cheeks.
Or add tiny white highlights inside each eye using a gel pen.
That tiny sparkle makes the face look much more expressive.
This is where your aquatic animal craft starts developing personality instead of becoming just another classroom project.
Step 6: Decorate with Ocean Texture
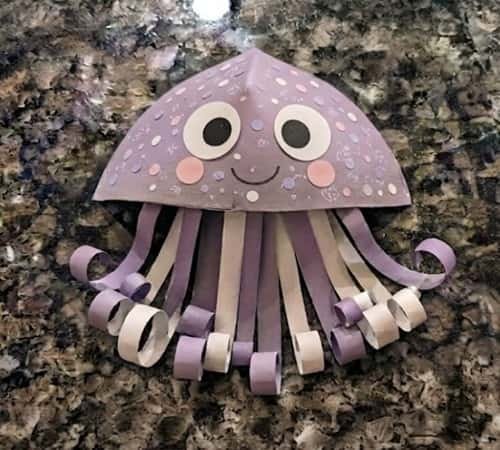
Now let’s make this stand apart from many ordinary jellyfish paper craft ideas.
Cut tiny circles, teardrops, or miniature bubbles from leftover paper.
Glue only a handful around the top of the dome.
Don’t cover everything.
Leave plenty of empty space.
You can also draw tiny dotted patterns with a white gel pen to imitate subtle underwater texture.
If you’re creating an aquatic theme classroom display, make two or three jellyfish in different colors and sizes instead of identical copies.
Another fun variation is adding folded paper fins near the sides for a playful fantasy version inspired by 3D craft ideas rather than scientific accuracy.
It looks imaginative without becoming unrealistic.
Step 7: Shape the Final 3D Craft
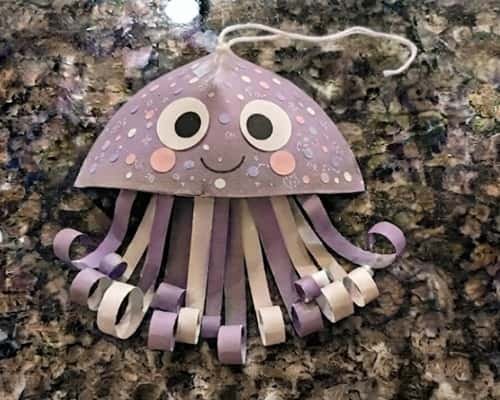
Pick the jellyfish up carefully.
Separate each paper curl using your fingers.
Twist one slightly tighter.
Loosen another.
Pull a few forward.
Push a couple backward.
These tiny adjustments create wonderful depth.
This is one reason I enjoy 3D crafts so much. The last two minutes often make the biggest visual difference.
If you’d like to hang it, poke a tiny hole at the top using a pencil tip and thread clear fishing line or white string through it.
Now your sea animal craft gently sways whenever air moves through the room.
Step 8: Display Your Jellyfis
Your jellyfish is finished.
Pretty satisfying, right?
Place it on a bulletin board, classroom wall, bedroom door, or suspend several from the ceiling to create a floating underwater scene.
Pair it with fish, turtles, coral reefs, and seaweed to build a complete sea animal craft idea collection.
It also fits nicely alongside DIY Fish Crafts, colored paper crafts, simple origami paper craft projects, and other paper arts and crafts activities.
Kids often enjoy making an entire ocean family once the first jellyfish is finished.
Helpful Tips
- Cardstock keeps the dome shape better than thin printer paper.
- Curl tentacles loosely for younger children because tighter curls can flatten more easily.
- Try mixing two shades of the same color for extra depth.
- Add glitter only in tiny amounts if desired.
- Younger children may need help cutting the half circle.
- Make several jellyfish in graduating sizes for a floating underwater display.
- This project pairs well with ocean books, marine biology lessons, or an aquatic theme birthday party.
- If you’re exploring more 3D craft ideas, experiment with layered tentacles or textured paper for different effects.
Final Thoughts
One thing I genuinely enjoy about this jellyfish paper craft is how it quietly teaches more than cutting and gluing.
Kids begin noticing patterns, balance, symmetry, and even how small design choices change the finished look.
A slightly tighter curl or a wider dome suddenly gives the jellyfish a completely different personality.
That’s the magic hiding inside simple paper craft projects. Instead of chasing perfection, encourage experimenting with colors, textures, and shapes.
The ocean is full of wonderfully unusual creatures, so your handmade jellyfish doesn’t need to copy anyone else’s to feel special.
Sometimes the most memorable kids craft is the one that looks wonderfully, proudly handmade.





