There’s something ridiculously satisfying about making tiny things, especially when a lump of clay slowly turns into an animal you can actually recognize.
These mini clay animal figures are designed to be small enough for a shelf, dollhouse, craft tray, or even a little handmade animal collection.
The fun part? You don’t need advanced sculpting skills or fancy tools.
Most of these designs begin with simple clay shapes… balls, coils, teardrops and flattened pieces… and a little patience.
So, ready to make a tiny zoo? Grab some air dry clay, a smooth work surface, a toothpick and your favorite colors, because these little clay critters are about to get very cute.
Choose Clay Type For Small Clay Projects
Polymer Clay | Air Dry Clay
Affiliate Disclaimer: Some of the links in this post may be affiliate links, which means I may earn a small commission if you choose to make a purchase through them – at no extra cost to you. I only share products that genuinely fit this project and can help make your ceramic mug clay craft process easier and smoother. Your support helps keep ideas like this coming.
Before You Start: A Tiny-Clay Trick That Makes Everything Easier
Use air dry clay or another beginner-friendly sculpting clay that stays workable long enough for you to shape small details.
Take only a small amount at a time and immediately cover the unused clay with an airtight bag or container; otherwise, the surface starts drying while you’re working.
For most projects below, aim for figures around 1 to 2 inches long.
Why so small? Tiny sculptures are easier to display, and they also encourage you to simplify the animal into recognizable forms rather than trying to reproduce every anatomical detail.
Keep a toothpick nearby for eyes, texture and tiny grooves. A blunt modeling tool, cocktail stick or the rounded end of a paintbrush can also work.
And don’t worry if the first one looks a little wonky.
That handmade unevenness is actually part of the charm, and perfectly identical figurines can sometimes look less interesting.
1. Mini Clay Hedgehog
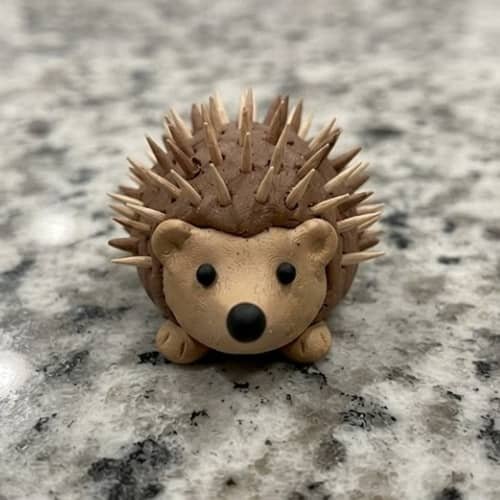
A hedgehog is a brilliant first project because its body can be one simple oval.
You’ll need: brown or tan clay, a little darker clay for the face, black clay or paint for the eyes and nose, plus a toothpick.
How to make it
- Roll a piece of brown clay between your palms until it becomes a smooth oval, roughly 1½ inches long.
- Pinch one end gently to create the animal’s face. Don’t make it too pointy; a soft wedge looks more natural.
- Add four tiny flattened pieces underneath for feet, pressing them gently into the body.
- Make two very small ears by forming little rounded triangles and attach them near the top of the head.
- Roll a tiny dark ball for the nose and press it onto the pointed end.
- Add two tiny black eyes. If you are using paint, wait until the clay is completely dry first.
- Now comes the fun bit: use a toothpick to make short diagonal marks across the back. Work in rows and slightly change the direction of some marks.
- Let the hedgehog dry completely according to your clay manufacturer’s instructions.
Don’t cut deep lines into the body because that can weaken the sculpture. Keep the texture shallow, irregular and closely spaced.
2. Tiny Clay Turtle
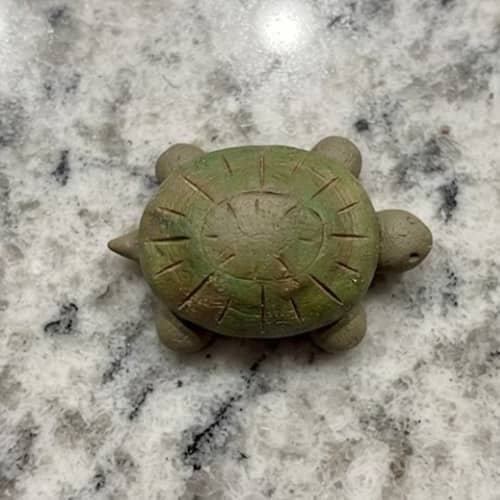
Want something even simpler? A turtle is basically an oval shell sitting on four little clay feet.
How to make it
- Roll green or brown clay into a ball.
- Press it gently against your work surface until you have a thick oval dome.
- Smooth the upper surface with your fingertip, but don’t flatten it completely.
- For the head, roll a tiny ball and attach it to one end.
- Make four miniature teardrop shapes for the legs and attach two on each side.
- Add a small tail at the opposite end using a tiny cone of clay.
- Use a toothpick to draw a simple shell pattern: begin with a small central shape, then add curved sections around it.
- Add two tiny eyes using black clay or paint.
- Check the turtle from the side. If the legs look too thin, reinforce them with slightly thicker pieces.
- Leave it undisturbed while it dries.
The shell pattern doesn’t need to be perfectly symmetrical, in fact a slightly uneven pattern makes the little animal feel handmade.
3. Mini Clay Bunny
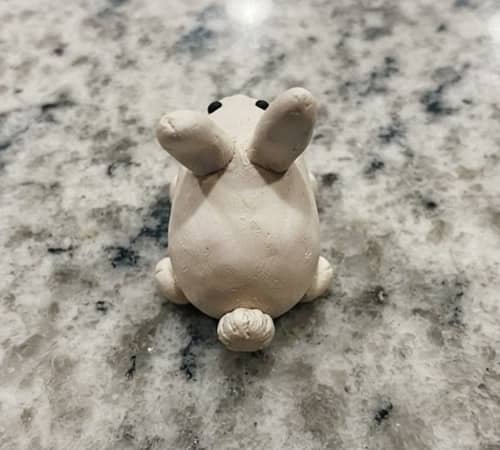
This one works beautifully with white, cream, pink or even pastel-colored clay.
How to make it
- Roll one larger ball for the body and one smaller ball for the head.
- Attach the head to the body, blending the connection with your fingertip.
- Roll two long, narrow pieces for the ears.
- Flatten each ear slightly, then pinch one end to make it narrower.
- Attach the ears to the top of the head.
- Make four tiny flattened feet and press them into place.
- Add a miniature round tail at the back.
- Press two tiny black eyes onto the face.
- For a little extra personality, use a toothpick to make a tiny mouth line.
- If desired, add small pink inner-ear pieces before the figure dries.
Keep the ears relatively thick. Super-thin clay ears break much easier after drying.
4. Little Clay Frog
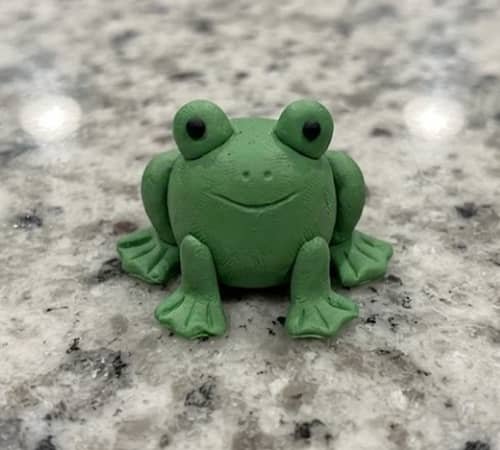
Frogs are perfect for experimenting with simple shapes because their bodies can stay wonderfully chunky.
How to make it
- Roll a small green ball for the body.
- Flatten the bottom slightly so the frog doesn’t roll around.
- Create two smaller green balls for the eyes.
- Press the eye bumps onto the upper front portion of the body.
- Add tiny black dots for pupils.
- Make four legs from short clay coils.
- Flatten the ends of the legs slightly to create feet.
- Attach two legs toward the front and two toward the back.
- Use a toothpick to draw a tiny curved mouth.
- Add a few shallow dots across the back if you want a textured frog skin effect.
Don’t overwork the clay. A frog made from five or six chunky shapes often looks better than one covered in microscopic details.
5. Mini Clay Elephant
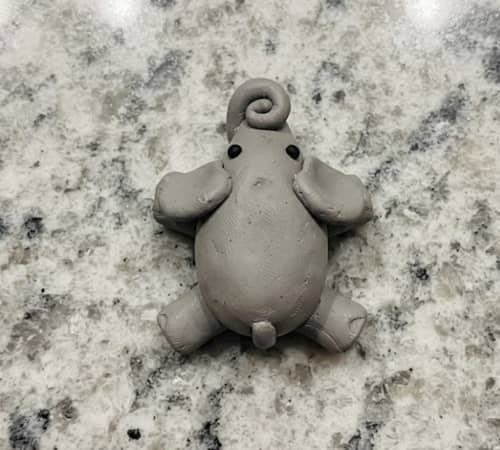
An elephant might sound complicated, but the trunk does most of the visual work.
How to make it
- Shape a small oval body from grey clay.
- Roll a smaller oval for the head and attach it to the front.
- Create four short, thick legs.
- Attach the legs underneath the body and make sure the figure can stand.
- Roll a thin but sturdy clay coil for the trunk.
- Attach the trunk to the front of the face and gently curve the tip upward.
- Flatten two small circles into ears.
- Press the ears onto both sides of the head.
- Add two tiny black eyes.
- Use a toothpick to make a few subtle wrinkles around the trunk if desired.
The trunk shouldn’t be extremely thin. Tiny clay details dry quickly and can snap when handled.
6. Tiny Clay Cat
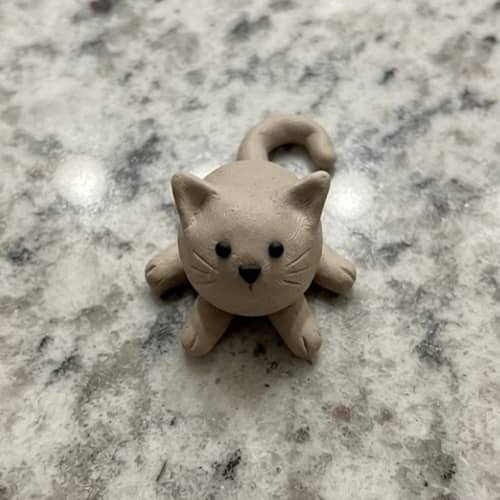
Here’s where a few simple pointed shapes suddenly turn into a recognizable little cat.
How to make it
- Make a rounded body from a small ball of clay.
- Add a smaller ball for the head.
- Blend the head and body together slightly.
- Form two tiny triangular ears and attach them to the top of the head.
- Make four little legs from short coils.
- Add a long, thin tail and curve it gently around one side.
- Press tiny black eyes into the face.
- Add a miniature triangular nose.
- Use a toothpick to draw three very shallow whisker lines on each cheek.
- If the cat feels too plain, add tiny patches of contrasting clay before drying.
A curved tail gives the figure much more personality without requiring complicated sculpting.
7. Mini Clay Duck
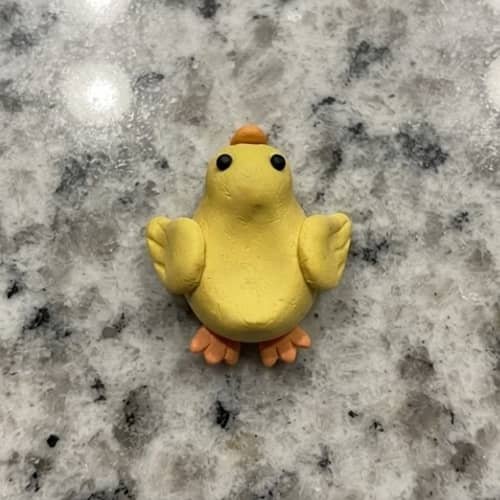
A tiny duck is mostly about getting the silhouette right.
How to make it
- Roll yellow clay into an oval body.
- Make a smaller round head.
- Attach the head and smooth the join.
- Roll orange clay into a tiny flat oval.
- Pinch the middle slightly to create a duck bill and attach it to the face.
- Make two small flattened wings.
- Press one wing onto each side.
- Add two tiny orange feet underneath.
- Place tiny black eyes above the bill.
- Slightly flatten the bottom so the duck sits steadily.
Don’t make the bill too large… the head should remain the dominant shape.
8. Little Clay Snail
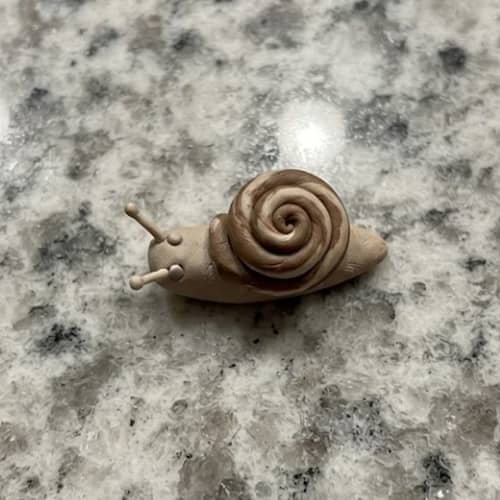
This one has a clever shortcut: the shell is just a rolled clay coil.
How to make it
- Shape a small elongated body from beige or light-colored clay.
- Flatten the bottom slightly.
- Roll a thin clay coil in a contrasting color.
- Starting from one end, coil it inward to create a spiral.
- Press the spiral gently so it becomes a compact shell.
- Attach the shell onto the upper middle of the body.
- Make two very thin antennae.
- Attach them to the head and gently bend the tips upward.
- Add tiny black eyes at the ends if your clay is firm enough to support them, or paint them later.
- Let the entire figure dry on a flat surface.
The shell should be firm enough to stay attached, but don’t press it so hard that the spiral disappears.
9. Mini Clay Penguin
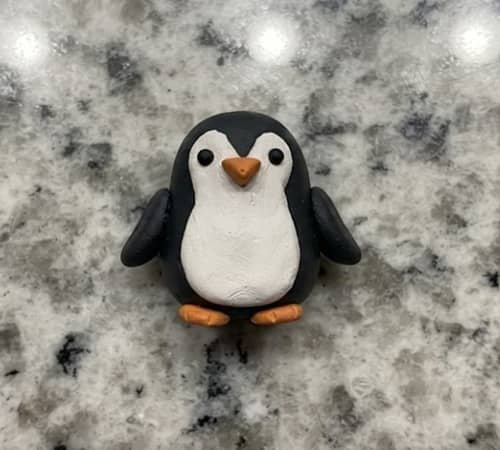
Black, white and orange clay create most of the contrast for you here.
How to make it
- Form a small black oval body.
- Make a slightly smaller black head.
- Attach the head and smooth the join.
- Flatten a small piece of white clay into an oval.
- Press it onto the front of the body to create the penguin’s belly.
- Add two tiny black wings to either side.
- Make two orange feet.
- Add a tiny orange triangular beak.
- Press in two small eyes.
- Keep the penguin upright while drying.
Want it extra cute? Tilt the head just a little before the clay hardens.
10. Tiny Clay Fox
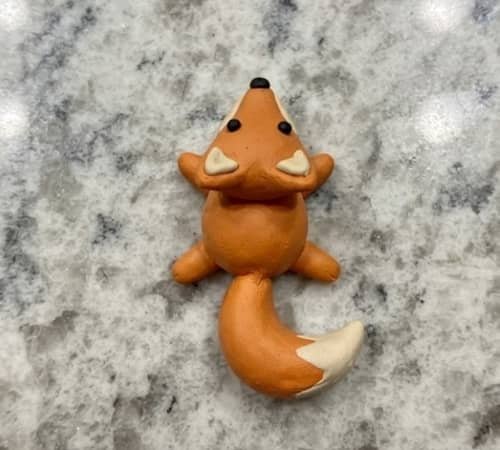
The fox gets its personality from the ears and tail, not complicated detailing.
How to make it
- Shape an orange oval for the body.
- Add a smaller orange head.
- Create two triangular ears and attach them to the head.
- Add small cream or white pieces inside the ears.
- Make four short legs.
- Roll a slightly thicker clay coil for the tail.
- Curve the tail upward or around the side of the body.
- Add a cream-colored chest patch.
- Add two black eyes and a tiny black nose.
- Use a toothpick to make a very subtle mouth line.
Make the tail slightly oversized. That’s what gives a miniature fox that instantly recognizable silhouette.
11. Mini Clay Bear
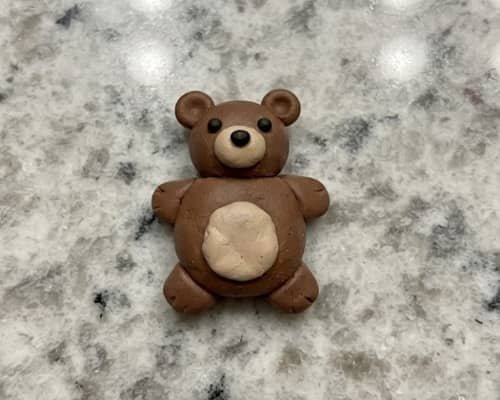
This is one of those small animal figures using clay where basic circles do almost everything.
How to make it
- Roll one oval body from brown clay.
- Make a smaller round head.
- Attach the head and blend the connection.
- Create two tiny round ears.
- Press them onto the sides of the head.
- Add four chunky little legs.
- Make a lighter-colored oval muzzle.
- Add a tiny dark nose.
- Place two small eyes above the muzzle.
- For extra detail, add a tiny lighter belly patch.
Keep the bear chunky rather than slender. A miniature bear should feel sturdy and rounded.
12. Mini Clay Octopus
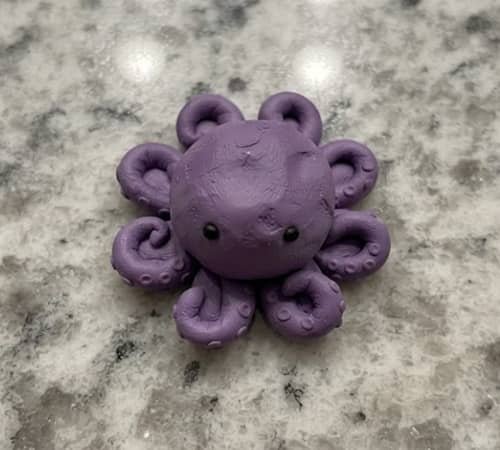
And finally, something with a completely different shape.
How to make it
- Roll a small ball of purple, blue, pink or orange clay.
- Gently elongate the upper portion to form a rounded head.
- For the tentacles, roll eight short clay coils.
- Make each coil slightly thicker at one end.
- Arrange the eight pieces in a circle underneath the head.
- Attach them one at a time, pressing the center firmly enough to hold everything together.
- Curve each tentacle slightly outward.
- Add two tiny eyes to the front.
- Use a toothpick to create tiny suction-cup dots along a few tentacles.
- Check that the figure can stand without the head pulling it over.
You don’t need eight identical tentacles… actually, don’t make them identical.
Small differences make these DIY clay crafts feel handmade rather than factory-produced.
Final Thoughts
Making mini clay animal figures is less about producing twelve perfect figurines and more about learning how tiny forms communicate an idea.
A two-millimeter change to an ear can suddenly make a creature look like a rabbit instead of a cat. Interesting, right? That’s why these projects are useful beyond ordinary clay craft… They quietly teach proportion, balance, texture and visual simplification.
If you’re making them with children, let them invent their own animals after trying a few of these.
Give the creature three ears, a giant tail or ridiculously tiny feet.
Sometimes the most memorable clay critters are the ones that technically aren’t any real animal at all.





