There is something oddly satisfying about turning one plain paper plate into a bright, cheerful apple.
This paper plate apple craft is simple enough for little hands, yet it still leaves plenty of room for creativity.
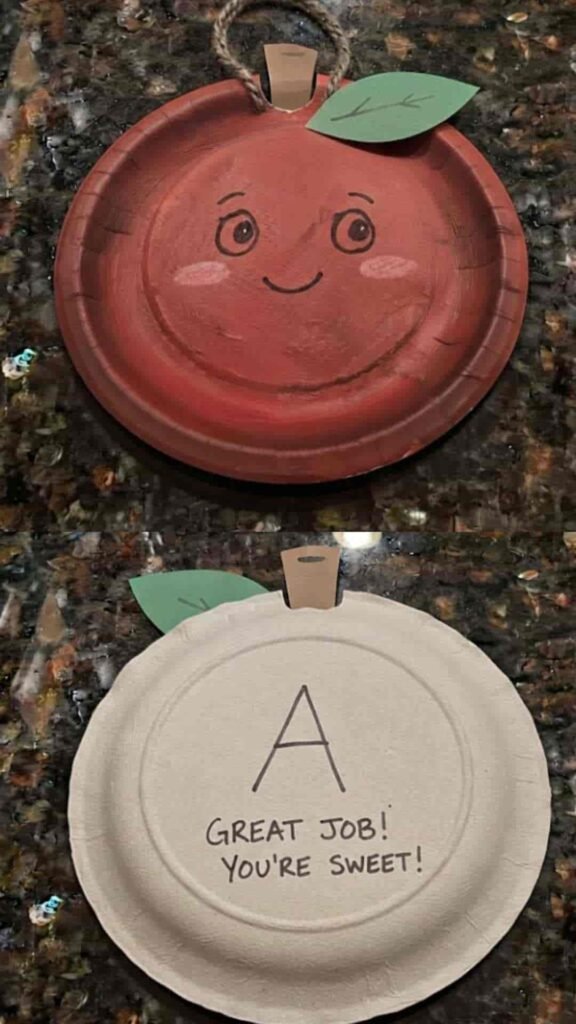
Whether you’re planning apple arts and crafts for preschool, decorating a classroom for autumn, or just looking for a relaxed afternoon kids craft, this project fits perfectly.
The best part? You probably already have everything you need sitting in a craft drawer.
Ready to make one? Let’s grab a paper plate and see how a few basic supplies slowly become a colorful apple that looks surprisingly cute.
Supplies Needed To Make Paper Plate Apple Craft
Before starting, gather everything in one place.
- 1 white paper plate (9-inch works best)
- Red acrylic or washable craft paint
- Green craft paper
- Brown craft paper
- Black marker
- Child-safe scissors
- Craft glue or glue stick
- Paintbrush
- Pencil
- Small scrap of white paper (optional for highlights)
- Newspaper or craft mat to protect the table
Difficulty: Beginner
Time Required: 25 to 35 minutes
Age Recommendation: Preschoolers with assistance, school-age children, and even adults who enjoy simple paper craft projects.
Step 1: Turn the Paper Plate Into Your Apple Base
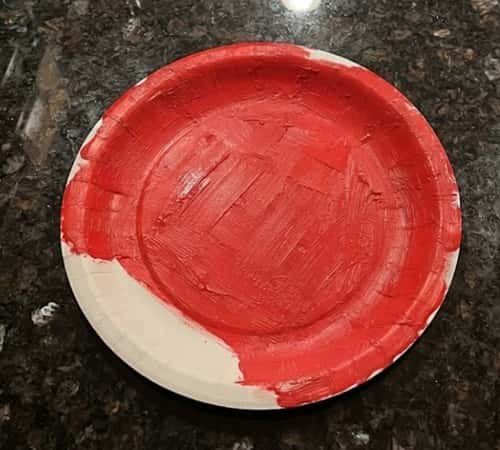
Lay the paper plate flat with the raised rim facing upward. Don’t flip it over.
The rim actually gives the finished apple a nice rounded look without doing any extra work.
Paint the entire front of the plate bright red. Start from the middle and slowly work toward the edges.
Use smooth strokes instead of loading the brush with too much paint. A thin coat dries much faster than one thick layer.
Notice a few white streaks showing through? That’s completely okay.
In fact, a slightly uneven paint finish makes the apple feel handmade instead of factory perfect.
Kids always enjoy seeing brush marks because they know they made it themselves.
Now place the plate somewhere flat and leave it alone until it’s fully dry.
It may look dry after a few minutes, but the center usually needs longer than you think.
It dont need to be perfectly covered, tiny imperfections make the craft feel real.
Step 2: Create the Classic Apple Dip
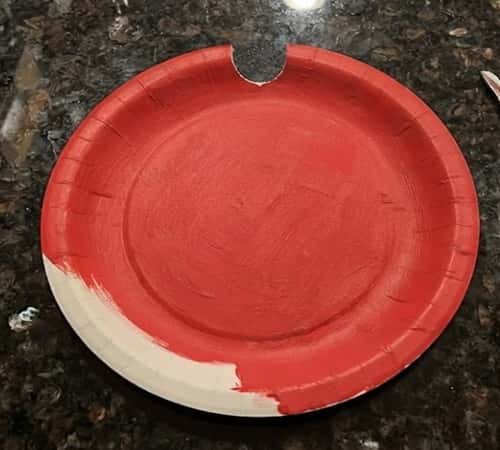
An apple doesn’t really look like an apple until the little notch appears at the top. Funny how one tiny detail changes everything.
Using a pencil, lightly sketch a shallow curved “V” shape at the top center of the plate.
Cut along the pencil line carefully. Remove only a small section.
Resist making the cut too deep because a gentle curve creates a much more recognizable apple shape.
Hold the plate up for a second. Doesn’t it already resemble an apple?
If the edges look fuzzy after cutting, trim tiny bits until both sides look balanced.
Step 3: Make the Stem and Leaf
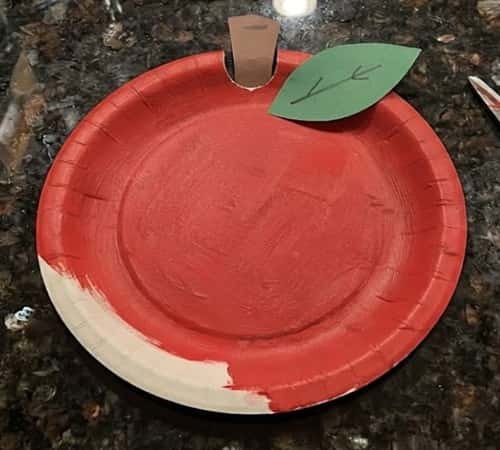
Now the apple needs a little personality.
Draw one short stem onto brown craft paper.
Keep it slightly curved instead of perfectly straight because real apple stems rarely grow like rulers.
Next, draw a simple leaf on green craft paper. A pointed oval shape works beautifully.
Cut both pieces out slowly.
Want an extra realistic touch?
Draw one center vein down the middle of the leaf with a black marker.
You could even curl the leaf gently around a pencil before attaching it. That tiny curve creates surprising depth.
The leaf dont have to match perfectly because every apple tree grows differently.
Glue the stem behind the notch first.
Then glue the leaf beside it.
Hold each piece for about twenty seconds before letting go.
Step 4: Add Texture That Makes the Apple Pop
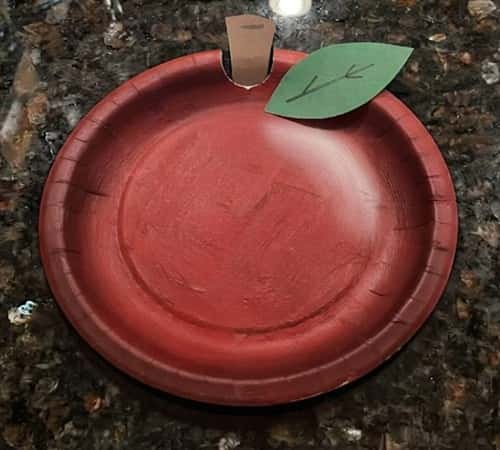
Here’s the part that most tutorials skip.
Instead of leaving the apple flat, lightly dry-brush tiny streaks of darker red around the outer edges.
Then dip the brush into a little white paint and gently brush across one side to create a soft highlight.
Suddenly the apple starts looking round instead of flat.
Pretty neat, right?
You don’t need fancy painting skills either.
Less paint is actually better here.
If you’re crafting with younger children, simply let them dab small amounts instead of brushing perfectly.
This little trick transforms a basic paper plate fruit craft into something with much more character.
Step 5: Give Your Apple a Friendly Face (Optional)
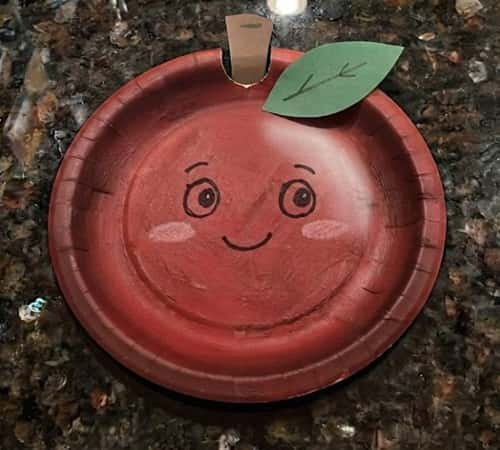
This step is optional, but preschoolers absolutely love it.
Draw two simple oval eyes with a black marker.
Add tiny white paper circles or paint dots inside the eyes for sparkle.
Draw a curved smile.
Maybe even tiny pink cheeks using a cotton swab and watered-down pink paint.
Isn’t it amazing how quickly a smiling face makes children connect with a craft?
If you’re creating a classroom display, each child can draw a different expression so every apple looks unique.
Step 6: Add Learning Elements
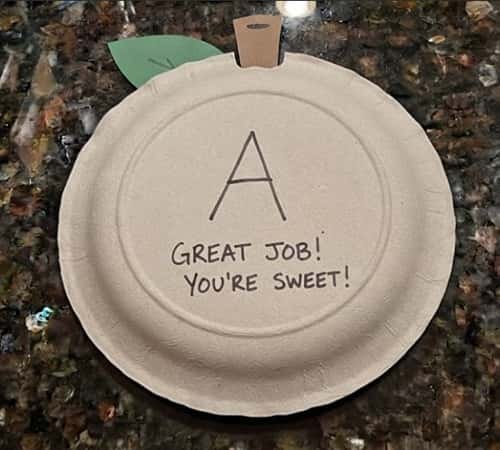
Why stop at making an apple when you can turn it into a learning activity too?
Flip the craft over.
Write one apple fact, a sight word, a letter of the alphabet, or even simple counting numbers.
Teachers often use this idea during autumn lessons because children naturally pick the apple up to see what’s on the back.
Parents can write little encouraging notes.
“I am kind.”
“I can learn.”
“I tried my best.”
Small details like these help transform a regular fruit-themed paper plate craft into something children remember long after the glue dries.
Step 7: Display Your Finished Apple
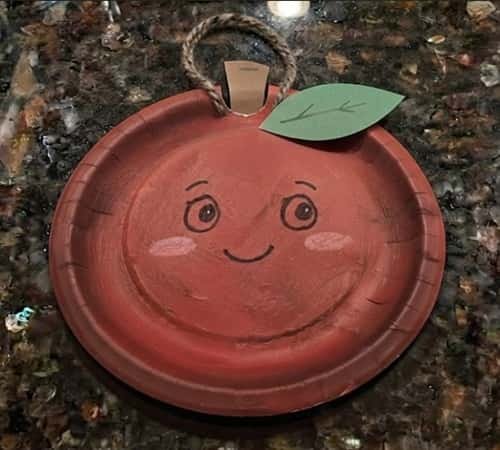
Now it’s time to show it off.
Punch a small hole near the stem and thread yarn through it for hanging.
Or glue several apples onto a classroom bulletin board to build a colorful apple orchard.
Another fun idea is connecting multiple apples into a garland for autumn decorations.
This project also fits beautifully into paper plate apple craft for toddlers and kids of all ages, because every child can personalize colors, faces, and messages while still following the same basic structure.
Looking around the room, you’ll quickly notice that no two apples ever end up looking exactly alike. Thats actually the fun part.
Fun Ways to Personalize Your Paper Plate Apple
Once you’ve finished the basic version, try making it your own.
- Create a green apple using light green paint.
- Paint a yellow apple inspired by Golden Delicious.
- Sprinkle red and yellow together for a mixed harvest apple.
- Add tissue paper squares instead of paint for extra texture.
- Glue crumpled paper instead of leaving the plate smooth.
- Attach a real twig instead of a paper stem.
- Add a tiny paper worm peeking from one side.
- Turn several apples into a classroom alphabet display.
- Label different apple varieties for a seasonal science activity.
- Pair it with an apple book during story time for a complete fall craft project.
Final Thoughts
One thing I’ve noticed after making dozens of seasonal crafts is that the projects children remember aren’t always the fanciest ones.
They’re the ones that leave room for their own ideas.
This paper plate apple craft does exactly that.
A child can change one color, draw a silly face, add a paper worm, or write a favorite word on the back, and suddenly the project becomes theirs instead of yours.
That’s why simple crafts continue to matter.
They quietly build fine motor skills, decision-making, confidence, and storytelling all at the same time, while creating something that still earns a proud spot on the refrigerator weeks later.





