Halloween crafts don’t always need fancy supplies or complicated techniques.
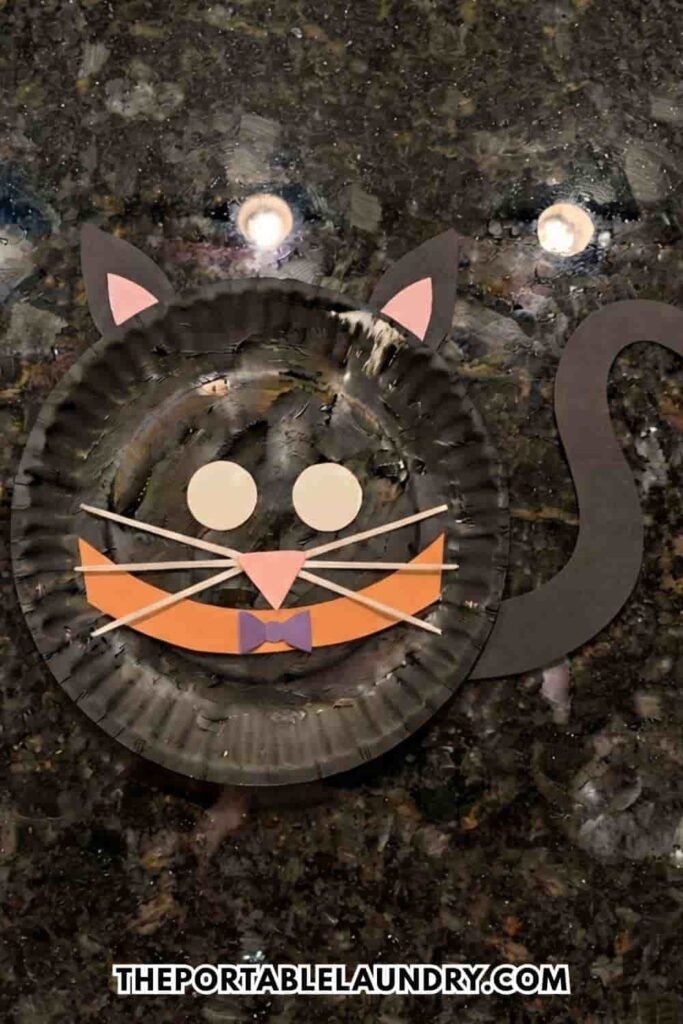
That’s exactly why I keep coming back to this paper plate black cat craft whenever I want something fun that kids can actually finish without getting frustrated.
Have you ever noticed how the simplest crafts often become the favorite ones?
This project uses a single paper plate, a few basic craft materials, and a printable template to create a playful black cat that’s perfect for classrooms, preschool activities, Halloween decorations, or afternoon crafting at home.
Even if you’ve never made a paper plate craft before, you’ll be surprised how easy this one is.
Also, I have made a clay version of this Black cat here, that’s equally entertaining, be sure to check that out too.
And if you are interested in the handprint version, you can check that Handprint black cat craft here.
With all that said, let’s dive right into this paper plate black cat craft.
Paper Plate Black Cat Craft at a Glance
Difficulty: Easy
Time Required: 25 to 35 minutes
Age Group: 4+ (with adult help for cutting)
Theme: Halloween Craft
Perfect For:
- Preschool classrooms
- Kindergarten Halloween activities
- Fall crafting sessions
- Family craft time
- Halloween party tables
- Paper plate craft for kids of all ages
Supplies Needed To Make Paper Plate Black Cat
- 1 white paper plate (9-inch)
- Black acrylic paint or black tempera paint
- Large paintbrush
- Black construction paper
- Pink construction paper
- White cardstock
- Printable black cat craft template
- Pencil
- Scissors
- Craft glue
- Black marker
- White gel pen (optional)
- Googly eyes or paper eyes
- Thin black pipe cleaner (optional for whiskers)
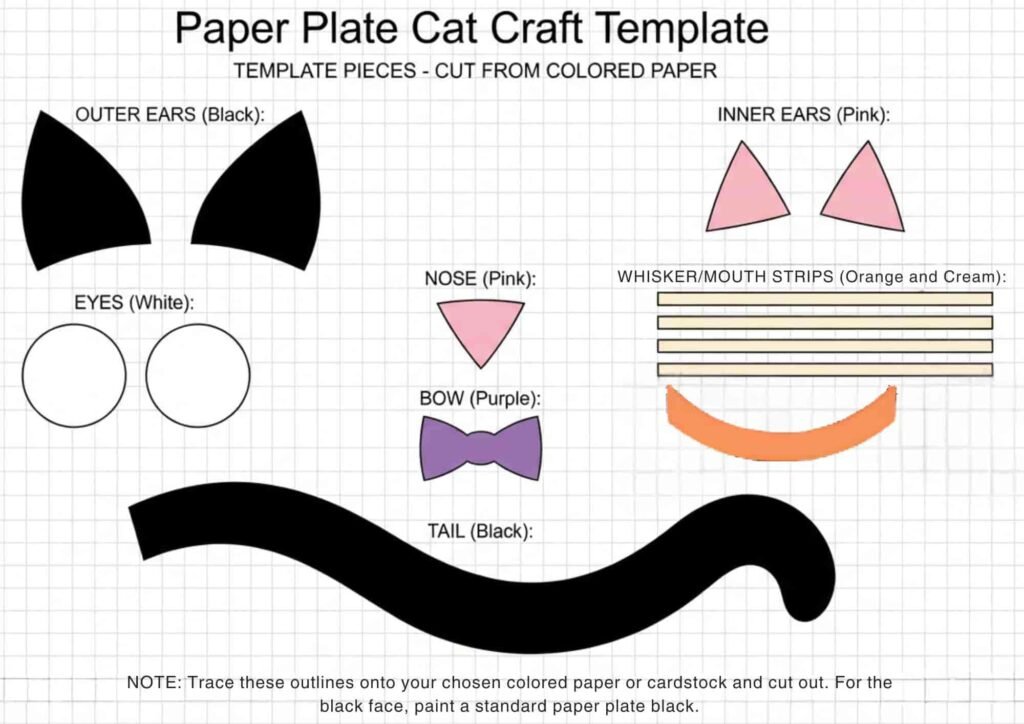
Free Printable Black Cat Craft Template
Step 1: Paint the Paper Plate Completely Black
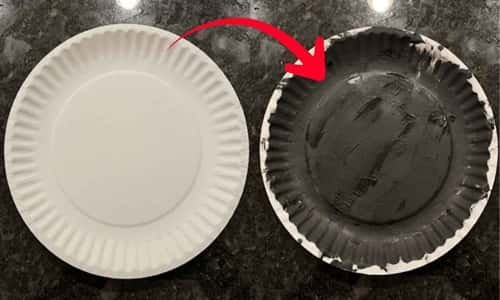
Start with the paper plate facing right-side up.
Hold it still with one hand while applying black paint using long brush strokes from the center toward the edges.
Don’t rush this part. Thick paint puddles take forever to dry.
Try covering every little white spot, especially around the raised rim. That outer edge becomes part of the cat’s face later.
Some kids likes adding extra paint because they think darker means better, but one even coat actually looks cleaner.
Place the plate somewhere flat until it’s completely dry.
Step 2: Trace and Cut the Template Pieces
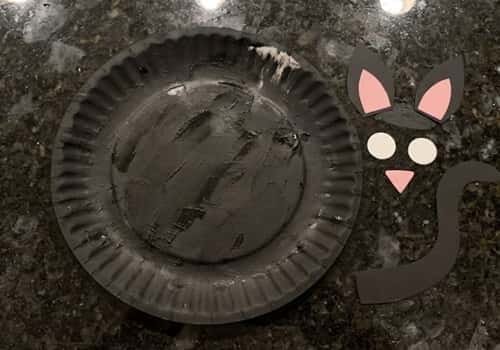
While the painted plate dries, print your template and trace each piece onto colored cardstock.
Use:
- Black cardstock for ears
- Pink cardstock for the inner ears
- White cardstock for the eyes
- Pink paper for the nose
- Black cardstock for the tail
Keep your scissors steady around the curved tail because uneven edges become noticeable later.
Don’t throw away leftover scraps. Tiny pieces are useful for fixing mistakes if somebody accidentally trims too much.
Now everything is ready before assembly begins.
Step 3: Build the Cat’s Face
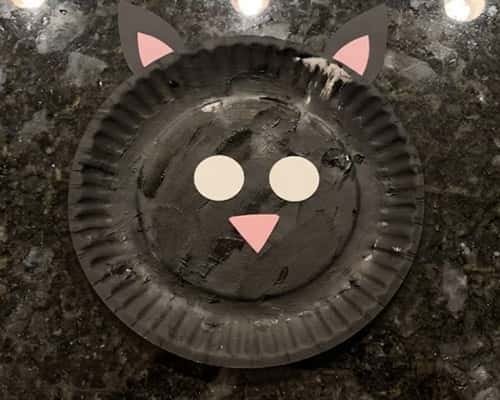
Now the personality starts showing.
Glue the ears behind the top rim of the plate so they stick upward evenly. Next, attach the pink inner ears directly onto each black ear.
Place the eyes about one-third down from the top. Before gluing, move them around a little until the expression feels right.
Glue the small pink triangle underneath the eyes.
Draw a smiling mouth with a black marker or keep it simple with just the nose and whiskers.
Funny enough, tiny adjustments completely changes how the cat looks.
Step 4: Add Whiskers and Extra Details
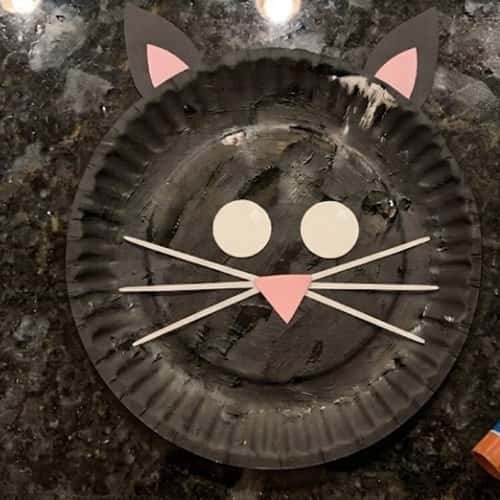
There are several ways to make whiskers.
You can:
- Draw them using a white paint marker.
- Glue short pipe cleaner pieces.
- Cut thin white cardstock strips.
I usually choose cardstock because it stays flat and photographs nicely.
Add tiny white highlights inside the eyes with a gel pen if you have one.
This little trick makes the cat look surprisingly lively.
Honestly, its amazing how one tiny dot changes the whole expression.
Step 5: Attach the Tail
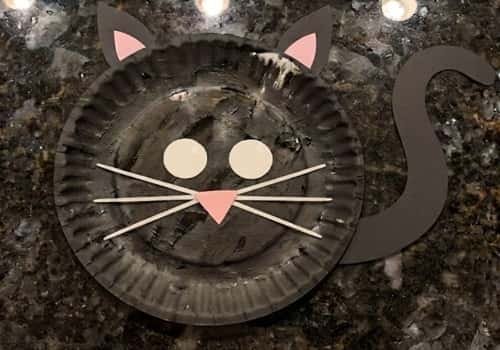
The curved tail gives the craft movement.
Glue it behind one side of the paper plate instead of directly underneath. Let it curl upward naturally.
Avoid making the tail perfectly straight.
Cats rarely hold their tails stiff, so a gentle curve feels much more playful.
Press firmly for about thirty seconds before letting go.
It don’t need lots of glue either.
Step 6: Give Your Cat a Halloween Personality
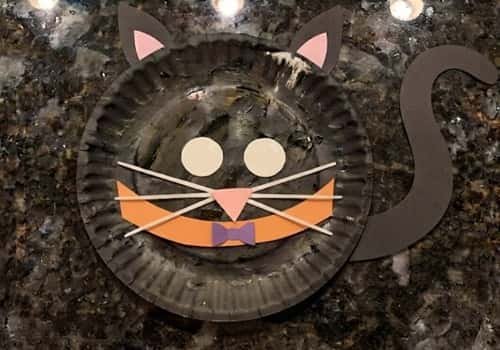
Here’s where your paper plate halloween cat becomes unique.
You could add:
- Tiny vampire fangs
- Purple bow tie
- Orange collar
- Witch hat
- Small paper pumpkin beside the cat
- Glitter moon
- Mini paper bat
If you’re creating paper plate halloween cat crafts for kids, let every child decorate differently instead of copying one sample.
That’s usually when creativity shows up.
Phew… your paper plate black cat craft is finally ready.
Take a moment to compare it with the plain paper plate you started with.
Quite a transformation, isn’t it?
Every little brush mark and slightly uneven cut actually makes the project feel handmade rather than factory perfect. That charm is hard to fake.
Whether you’re decorating for Halloween, using it in a classroom, or simply looking for a fun kids DIY project, this cheerful cat fits almost anywhere.
Creative Ways to Personalize Your Black Cat
Once the basic cat is finished, try making another one with a completely different personality.
Some fun ideas include:
- Friendly smiling cat
- Sleepy cat with closed eyes
- Witch’s magical black cat
- Pumpkin patch cat
- Glow-in-the-dark cat using fluorescent paint
- Rainbow whiskers
- Monster cat with goofy eyes
- Family of different-sized cats
Using the same template while changing facial expressions is an easy way to make every project feel original.
Helpful Tips for Better Results
- Paint before cutting any pieces.
- Let paint dry completely before gluing.
- Use thick cardstock instead of printer paper.
- Keep glue away from the edge of the plate.
- Round sharp paper corners slightly for a softer look.
- Test eye placement before sticking permanently.
- Older kids can cut their own templates while younger children trace first.
Final Thoughts
There’s something surprisingly timeless about a black cat made from a paper plate.
It isn’t expensive, it doesn’t demand artistic talent, and yet every finished version tells a slightly different story depending on who made it.
That’s one reason simple paper craft projects continue to stay popular year after year.
Instead of chasing perfect results, encourage children to experiment with expressions, colors, and tiny details that reflect their imagination.
Those small creative decisions build confidence far beyond Halloween, and they quietly teach design, observation, and problem-solving without ever feeling like a lesson. That might be the best part of this entire kids craft activity.





