There is something fun about turning an ordinary paper plate into a playful ocean animal.
This paper plate shark craft is simple enough for young children, yet creative enough to keep older kids interested too.
If you are searching for a beginner-friendly paper plate craft, this one checks all the boxes.
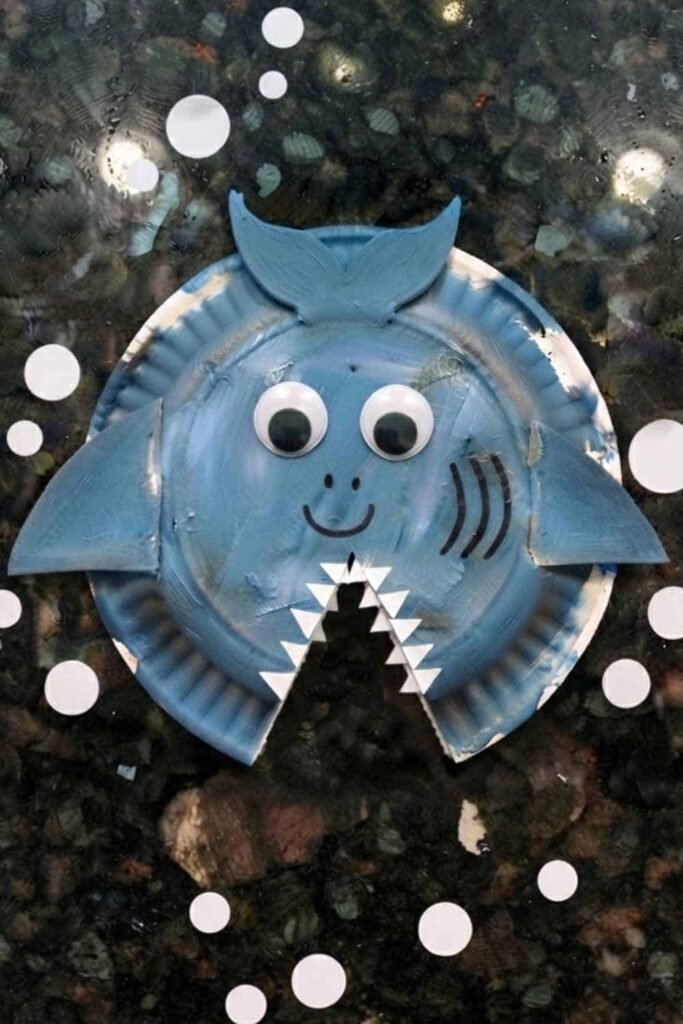
The finished shark has bold shapes, friendly features, and plenty of personality without being difficult to make.
Looking for a sea creature activity or an easy sea animal craft for preschoolers, kindergarten, or elementary kids? Grab a paper plate because we are about to make a shark that looks adorable rather than scary.
And yes, it doesn’t need expensive craft supplies.
Materials Needed To Make Paper Plate Shark Craft
- 1 white paper plate
- Blue acrylic paint or poster paint
- White paint (optional for touch-ups)
- Black marker
- Pencil
- Scissors
- Craft glue or school glue
- White cardstock or construction paper
- Black cardstock or black paper (optional for the eye)
- Paintbrush
- Googly eye (optional)
- Scrap paper for protecting the table
Step 1: Paint the Paper Plate
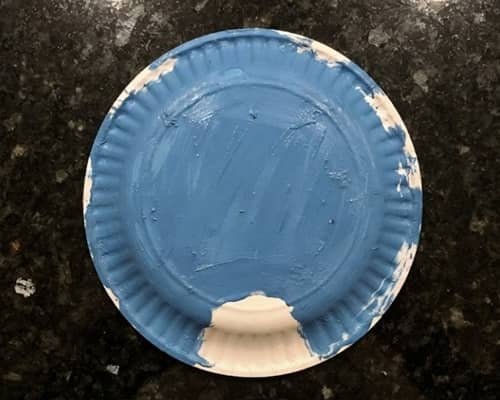
Place the paper plate upside down so the raised side faces up.
Paint the entire outside surface blue.
Don’t worry if the brush strokes are visible because they actually make the shark look more handmade.
Leave a narrow curved strip near the bottom white to become the shark’s belly, or paint it later if that’s easier.
Allow the paint to dry completely before moving on.
It may take around 15 to 20 minutes depending on the paint.
Step 2: Cut the Shark Body and Fins
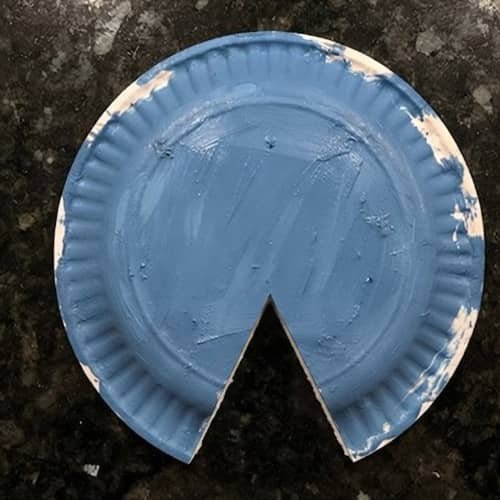
Draw a shallow V-shaped opening on one side of the plate.
This becomes the shark’s open mouth.
Cut it out carefully. Save the cut-out piece because you will use it to make the dorsal fin and both side fins.
Cut one tall triangle for the top fin and two smaller triangles for the side fins.
You don’t have to make them perfectly equal. Little differences actually makes the shark feel homemade.
Step 3: Glue the Fins
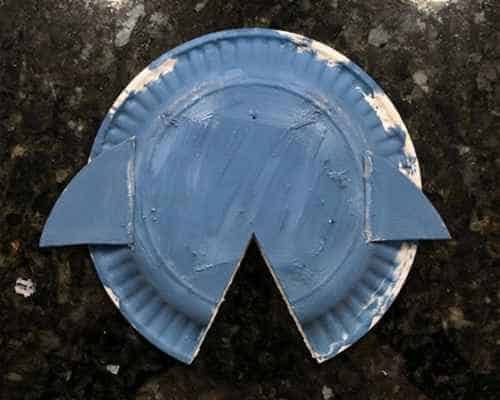
Glue the large triangular fin onto the back of the plate so it sticks up from the top.
Next, attach one small fin to each side near the middle. Hold each piece for a few seconds until the glue grabs.
If a little glue squeezes out, simply wipe it away with a tissue. Nothing has to be perfect here.
Step 4: Add the Tail
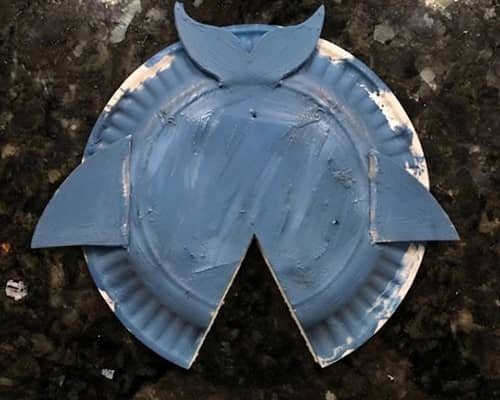
Cut a simple fishtail shape from leftover blue-painted paper plate scraps or blue construction paper.
The tail should look like two connected triangles with a small notch in the center.
Glue it behind the back edge of the plate so only the tail sticks out. Suddenly the shark starts looking like an actual sea animal, and that is where the excitement begins.
Step 5: Create the Mouth and Teeth
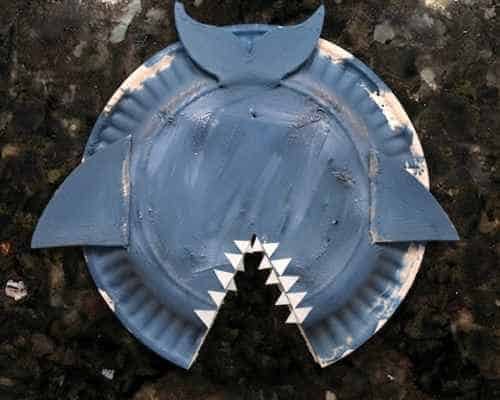
Cut several tiny white triangles from cardstock. Glue them around the inside edges of the V-shaped mouth.
Space them slightly apart instead of making them perfectly straight.
Draw a red tongue inside if you like, but keeping the inside plain white also looks great.
This friendly smile makes the craft suitable even for younger children.
It also works well as a baby shark paper plate craft for preschool classrooms.
Step 6: Finish the Face
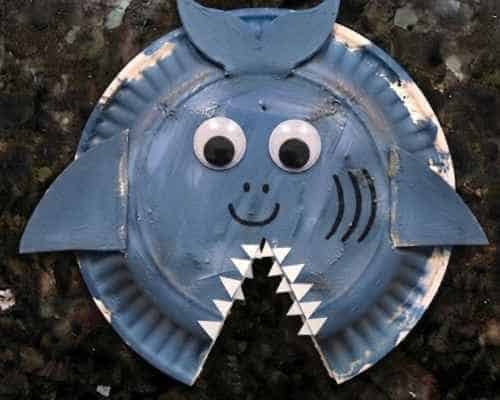
Glue on one large googly eye or make an eye using white and black paper circles.
Draw two small curved gill lines behind the eye with a black marker.
Add a tiny smile line if you want your shark to look extra friendly.
If you are planning a baby shark craft for toddlers, keeping the expression cheerful instead of fierce makes the activity much more inviting.
Some families even pair this with simple Pinkfong arts and crafts activities during ocean-themed learning.
Step 7: Add Ocean Details (Optional)
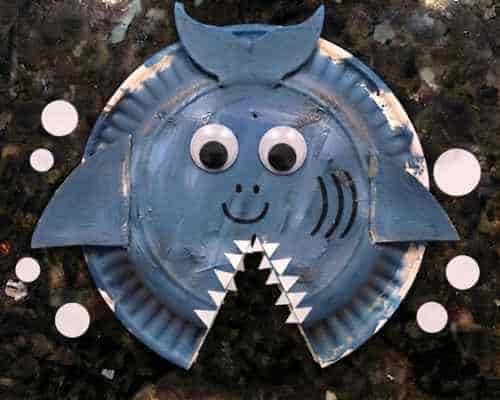
Your shark already looks complete, but you can give it a little underwater personality.
Cut a few tiny bubbles from white paper or draw them with a marker around the shark.
Add one or two small blue paper waves underneath if you like.
Resist the urge to overcrowd it though. Keeping the design simple helps the Shark-themed paper plate craft stand out much better.
This easy kids craft also fits nicely into lessons about sea creatures, ocean habitats, or marine life.
Final Thoughts
Simple crafts often teach the biggest lessons.
This paper plate shark craft is more than cutting and gluing because children naturally practice planning, fine motor control, and shape recognition while creating something they can proudly display.
You could even challenge kids to invent a name, habitat, or little story for their shark after it is finished, turning the activity into both art and imaginative play.
That extra storytelling element keeps the project memorable long after the glue dries.
Whether you are building an ocean unit, making a fun DIY project, or introducing a new sea creature craft, remember that the best creations are rarely perfect… they simply reflect the hands that made them.





