Halloween is one of those times when my craft table gets covered with paint, scraps of paper, and way too much glue.
Somehow, nobody minds. If you’re looking for a paper plate spider craft that’s simple enough for beginners but still turns out adorable, you’re in the right place.
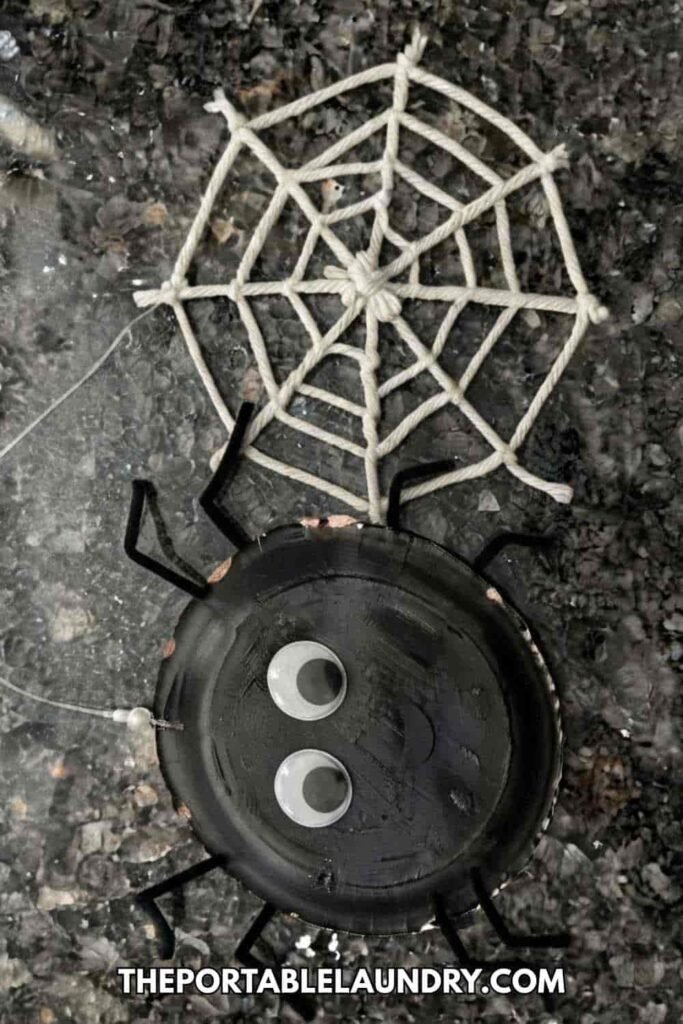
This project uses everyday supplies, doesn’t take forever, and gives kids plenty of chances to add their own personality.
Whether you’re planning a classroom activity, an afternoon kids craft, or adding another Halloween craft to your growing collection of paper plate craft ideas for kids, this spider is fun from the very first cut.
Why You’ll Love This Paper Plate Spider Craft
I like this project because there isn’t one “correct” way to make it. Every spider ends up with its own funny personality.
It works well for:
- Preschoolers (with a little help)
- Kindergarten classrooms
- Elementary school art time
- Halloween parties
- Rainy day crafting
- Family craft afternoons
If you’ve already made a paper plate bat craft, tried a bat plate craft, or even used a paper plate bat craft template, this spider makes a great companion decoration without needing many extra supplies.
Supplies Needed To Make Paper Plate Spider
Gather everything before you begin.
You’ll need:
- 1 small white paper plate
- Black acrylic paint
- Large paintbrush
- 8 black pipe cleaners
- 2 large googly eyes
- Black construction paper
- Pencil
- Scissors
- Hole punch
- School glue
- Craft glue or hot glue (adult supervision)
- Black marker
- Scrap paper for drying
Optional decorations:
- Purple glitter
- Orange ribbon
- Foam stickers
- Tiny plastic spiders
- Halloween-themed stickers
Before You Start
Cover the table with newspaper or a reusable craft mat.
Paint dries much quicker when the paper plate sits flat, so don’t rush this bit. I know…waiting isn’t fun, but wet paint and glue don’t gets along very well.
It also helps to arrange all eight pipe cleaners before attaching them. You’ll instantly see if they’re even on both sides.
Step 1: Paint the Paper Plate Black
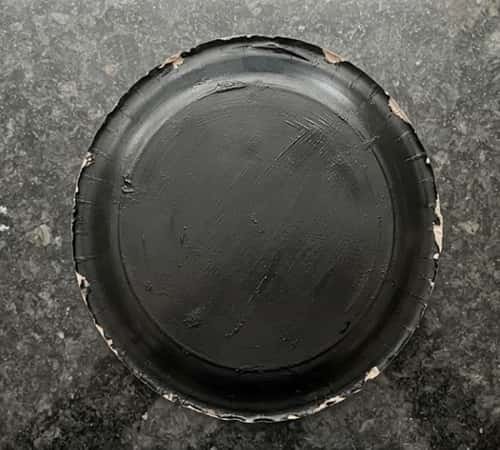
Place your paper plate upside down.
The raised side becomes the spider’s body because it creates a nice rounded shape.
Dip the paintbrush into black acrylic paint and begin from the center.
Smoothly move your brushstrokes outward until the entire plate is covered. Don’t forget the edges because those are easy to miss.
Turn the plate slightly while painting instead of moving your arm around. It’s a strange little trick, but it really makes things go more smoothly.
Some tiny streaks are perfectly okay. In fact, they makes the finished spider look handmade instead of factory-perfect.
Leave the plate on scrap paper for around 20 to 30 minutes until completely dry.
Step 2: Make the Spider’s Eight Legs
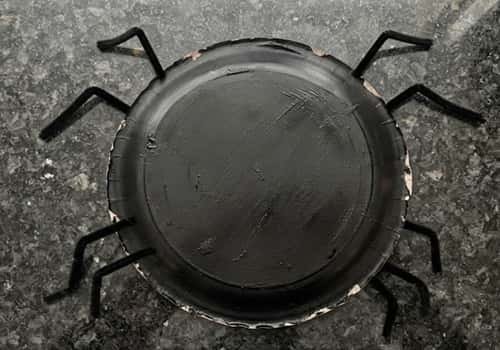
While the paint dries, it’s time to work on the legs.
Take eight black pipe cleaners.
Keep them full length for a larger spider or trim each to around 7 inches for a smaller version.
Now bend each one twice.
Don’t make sharp angles.
Instead, create gentle bends that resemble real spider legs. Think about how a spider stands with its legs slightly lifted rather than stretched flat.
Lay all eight beside one another.
Adjust each until they look roughly similar. They don’t has to be identical though. Tiny differences actually make the spider feel more alive.
Once you’re happy, keep them lined up in pairs.
Four legs will go on the left.
Four on the right.
Step 2.1: Attach the Legs Securely
Flip the plate over just enough to see the rim underneath.
Using a hole punch, make four evenly spaced holes on the left edge and four matching holes on the right.
Slide one pipe cleaner through each pair of holes.
Twist the ends together underneath the plate.
If you’re working with younger kids, a small dot of craft glue over each twist keeps everything from sliding around later.
Once every leg is attached, gently bend them outward.
Now set the spider on the table.
Does it wobble?
If yes, bend one or two legs until the spider stands evenly.
Funny enough, this is my favorite part because suddenly it actually starts looking like a spider.
Step 3: Give Your Spider a Face
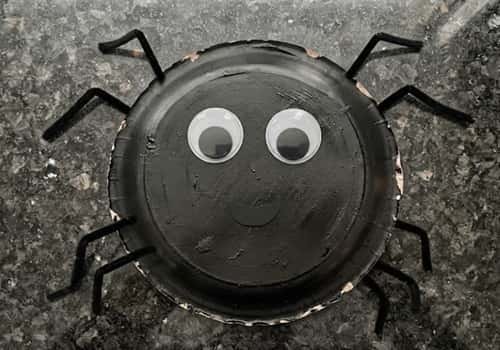
Every spider deserves a personality.
Glue two large googly eyes onto the front of the paper plate.
Place them close together for a cute spider.
Move them farther apart if you’d rather make it look a little silly.
Using black construction paper, cut a tiny smiling mouth.
Or skip the smile completely and use white paper to create two little fangs.
Both versions work.
If you enjoy expressive crafts, tiny eyebrows cut from paper completely changes how the spider feels.
Mine somehow always ends up looking surprised.
Before contacting the face, let the adhesive dry for an additional ten minutes.
Step 4: Add Texture So Your Spider Looks More Lively
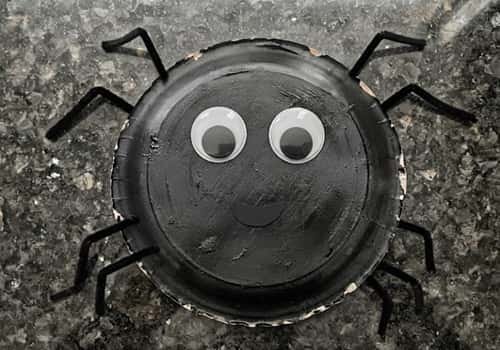
Right now your spider looks cute, but it probably feels a little flat.
This is where I like adding tiny details that make people stop and take a second look.
Take your black marker and lightly draw short curved lines across the paper plate.
Don’t press too hard. You’re not trying to create stripes. Instead, imagine little tufts of fuzzy spider hair.
Want to make it even more interesting?
Dry-brush a tiny amount of gray paint over the highest parts of the plate.
Dip the brush into gray paint, wipe almost all of it onto a paper towel, then gently sweep it across the raised surface.
The gray catches only the texture and leaves a soft shadow effect that gives the body more depth.
If you’re making this with younger children, skip the dry brushing and simply glue on a few foam dots or tiny Halloween stickers. It’ll still look fantastic.
Now curl the ends of each pipe cleaner just a little using a pencil.
Those gentle curves instantly make the legs feel more natural instead of looking stiff.
Take a step back for a second. See how much more personality it has already?
Step 5: Create a Fun Hanging Spider Web Display
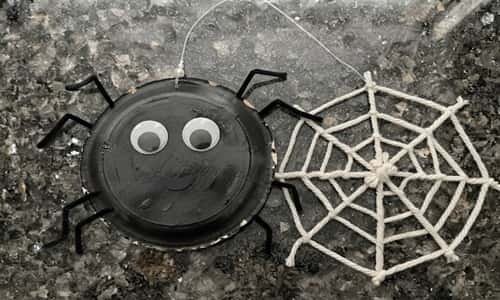
Your spider deserves somewhere fun to live.
Cut several long strips of white yarn, thick embroidery thread, or white string.
Tape or tie them together into a simple crisscross web.
Don’t overthink the pattern because real spider webs aren’t perfectly symmetrical anyway.
If you’re decorating a classroom, tape the web onto a black bulletin board.
At home, it looks great hanging inside a window, across a bookshelf, or on a bedroom door.
Punch a small hole near the top of the paper plate and thread a piece of string through it.
Tie a knot.
Now hang your spider so it dangles just in front of the web.
When someone walks past, the pipe cleaner legs move ever so slightly. That little movement makes the whole craft feel much more alive.
Kids absolutely loves watching it swing.
Step 6: Let Kids Personalize Their Spider
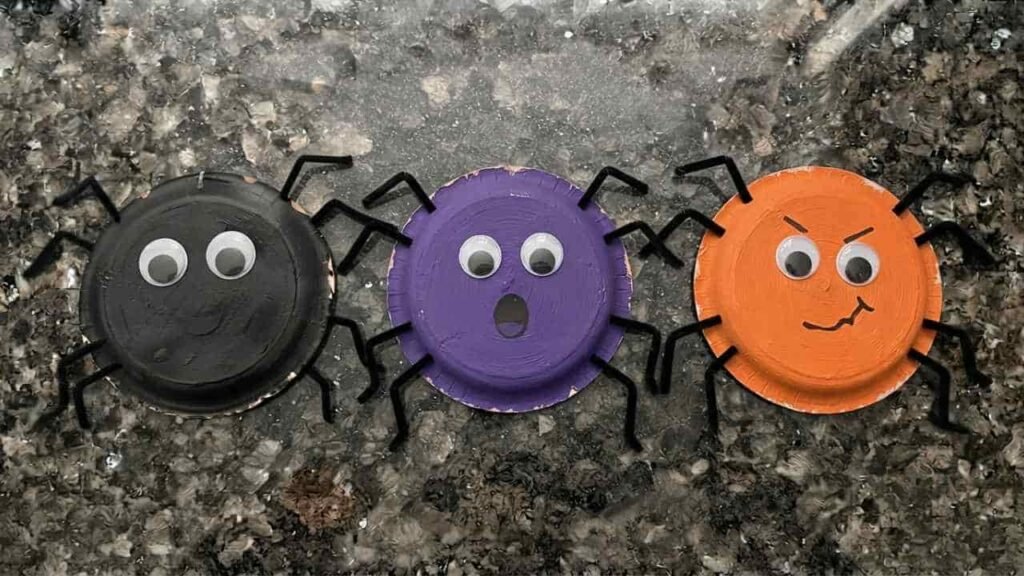
This might be my favorite part because every finished spider ends up looking completely different.
Instead of making every spider black, try painting one:
- Purple
- Orange
- Dark green
- Midnight blue
- Glitter black
Swap regular googly eyes for oversized ones if you want a funny cartoon look.
Older kids can glue tiny gems onto the body.
Preschoolers usually enjoy adding colorful foam circles or stickers.
Another fun idea is giving your spider a name.
Seriously…it makes the craft even more memorable.
Write the name underneath the plate or create a tiny paper tag that hangs below the spider.
Maybe “Mr. Wobbles.”
Maybe “Charlotte.”
Maybe something completely ridiculous.
There really isn’t a wrong answer here.
Creative Ways to Customize Your Spider
Once you’ve made one spider, you’ll probably want another. That’s exactly what happened at my house.
Here are a few easy variations to try:
- Add glow-in-the-dark paint for nighttime fun.
- Make tiny baby spiders using snack-sized paper plates.
- Create a rainbow spider for younger children who prefer friendly decorations.
- Glue cotton balls underneath to make a fluffy spider.
- Add tiny paper witch hats or miniature bows.
- Make a spider family with different-sized plates.
- Turn the craft into a Halloween puppet by attaching a craft stick underneath.
- Write silly Halloween jokes on the back for a classroom activity.
If you’ve been exploring paper plate craft ideas for kids, mixing spiders with pumpkins, ghosts and bats creates an entire handmade Halloween collection using the same inexpensive materials.
Common Mistakes (And Easy Fixes)
Even simple crafts can have little hiccups. Here are a few I see often.
The paint cracks: The paint layer was probably too thick. Apply two thin coats instead of one heavy coat next time.
The legs won’t stay straight: Twist the pipe cleaners tighter underneath the plate before bending them outward.
The spider won’t stand properly: Adjust each leg individually until all eight touch the surface.
The googly eyes fall off: Allow the paint to dry completely before gluing.
The plate bends while drying: Use heavier paper plates instead of lightweight party plates.
Final Thoughts
What I enjoy most about this paper plate spider craft isn’t actually the finished spider.
It’s watching how one simple paper plate somehow turns into twenty completely different creations once kids start making their own choices.
That freedom quietly builds confidence without them even realizing it.
A child who bends one leg differently, adds giant eyes, or paints a purple spider is already experimenting with design, balance, and creativity.
That’s why simple kids craft projects continue to matter.
They aren’t just decorations for Halloween.
They’re little opportunities to solve problems, make decisions, laugh at happy accidents, and discover that handmade things don’t have to be perfect to become someone’s favorite Halloween craft.





