Have you ever looked at a turkey craft and thought, “What if this turkey tried hiding as a pig?” That silly or I should say ridiculous notion is exactly what inspired this pig turkey disguise clay craft using air dry foam clay.
Instead of making a flat paper disguise, we are turning the turkey into a tiny handmade pig sculpture with a round pink body, floppy ears, snout, curly tail and little piggy details.
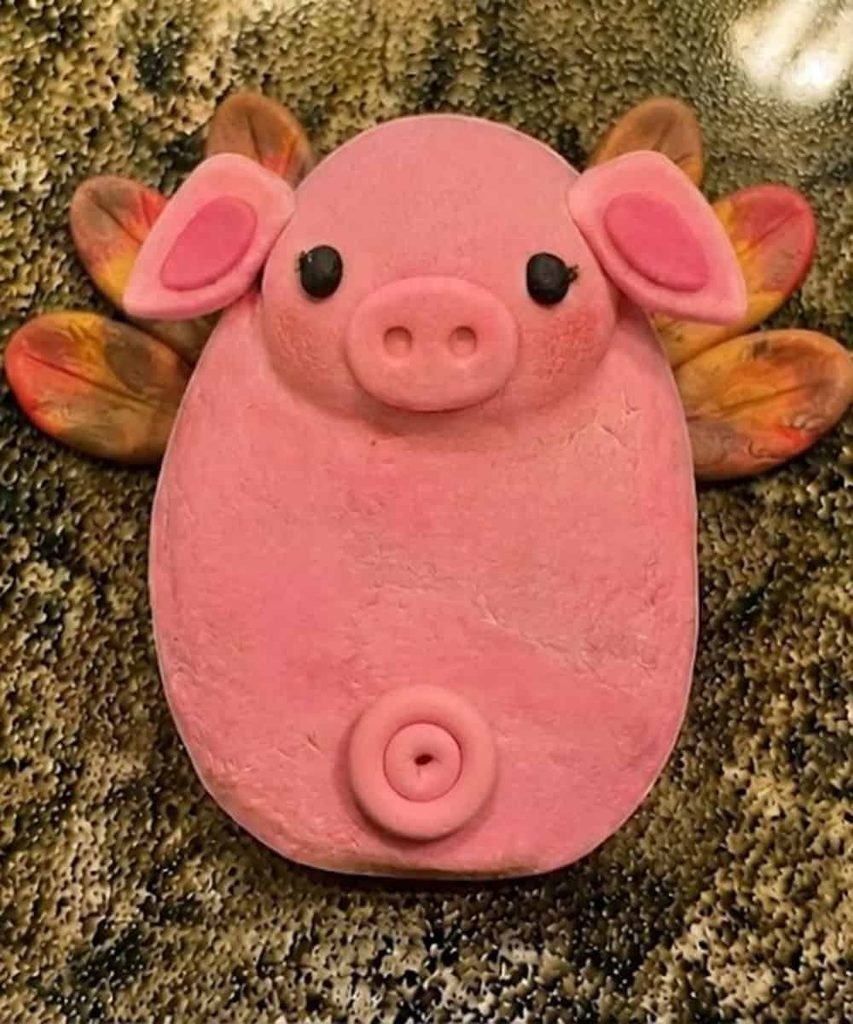
It is a fun Thanksgiving or November activity for kids, children, students, teachers and parents, and the simple shapes make it friendly for little fingers.
Best of all, this DIY clay project feels more like creative play than a school assignment.
What Makes This Pig Turkey Disguise Clay Craft Different?
Most “disguise a Turkey” projects rely on paper costumes, printed templates or elaborate accessories.
I wanted this one to feel like a miniature sculpture instead.
The clever part is that the turkey itself remains underneath the pig disguise.
We use a compact clay body, cover its visible shape with pink foam clay, then add recognizable pig features.
A few small turkey feathers can remain subtly hidden behind the pig body, giving the finished piece a playful “I almost got caught!” feeling.
That makes this more than just another animal craft.
It becomes a little Thanksgiving school project, a tactile sculpture and a disguise-a-turkey activity rolled into one.
Choose Your Air Dry Clay Type
Air Dry Foam Clay | Cornstarch Clay | Homemade Clay
Affiliate Disclaimer: Some of the links in this post may be affiliate links, which means I may earn a small commission if you choose to make a purchase through them – at no extra cost to you. I only share products that genuinely fit this project and can help make your ceramic mug clay craft process easier and smoother. Your support helps keep ideas like this coming.
Materials Needed To Make Turkey Disguised as Pig
Keep the supply list simple.
- Child-safe, non-toxic air dry foam clay
- Pink foam clay for the pig
- Small amount of black foam clay for eyes and nostrils
- Tiny amount of darker pink or red clay for the inner ears
- Optional brown, orange or red foam clay for subtle turkey details
- A clean work surface
- A small cup or bowl for shaping clay, if needed
- Toothpick only if an adult is assisting, or use a blunt clay tool designed for children
For younger children, I prefer using larger clay pieces rather than lots of tiny decorations.
Always check the manufacturer’s age and safety instructions. Children who still put objects in their mouths should not use small clay pieces.
You do not need salt dough, polymer clay or traditional modeling clay for this project.
Foam clay is soft, lightweight and particularly nice for simple molding and sculpting.
Step 1: Build the Hidden Turkey Body
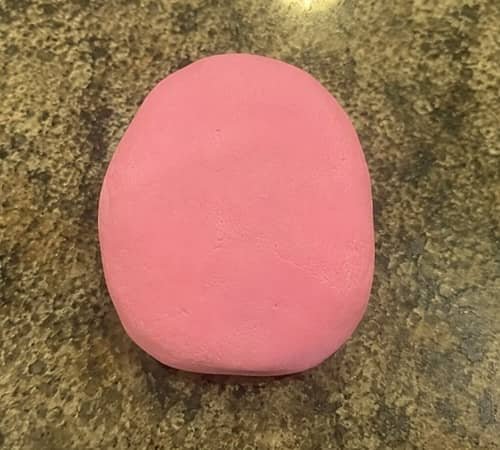
Start with the part that nobody should forget… the turkey underneath the disguise.
Take a medium-sized piece of pink foam clay and roll it gently between your palms.
Shape it into a slightly flattened oval. This will become the main body of the disguised turkey.
Don’t make it perfectly round. A slightly uneven handmade shape actually makes the finished craft more charming.
Now press the bottom gently against your work surface so the sculpture has a stable base.
Keep the front reasonably flat because we will be adding the pig face there later.
At this stage, the shape should look like a simple squat oval.
Step 2: Turn the Body Into a Piggy Shape
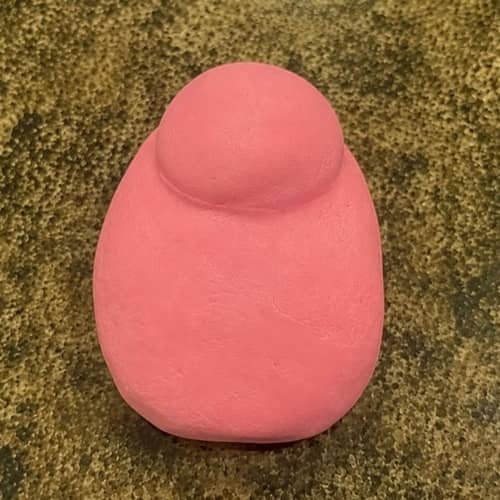
Take another smaller piece of pink foam clay and press it gently onto the upper front of the oval.
Blend the edges with your fingertips.
This creates a slightly raised head instead of making the pig look like a flat blob. Keep the transition soft and rounded.
You don’t need perfect sculpting skills here, and honestly, the little fingerprints make it feel handmade.
The head should be smaller than the body but still wide enough to hold the snout and eyes.
Press the entire sculpture lightly onto the granite again if it starts leaning.
Step 3: Make the Pig Ears
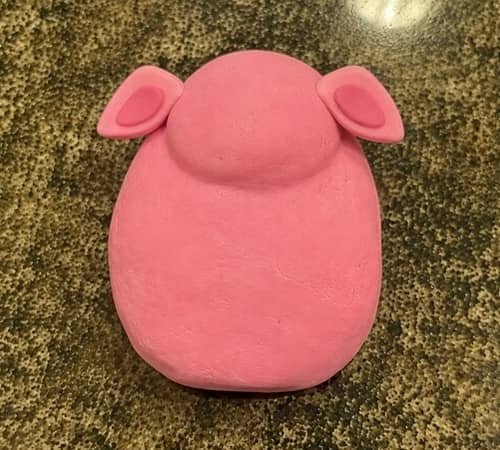
Now comes one of my favorite parts.
Pinch off two small pieces of pink foam clay and flatten each one between your fingers. Shape them into soft triangles with rounded corners.
Attach one ear to each side of the head.
Don’t make them razor sharp. Pig ears look much cuter when they are floppy and slightly rounded.
For a little extra character, press a tiny piece of darker pink clay into the center of each ear. Flatten it carefully so it doesn’t stick out too much.
The ears should tilt slightly outward.
Step 4: Add the Pig Snout
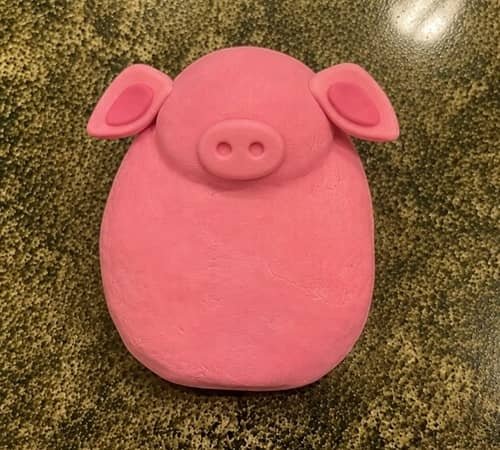
A pig needs a snout. Otherwise, everyone might think you’ve made a strange pink turkey!
Roll a small piece of pink foam clay into a short oval. Flatten it gently with your fingertip.
Place it in the middle of the pig’s face.
Use the blunt end of a child-safe clay tool, or your fingertip, to make two shallow nostril marks. Keep them close together.
Do not push all the way through the snout. Shallow impressions are enough.
The snout should sit slightly forward from the face, giving the sculpture a tiny three-dimensional nose.
Step 5: Give Your Pig a Face
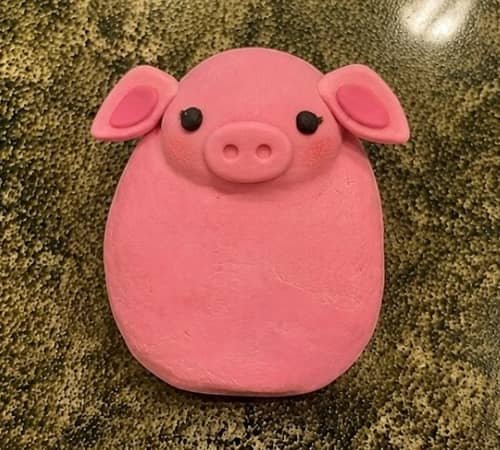
Let’s bring this little disguise to life.
Take two very small pieces of black foam clay and roll them into similar-sized balls. Press them gently onto the face above the snout.
These become the eyes.
Keep the eyes fairly large and simple. They are easier for kids to handle and they also photograph better.
If you want the pig to look extra cheerful, position the eyes slightly closer together rather than spreading them toward the ears.
You can also add two tiny pink cheeks by pressing minuscule pieces of lighter pink clay onto either side of the snout.
Step 6: Hide the Turkey With a Tiny Feather Clue
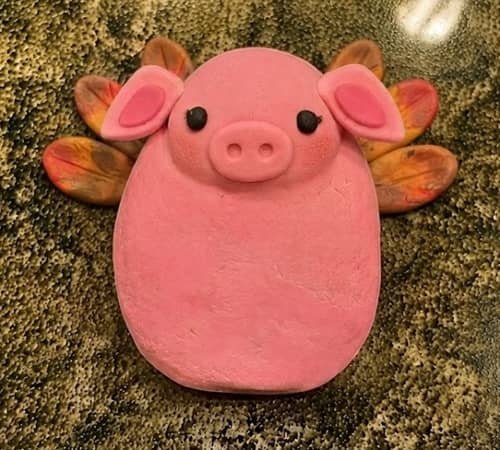
Here’s the twist.
Instead of completely removing every hint of the turkey, add a few tiny turkey feathers behind the pig’s body.
Use brown, orange or red foam clay. Flatten three or four small pieces and shape them like simple rounded feathers.
Attach them behind the upper sides of the pig body so only their edges peek out.
The feathers shouldn’t dominate the pig. They are supposed to look like evidence that this little turkey is hiding underneath its pig costume.
And that is what makes the disguise more fun.
Step 7: Make the Curly Pig Tail
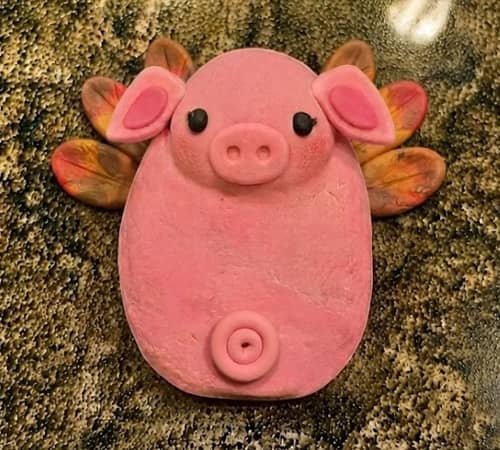
A pig without a tail feels unfinished.
Take a very thin strip of pink foam clay. Roll it between your fingers until it becomes a small soft rope.
Curl one end into a simple spiral.
Attach the opposite end to the back of the pig body.
Since we are photographing the finished craft from above, angle the tail slightly to one side so the curl can still be seen without turning the sculpture around.
Don’t worry if the spiral isn’t perfect. Mine would probably be slightly wonky too, and that’s part of the handmade charm.
Step 8: Check the Disguise and Let It Dry
Before leaving your sculpture alone, look at it from the front.
Does it look like a pig first and a turkey second?
Perfect.
Check that the eyes and snout are firmly attached. If something feels loose, gently press it back into place.
Don’t keep handling the sculpture once you’re happy with it.
Air dry foam clay needs time to set, and the exact drying time depends on the clay brand, thickness and room conditions.
Place it somewhere clean and undisturbed according to the manufacturer’s drying instructions.
Do not use a hair dryer or oven unless the specific product instructions explicitly say that it is suitable.
Air-dry clay is designed to harden through air exposure.
Helpful Tips for Parents and Teachers
Use larger pieces when working with younger children. Small details such as nostrils and eyes are easier for older kids to manage.
If the foam clay feels difficult to shape, warm it slightly between clean fingers rather than adding water.
Follow the manufacturer’s instructions because different brands behave differently.
I also recommend making the body fairly thick. A very thin sculpture can become harder to handle and may not hold its shape as well.
Most importantly, don’t chase perfection.
A handmade air dry foam clay craft should look handmade.
Slightly uneven ears, fingerprints and a crooked tail can make the finished pig turkey disguise clay craft feel much more personal than a perfectly manufactured-looking sculpture.
Final Thoughts
What I like most about this project is the little storytelling trick hidden inside it.
The pig isn’t really a pig… it is a turkey attempting a very questionable disguise.
That gives children something to think about while they are sculpting, not just something to copy.
During Fall and Thanksgiving, activities like this can also become conversation starters about camouflage, animal features and creative problem-solving.
If you’re making this as a school project, let each child invent a reason their turkey chose its disguise.
The clay sculpture then becomes a character, and that small change can make the activity far more memorable than a standard holiday craft.





