I’ve got a Diwali secret that’ll blow your mind – I reinvented our traditional kheer with PUMPKIN!
Oh yes, I did! My grandmother rolled her eyes when I first tried this crazy experiment, but NOW? She requests it at every family gathering!
Seriously though, this isn’t just another fusion recipe cluttering your feed, it’s a pumpkin kheer recipe tailored for Diwali.
It’s a nutrient-packed, creamy sensation that’ll have your guests fighting for seconds.
And between you and me? It’s so foolproof that I nailed it on my first try! Ready to shake up your Diwali spread? Let’s do this!
Why Pumpkin, You Ask?
Well, why not? Pumpkin is rich in vitamins, full of fiber, and has that lovely fall vibe that pairs perfectly with Diwali’s festive warmth.
Plus, it’s a conversation starter.
I can already imagine my aunt, eyes wide open, saying, “Pumpkin in kheer?
Honestly, pumpkin adds a delightful texture and a touch of natural sweetness to the kheer that you just can’t resist. It’s also an excellent method to sneak vegetables into dessert (Mom move, right?).
What You’ll Need
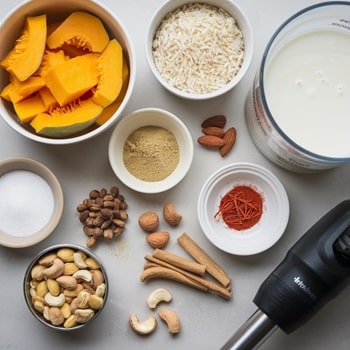
Alright, let’s get down to business. First things first: ingredients.
- 1 cup grated pumpkin (I like to use the orange, sweet kind)
- 1/2 cup basmati rice OR Gobindobhog rice (because Gobindobhog rice is basically kheer royalty)
- 1 liter full-fat milk (Absolute must if you intend to make the kheer thick)
- 1/4 cup sugar (feel free to tweak it based on how sweet you like your treats)
- 1/2 tsp cardamom powder (To get that typical kheer flavor)
- A pinch of nutmeg (to add that warm, toasty flavor that feels like a cozy hug)
- A handful of almonds and cashews (because what’s kheer without some crunch?)
- Saffron strands soaked in warm milk (optional but trust me, you want this)
- Ghee (for roasting nuts and rice)
- A high-quality hand blender or NutriBullet Blender (to make the pumpkin puree as smooth as velvet)
Step-by-Step Instructions
Step 1: Prepping the Pumpkin

Start by peeling and grating your pumpkin
If you’re feeling fancy, you can dice it into small cubes instead (You’ll need about a cup).
Now, the real magic unfolds when you cook the pumpkin in a dash of ghee, transforming it into a buttery delight that’s pure culinary wizardry.
Toss it in a pan with a teaspoon of ghee, and let it cook until it’s so soft and fragrant, even your neighbors might start wondering what’s for dinner.
Oh, the smell! Pumpkin sauteing in ghee smells like comfort and fall all wrapped in one.
Here’s a pro tip from non-pro chef: While the pumpkin softens, grab your NutriBullet or any hand blender to blitz it into a smooth puree once it cools down.
This is what gives the kheer that silky texture (Trust me, smooth is the way to go).
You do not want bits of pumpkin staring at you from the bowl of kheer.
Step 2: Roasting the Rice
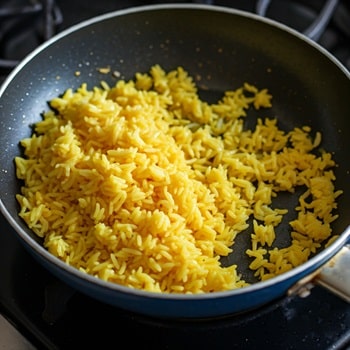
Now, don’t forget the rice! I recommend using Gobindobhog rice for kheer preferably as the end result is simply amazing.
It’s long, fragrant, and gives the kheer that perfect, light texture.
Dry roast the rice in a bit of ghee for a few minutes until it’s golden and fragrant – just be careful, because once that aroma hits, you might find yourself tasting it straight from the pan.
Not too long – just until it starts releasing that nutty aroma (Set it aside for a bit).
Step 3: The Milk

Milk is the soul of kheer, right? We’re talking full-fat milk, people.
None of that skimmed stuff here. Boil the milk in a heavy-bottomed pan. It’s a process that can’t be rushed.
To prevent the milk from staging a sticky rebellion at the bottom of the pan, keep stirring it constantly as it heats up – after all, nobody wants a burnt milk drama in their kitchen.
Pro tip: Stir like your life depends on it (Okay, maybe not so dramatic, but you get the point).
Step 4: Combine the Goodness

After the milk comes to a boil, stir in the roasted rice and let it simmer on low heat, keeping a close watch.
The rice will start absorbing all that milk, thickening into a creamy pudding. This is when the magic starts happening. Kheer is like a slow dance – it needs patience.
At this point, gently stir in the pumpkin puree you made earlier. The color! It’s this gorgeous, pale orange that just screams festive.
Step 5: Add the Spices and Sweetness
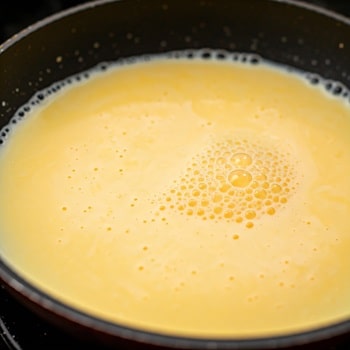
Now comes the fun part, that is to toss in some sugar, cardamom powder, and a sprinkle of nutmeg, because who doesn’t love a little spice and sweetness to kick things up a notch?
These spices are what give kheer its quintessential flavor. To be honest, they provide warmth, comfort, and a little bit of kick.
Don’t forget to add the soaked saffron strands. They elevate the flavor and add a subtle, luxurious touch. Plus, the yellow hue they impart? Stunning!
Step 6: Toast the Nuts
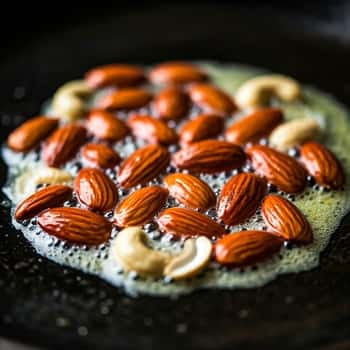
As the kheer bubbles away, take a moment to roast your almonds and cashews in ghee.
I swear the aroma of nuts frying in ghee is overpowering. Once they’ve turned a perfect golden brown, set them aside – these crispy gems will add a delightful crunch to your kheer.
Step 7: Finish Strong
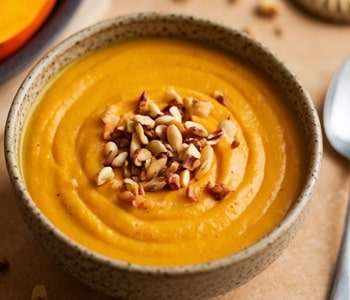
The kheer is just about ready! The pumpkin has transformed into a creamy blend with the milk and rice, and the spices are filling the kitchen with such a cozy, festive aroma that it’s practically begging to be devoured
Give it a final stir and a taste – if you’ve followed the steps, it should be absolutely delicious.
Give it one final stir and a taste test, if you’ve followed the instructions, I promise it’ll be so delicious that you might want to keep it all to yourself!
Need more sugar? A little more nutmeg? Adjust till it seems perfect.
Serving Suggestions
Now that your pumpkin kheer is ready, let’s talk about serving it. If you want your kheer cold, chill it in the fridge for a few hours or else simply serve it warm right off the burner (Personally, I love it chilled).
For some mysterious reason, when kheer is chilled, the flavors seem to burst with even more pizzazz, as if they’re throwing a little party in your mouth.
Sprinkle the toasted nuts and a few extra saffron strands on top for a burst of color. And if you’re in the mood to indulge, add a dollop of rich cream – trust me, it’s totally worth it!
Why You’ll Love This Twist
- Nutritional Punch: Pumpkin is rich in fiber, Vitamin A, and antioxidants. It’s like a superhero ingredient disguised as a humble vegetable.
- Festive Flair: The warm spices paired with the creamy pumpkin puree give this kheer a festive, fall-inspired twist.
- Conversation Starter: Pumpkin in kheer isn’t something you see every day. It’s unique, unexpected, and totally delicious.
- Easy to Make: You don’t need to don a chef’s hat to whip this up – it’s quick, easy, and guaranteed to impress your guests
The Perfect Companion: NutriBullet Blender
Let’s talk about gadgets for a second – A high-quality blender can be a game changer for this recipe, turning your ingredients into a smooth masterpiece in no time.
You want your pumpkin to be silky smooth, and a NutriBullet Blender does just that. It’s compact, powerful, and a breeze to operate – just the kind of gadget that makes you feel like a kitchen wizard.
Whether you’re blending pumpkin or whipping up a smoothie, it’s a must-have in the kitchen.
So, if you’re in the market for one, I highly recommend the NutriBullet. Trust me, it’s worth every penny.
Final Thoughts
The secret to this tasty kheer lies in that silky-smooth pumpkin purée, transforming an ancient Indian dessert into a modern masterpiece.
If you’re health conscious you should be delighted as you’re getting essential nutrients while indulging your sweet tooth!
Whether you serve it warm (cozy vibes) or chilled (refreshing elegance), this kheer will be your new go-to dessert for Diwali celebrations.
Pro tip: Don’t skip the saffron – it’s worth the splurge. And here’s the best part… drumroll This recipe is incredibly forgiving for beginners, so don’t stress about getting it perfect the first time.
