A dollhouse gets interesting when the tiny details start telling a story.
These small clay figures for dollhouse decor are a fun way to turn an ordinary miniature room into something that feels lived-in, playful, and completely your own.
You don’t need advanced sculpting skills either.
A little polymer clay, a toothpick, and some patience can take you surprisingly far.
Why buy every miniature when you can make little characters yourself? I’ve included 12 beginner-friendly ideas here, with simple shaping methods, tiny details, and practical tips for getting the proportions right.
They also work beautifully as kids craft activities, provided an adult handles baking and any sharp tools.
Before You Start: A Tiny-Sculpting Setup That Actually Helps
For a traditional 1:12 dollhouse, keep your figures small enough that they don’t overwhelm the furniture.
A finished person around 1½ to 2 inches tall is usually a comfortable starting point, while animals can be shorter.
You can use polymer clay for durable results, or air-dry clay if you don’t have access to an oven.
Don’t mix the curing instructions between products though… polymer clay brands have different baking temperatures and times, so follow the package exactly.
Your basic kit can be ridiculously simple:
- Polymer or air-dry clay in a few basic colors
- Toothpicks for texture and tiny lines
- A craft knife, used carefully by an adult
- A smooth tile, glass sheet, or other clean work surface
- Acrylic paint and a very fine brush for details
- A ruler for checking scale
- Optional: tiny ball stylus tools or dotting tools
One more thing: wash your hands between strong clay colors. Light-colored clay picks up fingerprints and pigment like it has a personal grudge.
Choose Clay Type For Small Clay Projects
Polymer Clay | Air Dry Clay
Affiliate Disclaimer: Some of the links in this post may be affiliate links, which means I may earn a small commission if you choose to make a purchase through them – at no extra cost to you. I only share products that genuinely fit this project and can help make your ceramic mug clay craft process easier and smoother. Your support helps keep ideas like this coming.
1. Sleepy Miniature Teddy Bear
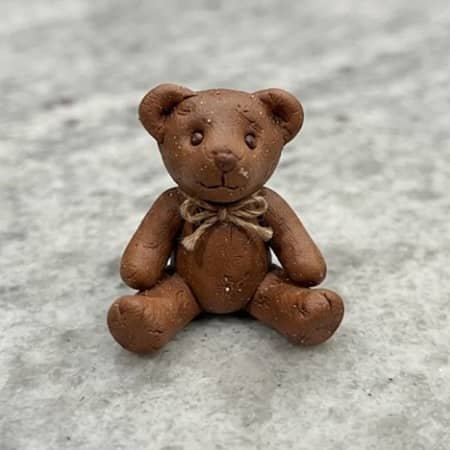
A tiny teddy bear is one of the easiest small clay figures to begin with because its body can be built from basic balls and cylinders.
What you’ll need
Use brown clay for the body, a lighter brown or cream for the muzzle, and tiny amounts of black for the eyes and nose.
How to make it
- Roll one larger ball for the bear’s torso.
- Make a smaller ball for its head.
- Gently press the head onto the body. If it feels loose, flatten the joining areas slightly before attaching them.
- Roll four short cylinders for the arms and legs.
- Flatten one end of each limb and attach them around the body.
- Make two tiny flattened balls for ears and press them onto the sides of the head.
- Add a small cream oval to the face.
- Use a toothpick to mark a tiny mouth.
- Add two miniature black eyes and a little black nose.
- Bend the arms slightly so the bear looks relaxed rather than stiff.
For a cute dollhouse scene, sit the bear on a miniature bed or chair. The imperfect shape actually makes it feel handmade.
2. Tiny Sitting Cat
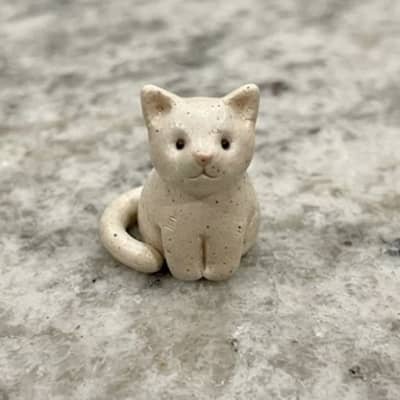
Want something that immediately gives a dollhouse personality? Make a little cat.
Start with a small teardrop-shaped body rather than trying to sculpt a complicated torso.
Make the head from a round ball and pinch two corners upward to create ears.
Attach four tiny paws, then roll an extremely thin clay snake for the tail. Curve it beside the body before curing.
For the face, use two tiny colored dots for eyes and an even smaller dot for the nose. A toothpick can create whisker marks.
Here’s the trick: don’t make the whiskers physically huge. Three tiny impressions on each side usually looks much better at miniature scale.
3. Little Clay Gardener
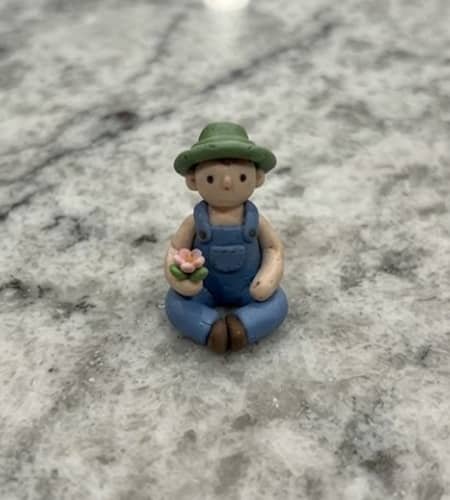
This miniature person adds a story rather than simply filling space.
Make the body from a rounded cylinder of blue clay for overalls.
Add a small skin-colored ball for the head and two short cylinders for the legs. The arms can be thin clay ropes bent naturally at the elbows.
For the hat, flatten a small green ball into a disk and place a slightly smaller dome on top. Add a tiny clay flower or leaf to one hand.
The face doesn’t need to be elaborate. Two dots and a tiny curved mouth is enough.
Keep the hands slightly oversized because microscopic fingers tend to disappear visually after curing.
This one is especially fun for kids craft activities, since children can choose the clothing colors and hairstyle.
4. Mini Clay Puppy
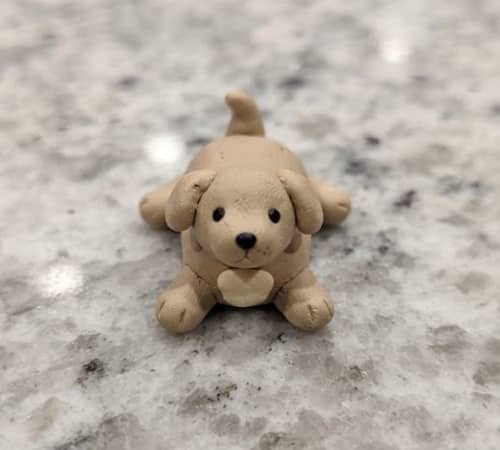
A puppy gives you plenty of room to play with exaggerated features.
Shape the body as a small oval. Add a round head, four stubby legs, floppy ears, and a slightly raised tail.
For the floppy ears, make two flattened teardrops and attach them high on either side of the head.
Press a tiny cream-colored oval onto the chest if you want a patch.
Use a toothpick to make a tiny mouth and add black clay for the eyes and nose.
Don’t chase perfect symmetry. One ear sitting slightly lower can make the puppy look far more charming than a perfectly manufactured miniature.
5. Tiny Bunny With Long Ears
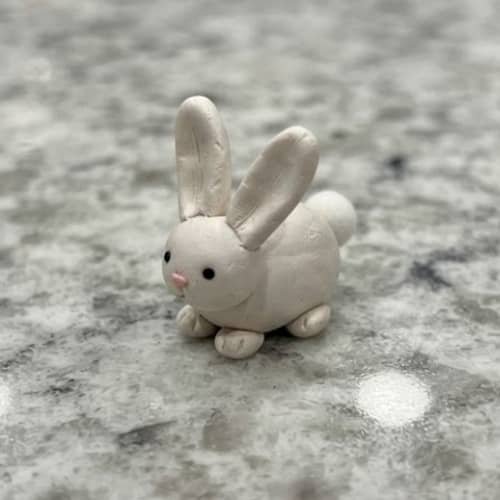
Bunnies are among the easiest little clay figures to customize.
Roll an oval body and a smaller round head. Make two long, narrow ears by rolling clay into tapered pieces and flattening them gently.
Attach four tiny feet, then add a small round tail at the back. For the face, use two dark dots and a tiny pink or cream nose.
You can also slightly bend one ear forward. That tiny change makes the bunny look less like a clay model and more like a character.
For a spring-themed dollhouse, pastel colors work nicely. But white, grey, tan, or brown looks more natural if you’re building a realistic miniature home.
6. Miniature Chef Character
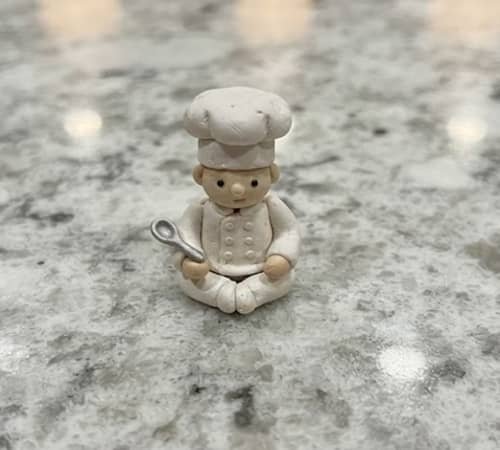
Now let’s give the dollhouse kitchen somebody to run it.
Make a simple white cylindrical body and add tiny arms bent forward.
Create the head from a skin-colored ball and place a flattened white chef hat on top.
The hat can be made from a small clay cylinder with a puffy flattened ball sitting above it. It doesn’t need to be perfect.
Add two dark dots for eyes and a tiny line for the mouth. For an extra detail, place a miniature clay spoon in one hand.
Keep the spoon extremely simple – a thin handle with a flattened oval at the end is enough.
7. Tiny Clay Bear With Backpack
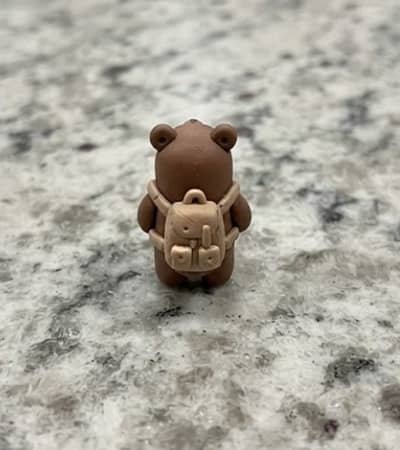
Here’s a slightly more unusual idea.
Make a basic bear using the same body technique as the teddy bear, but give it a tiny backpack.
This creates a miniature character that looks ready to leave the dollhouse for an adventure.
Sculpt two tiny flattened circles for the backpack straps and one small rounded rectangle for the bag itself.
Place the straps over the shoulders before attaching the backpack.
Add a little flap using another thin piece of clay.
The backpack should be smaller than you think. At this scale, even a few millimeters can change the whole appearance.
8. Mini Clay Gnome
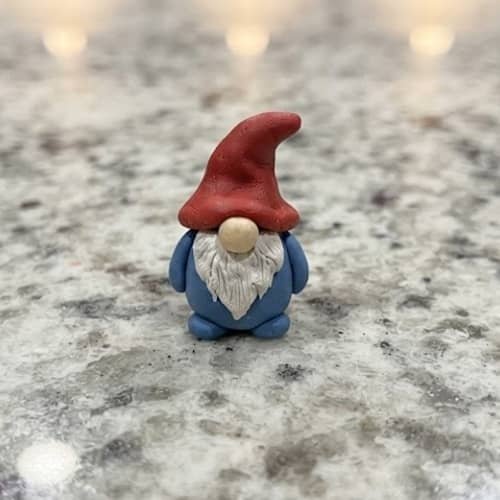
A gnome is perfect when you want a figure that doesn’t require complicated anatomy.
Make the body as a rounded cone. Add a small skin-colored face near the top and cover the upper portion with a large pointed hat.
For the beard, use a small white or cream teardrop shape. Press several shallow lines into it with a toothpick.
The nose can simply be a tiny clay ball.
Don’t make the hat perfectly straight. A slightly crooked hat gives the figure personality and makes the clay craft feel genuinely handmade.
9. Little Clay Schoolchild
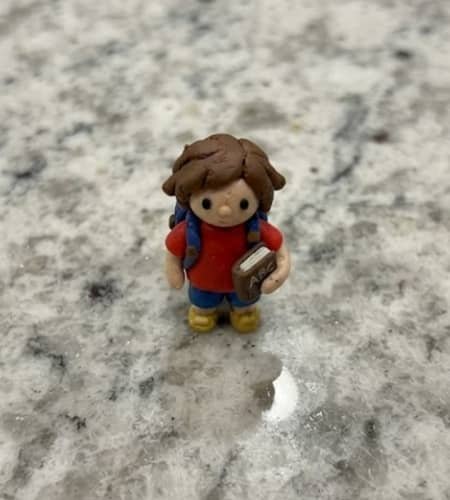
This one works beautifully inside a miniature bedroom, study area, or classroom.
Create a small body from a colored clay cylinder. Add two thin legs and two arms.
The head is simply a round ball with tiny hair pieces pressed around the top.
For a backpack, use the same miniature rounded-rectangle technique from earlier.
Give the character a tiny book: flatten a very small rectangle of clay, fold it gently down the center, and add a few toothpick lines to suggest pages.
The proportions can be slightly cartoonish. That’s actually easier for beginners and looks great inside a playful dollhouse.
10. Tiny Sleeping Puppy
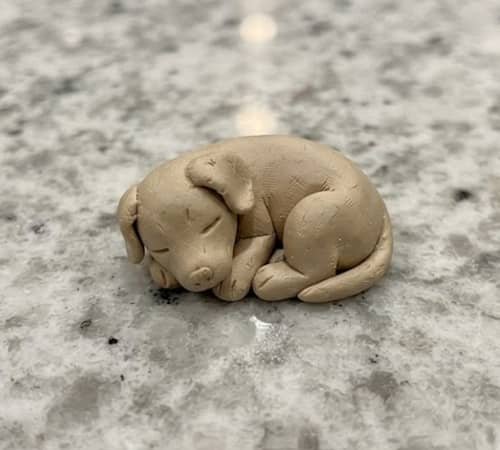
Need a miniature figure that looks different from the usual standing animals?
Make a sleeping puppy curled into a loose C shape.
Start with a flattened oval body. Add a small head resting against one side, four tiny paws tucked underneath, and a curled tail.
The ears should be floppy and relaxed. Add closed eyes using two very thin dark clay lines or paint them afterward.
This is one of those small clay ideas where the pose matters more than detail. A simple shape can communicate “sleeping” instantly.
11. Miniature Fairy Character
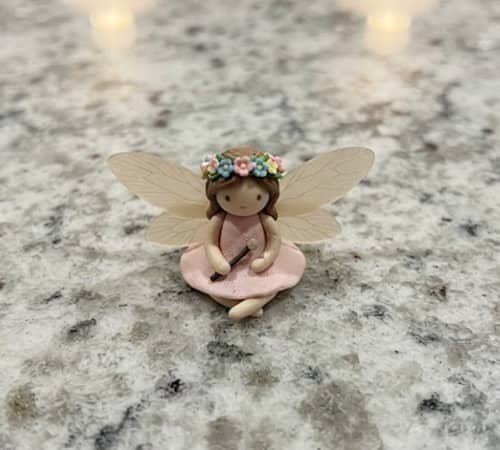
For something a little more whimsical, make a tiny fairy.
Build a narrow cone-shaped body, then add a small head and very thin arms.
Make two delicate wings from flattened translucent-looking pale clay if your material allows it, or use very thin white clay.
Keep the wings simple because overly thin pieces can break.
A tiny flower crown can be made by pressing three or four microscopic clay dots around the head.
The figure doesn’t need a complicated face. At miniature scale, posture and silhouette do most of the storytelling.
12. Little Clay Grandma Figure
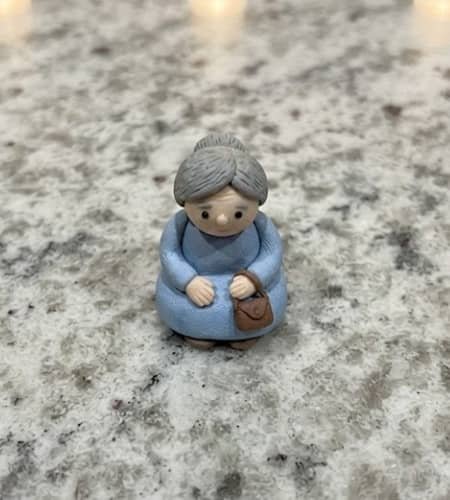
Let’s finish with a character that can make a dollhouse feel surprisingly warm.
Shape a simple seated body with a rounded dress, then add a head, short arms, and tiny shoes.
Give her a small grey clay hairstyle made from a few flattened strands.
For glasses, don’t try to sculpt microscopic frames unless you’re experienced. Instead, use two tiny dark dots near the eyes and connect them with a very fine painted line after curing.
Place a tiny handbag beside her or between her hands.
And don’t worry if she looks a little quirky. Handmade character figures aren’t supposed to look like factory miniatures.
Final Thoughts
The secret to convincing dollhouse miniatures isn’t actually microscopic detail, it’s scale, silhouette, and storytelling.
A tiny person holding a book can say more than a beautifully sculpted face with no context.
Try placing your figures at different heights and poses, too, because repetition makes a miniature scene feel staged while small variations make it feel inhabited.
You can even build a recurring cast… a gardener, sleepy puppy, chef, and schoolchild… and slowly create your own miniature neighborhood.
That’s where these little clay figures become more than decorations.
They become characters. And once you understand that, the possibilities for dollhouse decor using clay get much, much bigger.





