Terrazzo has this funny way of making simple things look expensive.
I love the little chips of color scattered across a plain surface because every piece ends up slightly different.
A terrazzo clay craft takes that same idea and turns it into something you can actually make at home with basic clay and a few leftover supplies.
Better still, these projects work beautifully as kids craft activities, handmade gifts, desk accessories, and small pieces of homemade terrazzo decor.
So, ready to get a little messy? Let’s make these designs more playful than the usual terrazzo crafts you see everywhere.
Before You Start… The Easy Terrazzo Technique
The secret is actually pretty simple.
Start with a base color of clay, then make several tiny pieces from contrasting clay colors.
Roll each color very thin, let the pieces firm up slightly, and chop them into deliberately uneven fragments.
Press those fragments onto the base clay and roll everything gently together.
Don’t make the chips too uniform.
Real terrazzo has variation, and that little bit of randomness is what makes a handmade terrazzo clay craft look convincing.
For air-dry clay, allow the finished project to dry completely according to the clay manufacturer’s instructions.
For pieces that may touch water, such as coasters, apply an appropriate waterproof or water-resistant sealer after the clay has fully cured. Air-dry clay itself is not automatically waterproof.
Choose Your Air Dry Clay Type
Regular Air Dry Clay | Cornstarch Clay | Homemade Clay
Affiliate Disclaimer: Some of the links in this post may be affiliate links, which means I may earn a small commission if you choose to make a purchase through them – at no extra cost to you. I only share products that genuinely fit this project and can help make your ceramic mug clay craft process easier and smoother. Your support helps keep ideas like this coming.
1. Mini Terrazzo Trinket Dish
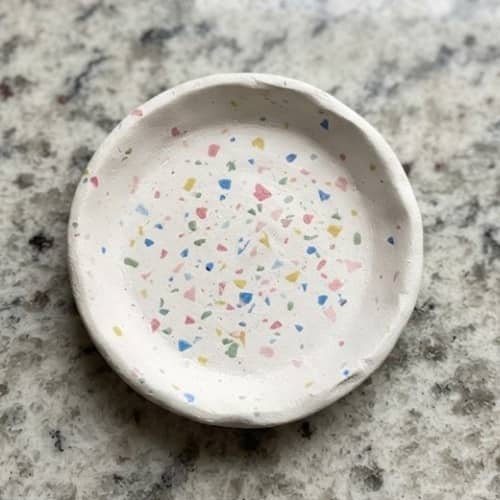
This is probably where I would start if you’re completely new to clay.
What you need
- White or cream air-dry clay
- Small pieces of pink, blue, yellow and green clay
- Rolling pin
- Craft knife
- Small bowl
- Fine sandpaper
- Acrylic sealer
How to make it
Roll the base clay into a ball and flatten it until you have a slab around 5 to 7 mm thick. Don’t worry if the edges aren’t perfectly straight.
Now cut tiny pieces from your colored clay.
I like mixing little triangles, rectangles and oddly shaped slivers because they create more visual movement.
Press the pieces lightly over the clay slab. Leave some areas empty so the design doesn’t become too crowded.
Roll over everything very gently once or twice.
You aren’t trying to flatten the terrazzo pieces completely. You just want them embedded into the surface.
Place the slab inside a small bowl and gently push the center downward to create a shallow dish.
Let it dry completely, remove it carefully and smooth the edges with fine sandpaper.
A quick coat of suitable sealer gives it a cleaner finish.
2. Speckled Terrazzo Clay Coasters
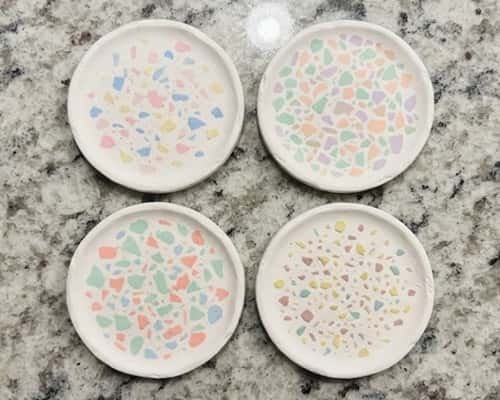
Want to know how to make terrazzo coasters without complicated equipment? This version keeps it beginner friendly.
Roll your base clay into a 6 to 8 mm slab. Make tiny fragments from three or four contrasting colors, then scatter them over the slab.
Press the fragments down with your fingertips. Follow with a rolling pin, using very light pressure.
Cut circles using a cookie cutter or trace around a small glass. Remove the extra clay around each coaster.
For a more interesting finish, don’t make all four pieces identical. Change the chip placement slightly for every coaster.
Smooth the edges with a damp fingertip while the clay is still workable.
Once fully dry, sand the edges and seal the surface with a suitable water-resistant sealer.
Remember, these are decorative handmade coasters, so don’t leave standing water on them for hours.
The little imperfections actually makes them look more handmade.
3. Terrazzo Clay Pencil Holder
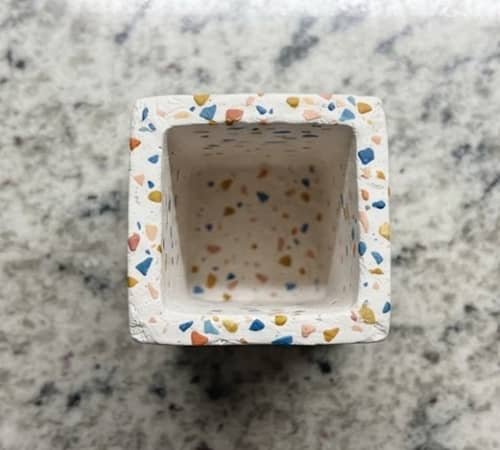
This one is fun for a child’s desk or craft corner.
Create a thick rectangular slab of clay and cut it into four matching wall pieces plus a square bottom. Keep the pieces around 5 to 7 mm thick.
Before joining them, decorate each slab with different colored clay fragments.
Use slip or the joining method recommended for your particular air-dry clay to attach the walls.
Press the seams together firmly and smooth the inside corners.
Build the holder around the bottom piece, keeping the top opening square.
I would leave the exterior slightly imperfect instead of obsessing over every edge. That’s part of the charm.
After drying, lightly sand rough spots and apply sealer.
For kids, this can become one of those kids craft activities that also has a useful result sitting on their study table.
4. Terrazzo Clay Hair Clip Tray
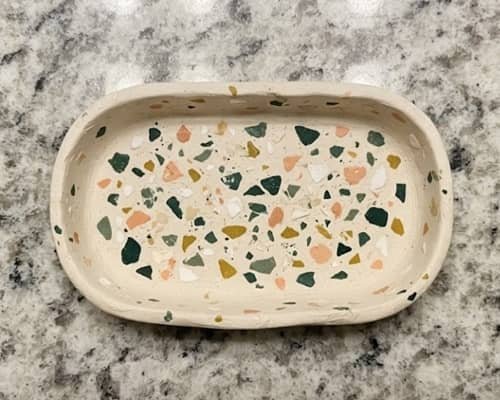
Small trays are perfect for using up leftover clay.
Roll a cream clay slab and cover it with tiny colorful fragments. Try using one unusual color, such as dark green, alongside softer shades.
Cut a rounded rectangle approximately 10 to 12 cm long.
Lift the edges slightly using your fingers. You only need a very shallow lip.
Smooth the corners and allow the tray to dry flat.
Once cured, gently sand any sharp spots.
I like this idea because it turns scraps into something useful instead of throwing them away. Plus, the random colors makes every tray different.
Use it beside a mirror for hair clips, rings or small accessories.
5. Terrazzo Clay Fridge Magnets
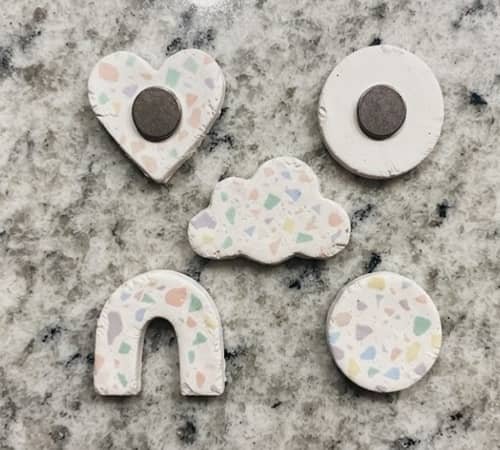
Here’s a tiny project with a surprisingly big payoff.
Flatten your base clay to roughly 5 mm thick. Scatter colorful clay chips over the surface and roll them in gently.
Cut small shapes such as hearts, circles, clouds or arches.
Make a shallow indentation on the back of each piece if needed for your chosen magnet, then let the clay dry completely.
Once cured, attach small craft magnets using a strong adhesive suitable for the magnet and clay.
Keep the shapes lightweight. Heavy clay pieces may slide down the refrigerator.
These are also lovely diy gift ideas for friends, especially when you make a set based around their favorite colors.
6. Terrazzo Clay Plant Marker
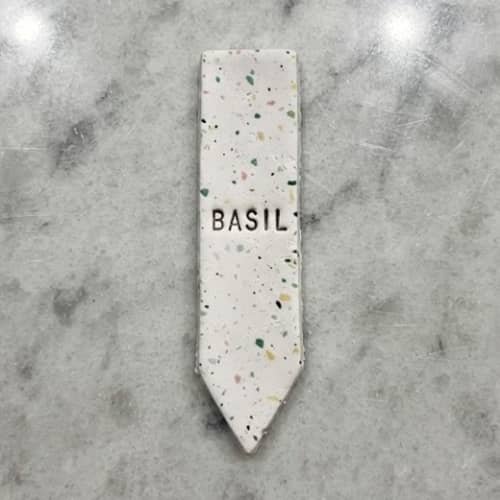
For this project, simplicity wins.
Roll a narrow strip of clay about 5 mm thick and cut it into a long rectangular marker.
Decorate one side with tiny terrazzo fragments. Keep the chips relatively small because the marker itself is narrow.
Cut one end into a simple point so it can be pushed gently into potting soil later.
You can stamp a plant name into the clay while it is still soft. Try words such as “Basil,” “Mint” or “Rosemary.”
Let the marker dry completely before using it.
If the marker will regularly contact wet soil, sealing it is especially important, although the clay should still not be considered permanently waterproof.
7. Terrazzo Clay Incense Holder
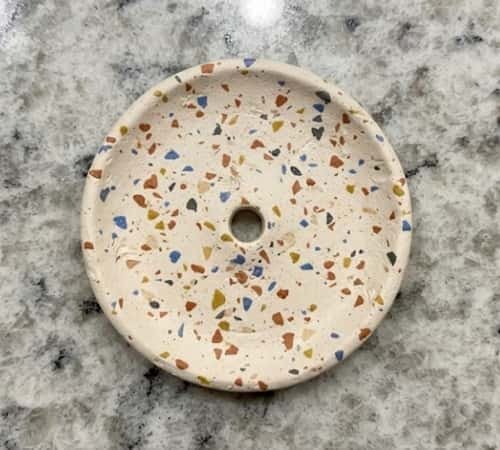
This design needs just a little more care.
Make a thick round clay disc, around 7 to 10 mm thick, and decorate it with your terrazzo fragments.
Roll the surface gently until the fragments are secure.
Create a small hole near the center using a skewer or appropriately sized tool.
Make sure it goes vertically through the clay and is wide enough for your incense stick.
Smooth the top and bottom edges.
Allow the holder to dry completely before using it.
One important point: air-dry clay can be vulnerable to heat.
I would use this as a decorative holder only unless the clay and finish you choose are specifically rated for the temperatures involved. Safety first, pretty craft second.
8. Terrazzo Clay Wall Hanging
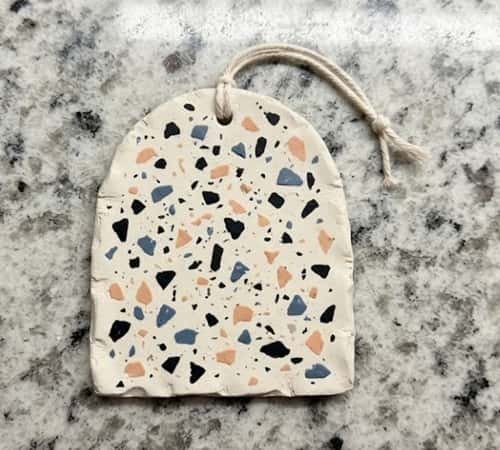
Now let’s make something that feels more like a small art piece.
Roll a clay slab approximately 6 mm thick.
Cover it with scattered fragments in two or three strong colors. Instead of rolling them completely flat, leave some fragments slightly visible.
Cut the slab into an arch, oval or irregular geometric shape.
Make a small hanging hole near the top while the clay is still soft.
After it dries, smooth the edges and add a thin coat of suitable matte or satin sealer.
Thread cotton cord through the hole.
This is one of my favorite diy Terrazzo art projects because you can play with shape instead of making another round tray.
9. Terrazzo Clay Bookmark
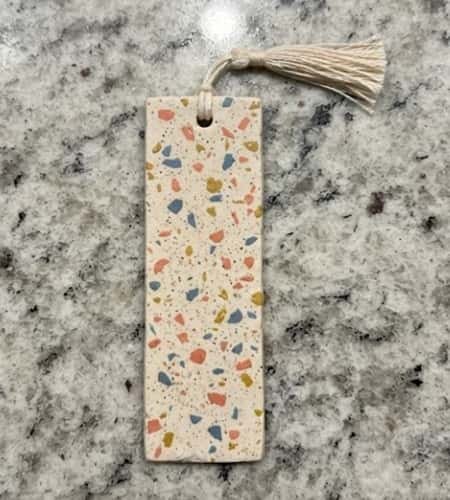
This is a brilliant scrap-clay project.
Roll your base clay into a narrow strip around 3 to 4 mm thick.
Press a small number of colored fragments into it.
Keep the terrazzo pieces thin and flat so the finished bookmark doesn’t become bulky inside a book.
Trim the edges with a ruler and craft knife.
Make a small hole at the top if you want to add a cotton tassel.
Allow it to dry completely on a flat surface. Place a lightweight object nearby if the clay tends to curl, but don’t press directly onto the wet clay.
Once dry, lightly sand the edges.
The finished bookmark should be thin, simple and slightly quirky.
10. Terrazzo Clay Ring Dish
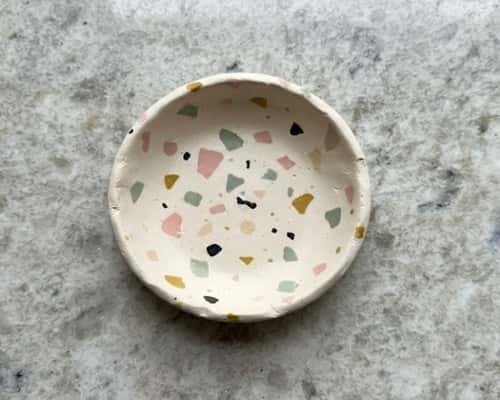
A tiny ring dish is another great beginner project.
Roll the base clay into a thick circular slab.
Scatter contrasting fragments over the entire surface, concentrating a few larger pieces toward the center.
Roll gently once to embed them.
Place the slab over the underside of a small bowl and press the middle down carefully.
This creates the curved shape without requiring a pottery wheel.
Remove the bowl once the clay has firmed enough to hold its shape.
Smooth the rim with your finger.
After complete drying, sand and seal it.
You could even create a matching pair in two different color combinations.
11. Terrazzo Clay Photo Holder
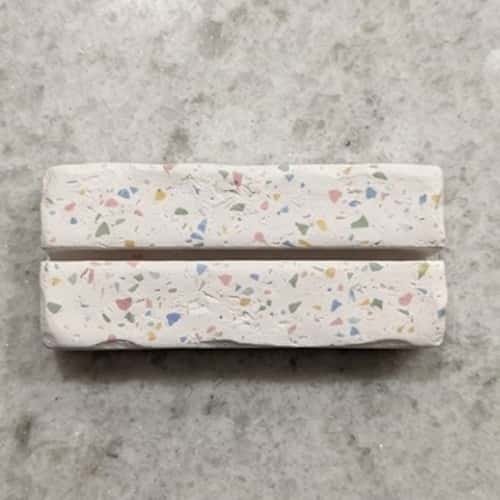
Here’s a clever little desk accessory.
Form a small rectangular or square clay block about 2 cm thick.
Press colorful terrazzo fragments into the front and sides.
While the clay is still soft, create a narrow horizontal slit across the top using a craft knife or firm card edge.
Don’t make the slit too deep. It only needs to hold the bottom edge of a lightweight photograph or small card.
Let the block dry completely before using it.
For children, this can become a personalized project for displaying drawings, family photos or little notes.
And honestly, a handmade photo holder feels much more personal than another store-bought desk accessory.
12. Terrazzo Clay Mini Art Tiles
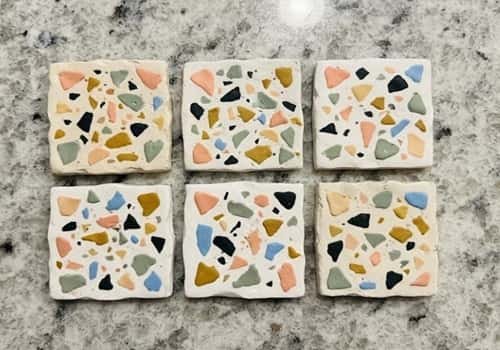
Let’s finish with something that gives you plenty of room to experiment.
Roll a clay slab around 6 mm thick.
Cover it with fragments in completely different color combinations. Try black and cream for a modern look, or peach, lilac and yellow for something softer.
Cut the slab into several small squares or rectangles.
Use a ruler for straight edges, but don’t worry if every tile isn’t identical.
After drying, sand the edges and seal them if desired.
Display the tiles individually, combine several into a mini gallery arrangement, or use them as decorative pieces around your home.
These little tiles are also excellent for exploring diy Terrazzo clay craft projects before committing to a larger piece.
Final Thoughts
A good terrazzo clay craft isn’t really about copying the look of expensive terrazzo stone.
It’s about learning how scattered color, texture and negative space work together.
Once you understand that, you can create your own patterns instead of following a fixed template.
That’s what makes these projects interesting for both adults and children.
Start with a small dish or tile, experiment with three colors, and photograph the result from above.
You may discover a color combination worth repeating across an entire collection.
The best part? Your “mistakes” can become the most distinctive details in the finished piece.





