There’s something ridiculously charming about a garden that has its own tiny world hiding inside it.
These tiny clay garden figures turn simple pieces of clay into miniature mushrooms, garden signs, snails, frogs, gnomes and other little characters that can sit beside plants, fairy gardens, pots, or even a small indoor display.
The fun part? You don’t need advanced sculpting skills or expensive equipment.
With a little Homemade clay, air-dry clay, or polymer clay such as Sculpey clay, you can build most of these using basic shapes. Ready to make your own mini clay garden? Let’s start small!
1. Tiny Mushroom With a Spotted Cap
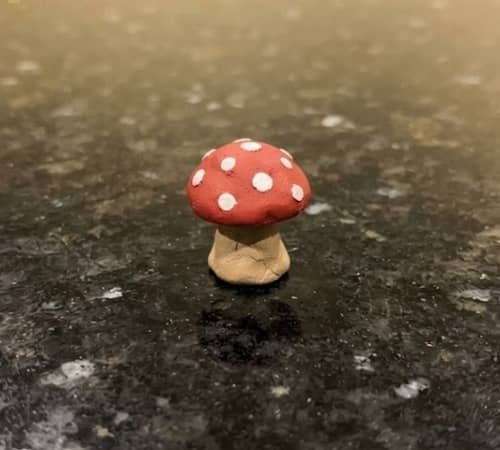
A miniature mushroom is probably one of the easiest places to begin.
What you need:
- Red or orange clay
- White clay
- Beige or cream clay
- Toothpick or sculpting tool
- Small piece of parchment paper
How to make it
Start by rolling a tiny piece of beige clay between your palms until you have a short cylinder.
This becomes the mushroom stem.
Don’t make it perfectly straight, a slightly wobbly stem actually makes the finished piece look more handmade.
Next, take red clay and roll it into a small ball.
Flatten the bottom gently against your work surface, then press the top between your fingers to create a rounded mushroom-cap shape.
You want the center slightly higher than the edges.
Make several microscopic white clay balls and press them onto the red cap. Keep their sizes a little different.
Now place the cap on the stem and gently press the two pieces together.
Use a toothpick to add a few shallow lines underneath the cap if you want extra detail.
For air-dry clay, leave the mushroom somewhere dry until completely hardened.
Polymer clay should be baked according to the manufacturer’s temperature and time instructions.
Tiny twist: Make three mushrooms in different heights instead of one. A little cluster instantly looks more like something you’d discover growing in a miniature garden.
2. Mini Clay Garden Gnome
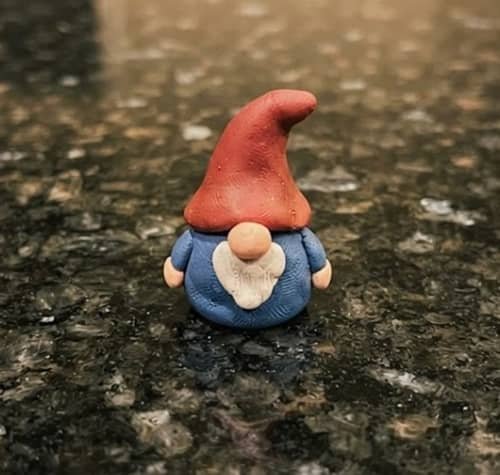
Who says a garden needs a full-size gnome?
For the body, roll a small piece of blue, green, or brown clay into a rounded teardrop.
This gives you a simple little coat without needing complicated sculpting.
Roll a smaller skin-colored ball for the head. Attach it to the top of the body and gently blend the connection with your fingertip.
Now comes the fun bit.
Make a long cone from colored clay for the hat. Curve the tip slightly to one side before placing it over the head.
A crooked hat looks much more playful than a mathematically perfect one.
Add a tiny flattened ball for the nose. For the beard, use several tiny pieces of white clay pressed together underneath the nose. You can texture the beard with a toothpick.
For the arms, roll two extremely thin clay sausages and attach them to either side of the body.
Keep the face simple. Two tiny black dots are enough.
Beginner trick: Don’t try sculpting fingers, shoes, wrinkles and facial expressions at this scale. They usually make miniature figures look cluttered rather than detailed.
3. Little Clay Snail
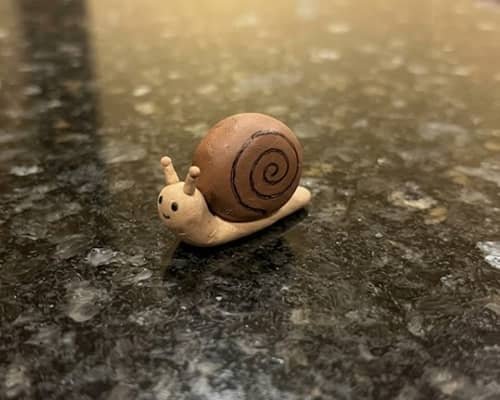
A snail gives you a chance to create something recognizable using almost no clay.
Roll beige or brown clay into a short thick sausage. Taper one end slightly to form the head. The opposite end becomes the tail.
For the shell, roll another piece into a ball and flatten it slightly. You can use a darker shade for contrast.
Now take a toothpick and carefully draw a spiral into the shell. Don’t press too deeply because the shell can split if your clay is soft.
Place the shell onto the snail’s body and press gently.
For antennae, make two very thin pieces of clay and attach them to the head. If they keep bending, make them slightly thicker.
Finally, add two tiny black eyes.
Want it cuter? Give the snail an oversized shell compared with its body.
That exaggerated proportion works beautifully for cute clay miniatures.
4. Tiny Garden Frog
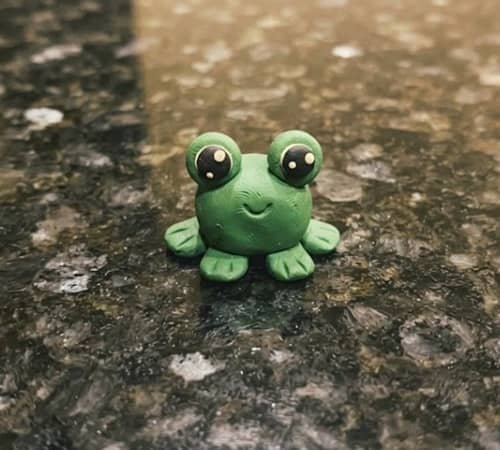
A tiny frog can be built almost entirely from balls.
Roll one green ball for the body and a slightly smaller one for the head. Flatten the body just a little so the figure doesn’t roll around.
Add two small green balls to the top of the head. Flatten them gently and place tiny black clay dots in the centers. These become the frog’s oversized eyes.
For the legs, make four short flattened pieces. The back legs should be slightly larger than the front ones.
Use a toothpick to create a tiny smiling mouth.
Then add two small cream or yellow dots on the eyes if you want that wide-eyed cartoon look.
Don’t overwork the clay. Small handmade imperfections make these small clay ideas feel much more alive.
5. Miniature Garden Sign
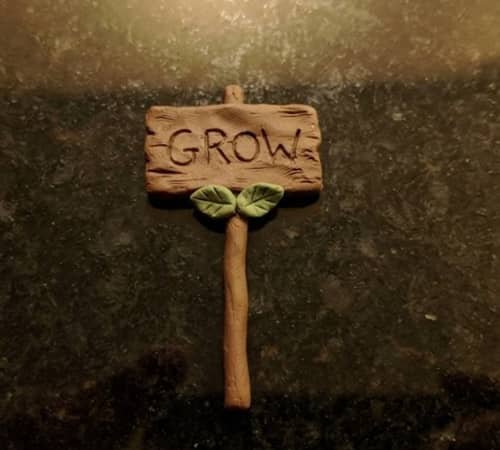
This one is wonderfully simple and can personalize the entire miniature display.
Roll a very thin piece of brown clay into a small rectangular plank. Don’t worry if the edges aren’t perfectly straight.
Use a toothpick to carve the word GROW, BLOOM, or even your own short word into the front.
For the post, roll a skinny piece of brown clay. Attach it underneath the sign.
You can add two tiny leaves beside the lettering by flattening small green clay balls and pinching one end.
If you’re using polymer clay, keep the lettering shallow because deep cuts can weaken a very thin sign.
This is one of those clay craft projects where simplicity wins.
A tiny handmade sign can make several other figures look like they belong together.
6. Tiny Clay Ladybug
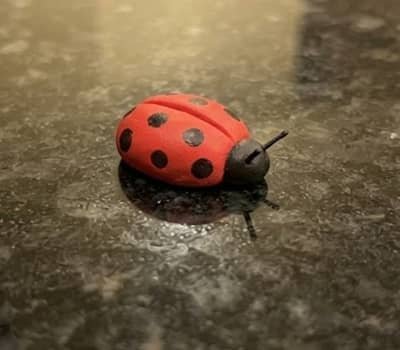
A ladybug needs only a few shapes, so this is a great afternoon project.
Make a small red oval for the body. Flatten the bottom slightly so it sits securely.
Roll a tiny black ball and press it onto one end for the head.
Now add several tiny black dots across the red back.
Try not to make them perfectly symmetrical. Nature isn’t working with a ruler either.
For the central line, use a toothpick to create a shallow groove running from the head toward the rear.
Two tiny black antennae finish the piece.
If your clay is extremely soft, wait a few minutes before adding the dots. Otherwise, your fingers may accidentally flatten the whole body.
7. Little Clay Flower Pot
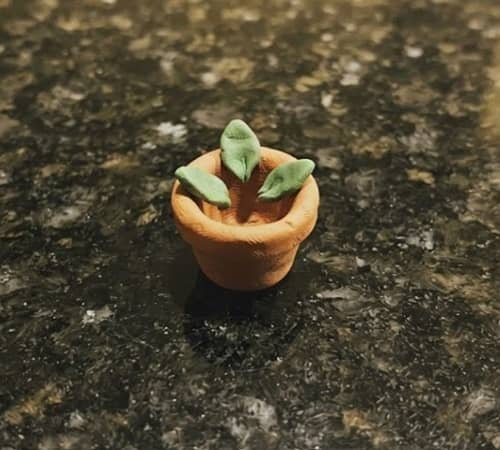
This miniature pot is more interesting than it first appears.
Start with a small ball of terracotta-colored clay. Push your thumb into the center while rotating the piece slowly.
Keep pressing outward until you create a tiny hollow pot.
Don’t make the walls paper-thin; about a few millimeters is safer for beginners.
Flatten the base.
For the rim, roll a very thin clay rope and wrap it around the top edge. Blend the seam gently.
Now add a tiny green plant. Make three or four small leaves from flattened green clay, then attach them inside the opening.
You could even make several pots in slightly different earthy shades.
That’s the little secret with miniature clay design… variation often looks better than identical repetition.
8. Tiny Garden Bird
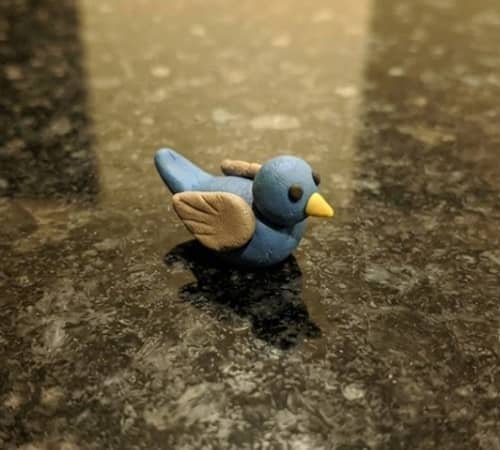
Let’s make a bird without attempting complicated feathers.
Roll a small oval of blue, yellow, brown, or green clay for the body.
Pinch one end slightly to create a tail.
Add a smaller ball for the head.
For the beak, use a tiny orange or yellow cone and press it gently into the front of the head.
Make two tiny black eyes.
Now create two flattened teardrop shapes for wings. Press shallow feather lines into them using a toothpick and attach them to either side.
The feet can be skipped entirely if you want the bird sitting down. Honestly, at this size, nobody will miss them.
9. Mini Clay Watering Can
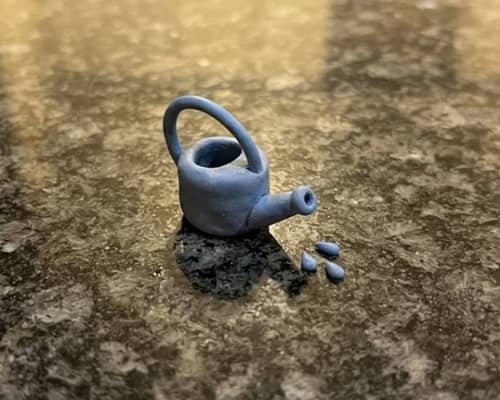
This is where your miniature garden starts getting a little story.
Form the main body from a small flattened oval of gray, blue, or green clay.
Add a tiny cylindrical opening on top.
For the handle, roll a thin clay rope and bend it into an arch. Attach both ends carefully to opposite sides of the body.
The spout is another thin clay tube. Make it slightly thicker near the body and narrower toward the tip.
For extra personality, add a few tiny clay “water droplets” beside the spout.
Be gentle while attaching the handle because thin clay pieces can break easily, especially before polymer clay is cured.
10. Tiny Garden Fairy Door
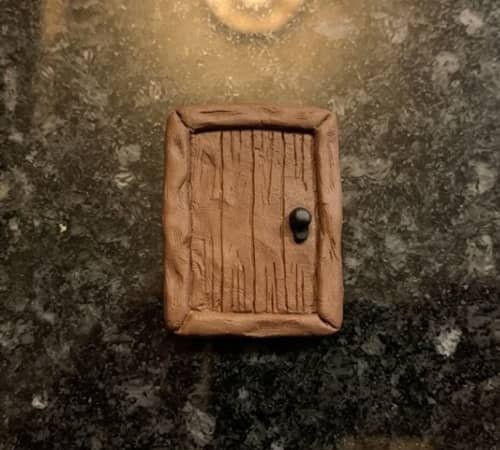
Instead of making a whole fairy, make the little doorway they might disappear through.
Shape brown clay into a tiny rounded-top door.
Use a toothpick to score several vertical plank lines. Then add a horizontal line or two.
A microscopic black or gold clay ball can become the doorknob.
For the frame, roll two thin brown clay ropes and attach them vertically along the sides. Add a curved strip over the top.
Want more character? Make the door slightly crooked.
This is one of the most useful miniature pieces because it can become the focal point of a fairy-garden arrangement without requiring a complicated character.
11. Tiny Clay Caterpillar
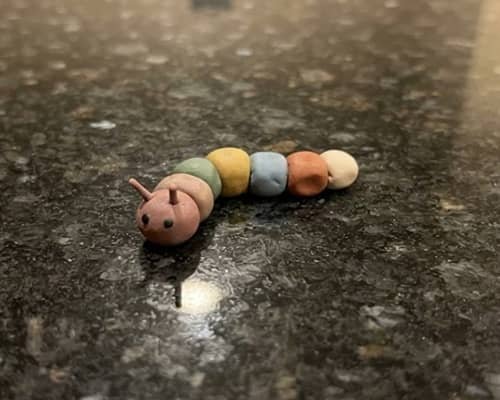
This one is almost ridiculously easy.
Roll five or six tiny balls of clay in different colors.
Arrange them in a gentle curve, then press the balls together just enough that they stay connected.
Use one larger ball for the head.
Add two tiny black eyes and two little antennae.
You can also flatten the underside very slightly so the caterpillar doesn’t wobble.
Here’s the fun part: don’t use identical colors. Try a mustard-yellow, pale green, blue, cream and orange sequence.
The mismatched colors make the figure feel playful rather than factory-made.
And yes, beginners can make this one without sculpting experience.
12. Mini Clay Garden Hedgehog
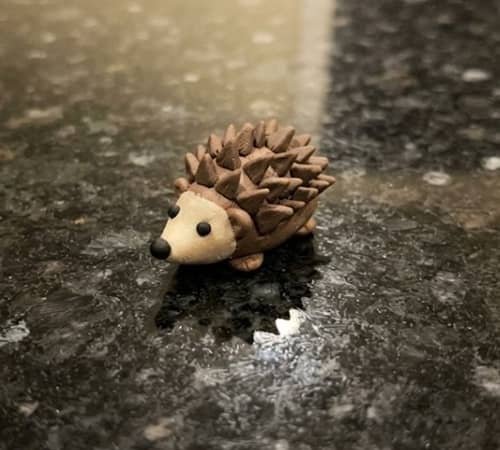
Let’s finish with something slightly more detailed.
Make a small brown or tan oval for the hedgehog’s body.
Pinch one end gently to create the pointed face.
Add a tiny black ball for the nose and two very small black eyes.
For the spines, use thin pieces of darker brown clay.
Instead of individually attaching dozens of spikes, make several tiny triangular pieces and arrange them in rows across the back.
Press them down firmly enough to stay attached but don’t squash their pointed ends.
Add four tiny feet underneath if you like.
A cream-colored face against a darker brown body gives the little animal a surprisingly expressive look.
This makes a lovely final piece because it combines simple clay shapes with a little texture.
Final Thoughts
The real charm of tiny clay garden figures isn’t perfection, it’s the sense that each little object belongs to a miniature story.
A snail can sit beside a crooked garden sign, a frog can guard a tiny flower pot, and a watering can can appear as though someone just walked away from it.
That’s why these small clay craft projects are worth making as a collection rather than one at a time.
Try changing proportions, repeating a few colors, or deliberately leaving tiny fingerprints in the surface.
Those imperfections become part of the personality.
And if you make several pieces, arrange them as a tiny scene… the result can feel surprisingly much more special than a shelf full of individually perfect miniatures.





