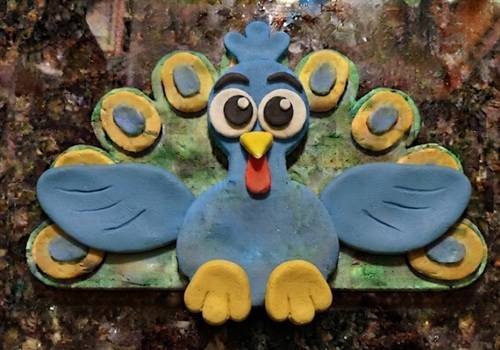
Want to turn the classic Thanksgiving turkey disguise project into something a little more creative? I made this Turkey disguise peacock clay craft by using air dry foam clay.
Instead of paper feathers, we’ll build a fan of chunky clay feathers, colorful eye-spots, a blue body, tiny feet, and a funny little turkey wattle.
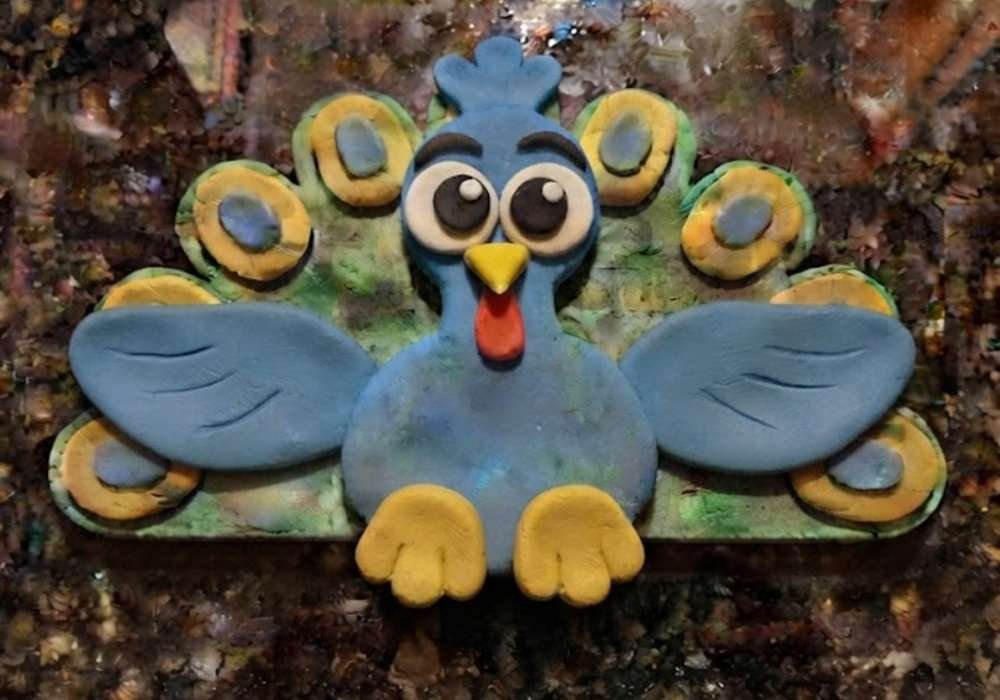
It feels like a mini sculpture, but the shapes are simple enough for kids to copy.
This is a fun fall, autumn, or November craft for home or classroom use, especially when everyone is making their own version of a disguised turkey.
What Makes This Peacock Turkey Disguise Craft Different?
The fun part is that this isn’t just a blue bird stuck onto a turkey shape.
I’m building the peacock disguise in layers so the finished piece has a little more character.
The tail becomes the star of the craft, with oversized green feathers and yellow-and-blue centers that resemble peacock eye-spots.
The body stays rounded and friendly, while the red turkey wattle gives away the real bird underneath.
Wouldn’t it be funny if the turkey thought nobody would recognize him?
For this project, I recommend air dry foam clay because it is soft, lightweight, easy to shape, and doesn’t need baking.
Regular air-dry clay can work too, although foam clay is especially nice for kids because it can be pressed and molded with little fingers.
Modeling clay is another option if you don’t need the project to permanently harden.
Salt dough can also be used, but it needs a different drying and finishing process.
Choose Your Air Dry Clay Type
Air Dry Foam Clay | Cornstarch Clay | Homemade Clay
Affiliate Disclaimer: Some of the links in this post may be affiliate links, which means I may earn a small commission if you choose to make a purchase through them – at no extra cost to you. I only share products that genuinely fit this project and can help make your ceramic mug clay craft process easier and smoother. Your support helps keep ideas like this coming.
Materials Needed To Make Turkey Disguise Peacock Clay Craft
- Blue air dry foam clay
- Green air dry foam clay
- Yellow air dry foam clay
- Red air dry foam clay
- White air dry foam clay
- Black air dry foam clay
- A clean, smooth work surface
- A small cup of water, only if your clay brand recommends it
- A rolling tool or smooth bottle, optional
- Child-safe plastic shaping tool, optional
Keep the shapes chunky rather than tiny.
Small loose clay pieces can be a choking concern for very young children, so younger kids should work with an adult nearby and should never put clay in their mouth.
No wire, pins, toothpicks, blades, or sharp sculpting tools are needed for this air dry foam clay craft.
Step 1: Make the Peacock-Style Tail Fan
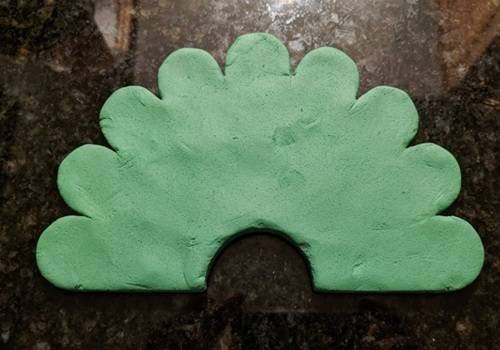
Start with the part that makes this disguise instantly recognizable: the giant peacock tail.
Take a generous amount of green foam clay and roll it between your palms.
Flatten it into a wide, rounded fan shape. You can think of it like a large semicircle just below where the body sits.
Don’t worry about making the curve perfect. In fact, a slightly uneven edge makes the craft look handmade.
Now create about seven to nine individual feather shapes from green clay.
Make each one like a rounded leaf or fat teardrop. Arrange them around the fan so the feathers overlap slightly.
Press the pieces together gently at their lower ends. Keep the tail fairly flat because our turkey will be placed over it later.
Step 2: Add the Colorful Peacock Eye-Spots
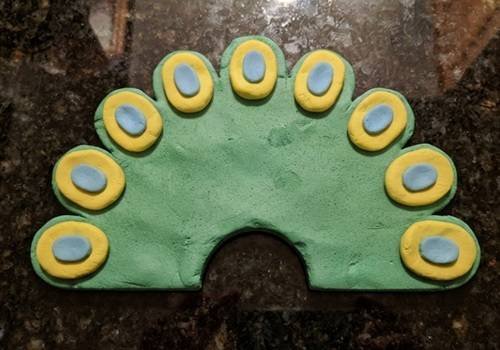
Now comes my favorite part.
Roll small yellow pieces of foam clay into balls and flatten them into oval rings. Place one yellow oval toward the upper portion of each green feather.
Leave some green space around the yellow shapes. That little border makes the colors pop.
Next, add smaller blue or light-blue clay circles inside the yellow ovals. Press them down gently without flattening the entire feather.
You don’t need every eye-spot to be identical. Mine usually aren’t, and thats part of the charm.
For an extra twist, add a tiny dark-blue or black dot inside a few of the blue centers.
This creates a more layered peacock-feather appearance without making the project complicated.
Step 3: Shape the Blue Turkey Body
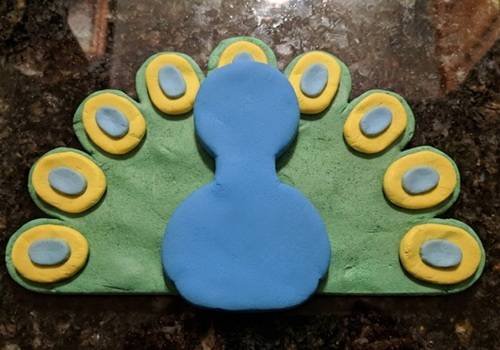
The turkey hiding inside our peacock disguise needs a body.
Take blue foam clay and roll it into one large smooth ball.
Gently press it down and shape it into a rounded pear-like body. The top should be slightly narrower than the bottom.
Don’t make the body too thin. A plump shape will sit nicely over the green tail.
For the head, make another blue ball. Press it gently into an oval shape, keeping it wider than it is tall.
Place the head over the upper-middle portion of the tail and the body underneath it. At this point, you should already see the basic bird silhouette.
I like to keep the head and body as two separate clay pieces rather than blending them completely. This gives the little bird more dimension.
Step 4: Give the Turkey Its Peacock Crest
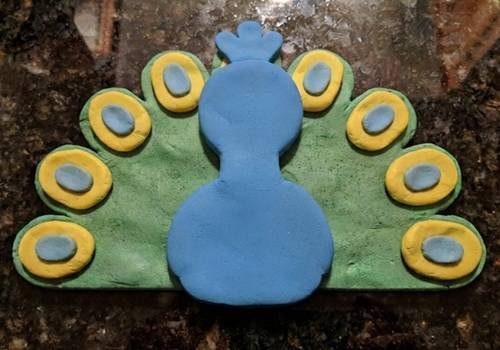
A peacock needs a crest, and this is where our disguise starts looking really convincing.
Take a small amount of blue clay and flatten it slightly. Cut or pinch it into three simple rounded spikes using your fingers.
You don’t need sharp points. Soft little spikes work better and are safer for a kids craft.
Place the crest on top of the bird’s head. Press the bottom edge gently against the head so it stays attached.
Try tilting the three crest pieces in slightly different directions. Suddenly the bird has personality!
At this stage, the craft should still look like a very simple blue bird sitting in a large peacock tail.
Step 5: Make Big Friendly Eyes
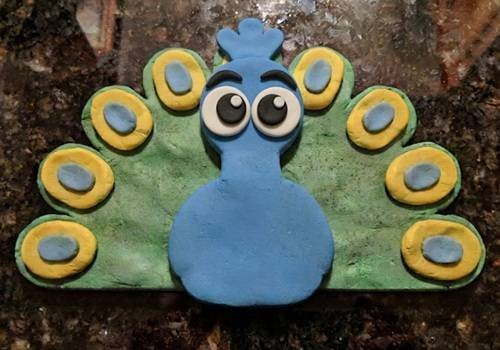
Let’s give this little turkey some expression.
Make two small white balls and flatten them into rounded discs. Place them side by side on the blue face.
Add smaller black clay circles in the center of the white eyes. Then add tiny white dots on the black pupils for a playful cartoon look.
Keep the eyes large compared with the head. This makes the craft look cute instead of overly realistic.
For eyebrows, roll two very thin pieces of dark blue or black clay and curve them slightly above the eyes. They don’t have to match perfectly.
The face already look adorable at this point.
Step 6: Add the Beak and Turkey Wattle
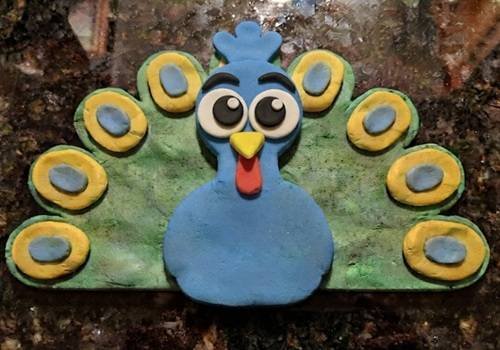
Here’s the tiny detail that tells everyone there is still a turkey hiding underneath the disguise.
Take yellow foam clay and form a small rounded triangle for the beak. Flatten it slightly and place it between the eyes.
For the wattle, use red clay. Roll a small piece into a short teardrop and flatten it. Attach it directly underneath the beak.
Keep the wattle small. We want it visible, but we don’t want it covering the body.
This combination of a peacock-colored bird, bright yellow beak, and red turkey wattle is our little visual joke.
Step 7: Sculpt Simple Wings and Feet
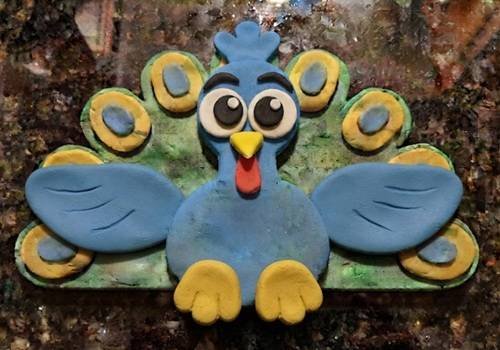
Now we can make the bird feel finished.
For each wing, take a small piece of blue clay and flatten it into a rounded teardrop. Place one on either side of the body.
Use your fingertip to press two or three shallow curved lines into each wing. These don’t need to be deep. They simply suggest feathers.
For the feet, use yellow clay.
Make two small flattened shapes with three rounded toes on each. Avoid making thin individual toes.
Chunky toes are easier for kids to shape and less likely to break.
Place the feet underneath the body so they extend slightly forward.
The bird is looking pretty proud now, isn’t he?
Step 8: Add the Final Peacock Details
This is where I like to add my own little twist.
Take a very small amount of blue clay and make tiny rounded accents for the center of the tail.
Place them between the bird and the green fan so the transition doesn’t look completely flat.
You can also add a few small yellow dots around the blue centers of the feathers.
Don’t cover every open space. A little irregularity makes the tail look more handmade.
Finally, gently press every major clay piece once more to make sure it is attached.
Don’t keep reshaping everything at this point. Foam clay can lose its clean forms if you fiddle with it too much.
Let the finished piece air-dry according to the clay manufacturer’s instructions.
Easy Ways Kids Can Personalize Their Peacock Turkey
Once the basic sculpture is complete, let kids make their own choices.
One child might make a rainbow tail. Another might make a purple peacock with pink eye-spots. Someone else may decide their turkey needs an enormous crest!
You can even turn this into a classroom Turkey in Disguise activity.
Give every child the same basic body shape and let them invent a completely different costume.
For older kids, you could experiment with raised feather layers or add a tiny clay name tag.
Younger children can simply concentrate on rolling balls, flattening circles, and arranging the tail.
The goal isn’t perfect sculpting. It is learning how simple shapes can become something recognizable.
Final Thoughts
What I really like about this Turkey disguise peacock clay craft is that it teaches kids more than just how to make a cute Thanksgiving bird.
They get to practice basic sculpting skills such as rolling, flattening, layering, attaching, and creating repeated patterns.
The peacock tail also introduces a simple lesson in visual symmetry without making it feel like schoolwork.
During Fall or November, you could use the finished pieces as table decorations, classroom displays, or part of a larger disguise of a turkey craft using clay activity.
And if foam clay isn’t available, the same construction idea can be adapted to air-dry clay, modeling clay, or even salt dough.





