Christmas crafts always feel a little more special when tiny hands are involved.
That is exactly why I love making watercolor Christmas ornaments for kids every holiday season.
They are simple enough for younger children, creative enough to keep older kids interested, and every ornament ends up looking different. Isn’t that the fun part?
This kids craft combines watercolor painting with a handmade ornament that actually deserves a spot on the Christmas tree.
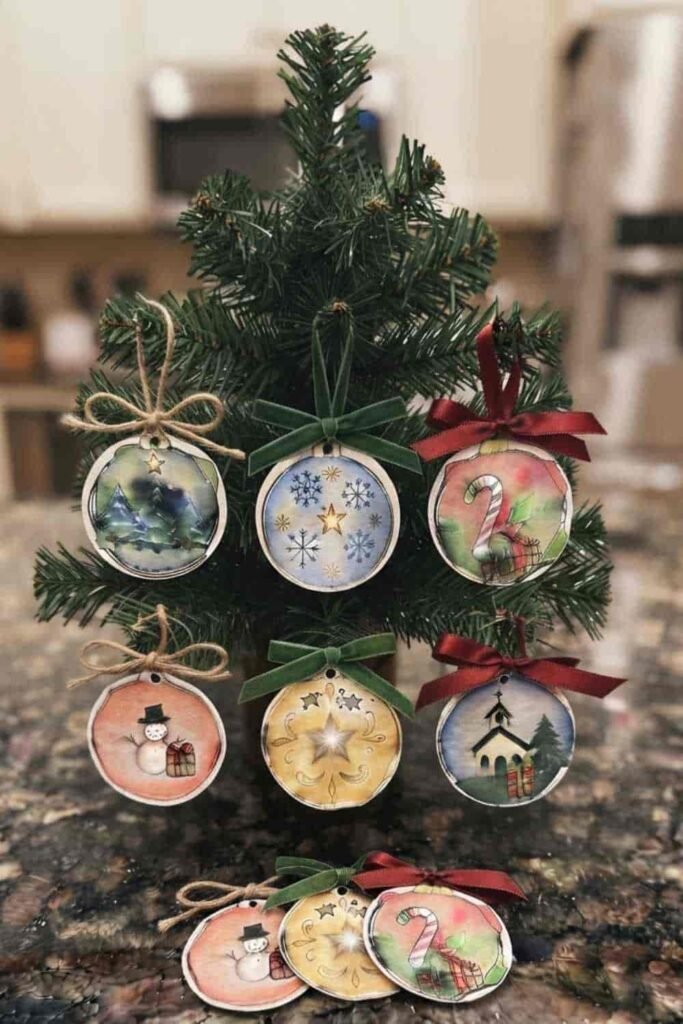
This project is surprisingly forgiving and full of personality, whether you’re seeking for primary school Christmas ornament crafts, grade 3 Christmas crafts, or just a calming Christmas activity to do at home.
Materials Needed To Make Watercolor Christmas Ornaments
- Heavy watercolor paper (300 GSM works best)
- Watercolor paint set
- Round watercolor brushes (small and medium)
- Clean water in two cups
- Pencil
- Eraser
- Black waterproof fineliner (optional)
- White gel pen (optional for highlights)
- Scissors
- Hole punch
- Twine, ribbon, or thin jute string
- Cardboard circle template (about 3 to 4 inches wide)
- Paper towel
- Craft mat or newspaper
Step 1: Sketch Your Ornament Shapes
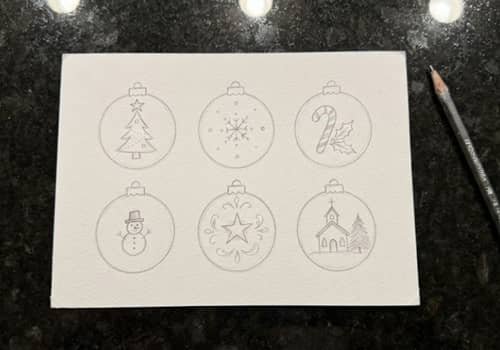
Start by placing the cardboard circle on your watercolor paper and lightly trace several circles.
Keep the pencil lines soft because they don’t needs to be dark.
Add tiny ornament caps at the top of every circle and sketch very simple holiday elements inside each ornament.
Think snowflakes, little pine trees, candy canes, stars, holly leaves, gifts, or tiny houses.
Avoid filling every inch because watercolor needs breathing room.
If you’re working with younger children or creating 3rd grade classroom projects, keeping the designs bold and uncomplicated makes painting much easier.
Older kids in grade 6 or even 5th grade can add slightly more detail without making the project overwhelming.
Step 2: Paint the First Watercolor Wash
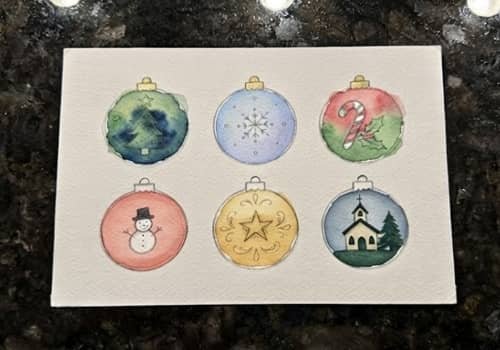
Now comes the fun part. Wet only one ornament with clean water before adding paint.
Watch the colors gently spread across the paper instead of forcing them around.
Try combinations like blue and purple, pink and orange, green and turquoise, or red fading into yellow.
Every ornament can have its own personality.
Don’t stir the brush forever.
The colors gets muddy if you overwork them.
Let little blooms and soft gradients happen naturally because they actually make the ornament look handmade.
Leave plenty of white space around the tiny illustrations if you want them to stand out later.
Step 3: Add Holiday Details
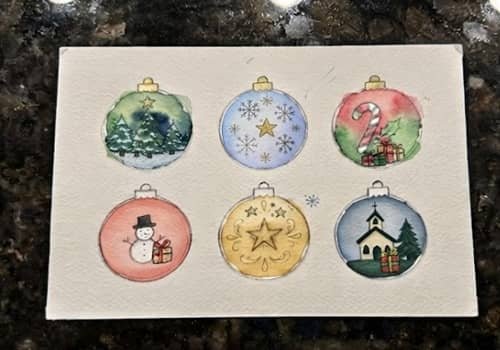
Allow the watercolor to dry completely before adding details. This patience really pays off.
Using a smaller brush, paint your holiday elements over the dried backgrounds.
White snowflakes, dark green pine trees, tiny red berries, striped candy canes, miniature gifts, stars, ornaments, or little Christmas stockings all work beautifully.
Want another trick? Add tiny dots instead of trying to paint perfect snowflakes. It creates movement without making the design look crowded.
This is where the project slowly transforms from colorful circles into recognizable watercolor christmas ornaments for kids.
Step 4: Make Every Ornament Pop
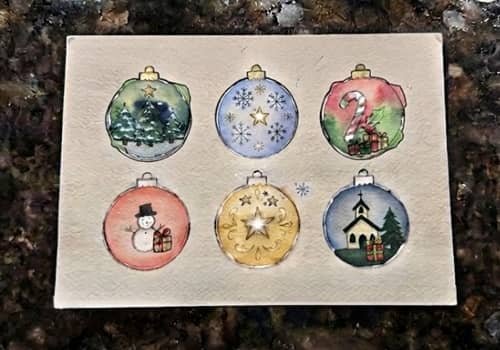
Once everything is dry, use a waterproof black fineliner sparingly around larger shapes if you’d like slightly sharper designs.
Skip outlining everything because watercolor looks best when it stays soft.
Next, add tiny white gel pen dots for falling snow, star highlights, stitched patterns, or decorative swirls. Suddenly the ornaments start looking layered instead of flat.
I always remind kids there isn’t a wrong way to decorate these.
Some ornaments become colorful masterpieces, others stay wonderfully simple.
That variety actually makes the finished set feel more authentic.
Step 5: Cut Out the Ornaments Carefully
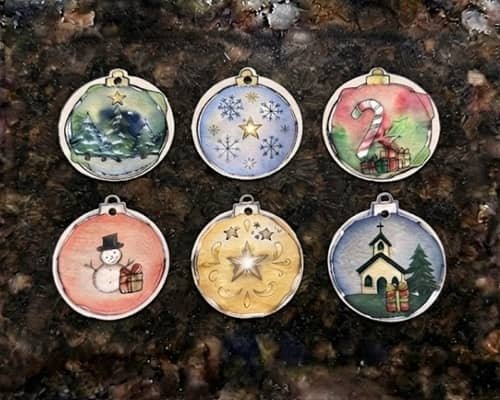
Once every ornament is completely dry, carefully cut around each circle using sharp scissors.
Leave a smooth edge because rough cuts become noticeable once they’re hanging.
Punch one hole just beneath the ornament cap.
If the paper bends slightly, don’t panic… it usually flattens once the ribbon is attached.
For younger children completing this kids craft, an adult should handle the cutting while kids continue decorating.
These also work wonderfully if you’re planning to make ornaments with kids during classroom Christmas parties or family craft afternoons.
Step 6: Add Ribbon and Optional Backing

Thread ribbon, baker’s twine, or jute through each hole and tie a simple knot. That’s enough to hang them on the tree.
If you’d like sturdier ornaments, glue each watercolor ornament onto slightly larger kraft cardstock before trimming again.
This makes them last for many Christmas seasons.
Kids love writing the year or their names on the back too. Years later, those tiny signatures become the best part.
Funny how a simple DIY project quietly turns into a family keepsake.
Step 7: Display Your Handmade Ornaments
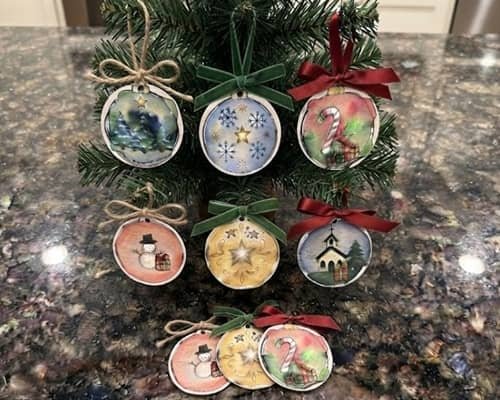
Hang the ornaments across your Christmas tree, attach them to wrapped gifts, decorate a holiday wreath, or even string several together into a festive garland.
Teachers often adapt this project into elementary Christmas ornament crafts because every child creates something unique while following the same simple process.
It also fits nicely into watercolor painting lessons without requiring advanced techniques.
No two ornaments will ever match exactly, and honestly, thats what makes them feel personal.
Final Thoughts
Some crafts disappear after the holidays, but handmade ornaments tend to stay around for years because they’re tied to memories instead of perfection.
That is one reason I keep coming back to watercolor christmas ornaments for kids every December.
Watercolor naturally encourages experimentation, so children learn to embrace happy accidents rather than fear mistakes.
It also quietly builds confidence with color mixing, brush control, and creative decision-making without feeling like a lesson.
Whether you’re planning activities for grade 3 christmas crafts, or older children in grade 6, or creative 5th grade holiday crafts, this project grows with every age while still feeling wonderfully handmade.





