There is something so fun about turning a lump of clay into a tiny glowing object.
I especially like a diy witchy clay lantern craft because kids can shape, poke, press and decorate it without needing complicated techniques.
With air dry clay and a battery-powered LED tea light, even little fingers can create a spooky lantern that actually feels handmade.
Forget perfectly smooth Pinterest-perfect pieces. The tiny fingerprints, uneven edges and quirky faces are part of the charm.
Ready to make a little witchy magic? These ideas mix gothic shapes, moons, bats, stars and dark floral details into beginner-friendly clay craft projects that can also become cute selling crafts.
Choose Your Air Dry Clay Type
Regular Air Dry Clay | Cornstarch Clay | Homemade Clay
Affiliate Disclaimer: Some of the links in this post may be affiliate links, which means I may earn a small commission if you choose to make a purchase through them – at no extra cost to you. I only share products that genuinely fit this project and can help make your ceramic mug clay craft process easier and smoother. Your support helps keep ideas like this coming.
1. Crooked Witch Hat Clay Lantern
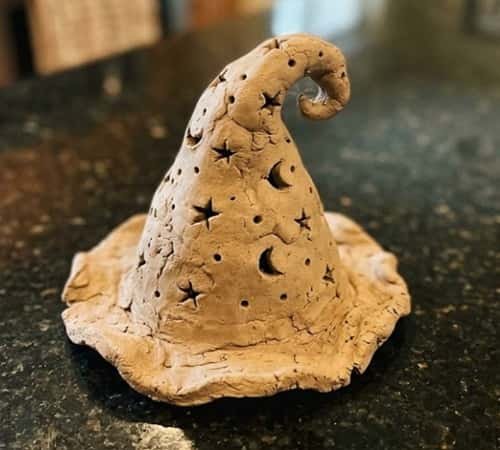
This one is almost impossible to make look boring.
Start by forming a small rounded clay body about the size of a large orange. Flatten the bottom so the lantern can stand while you work.
Then roll a long piece of clay into a thin strip and attach it around the upper section as a decorative rim.
Now make the roof.
Shape a cone from clay, but deliberately bend the tip slightly sideways.
Place it over the top of the lantern and gently press the edges together. Don’t seal the entire top because the LED light needs to illuminate the inside.
For the windows, make tiny moon, star or triangle openings around the body using the rounded end of a child-safe clay tool. Keep the holes reasonably large so light can escape.
Add a few tiny clay buckles around the hat if you want extra detail.
Let everything dry completely before adding paint. A deep purple, charcoal, muted green or dusty black works beautifully.
Safety tip: Use a battery LED tea light inside. Never use a real flame.
2. Crescent Moon Witchy Lantern
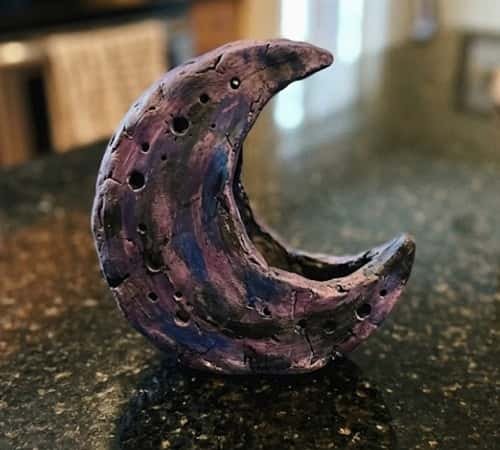
Want something more mysterious?
Roll air dry clay into a thick rounded cylinder. Carefully flatten the front and carve a large crescent moon opening into it.
Don’t make the walls paper-thin. Around 1 cm thickness gives the piece enough strength for beginners.
Next, add several tiny stars around the crescent. Push the tool gently through the clay instead of twisting aggressively.
For a little personality, place two tiny clay clouds near the bottom of the moon.
The inside stays hollow so an LED tea light can sit underneath or behind the lantern.
Once dry, paint the outside charcoal gray and lightly brush silver or muted gold around the raised edges.
This creates a simple lantern aesthetic without requiring advanced clay sculpture skills.
3. Bat Window Clay Lantern
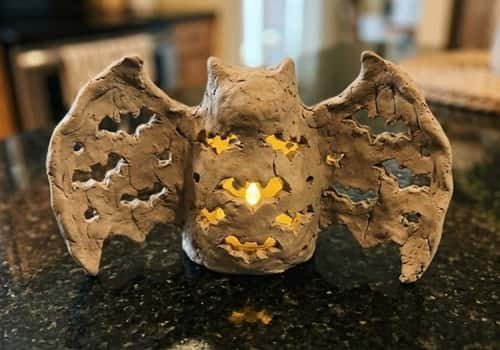
Bats instantly give this clay craft a witchy personality.
Build a small hollow clay lantern using a rounded rectangular shape. Smooth only the major cracks. Keep some surface texture because it makes the finished piece look genuinely handmade.
Cut or press several bat silhouettes into the front and sides.
Here’s the fun part: make every bat slightly different. One can have larger wings. Another can be tiny. A third can be upside down.
Add a thin clay rim around the top and bottom to make the lantern look finished.
After drying, paint it dark gray or black. Place the LED inside and the bat shapes will glow beautifully.
Kids usually enjoy making the bats more than making the lantern itself!
4. Witchy Mushroom Lantern
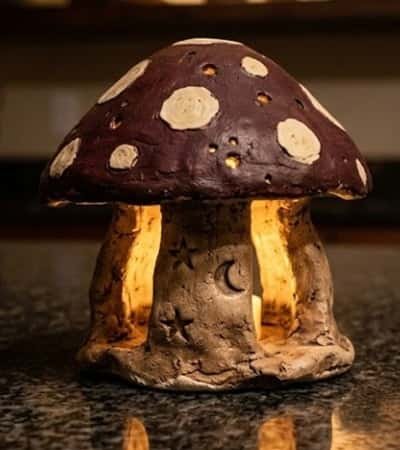
This one takes a completely different direction.
Make a short rounded clay base first. Then create a wider mushroom-cap shape and attach it loosely to the top, leaving enough opening underneath for the LED light.
Press small circles and irregular spots into the mushroom cap.
Don’t make the spots perfectly symmetrical. A slightly wonky mushroom actually looks better.
For the stem, keep the clay fairly thick so it doesn’t crack while drying. Add tiny crescent windows around the stem section.
Paint the mushroom in muted purple, burgundy, gray or moss green. A little dark floral decoration around the base can make it look like something from an enchanted garden.
5. Gothic Window Arch Lantern
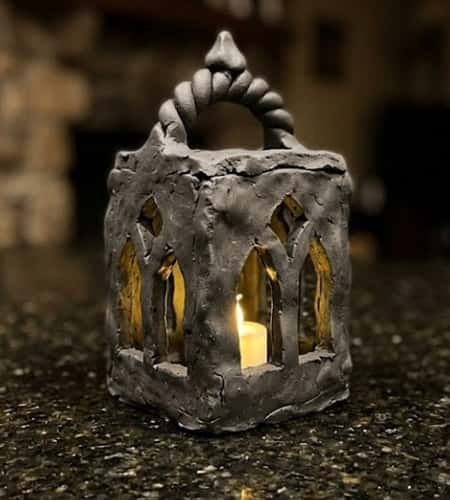
For older kids, this makes a great beginner introduction to gothic clay decor.
Form a hollow rectangular clay body. Add a pointed arch shape on the front using a blunt child-safe shaping tool.
Instead of cutting the whole arch away, create several small openings inside it. Think of a miniature gothic window.
Add tiny clay lines around the arch to imitate stonework.
You can even press small dots along the border.
Once dry, paint the lantern charcoal, dusty purple or aged gray.
Dry-brush a lighter color across the raised areas to create a worn clay antique Inspiration effect.
It looks complicated, but the construction is surprisingly simple.
6. Black Cat Witch Lantern
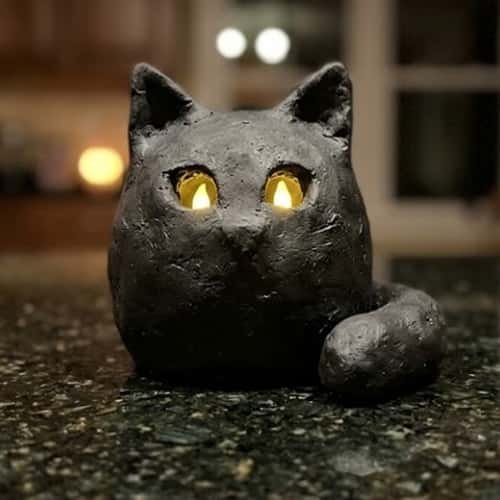
Who doesn’t need a tiny glowing black cat?
Make a rounded hollow body and gently pull two pointed ears from a separate piece of clay. Attach them firmly to the top.
Press two small eye openings into the front.
For the tail, roll a thick clay rope and curve it beside the body. Keep it chunky rather than thin so it survives drying.
Add little paw shapes around the bottom.
Paint the entire piece black or very dark gray. Once completely dry, add tiny purple eyes around the openings.
This could easily become one of those cute selling craft ideas for a Halloween craft table.
7. Spiderweb Clay Lantern
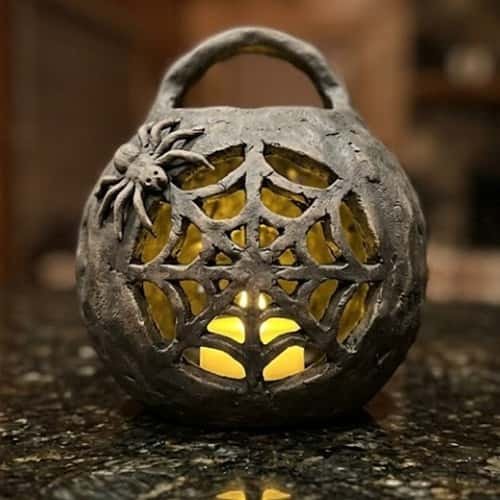
Make a simple round lantern body first.
Once the clay has firmed up slightly, press a spiderweb pattern into the front using a blunt tool. Work from the center outward so the web stays connected.
Add several tiny holes around the sides.
You don’t need to make a perfect web. In fact, an uneven web looks more handmade.
For an extra touch, attach a tiny clay spider near the bottom.
Paint the lantern matte black and add a little gray around the raised web lines. The result has a strong gothic lantern look without needing complicated sculpting.
8. Haunted House Clay Lantern
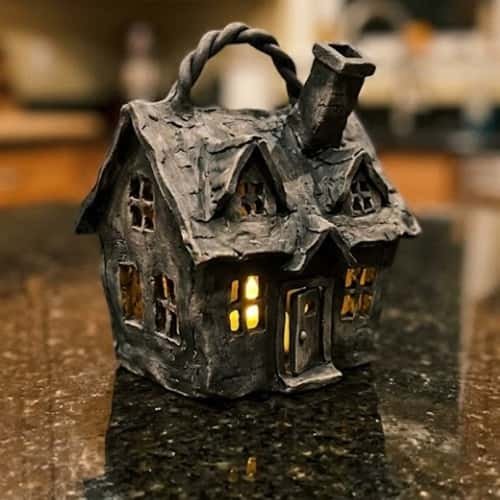
This is a great clay activity when kids want to build something that feels like a tiny scene.
Create four clay walls around a hollow center. Keep the walls thick enough to remain sturdy.
Press tiny windows and a crooked door into the front.
Then add a triangular roof.
Make the roof slightly uneven. Add a tiny chimney on one side and a few crooked bricks.
Once dry, use gray, black and muted purple paint.
The LED light shining through the windows makes the little house feel surprisingly atmospheric.
9. Witch’s Cauldron Lantern
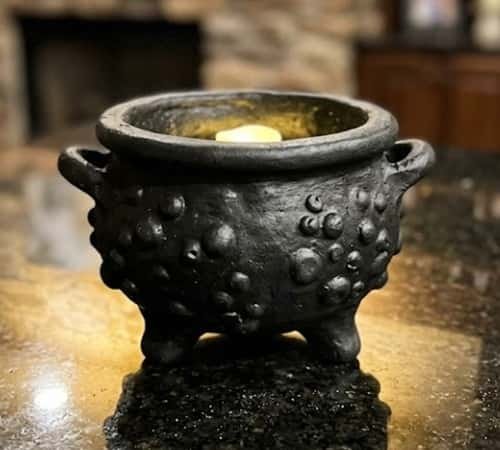
Now let’s make the lantern look like a bubbling cauldron.
Shape a wide, rounded hollow bowl from clay. Add three chunky little feet underneath.
Create a thick rim around the top.
Instead of making the entire top solid, leave the center open so the LED can sit inside.
Add several tiny raised clay bubbles around the rim.
You could also make three tiny clay stars or moons and attach them to the sides.
Paint it black with a little dark green or purple around the raised details. It has that classic witchy candle lantern feeling without an actual candle.
10. Dark Floral Witch Lantern
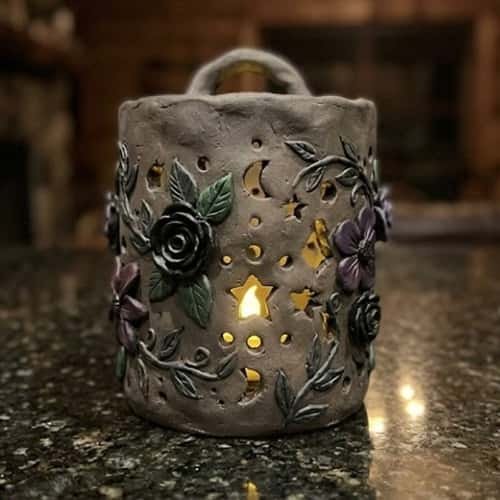
This idea brings a softer side to the theme.
Build a basic cylindrical lantern and add small handmade flowers around the lower half.
Keep the flowers simple. Flatten five tiny clay balls into petals and press them together.
Add leaves using small oval pieces.
For the light openings, create little circles between the flowers.
Paint the base charcoal gray and use muted plum, dusty red or faded purple for the flowers.
This combination of dark floral details and rough clay gives the piece a vintage, almost Victorian clay lamp feeling.
11. Owl Moon Witch Lantern
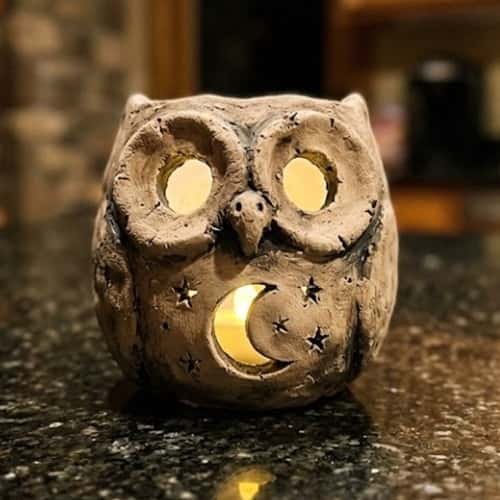
Make a small rounded owl body from clay.
Add two large circular eye openings and a tiny triangular beak.
Instead of making detailed feathers, press simple curved lines across the body.
Place a crescent moon shape on the side.
The lantern should remain hollow, with enough space for an LED light underneath or inside.
Paint the owl dark brown, charcoal or muted purple.
The roughness is actually useful here. Perfectly smooth clay can make the owl look manufactured, while tiny bumps make it feel like a kid actually made it.
12. Victorian-Style Hanging Lantern
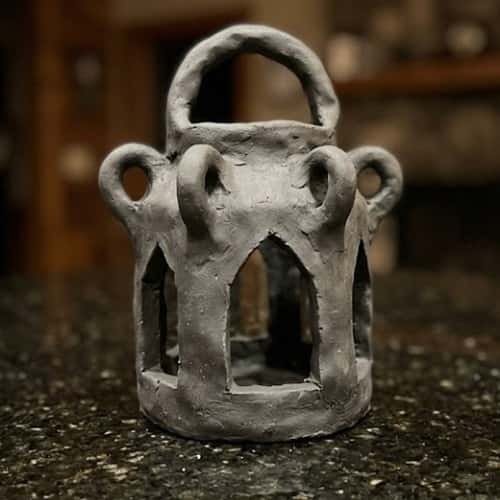
This one has a slightly old-world personality.
Make a hollow rectangular lantern with gently rounded corners.
Create small arched openings on all four sides. Add a raised border around each opening using thin clay ropes.
For the hanging appearance, form two chunky clay side loops and connect them with a thicker clay handle.
Keep everything sturdy and broad. Very thin clay handles can break while drying.
Decorate the corners with tiny clay dots or simple leaves.
Paint it charcoal gray with muted bronze highlights after it has completely dried.
The result has that old lantern aesthetic I love, somewhere between gothic decor and a miniature Victorian clay lamp.
For kids, display it as a hanging-style craft only when the structure is completely dry and securely supported. Use LED lighting only.
13. Tiny Witch Moon Door Lantern
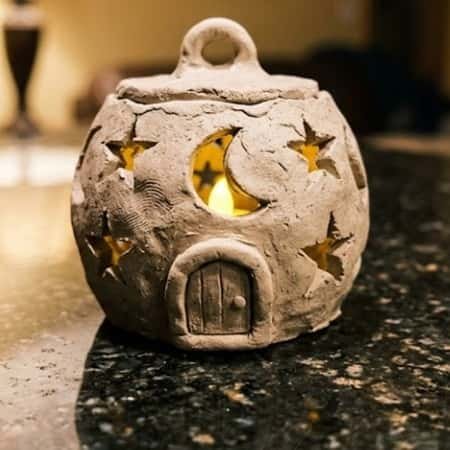
Why stop at twelve?
Make a squat rounded lantern with a tiny arched door on the front.
Press a crescent moon into the door and add three tiny stars above it.
Around the body, create little irregular stone shapes by pressing shallow lines into the clay.
Keep the texture rough.
After drying, paint the lantern dark gray and lightly highlight the raised areas with dusty purple.
This is a lovely beginner project because there are no complicated components. Just shape, press, dry and paint.
It also makes a fun addition to a Halloween-themed clay craft collection.
Final Thoughts
The interesting thing about a witchy clay lantern craft is that the lighting doesn’t have to come from a complicated design.
The negative space does most of the work. A few well-placed holes can create bats, moons, stars or gothic windows once the LED starts glowing behind them.
That makes this a clever beginner clay sculpture exercise too, because kids learn how shape, thickness and openings affect the final appearance.
If you’re making these for selling crafts, don’t chase perfect symmetry either.
A recognizable silhouette, sturdy construction and a handmade surface often gives a small clay piece far more personality than an overly polished finish.





