What if your Thanksgiving turkey could cast a little magic spell and completely disappear into a wizard costume? That was the idea behind this wizard Turkey disguise craft using air dry foam clay.
Instead of simply adding a paper hat or cape, we’re turning the turkey into a tiny handmade wizard with a tall crooked hat, robe, wand, belt and a few fun magical details.
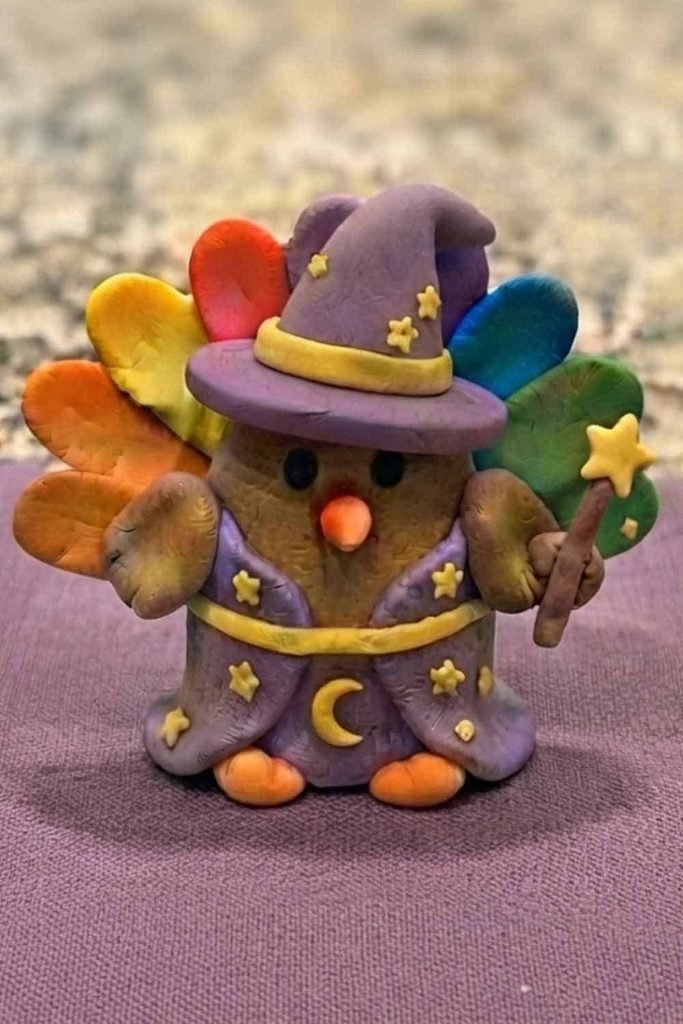
I especially like this version for November because it feels like a real sculpture while still being simple enough for kids, children, and students to make.
The best part? You can shape the whole disguise with lightweight foam clay using little fingers and basic household supplies.
What Makes This Wizard Turkey Disguise Different?
Most “disguise a turkey” projects rely on paper, feathers, cardboard or printable costumes. This one takes a different route.
The turkey remains the main character, but the wizard clothing becomes a removable-looking sculpted costume around it.
I also added three details that make the finished project more interesting:
- A slightly oversized pointed wizard hat.
- A tiny magical wand with a star tip.
- A curved moon-and-star belt decoration.
Why make it look perfect? A handmade school project should still look handmade. Slightly uneven shapes actually give the air dry foam clay craft personality.
Materials Needed To Make Wizard Turkey Disguise Using Clay
You don’t need a huge craft box for this DIY clay project.
- Air dry foam clay in brown, orange, black, purple or other preferred colors
- Small amount of white foam clay
- Small amount of yellow foam clay
- A flat piece of cardboard or thick paper for temporary support
- A clean work surface
- A blunt plastic sculpting tool or craft stick
- A small cup of water for lightly smoothing fingers if needed
- Optional: a tiny amount of glue for attaching fully dried pieces
- Printed or hand-drawn turkey template if your school assignment requires a recognizable turkey shape
Safety note: Choose child-friendly, non-toxic air-dry foam clay and supervise younger children according to the product instructions. Skip sharp tools, wire, toothpicks and other pointed objects.
Choose Your Air Dry Clay Type
Air Dry Foam Clay | Cornstarch Clay | Homemade Clay
Affiliate Disclaimer: Some of the links in this post may be affiliate links, which means I may earn a small commission if you choose to make a purchase through them – at no extra cost to you. I only share products that genuinely fit this project and can help make your ceramic mug clay craft process easier and smoother. Your support helps keep ideas like this coming.
Wizard Turkey Disguise Craft Instructions
Step 1: Make the Turkey Body
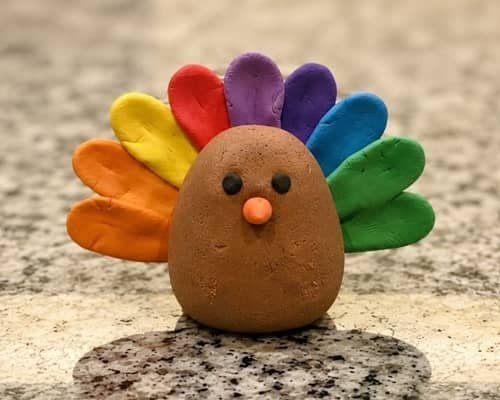
Start with brown air dry foam clay for the turkey’s body.
Take a fairly large piece and roll it gently between your palms until it becomes a rounded, slightly oval shape.
Now make the face. Take a tiny piece of orange foam clay, roll it into a small cone and flatten the tip slightly to create the beak.
Add two tiny black foam-clay balls for the eyes.
Keep the eyes fairly large and simple because this is a kids’ craft and we want the turkey to have a friendly expression.
Now comes the part that makes our turkey unmistakable… the colorful tail.
Make 7 small pieces of foam clay in different colors. I’d use orange, yellow, red, purple, blue, green and brown.
Roll each piece into a ball, then flatten it into a teardrop or feather shape. Don’t worry if every feather isn’t exactly the same.
In fact, a little unevenness makes the finished sculpture look more handmade.
Use a blunt plastic sculpting tool or craft stick to press one shallow line down the middle of each feather.
Arrange the feathers behind the turkey’s upper body in a fan shape. Start with the center feather, then place the remaining feathers slightly outward on both sides. Press their lower ends gently together so they form one solid tail.
Important: Don’t cover the entire back with clay. Leave the lower center area relatively clear because we’ll eventually add the wizard robe around the turkey.
At this point, you should have a brown turkey with a colorful fan-shaped tail, two eyes and an orange beak. No wizard costume yet.
Step 2: Build the Wizard Robe
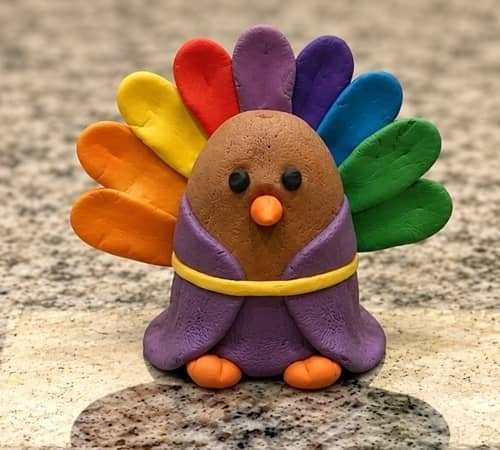
Here’s where the disguise really starts.
Choose purple, dark blue or another color for the wizard robe.
Take a large piece of foam clay and flatten it between your fingers into a thin oval sheet.
It shouldn’t be paper-thin. Aim for roughly 3 to 5 mm thickness.
Wrap the clay around the lower portion of the turkey body like a tiny robe.
Don’t cover the face, wings or feet.
Press the edges gently against the body so the robe stays attached. Then create a simple V-shaped opening down the front using a blunt sculpting tool.
I like making the robe slightly uneven at the bottom because it gives the wizard a more handmade appearance.
Add a narrow strip of yellow or gold-colored foam clay around the waist.
That becomes the wizard’s belt.
Step 3: Add the Turkeys Feet and Wings
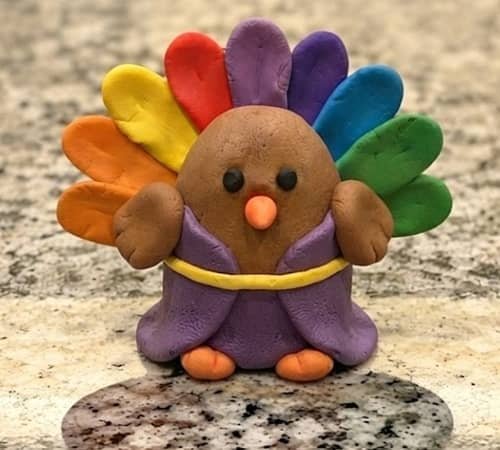
Now let’s give our little turkey some structure.
Roll two very small orange pieces into short cylinders for the legs. Flatten the bottom ends so they look like simple feet.
For each foot, make three tiny toe shapes by pressing shallow lines into the orange clay with a blunt plastic tool.
The wings are even easier. Take two equal pieces of brown foam clay and flatten each one into a rounded teardrop.
Place one wing on each side of the body.
Press gently rather than squeezing. Foam clay can lose its shape if little fingers keep moving it around.
The turkey should now look complete enough to recognize, even before the disguise is added.
Step 4: Sculpt the Oversized Wizard Hat
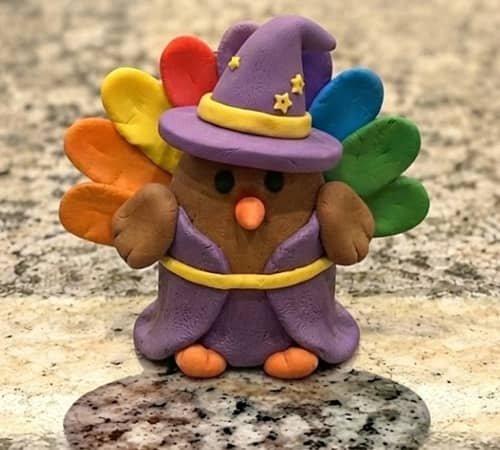
This is my favorite part.
Take purple foam clay and roll it into a ball first. Then gradually stretch one side upward until you have a cone.
Don’t make the cone perfectly straight.
Bend the tip slightly to one side. A crooked hat looks much more like a playful wizard hat than a stiff geometric cone.
For the brim, flatten another piece of purple clay into a small round disc.
Place the cone on the center of the disc and press the two pieces together.
Add a thin yellow band around the bottom of the hat.
You can also flatten two tiny yellow pieces into stars and place them on the hat.
The hat should be slightly oversized compared with the turkey. That exaggerated proportion makes the disguise instantly readable.
Step 5: Make the Magical Wand
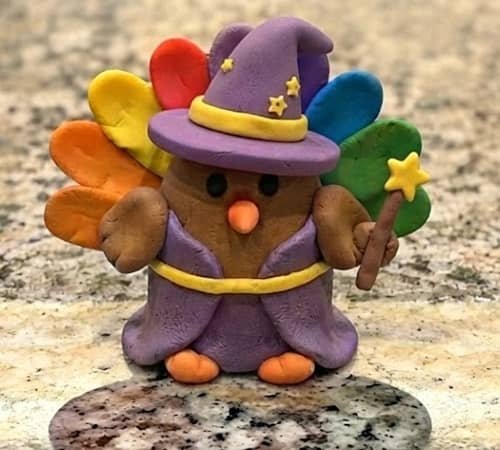
Every wizard needs a wand, right?
Take a very small piece of brown or black foam clay and roll it into a thin cylinder.
Keep it short. A wand around the length of the turkey’s body works nicely.
Now make a tiny yellow star.
Start with a small yellow ball. Flatten it gently, then use a blunt plastic tool to create five shallow points.
Attach the star to the end of the wand.
Place the wand diagonally across one wing or beside the turkey’s body.
If it doesn’t stay attached, let the clay firm up according to its package instructions and attach the completely dried wand with a tiny amount of suitable craft glue under adult supervision.
Step 6: Add the Magical Turkey Details
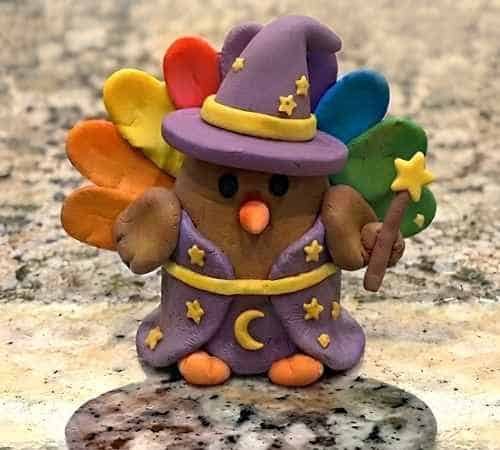
Now we can make this wizard Turkey disguise craft feel like our own creation.
Add two tiny yellow stars to the robe.
You could also make a small crescent moon from yellow foam clay and place it beside the belt.
For an extra fun touch, create three tiny purple or yellow clay dots around the wand. They can represent magical sparks.
Keep these decorations small. Too many details can make the turkey look crowded.
What I love about this part is that kids can make their own decisions.
One child might create a spooky wizard for Halloween-style play, while another may make a cheerful Thanksgiving wizard for November.
The turkey are still clearly visible, which is important for a disguise-a-turkey school project.
Step 7: Let the Foam Clay Dry
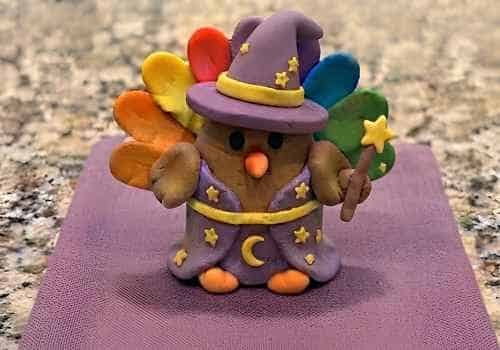
Don’t rush this part.
Place the finished turkey on a clean, flat surface and allow the air dry foam clay to dry according to the manufacturer’s instructions.
Drying time depends on the thickness of the clay, room temperature and the particular product you’re using.
Avoid putting the sculpture directly under strong heat to speed things up. That can cause unwanted changes in the shape.
Once completely dry, gently check the hat, wings, robe and wand.
If a small piece has loosened, an adult can repair it using an appropriate child-safe craft adhesive.
And that’s it. Your turkey has officially gone from ordinary bird to tiny magical wizard.
Helpful Tips for Working With Air Dry Foam Clay
Foam clay is forgiving, but a few habits make a big difference.
Work with small portions: Keep unused clay covered or sealed so it doesn’t dry prematurely.
Don’t soak the clay: If your product allows water for smoothing, use only a tiny amount.
Build thin details separately: The hat band, stars and wand are easier to control when made independently.
Let thick sections dry properly: A chunky robe or large hat can take longer than tiny decorations.
Keep the turkey recognizable: Since this is a turkey disguise project, don’t cover every feather or facial feature.
And remember, air-dry clay, foam clay, modeling clay and salt dough don’t behave exactly the same way.
For this particular project, lightweight foam clay is useful because it is easy to shape and doesn’t require baking.
Final Thoughts
The clever part of a turkey disguise project isn’t really the costume. It’s the transformation.
When kids turn a familiar turkey into a wizard, they’re practicing proportion, texture, shaping and visual storytelling at the same time.
I also like that this version doesn’t depend on complicated cutting or tiny mechanical pieces.
The slightly crooked hat, uneven robe and handmade stars are actually part of its charm.
If you’re making it for a November classroom display, let every child give their wizard a different personality.
Those little differences is what makes a wall full of handmade turkeys far more interesting than a row of identical templates.





