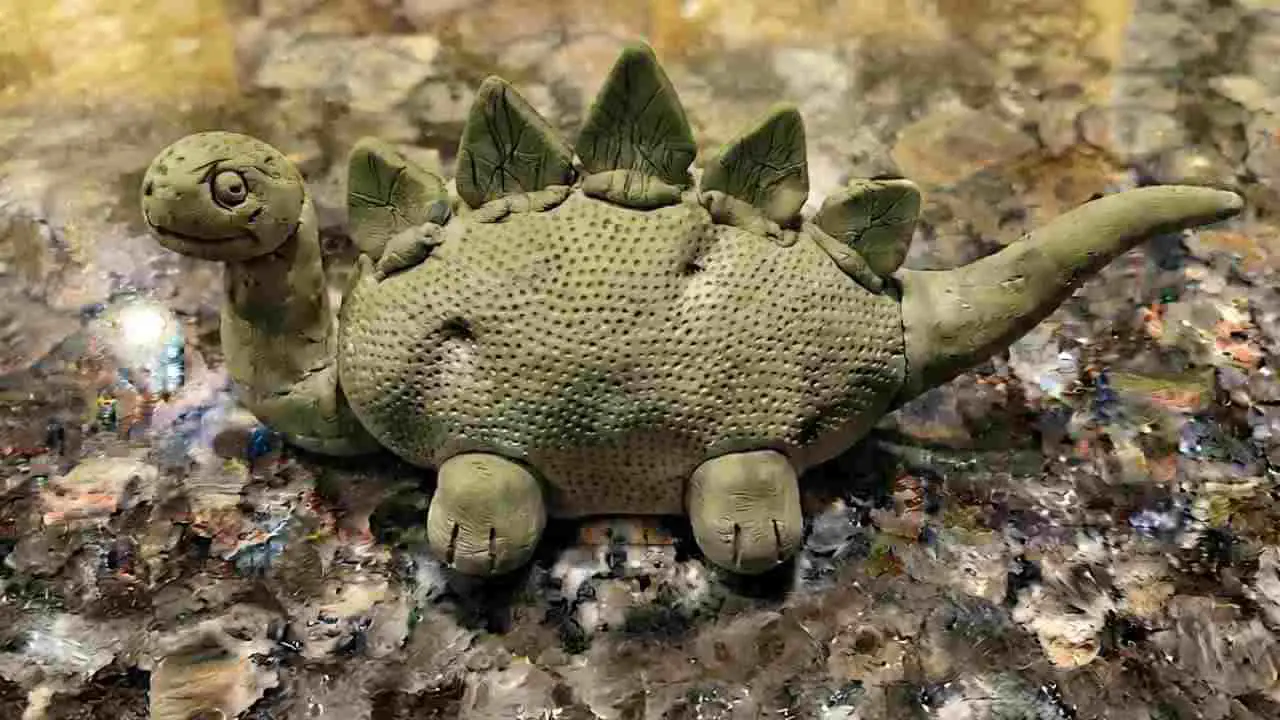
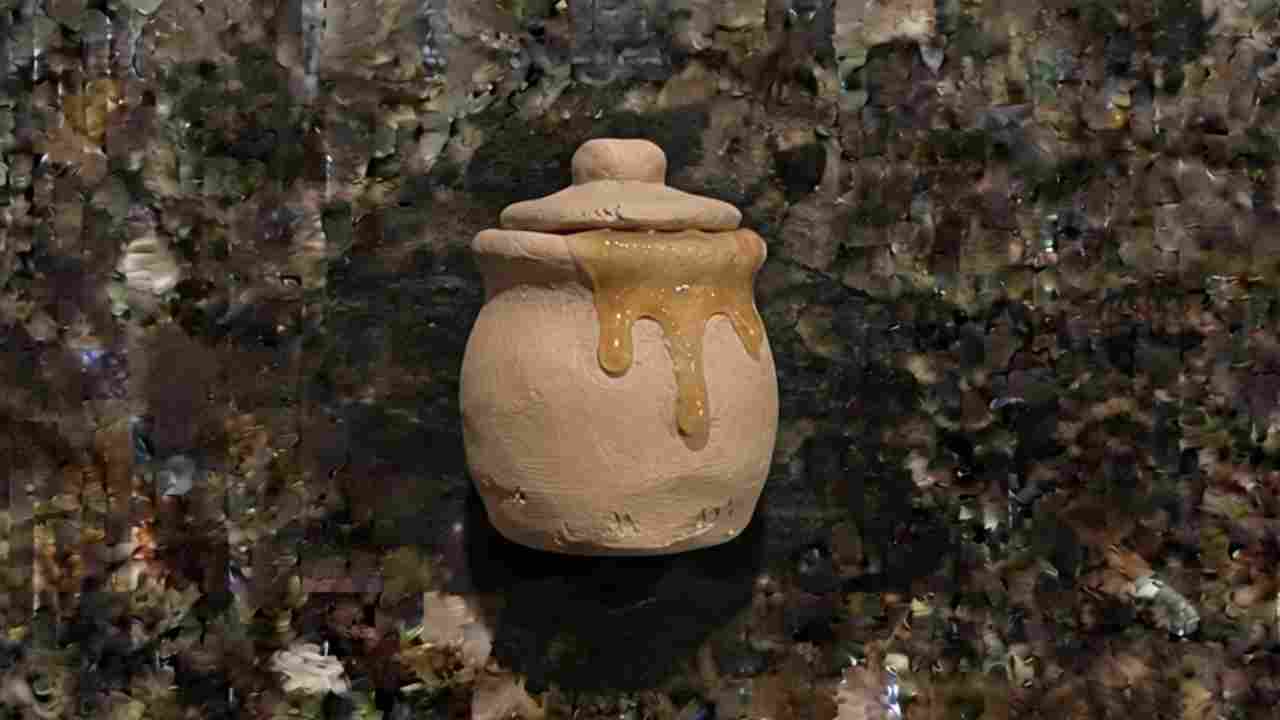
Teachers hang onto thoughtful presents far longer than expensive ones.
A tiny handmade piece sitting on a desk can remind them of a favorite student years later.
That’s why I love making clay gifts for teachers using polymer clay instead of buying something from a store.
They’re affordable, surprisingly relaxing to create, and every single piece ends up with its own little personality.
Don’t worry if you’ve never worked with polymer clay or any clay for that matter.
These projects are broken into simple steps that anyone can follow, and none of them require fancy artistic skills. Sometimes imperfect looks even more charming.
Choose Your Polymer Clay Type
→ Sculpey | FIMO Soft | Regular ←
Affiliate Disclaimer: Some of the links in this post may be affiliate links, which means I may earn a small commission if you choose to make a purchase through them – at no extra cost to you. I only share products that genuinely fit this project and can help make your ceramic mug clay craft process easier and smoother. Your support helps keep ideas like this coming.
1. Apple Slice Bookmark Charm with Personalized Initial
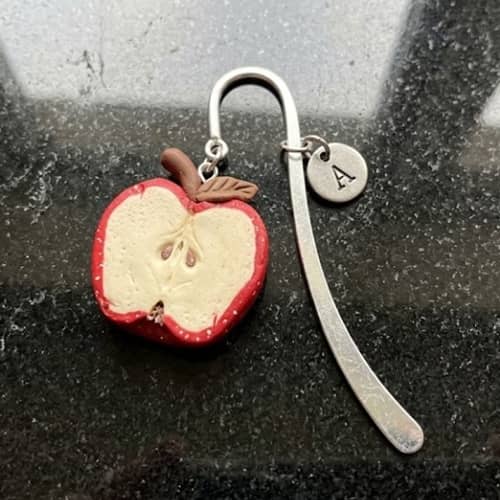
Everyone expects a whole apple. I say skip it.
A tiny apple slice attached to a bookmark feels fresh, playful, and it actually gets used.
It also doubles as one of those handmade gifts for teacher that doesn’t take hours to finish.
Start by conditioning a ball of red polymer clay until it feels soft instead of stiff.
Roll another tiny piece of cream-colored clay for the inside of the apple.
Flatten both pieces slightly with your fingers instead of a roller because slight unevenness makes it look handmade.
Trim one side so the shape becomes a sliced apple rather than a full circle.
Add a thin brown stem using a tiny snake of clay and press two green leaves beside it.
Don’t worry if one leaf is slightly bigger. Nobody notices unless you tell them.
Use a toothpick to make five tiny seed holes in the center, then press very small black clay dots into those holes.
If you want extra realism, gently texture the cream section using an old soft toothbrush.
Now make a tiny circle from white clay. Press the teacher’s first initial into it using a letter stamp or carefully carve it with a craft knife.
Bake according to your clay brand’s instructions.
After cooling, attach the apple slice and initial charm to a metal bookmark using a jump ring.
Add a satin ribbon if you’d like a softer finish. It look surprisingly expensive even though it wasn’t.
2. Tiny Book Stack Desk Buddy with Hidden Encouragement Note
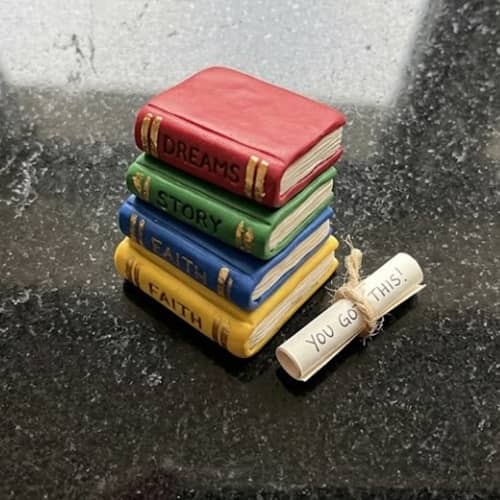
Teachers collect books. So why not make one that smiles back?
This little desk decoration is small enough to sit beside a computer monitor without taking up valuable classroom space.
I honestly think this is one of my favorite polymer clay gifts because it feels personal.
Condition white, navy blue, mustard yellow and dark green clay separately.
Roll each color into a small rectangle about the size of your thumb. Stack them unevenly so they resemble four tiny books piled together.
Press lightly instead of squeezing hard. You want the layers to stay visible.
Use a needle tool to draw thin horizontal lines around each book edge. These become the pages.
Add tiny decorative lines or miniature dots on the spines to imitate book titles.
Now here’s the twist.
Roll a tiny hollow tube from white clay, almost like a miniature scroll.
Write a tiny encouraging note on a narrow strip of paper before rolling it tightly.
Messages like “You make learning fun” or “Thank you for believing in us” work beautifully.
Place the rolled note underneath the finished clay books after baking rather than sealing it inside.
The teacher discovers the hidden message later, which makes the gift far more memorable than an ordinary decoration.
A small matte varnish keeps fingerprints away without making everything overly shiny.
3. Pencil Cup Mini Planter for Succulents
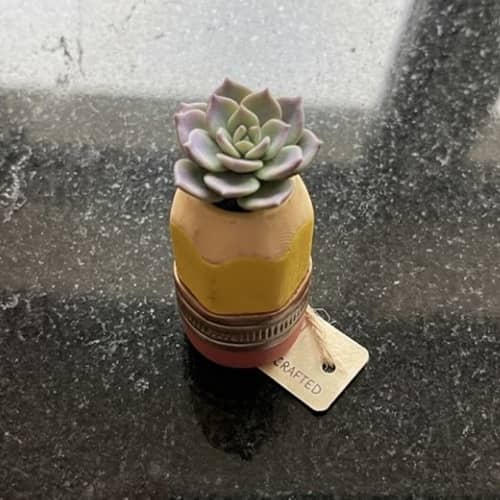
Who says pencil holders have to hold pencils?
This version works as a tiny succulent planter, candy holder, paper clip organizer, or even a cheerful classroom decoration.
That’s what makes a good teacher craft – it’s flexible.
Begin with aluminum foil rolled into a cylinder. Cover it evenly using light yellow polymer clay about 4 mm thick.
Smooth the sides with your fingers until the surface becomes fairly even.
Wrap a thinner strip of pink clay around the top edge to create the eraser.
Add an even thinner silver strip beneath it to imitate the pencil ferrule.
Roll tiny black clay into a cone and attach it to the bottom so the container resembles a standing pencil.
Using a needle tool, lightly draw vertical wood grain lines near the pencil tip. These little details make a huge difference.
Bake the entire piece while keeping the foil inside for support.
Once cooled completely, place a tiny artificial succulent or cactus inside.
Real plants need drainage holes, so decorative faux greenery works much better here.
There is lots of people who prefer the artificial ones anyway because they’re maintenance free.
This project also pairs nicely with other DIY gifts for teacher, especially if you’re making a classroom appreciation basket.
4. Personalized Clay Keychain with Classroom Icons
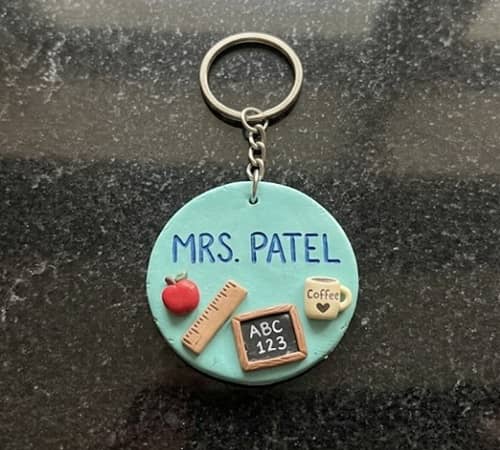
Every teacher carries keys.
Instead of making an ordinary tag, create a layered clay keychain filled with miniature classroom symbols that tell a tiny story.
Roll beige polymer clay into a rounded rectangle around 2½ inches tall.
Smooth the edges with your fingertip. Don’t obsess over perfect symmetry because handmade pieces have character.
Now make miniature decorations.
A tiny apple.
A microscopic ruler.
A chalkboard rectangle.
A yellow school bus.
Teachers really deserve coffee, so perhaps even a small coffee mug.
Arrange only three or four icons so the design stays clean. Press them gently onto the base without flattening the details.
Use alphabet stamps or carefully carve the teacher’s name near the bottom.
Add one small hole before baking so you don’t accidentally crack the clay afterward.
Bake as directed on the packet, then let everything cool naturally.
Apply a satin glaze if desired, then attach the finished charm to a sturdy keyring.
If your teacher happens to love animated characters, you could even add subtle polymer clay Disney-inspired colors without copying copyrighted designs directly. A color palette often says enough.
It’s small. It’s practical. And every single day they’ll actually use it.
5. Plant Marker Set That Makes Every Classroom Plant Feel Special
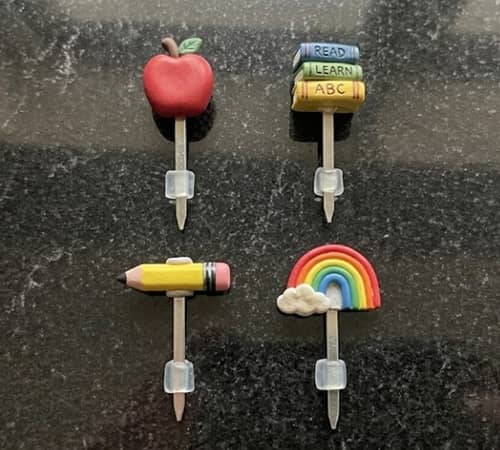
Some classrooms have that one lonely little plant sitting by the window. Why not give it a personality?
This project creates decorative plant markers that can also work as desk labels, which makes them one of those clay gifts for teachers that stay useful all year.
They’re simple enough for beginners, yet they look surprisingly thoughtful.
Condition green, white, brown, and pastel-colored polymer clay until each color feels soft and flexible.
Roll the clay to about ⅛ inch thick using an acrylic roller or a smooth drinking glass.
Cut four small circles, ovals, or speech bubbles.
Don’t worry if they aren’t perfectly identical. Handmade things wasn’t ever meant to be factory perfect.
Roll a thin snake of brown clay for each marker stem.
Flatten one end slightly and gently press the decorative topper onto it.
Reinforce the back with a tiny extra piece of clay if needed so it won’t snap after baking.
Decorate each topper differently. One could have a tiny smiling apple. Another might feature stacked books.
Add a miniature pencil, a globe, or even a tiny rainbow because classrooms deserve cheerful colors.
Use a needle tool to lightly score details before adding tiny clay pieces so they stick better.
Personalize one marker with “Best Teacher,” another with the teacher’s name, and leave the remaining ones with encouraging words like “Grow,” “Imagine,” or “Read.”
Letter stamps help, but carving slowly with a needle works just as well.
Bake according to your clay manufacturer’s directions. Once cooled, apply a thin coat of matte varnish for durability if desired.
These pair beautifully with a small potted succulent and instantly become memorable polymer crafts that don’t feel generic.
6. Teacher Survival Trinket Tray with Mini School Supplies
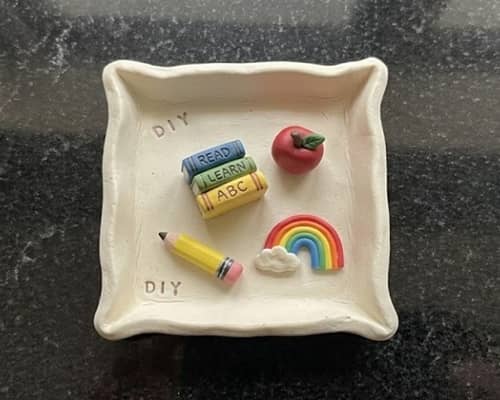
Teachers always seem to have tiny things floating around their desk.
Paper clips.
Sticky notes.
Hair ties.
Random binder clips.
A handmade trinket tray gives all those little items a home while adding color to the classroom.
Start with a ball of white or pastel polymer clay.
Roll it into a circle roughly five inches across and about ¼ inch thick.
Place it over an upside-down cereal bowl lined with parchment paper so the edges naturally curve downward.
Smooth fingerprints with your fingertip dipped in a tiny bit of rubbing alcohol. It works better than most beginners expect.
Now decorate only one side of the tray rather than covering the whole thing. Less really does look better here.
Create miniature classroom-themed embellishments like a tiny notebook, scissors, ruler, paper airplane, crayons, and an apple.
Press them gently into the rim while leaving the center open so the tray remains practical.
Add the phrase “Teaching Changes Everything” or personalize it with the teacher’s last name.
Bake carefully, allowing the bowl to support the shape throughout the baking process.
After cooling, seal with a satin finish if you’d like a little extra protection.
This is one of those polymer clay DIY projects that feels much more expensive than the materials actually cost.
7. Mini Friendship Bracelet Holder with Clay Apple Accent
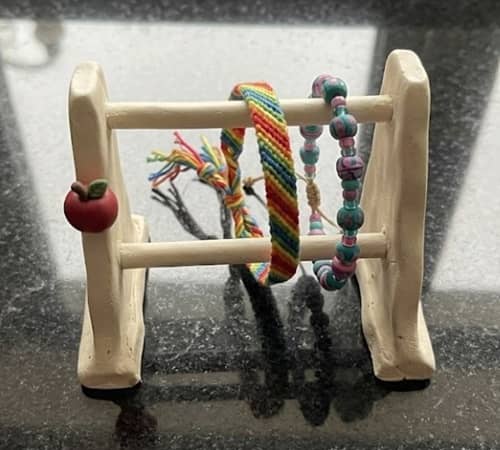
Friendship bracelets aren’t just for kids anymore.
Teachers often receive bracelets from students, but they usually end up tucked inside a drawer.
This simple display stand gives those keepsakes a proper place while introducing a fun DIY bracelet craft element.
Roll beige polymer clay into a cylinder about four inches long. Shape it into a smooth rounded display bar, almost like a tiny log.
Create two sturdy rectangular supports from matching clay and gently attach the bar across them. Blend the seams carefully using your fingertip.
Before baking, make a miniature red apple no larger than a marble. Add a brown stem and two tiny green leaves.
Place it slightly off-center on one support rather than directly in the middle. That uneven placement actually makes the design feel more modern.
Texture the apple with a soft toothbrush to remove the overly smooth appearance. If you like, add a microscopic heart beside it using pink clay.
Bake according to the package instructions and allow everything to cool completely before handling.
Slide one or two handmade friendship bracelets over the display bar.
The teacher can replace them anytime with bracelets collected from students over the years, making the gift more meaningful as time goes on.
Honestly, this may become one of those diy gifts for teacher that keeps growing with memories instead of staying exactly the same forever.
8. Storybook Door Hanger with Tiny Reading Friends
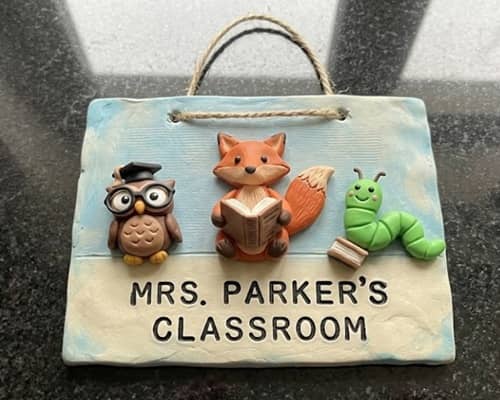
Reading corners deserve something whimsical.
Instead of making another classroom sign, create a miniature door hanger inspired by favorite storytime moments.
It works wonderfully as one of those timeless clay gifts for teacher because every teacher can display it somewhere.
Condition cream-colored polymer clay until soft and roll it into an oval roughly four inches tall.
Cut a hole near the top large enough to fit over a cabinet knob or classroom hook.
Around the edges, build a raised border using a thin rolled rope of clay. Blend it lightly without squashing the shape.
Now comes the fun part.
Create three tiny reading companions. Think a smiling owl with oversized glasses, a friendly fox holding a book, and a little worm peeking out of an open storybook.
These aren’t difficult if you break each one into basic shapes like circles, teardrops, and tiny cylinders.
Arrange the characters around the lower half of the plaque, leaving space in the middle for the teacher’s name or a phrase like “Reading Time” or “Adventure Starts Here.”
If your teacher loves classic animation, you can subtly borrow cheerful color palettes reminiscent of polymer clay Disney themes while creating completely original characters. That keeps everything unique and personal.
Bake, cool completely, then thread a soft ribbon through the hanging hole.
The little figures doesn’t have to be perfect. Their tiny crooked smiles are exactly what gives the finished piece its charm.
9. Crayon Name Plate That Looks Like It Jumped Off a Teacher’s Desk
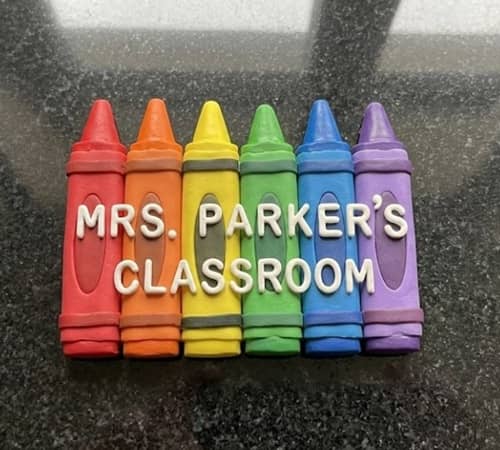
Walk into almost any classroom and you’ll spot crayons somewhere. So instead of making another plain name sign, turn the crayons into the sign itself.
This is one of my favorite clay gifts for teachers because it feels playful without looking childish. Plus, beginners can absolutely pull it off.
Condition red, blue, yellow, green, orange, purple, black, and white polymer clay until each color bends easily without cracking.
Roll each color into a cylinder about 3 inches long and gently taper one end into a crayon tip.
Flatten the opposite end just a little so every crayon sits nicely beside the next one.
Arrange five or six crayons side by side, pressing them together gently until they form one solid plaque.
Don’t mash them flat. You still want each crayon shape to stay visible.
Now roll tiny white clay letters spelling the teacher’s name. Place the letters across the crayons before baking.
If rolling letters feels intimidating, use alphabet stamps instead.
For extra personality, add one miniature smiling crayon tucked into the corner, almost as if it’s waving.
Tiny details like this make polymer clay gifts feel custom instead of mass-produced.
Bake according to your clay brand’s instructions. After cooling, glue a small wooden stand to the back if you’d like it displayed upright on a desk.
It ain’t hard once you finish the first crayon. The rest comes together surprisingly fast.
10. Tiny Classroom Memory Jar with Mini Clay Notes
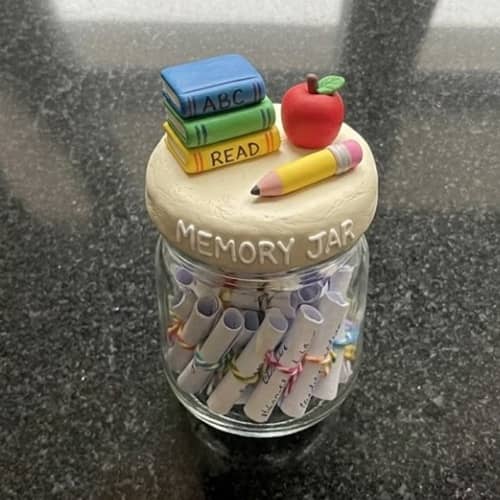
Not every gift has to be useful.
Sometimes it just needs to make somebody smile.
This miniature memory jar combines polymer clay, tiny handwritten notes, and a keepsake that can stay on a classroom shelf for years.
It’s one of those handmade gifts for teacher that quietly becomes sentimental over time.
Begin by covering a small glass jar lid with pastel blue or mint green polymer clay.
Smooth the surface carefully, trimming away excess clay with a craft knife.
Now create tiny clay decorations for the lid. A little apple, stacked books, a smiling pencil, and a miniature ruler all work beautifully.
Keep every piece smaller than your thumbnail. Press them gently onto the lid, blending only the bottoms so they stay secure.
Bake only the clay-covered lid according to package instructions.
While it cools, cut several tiny strips of colorful paper. On each strip, write one short appreciation message.
“Thanks for making math easier.”
“You believed in me.”
“I’ll never forget your class.”
Roll every note tightly and tie some with embroidery thread while leaving others loose inside the jar.
Finish by tying a ribbon around the neck of the jar.
It feels simple, but teachers often treasure handwritten words far more than expensive presents. Funny how that works, isn’t it?
This project also pairs nicely with other small teacher craft ideas if you’re putting together a gift basket.
11. Coffee Mug Spoon Rest with Tiny Cookie and Apple Details
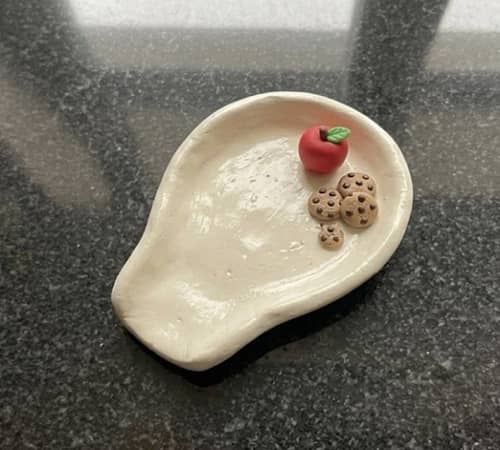
Let’s be honest…
Teachers deserve coffee.
Probably lots of it.
Instead of making another mug, create a spoon rest that sits beside their favorite cup.
It’s practical, easy to clean, and different from most clay gifts for teachers you’ll find online.
Roll cream-colored polymer clay into a circle about 4½ inches wide and around ¼ inch thick.
Lay it over a shallow bowl lined with parchment paper to create a gentle curve.
Smooth the edges using your fingertips until they feel comfortable to touch.
Shape a tiny red apple no larger than a marble and place it near one edge.
Beside it, make two miniature chocolate chip cookies using tan clay with tiny dark brown dots pressed into the surface.
Use a needle tool to add subtle texture to the cookies so they resemble baked edges rather than perfectly smooth circles.
Personalize the opposite side with the teacher’s initials or the word “Coffee” using stamped letters.
Bake while the clay remains supported by the bowl. Let everything cool naturally before removing it.
Add a food-safe resin coating only if your chosen clay manufacturer recommends it for decorative kitchen accessories.
This little project fits beautifully alongside other polymer crafts, especially when gifting a favorite coffee blend or hot chocolate mix.
12. Mini “Classroom in a Frame” Shadow Box Keepsake
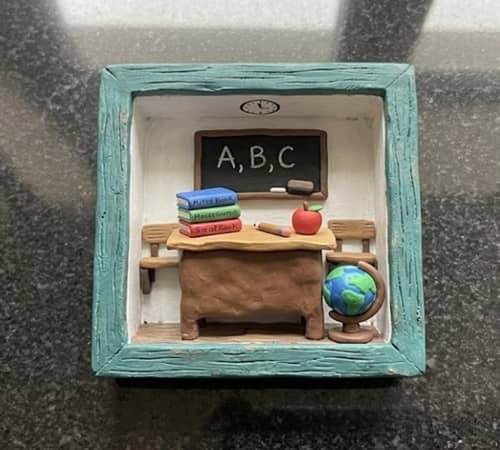
Here’s something teachers almost never receive.
A tiny classroom they can display anywhere.
This miniature framed scene turns ordinary polymer clay into a tiny world filled with classroom memories.
It may take a little longer than the others, but the finished result feels incredibly special.
Start with a small shadow box frame about five inches square. Remove the backing and paint it a neutral color if needed.
Roll brown clay into a miniature teacher’s desk. Build it from simple rectangles instead of trying to sculpt everything at once.
Next, make tiny books, an apple, a globe, stacked notebooks, a pencil cup, and one little chalkboard.
The chalkboard can display a handwritten message like “Thank You” or the current school year.
Arrange all the pieces inside the frame before baking anything.
This lets you experiment with the layout until it feels balanced. Sometimes moving one tiny book half an inch makes the whole thing look better.
Bake each clay piece separately according to the manufacturer’s directions.
Once cooled, glue everything inside the shadow box using strong craft adhesive.
Add a small personalized name plaque across the bottom edge.
If your teacher enjoys magical stories, subtle color choices inspired by polymer clay Disney aesthetics can add a playful touch while keeping every figure completely original.
There are so many tiny details here, and somehow that’s exactly what makes people stop and look twice.
Final Thoughts
The best clay gifts for teachers aren’t the ones with flawless edges or perfectly matched colors.
They’re the ones that clearly took time, patience, and genuine thought to create.
Funny enough, those tiny fingerprints, slightly uneven lines, or crooked little apples often become the details that make a gift feel truly one of a kind. That’s something a factory simply can’t copy.
If you’re just getting started with polymer clay, don’t chase perfection on your first project.
Focus on making something meaningful instead.