Spooky season is creeping up fast, and honestly, who isn’t tired of the same old plastic store-bought junk? If you wanna level up your spooky decor this year, making your own halloween clay figures is the ultimate way to go.
Why settle for boring when you can cook up a whole miniature monster mash right on your kitchen table? Crafting these little ghouls is honestly therapeutic, and it’s a great halloween clay craft to tackle over a weekend.
Let’s dive into some weirdly unique, slightly chaotic designs that will make your friends do a double-take!
Choose Your Clay Type For These Projects
Air Dry Clay | Polymer Clay
Affiliate Disclaimer: Some of the links in this post may be affiliate links, which means I may earn a small commission if you choose to make a purchase through them – at no extra cost to you. I only share products that genuinely fit this project and can help make your ceramic mug clay craft process easier and smoother. Your support helps keep ideas like this coming.
1. The One-Eyed Melted Candy Corn
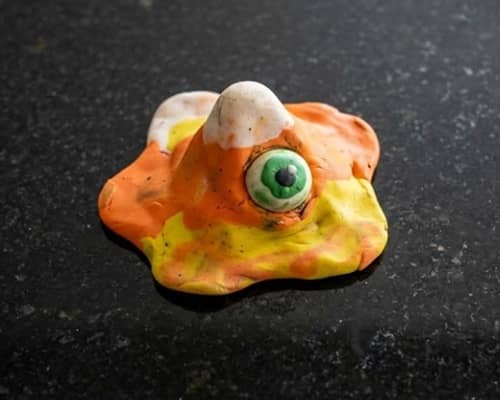
Forget that pristine, perfectly tri-colored candy corn everyone always makes. We are going for a mutant, half-melted version that looks like it survived a nuclear autumn.
What You’ll Need
- Air-dry or polymer clay (Yellow, Orange, White, and a tiny bit of Neon Green)
- A toothpick or needle tool
- Glossy glaze varnish
Step-by-Step Instructions
First, grab a chunk of yellow clay and roll it into a thick, messy pancake for the base.
Don’t make it perfect – let the edges sag! Next, roll out a slightly smaller cone of orange clay and squash it right on top of the yellow layer.
Now, pinch a small blob of white clay into a droopy teardrop shape and press it onto the very top.
Here is where the magic happens: take your toothpick and drag it downwards across the seams where the colors meet to create a “melting” liquid drip effect.
For the twist, roll a tiny ball of neon green clay, flatten it onto the orange section, and press a smaller black dot inside it to create a creepy, bloodshot eyeball.
Bake or air-dry according to package directions, then slather on a thick coat of glossy glaze so it looks wet and slimy.
Pro Tip: If your clay layers aren’t sticking together, use a tiny drop of water or liquid clay to bond them before baking!
2. Neon Pink Disco Frankenstein
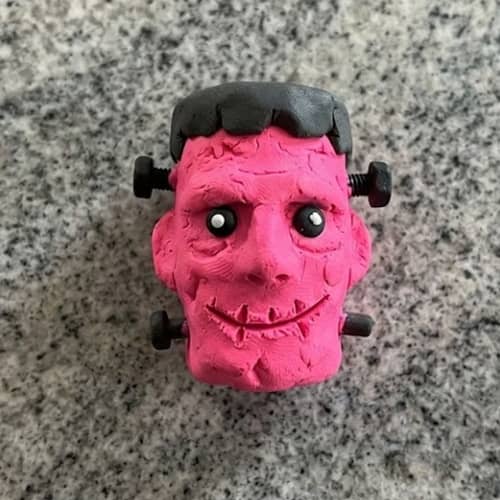
Who said monsters only wear drab green? Let’s give Frank a glamorous, retro makeover that screams 1970s dance floor horror.
What You’ll Need
- Neon Pink, Metallic Silver, and Jet Black clay
- A butter knife or flat scraping tool
Step-by-Step Instructions
Start by molding a large chunk of neon pink clay into a thick, chunky rectangular block for the head. Use your fingers to pinch out a heavy, prominent brow ridge near the top.
For the hair, roll out some black clay into a flat sheet, cut a zigzag pattern along one edge, and drape it over his head like a stylish toupee.
Now, take two tiny bits of metallic silver clay and shape them into tiny cylinders; press these into the sides of his lower neck to act as his iconic bolts.
They don’t even have to be level, which makes it look cooler! Scratch a jagged, crooked smile into his pink face using your knife tool.
In my opinion, cute Halloween clay crafts like this really pops out on a shelf because of the wacky color contrast.
I have made a detailed and better version of Halloween Clay Frankenstein Craft Here.
Also Read: Halloween Bedroom Decor Ideas
3. The Sentient Pumpkin Pot Pie
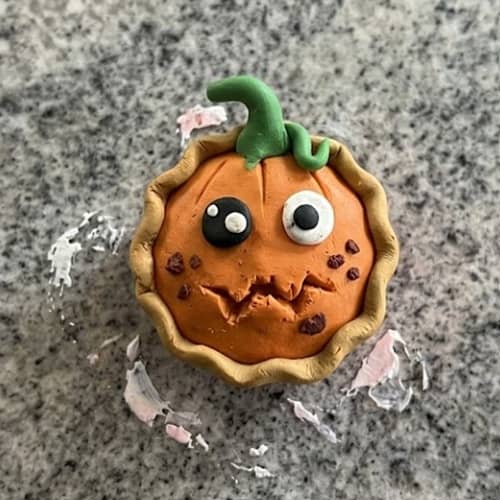
Let’s combine baking and sculpting into a bizarre, whimsical masterpiece that looks good enough to eat – but don’t.
Things You’ll Need
- Terra cotta or tan clay, Dark Orange clay, and Dark Brown clay
- Toothpick
Step-by-Step Instructions
Roll out the tan clay into a flat circle to form your pie crust.
Press it gently into a small, shallow bowl shape. Next, roll a big ball of orange clay, flatten it slightly, and stuff it inside your crust.
Take your toothpick and press tiny lines along the edge of the tan clay to mimic a crimped pie crust edge.
Now, instead of a normal lattice top, use a knife to cut out three tiny triangle eyes and a jagged mouth from a flat piece of tan clay, and lay it over the orange center.
It should look like a clay Halloween pumpkins face is bursting out from inside a pastry!
Also See: Clay Ghost Projects For Halloween
4. Cosmic Pastel Witch Hat
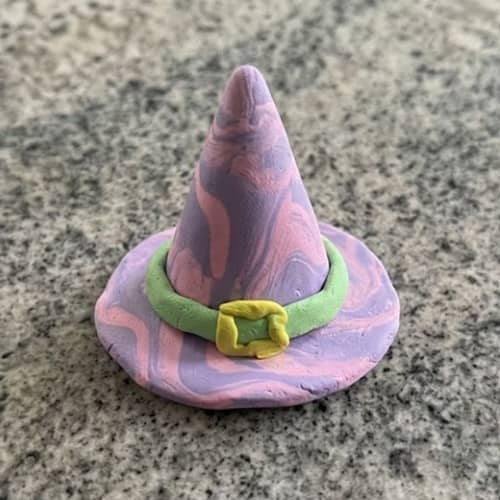
Witches are cool, but galaxy-themed, pastel-colored witch hats are infinitely better than plain old black wool.
What You’ll Need
- Pastel Purple, Mint Green, and Soft Pink clay
- Glitter powder
Step-by-Step Instructions
Mingle your purple and pink clay together lightly, but do not mix them completely – you want a marbled, swirly look.
Roll this marbled mixture into a wide, flat circle for the hat brim.
Next, twist another chunk of the marbled clay into a tall, winding cone that curves dramatically at the tip.
Press the cone firmly onto the center of your brim. Roll a thin snake of mint green clay and wrap it around the base of the cone to form the hatband.
Sprinkle a generous amount of glitter over the entire piece before it dries to give it that magical, cosmic shimmer.
This project is one of those perfect diy Halloween craft projects for anyone who loves alternative aesthetics.
Also Learn To Make: Halloween Clay Gnome Craft
5. The Shy Mummy
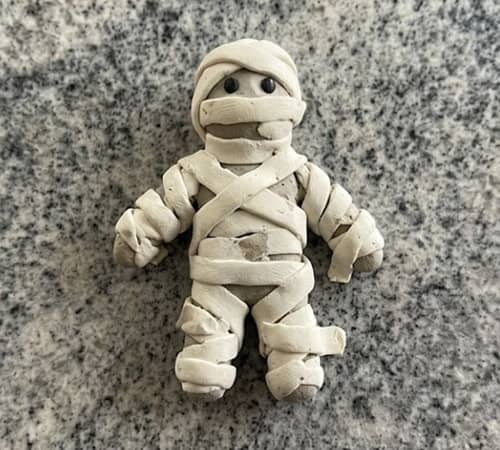
Mummies are usually terrifying, but this little guy is just trying to get some cozy rest after a long century of haunting.
What You’ll Need
- Off-white or Cream clay, Charcoal Grey clay
- A rolling pin or smooth marker
Step-by-Step Instructions
First, create an oblong, pill-shaped body out of the charcoal grey clay.
Flatten a large chunk of cream-colored clay with your rolling pin until it’s super thin.
Cut this sheet into dozens of thin, uneven strips using a butter knife. Wrap these strips around the grey body haphazardly, overlapping them wildly.
Make sure you leave a small gap near the top so the grey peeks through. Inside that little gap, poke two tiny holes with a toothpick to simulate his shy, peeking eyes.
When figuring out how to make Halloween clay crafts that stand out, playing with textures like these overlapping bandages is key.
Also Read: Primitive Clay Halloween Decor Ideas
6. The Glitched Ghost
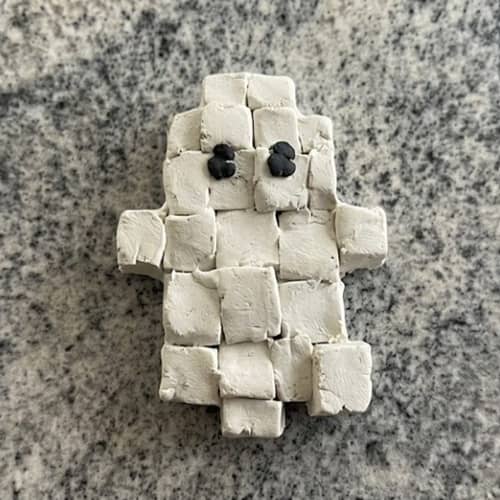
Traditional ghosts are overdone, so let’s make a digital, pixelated phantom that looks like a video game error.
Materials Needed
- White, Translucent, and Light Blue clay
- Square grid cutter or a sharp hobby knife
Step-by-Step Instructions
Flatten your white clay into a thick slab. Instead of smoothing it into a classic dome, use your knife to cut rigid, blocky steps along the outer edges to create a pixelated silhouette.
Do the same with small bits of light blue and translucent clay, stacking them slightly offset behind the white body to give it a “chromatic aberration” glitch effect. Cut out square blocks for the eyes rather than circles.
This creates a wildly unique addition to your collection of cute Halloween decorations.
7. The Crying Spider Broccoli
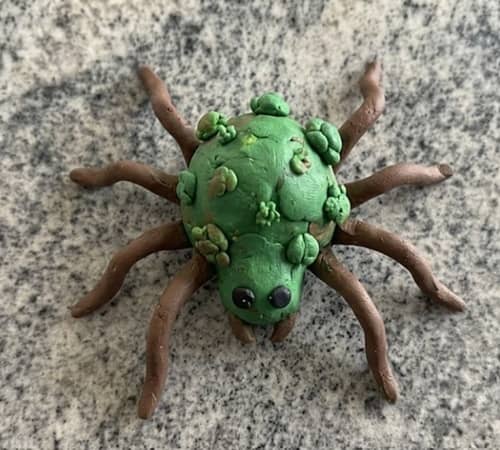
What happens when you mix a terrifying arachnid with a universally avoided vegetable? Pure, unadulterated art.
What You’ll Need
- Deep Green, Lime Green, and Black clay
- Toothpick
Step-by-Step Instructions
Roll a thick stalk out of deep green clay, making it wider at the bottom.
For the top of the broccoli, roll dozens of tiny lime green balls and mash them together onto the stalk to form a textured, bumpy canopy.
Now for the creepy part: roll out eight spindly, thin black legs and attach them to the base of the green stalk so it can walk around.
Use your toothpick to texturize the canopy even more by poking hundreds of tiny dots into the clay surface.
8. Gothic Vampire Teacup
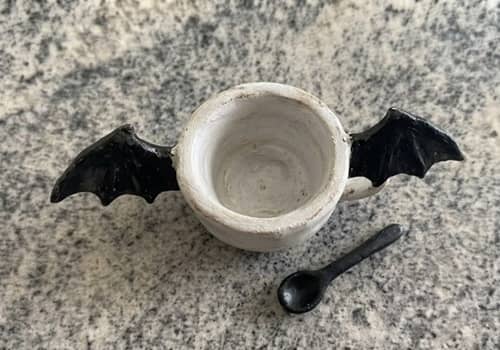
Let’s craft a sophisticated vampire who decided to turn into a piece of fine porcelain dinnerware instead of a bat.
What You’ll Need
- Crimson Red, Bone White, and Black clay
- Sculpting wire or paperclip (optional for handle support)
Step-by-Step Instructions
Shape a lump of bone white clay into a hollow, stubby cup shape.
Attach a small, curved handle made of white clay to the side, perhaps inserting a bit of wire inside for stability.
Roll out a thin sheet of black clay and wrap it around the top rim of the cup, cutting it into elegant, sweeping bat-wing points that drape down the sides.
Fill the inside of the teacup with smooth, liquid-looking crimson red clay right up to the brim so it looks full of a spooky beverage.
This elegant yet bizarre creation becomes a fantastic Halloween clay Art especially for decorators who want a classy vibe.
9. The Melted Candle Zombie
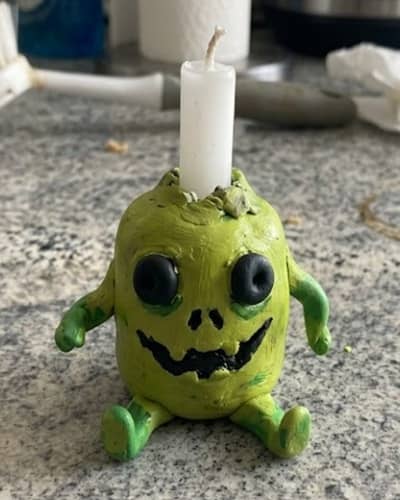
Zombies are usually gory, but a zombie made of dripping, colorful candle wax is much cleaner and way cooler to look at.
Items Needed
- Slime Green, Blood Red, and Yellow clay
- A real birthday candle wick
Step-by-Step Instructions
Sculpt a basic, rough cylinder out of the slime green clay to serve as the zombie torso and head. Roll out long, thin snakes of yellow and red clay.
Drape these colorful snakes from the top of the head all the way down the body, flattening them with your thumb so they look like pools of running, melted wax.
Press a small piece of a real candle wick directly into the center of the head.
10. The Extraterrestrial Black Cat
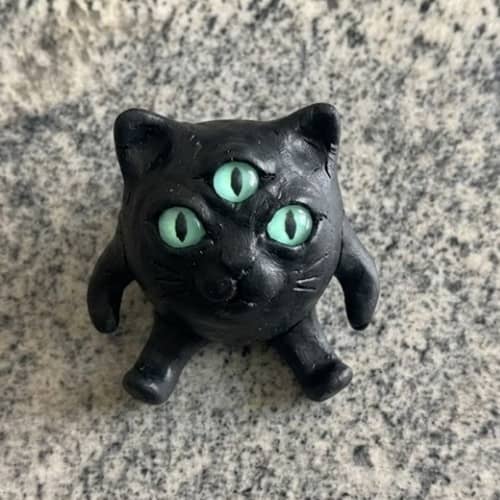
Black cats are a staple of autumn, but this one came straight from a UFO to crash your local party.
What You’ll Need
- Pitch Black, Glow-in-the-Dark, and Deep Purple clay
Step-by-Step Instructions
Form a smooth, pear-shaped body using your black clay. Instead of two eyes, give this cat three large, almond-shaped eyes made out of the glow-in-the-dark clay.
Position the third eye right in the middle of its forehead! Add two long, alien-like antennae with purple tips onto its head instead of standard ears.
Also See: Boo Basket Ideas For Halloween
11. The Grumpy Candy Apple Monster
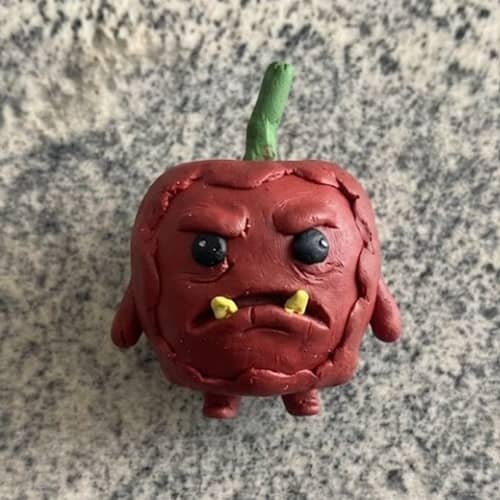
A sweet autumn treat that bites back! This little guy is angry about being dipped in caramel.
Materials Needed
- Bright Red, Glossy Brown, and White clay
- A real wooden popsicle stick
Instructions To Make Grumpy Apple Monster
Roll a perfect, plump sphere out of bright red clay. Push a real wooden stick halfway down into the top of the sphere.
Next, take your brown clay and drape it unevenly over the top half of the red apple, letting it ooze downwards in fat droplets.
Use a knife to carve a giant, angry mouth into the red exposed part, and stuff it with tiny, jagged white clay triangles for teeth.
12. The Haunted Tombstone Sofa
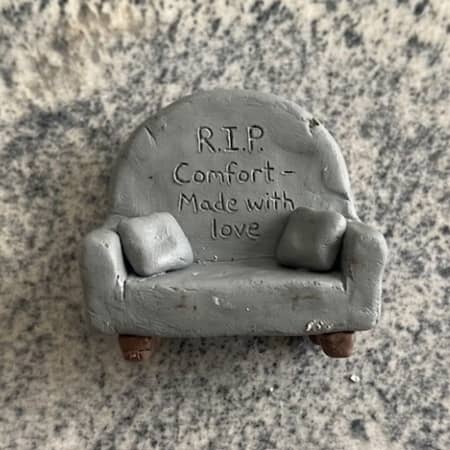
Where do tired ghosts sit down after a long night of rattling chains? On a comfy, haunted Victorian sofa, obviously.
What You’ll Need
- Granite-effect or Grey clay, Deep Purple clay
- A blunt needle or dotting tool
Step-by-Step Instructions
Sculpt a long, rectangular block out of your grey clay to form the base cushion of the sofa.
For the backrest, shape a flat, rounded tombstone silhouette out of more grey clay and attach it firmly to the back of the cushion.
Use purple clay to add tiny, plush armrests on either side. Take your dotting tool and press small indentations into the tombstone backrest to give it a luxurious, tufted cushion texture.
Final Thoughts
Stepping away from traditional, copy-paste seasonal decor allows your creative spirit to actually breathe.
Making halloween clay figures isn’t about achieving factory-grade perfection, it’s about capturing that cozy, chaotic, homemade energy that makes autumn crafting so memorable.
These weird little guys tell a story on your shelves that nothing from a big-box retail store could ever replicate.
So fire up your oven, clear off a workspace, and don’t be afraid to let your clay creations look a little bit wonky, wonderfully weird, and completely your own!





