There is something oddly satisfying about turning a tiny lump of polymer clay into a character that instantly feels alive.
This Halloween Clay Frankenstein project became one of my favorite Halloween-themed crafts because it doesn’t need fancy sculpting skills or expensive tools.
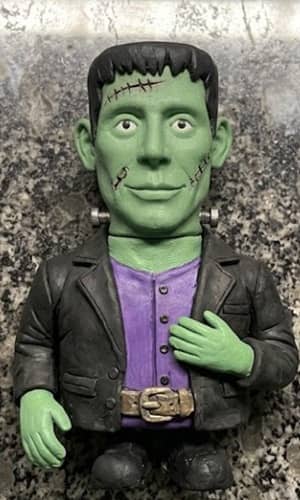
Even if you’ve never made Halloween clay figure projects before, you’ll be surprised how quickly the blocky head, goofy expression, and tiny bolts start looking like the classic movie monster.
The best part? Every finished figure ends up with its own personality, which means yours don’t have to look exactly like mine – and honestly, thats what makes handmade crafts fun.
Choose Your Polymer Clay Type
→ Sculpey | FIMO Soft | Regular ←
Affiliate Disclaimer: Some of the links in this post may be affiliate links, which means I may earn a small commission if you choose to make a purchase through them – at no extra cost to you. I only share products that genuinely fit this project and can help make your ceramic mug clay craft process easier and smoother. Your support helps keep ideas like this coming.
Materials Needed To Make Halloween Clay Frankenstein
Keep everything nearby before starting. It makes the entire process much smoother.
- Green polymer clay
- Black polymer clay
- White polymer clay
- Grey polymer clay
- Small amount of pink clay (optional)
- Tiny amount of brown clay
- Clay blade
- Dotting tool or ball stylus
- Toothpick
- Silicone shaping tool
- Acrylic roller (optional)
- Baking tile or ceramic tile
- Oven (follow clay manufacturer’s instructions)
Step 1: Build the Signature Frankenstein Head
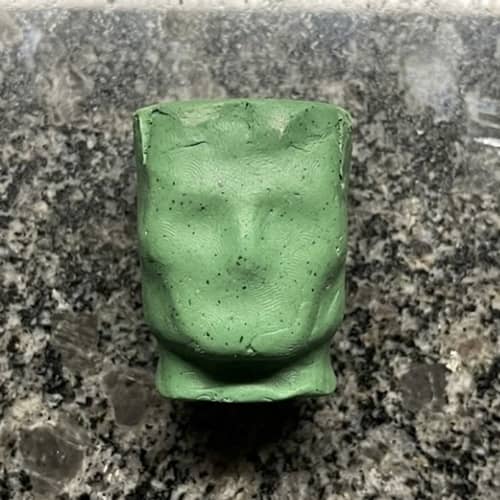
Forget making a perfect sphere. Frankenstein’s head actually looks better when it’s slightly boxy.
Roll a medium-sized ball of green polymer clay between your palms until smooth.
Now gently press the top and both sides with your fingers to flatten them. Rotate it often while pressing so every side stays balanced.
Don’t worry if one corner looks just a little uneven. Tiny imperfections make handmade monsters look believable.
Now flatten the bottom slightly so the head sits without rolling away.
Next, gently pinch the chin area to create a subtle jawline. You aren’t making sharp angles – just enough to separate the face from the neck.
Finally smooth fingerprints using a silicone tool or your fingertip.
Already starting to look like Frankenstein? Yep, kinda.
Step 2: Shape the Face Before Adding Details
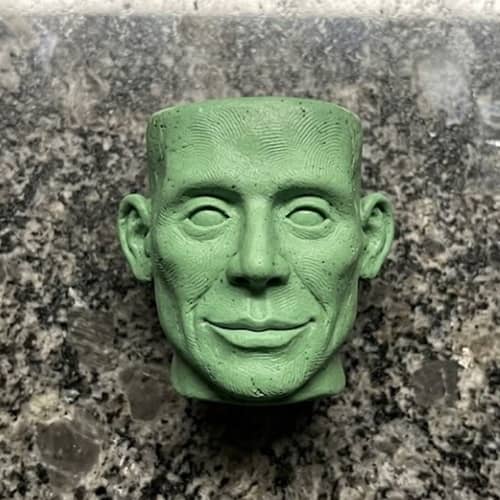
This step changes everything.
Use your thumb to gently press two shallow eye sockets. Keep them level, but don’t obsess over perfect symmetry because real handmade figures rarely are.
Roll a tiny green cylinder and attach it down the center for the nose.
Use a dotting tool to press a small smiling mouth underneath.
Then create tiny ears using two miniature flattened circles.
Lightly blend every connection with your silicone tool until everything looks like one piece instead of separate clay bits.
If the face feels slightly awkward…good. Frankenstein isn’t supposed to be pretty.
Step 3: Add the Hair, Eyes and Neck Bolts
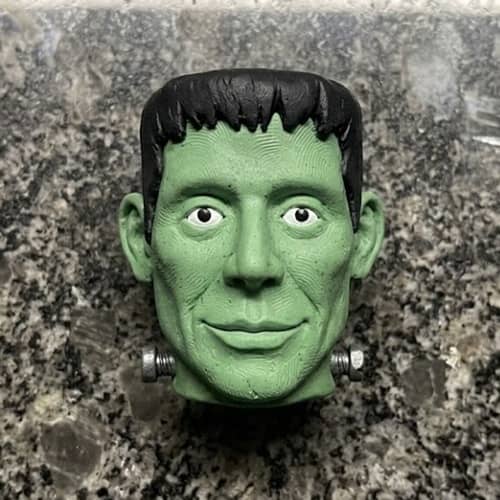
Now your polymer clay Frankenstein begins looking unmistakable.
Flatten black polymer clay into a thin sheet.
Cut rough zig-zag edges before placing it across the top of the head. Instead of making perfectly neat hair, create little chunky spikes and uneven edges. They add charm.
Roll two tiny white balls for the eyeballs.
Place miniature black dots inside them.
Press the eyes gently into the sockets.
Roll two short gray cylinders.
Attach one on each side of the neck as Frankenstein’s famous metal bolts.
Tiny details suddenly make everything feel complete, doesn’t they?
Use a needle tool to add tiny texture around the hairline if you’d like.
Step 4: Create the Body and Attach the Head
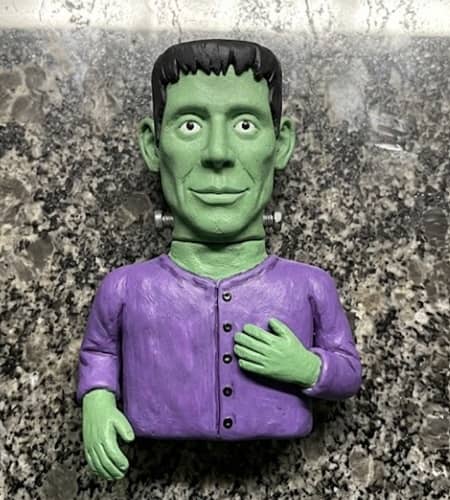
Let’s give your monster somewhere to stand.
Roll green clay into a short thick cylinder for the neck.
For the body, shape purple polymer clay into a rounded rectangle.
Flatten the front very lightly.
Attach the neck first.
Now carefully place the head on top.
Push gently until everything joins securely.
Smooth the connection using a silicone tool.
Next roll two tiny green cylinders for arms.
Attach them near the shoulders.
Keep them slightly bent instead of perfectly straight.
Small natural poses usually looks much more interesting.
Step 5: Sculpt the Clothes and Tiny Character Details
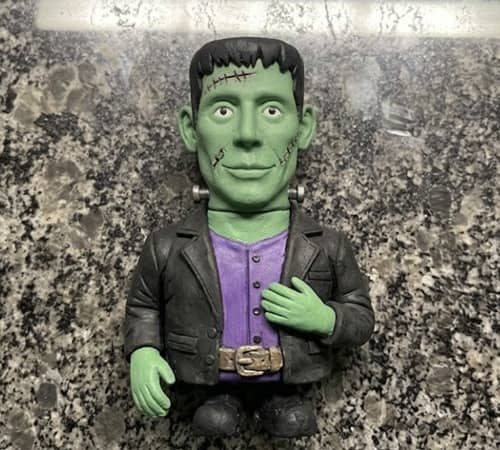
Here’s where your halloween clay frankenstein stops looking like basic clay and starts becoming an actual Halloween display piece.
Roll a very thin strip of black clay.
Wrap it around the waist as a belt.
Add tiny black shoes.
Create simple jacket edges by layering very thin black clay strips over the shoulders.
Using a toothpick, press tiny stitch marks around one cheek and across the forehead.
Don’t press too deep.
Tiny stitched scars work much better than oversized cuts.
You can even add a little pink blush inside the ears if you enjoy softer handmade styles.
This is also where many polymer clay Halloween crafts begin showing personality rather than just technique.
Step 6: Bake, Cool and Finish the Surface
Before baking, inspect every angle.
If you notice fingerprints, gently smooth them with a soft silicone tool.
Check that the head sits straight.
Make sure the bolts aren’t loose.
Bake according to your polymer clay manufacturer’s recommended temperature and time.
Never guess the temperature because different brands cure differently.
Once baked, allow everything to cool completely before touching.
Seriously…don’t rush this part.
Warm polymer clay feels firmer than it really is and can still bend if handled too early.
After cooling, lightly buff any rough spots if needed.
A tiny satin glaze on the eyes can create a fun cartoon shine without making the entire figure glossy.
This same finishing approach works wonderfully across many Halloween clay characters, polymer clay monster tutorial projects, and other Halloween monster clay crafts.
Step 7: Optional Mini Display Base
Want your monster to feel extra special?
Make a tiny display base.
Make a tiny oval out of dark gray polymer clay by flattening it.
Texture it using aluminum foil to imitate rough stone.
Attach a few tiny orange pumpkins, one miniature gravestone, or scattered fallen leaves around the feet.
Don’t overcrowd it.
Negative space helps your Frankenstein remain the star.
This little base transforms a simple clay craft into a shelf decoration that instantly feels finished.
It also photographs beautifully if you’re sharing your work online or building a collection of clay figures halloween creations.
Helpful Beginner Tips
- Condition polymer clay thoroughly before sculpting.
- Build larger shapes first before adding details.
- Blend seams slowly instead of pressing hard.
- Keep fingers clean when switching between light and dark colors.
- Rotate the figure constantly while sculpting instead of working from only one side.
- If a piece becomes too soft, let it rest for 10–15 minutes before continuing.
- Photograph each stage. It becomes much easier to recreate your favorite monster later.
Final Thoughts
One thing I’ve noticed after making lots of Halloween characters is that memorable creations rarely come from perfect sculpting – they come from tiny decisions that give each figure a personality.
Maybe your Frankenstein gets oversized boots, a crooked grin, or ridiculously fluffy hair.
Thats the kind of detail people remember. As your confidence grows, try mixing this monster with ghosts, pumpkins, witches, or vampires to build an entire handmade Halloween village.
You’ll naturally improve with every figure, and before long, creating unique polymer clay halloween crafts won’t feel intimidating anymore – it’ll become part of your yearly Halloween tradition.





