If your child loves cheerful cartoon characters and enjoys creating things with their own hands, this air dry clay Alvin and chipmunks craft is a project worth trying.
It isn’t difficult, yet it teaches shaping, patience, and attention to tiny details without feeling like a lesson.
I enjoy projects that look impressive but don’t demand fancy tools. This one does exactly that.
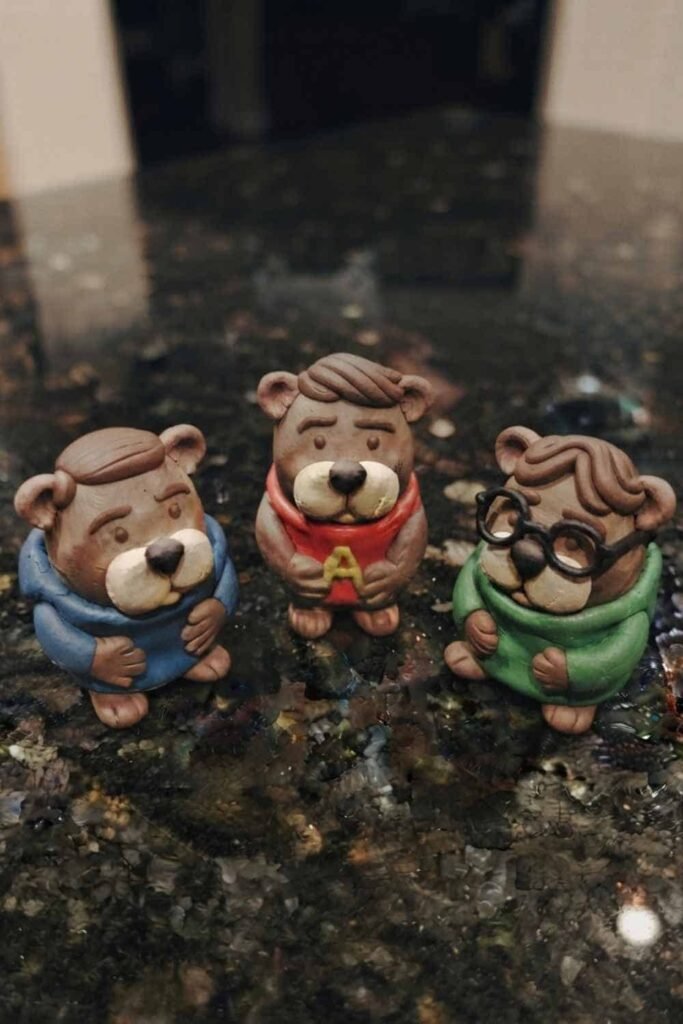
You’ll slowly transform small pieces of clay into three adorable chipmunks while learning simple sculpting tricks that beginners can actually follow.
And yes, it looks much harder than it really is. Once you finish one character, making the rest suddenly feels much easier.
Choose Your Air Dry Clay Type
Regular Air Dry Clay | Cornstarch Clay | Homemade Clay
Affiliate Disclaimer: Some of the links in this post may be affiliate links, which means I may earn a small commission if you choose to make a purchase through them – at no extra cost to you. I only share products that genuinely fit this project and can help make your ceramic mug clay craft process easier and smoother. Your support helps keep ideas like this coming.
Materials Needed To Make Air Dry Clay Alvin and Chipmunks Craft
- Brown air dry clay (light and dark shades if available)
- Red, blue, and green air dry clay
- Beige or cream air dry clay
- White air dry clay
- Black air dry clay
- Small amount of yellow clay
- Clay sculpting tool or toothpick
- Acrylic roller or smooth bottle
- Small paintbrush (optional)
- Water for smoothing
- Silicone mat or clean granite countertop
- Clear matte varnish (optional after drying)
You May Also Like: Alvin and Chipmunks Paper Craft (DIY KIDS Craft Idea)
Step 1: Shape the Three Chipmunk Bodies
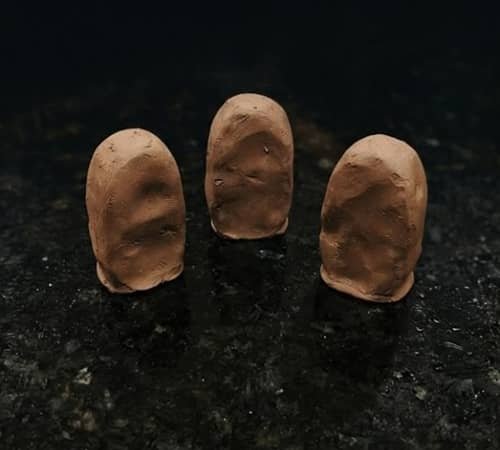
Start by dividing your clay into three equal portions.
Roll each piece into a smooth oval about the size of a golf ball.
Gently flatten the bottom so every figure can stand on its own without wobbling.
Now pinch the upper section slightly to suggest shoulders instead of leaving everything perfectly round.
It doesn’t have to be perfectly identical because handmade characters always look more charming with tiny differences.
Place the three bodies next to one another and compare their height before moving forward.
Keeping them similar now saves adjustments later.
Step 2: Build the Heads and Signature Chipmunk Faces
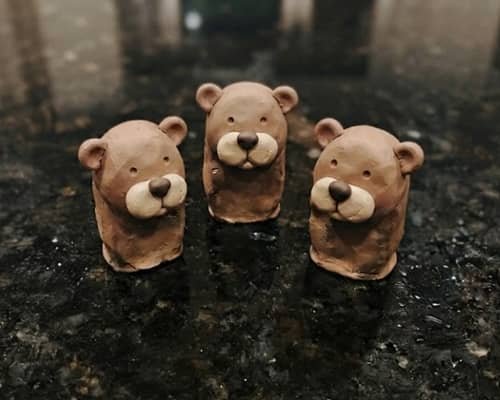
Roll three slightly smaller balls for the heads.
Attach each head using a tiny amount of water and gently blend the neck area with your finger.
Create a rounded muzzle using beige clay and press it onto the lower half of each face.
Add tiny black noses and shallow smile lines with a sculpting tool.
Press two small flattened circles into the face for eye sockets before adding white eyes and tiny black pupils.
Suddenly they starts looking alive. Add rounded ears near the top of each head using two small brown discs.
Step 3: Add Alvin, Simon and Theodore’s Outfits
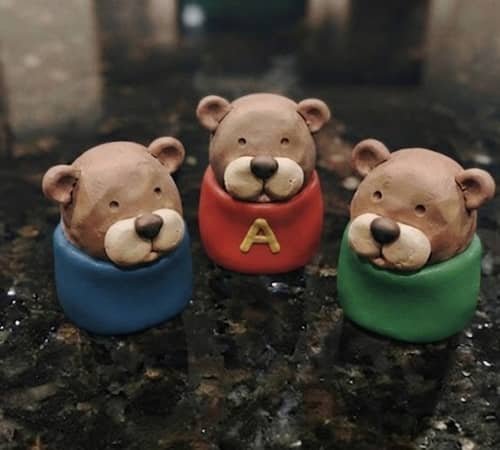
This is where the personalities appear.
Cover Alvin’s torso with red clay and press a tiny yellow letter “A” onto the center.
Dress Simon in blue and Theodore in green using thin sheets of clay wrapped around the body.
Smooth every seam carefully using damp fingertips.
Don’t rush here because fingerprints become much more noticeable after the clay dries.
Tiny wrinkles are okay though, they actually makes the clothing feel handmade instead of factory perfect.
Your air dry clay cartoon character craft should already be instantly recognizable from above.
Step 4: Create the Arms, Legs and Oversized Feet
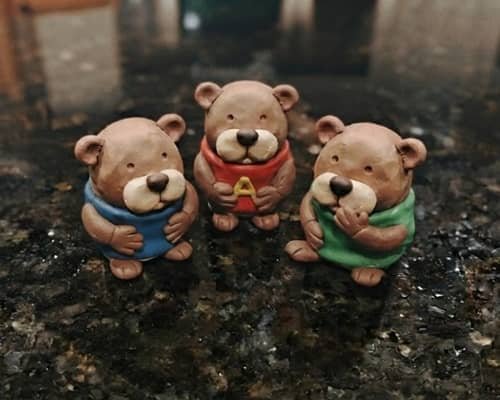
Roll thin clay snakes for the arms and attach them along the sides of each shirt.
Bend them slightly instead of leaving them perfectly straight because natural poses look much friendlier.
Form short legs using thicker rolls and flatten tiny oval feet underneath.
Add simple hands by gently pinching the ends before pressing shallow finger lines with a toothpick.
This step really changes everything.
The characters now begin looking like miniature figures instead of simple clay dolls.
If you’re making a diy alvin and the chipmunks clay craft, balanced proportions matter more than perfect details.
Step 5: Sculpt the Hair and Final Expressions
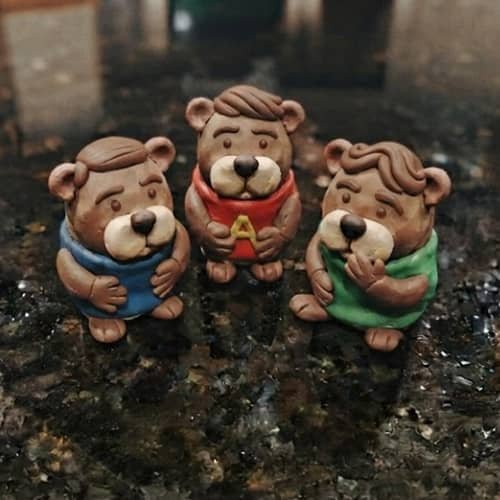
Roll tiny strips of brown clay to build their hairstyles.
Alvin’s hairstyle should point upward with playful spikes.
Simon’s hair stays neat and rounded while Theodore’s looks softer and slightly fuller.
Add tiny eyebrows and refine each smile using the sculpting tool.
Small changes around the eyes create surprisingly big expressions.
If one face looks slightly uneven, gently smooth it with a damp fingertip instead of starting over.
Handmade charm beats machine perfection every single time.
Step 6: Add the Finishing Details
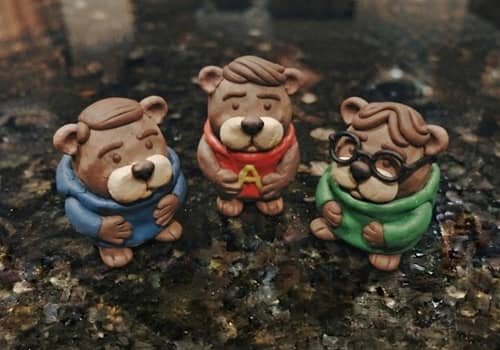
Now attach Simon’s simple round glasses using thin black clay ropes.
Refine Alvin’s yellow “A” if needed and smooth Theodore’s shirt edges.
Check that every figure stands steadily before leaving them untouched to dry for at least 24 to 48 hours depending on humidity.
After drying completely, apply a thin layer of matte varnish if you want extra durability.
They was surprisingly sturdy after drying, even though air dry clay feels delicate while fresh.
Your air dry clay Alvin and chipmunks craft is finally complete and ready for display.
Creative Ways to Use Your Finished Clay Chipmunks Craft
This kid’s craft can become much more than shelf decoration.
- Display the figures in a child’s study room.
- Create a small cartoon-themed birthday centerpiece.
- Turn them into desk companions.
- Use them as storytelling characters during family craft time.
- Pair them with Alvin and the Chipmunks puppets for imaginative play sessions.
- Build a larger cartoon display by adding an Alvin doll beside the handmade figures.
- Include them in an animal craft collection featuring other woodland-inspired clay creations.
- Expand the idea into a complete air dry clay craft weekend project by sculpting additional cartoon friends.
Final Thoughts
One thing I appreciate about cartoon-inspired clay projects is how forgiving they are.
Tiny fingerprints, uneven smiles, or slightly different ear sizes rarely ruin the final result because animated characters naturally have playful personalities.
That makes this air dry clay Alvin and chipmunks craft perfect for beginners who are still learning basic sculpting techniques.
After finishing these three chipmunks, you’ll already understand proportion, layering, texture, and facial expression well enough to design completely original characters too.
Skills grow much faster when every project teaches several techniques instead of only producing another decoration, and that’s exactly why this craft remains enjoyable long after the clay has dried.





