Creating an Air dry clay deer craft does not have to feel complicated.
I actually enjoy projects that look handmade because that’s where the personality shows up.
This little clay craft uses shapes, making it perfect for beginners, families, and anyone exploring air dry clay crafts for the first time.
If you’ve been looking for an easy kids craft that doesn’t demand fancy sculpting skills, this one is worth trying.
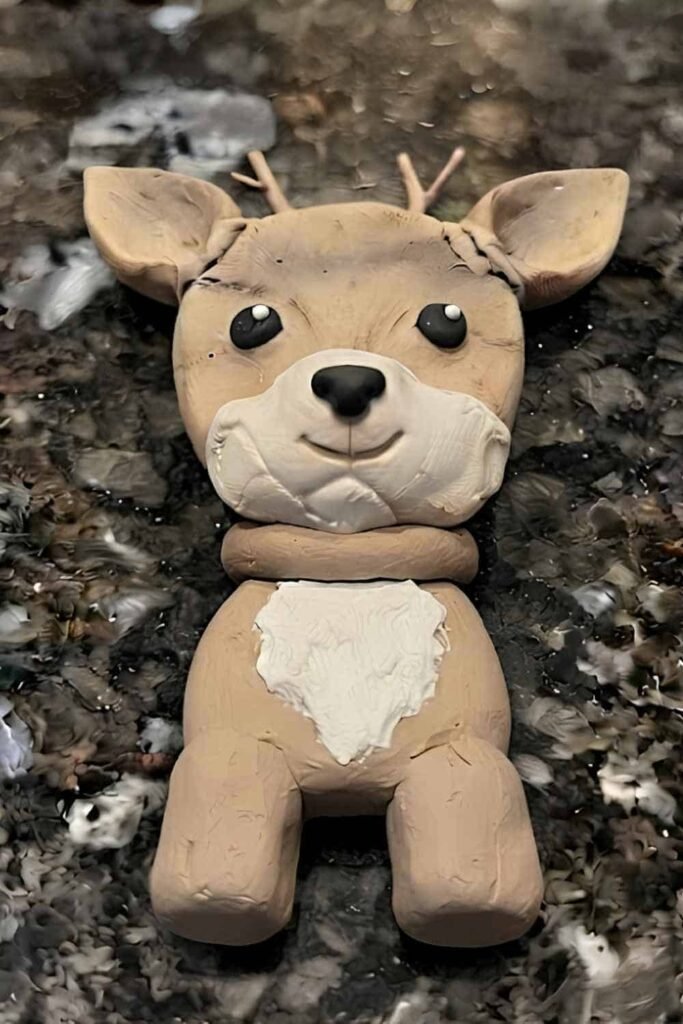
Even if your deer ends up slightly lopsided, that’s perfectly okay. It still looks adorable.
And honestly, those tiny imperfections makes every handmade deer feel one of a kind.
Materials Needed To Make Air Dry Clay Deer Craft
- Air dry clay (light brown, white, black and a tiny amount of dark brown)
- Clay sculpting tool or butter knife
- Toothpick
- Small rolling tool or marker
- Bowl of water
- Soft paintbrush
- Acrylic paint (optional for finishing)
- Clear matte varnish (optional)
You May Also Like: Paper Deer Craft (Woodland Kids Craft Using Simple Shapes)
Step 1: Build the Main Head Shape
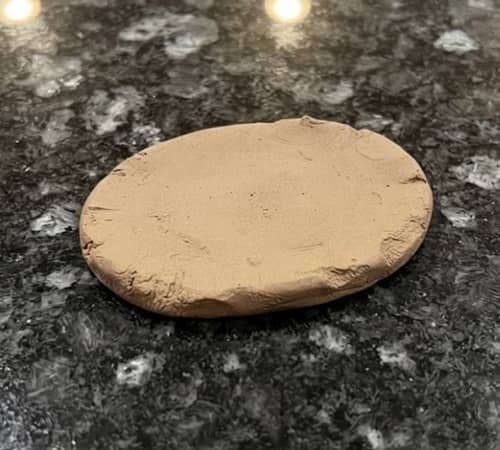
Roll a medium-sized clay ball and gently flatten it into a rounded oval.
It’s OK if it’s not perfectly symmetrical because real handmade projects rarely are… so dont worry here.
Now pinch one end slightly to create the beginning of the muzzle.
Smooth the edges with a damp fingertip but avoid adding too much water. The surface should stay soft without becoming sticky.
Take a moment and compare both sides. Is one cheek a little fuller? Leave it.
Tiny differences help your air dry clay deer craft feel natural instead of factory made.
Step 2: Shape the Ears and Tiny Antlers
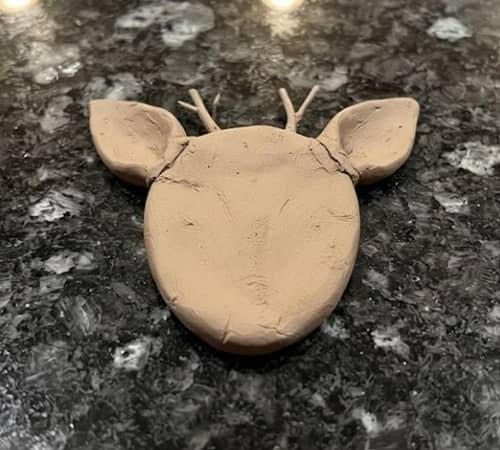
Roll two small teardrops for the ears.
Flatten them gently and press a shallow groove down the center using a sculpting tool.
Attach one ear to each side of the head with a tiny bit of water.
Next, roll two thin clay snakes. Split each into short branches to form tiny beginner-friendly antlers. Don’t overthink them.
This isn’t a moose with giant antlers or an elaborate reindeer sculpture.
Keep each antler to just two or three branches so it’s easy for kids.
Mine wasn’t perfectly matching, and thats completely fine.
Step 3: Add the Muzzle and Nose
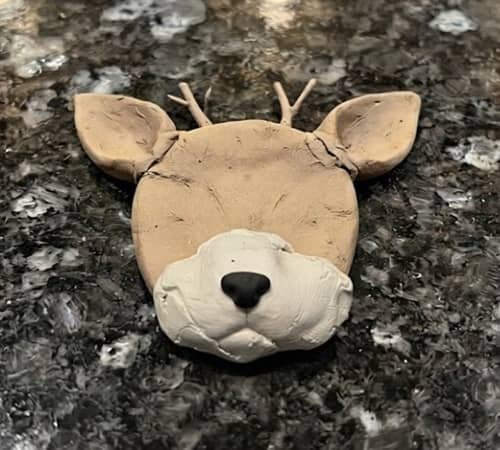
Roll a small oval using white clay and gently flatten it.
Place it on the lower front of the face to create the muzzle. Smooth only the edges where it joins the head.
Roll an even smaller black ball and press it lightly in the center. That becomes the nose.
You can gently press two tiny nostril marks with a toothpick if you like. It takes just a few seconds, yet it changes the whole expression.
This is where the deer starts reminding me of a soft woodland Bambi craft, although I avoid copying any Disney design directly.
Step 4: Give Your Deer a Friendly Face
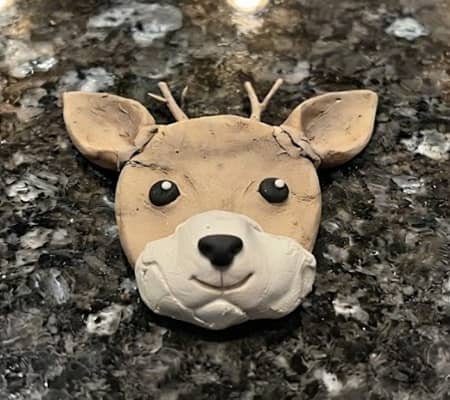
Roll two tiny black clay balls for the eyes and press them gently into place.
Keep plenty of space between them. Wide-set eyes instantly create a softer expression.
Add two tiny white dots beside the eyes if you want a little sparkle.
Use a toothpick to draw a tiny curved smile under the nose. Don’t carve deeply.
Suddenly the project feels alive. Weird how such tiny details can do that, isn’t it?
It are starting to look like a real deer now.
Step 5: Make the Neck and Little Body
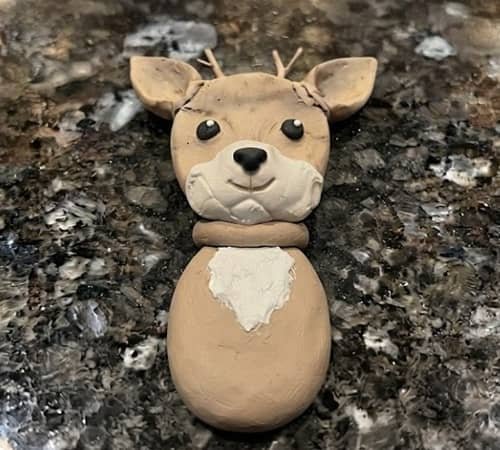
Roll a short cylinder for the neck and attach it beneath the head.
Create another slightly larger oval for the body.
Press the neck onto it carefully. Smooth the connection without removing all the handmade texture.
Flatten a small white oval and place it on the chest.
This little patch gives the deer more contrast while keeping the overall easy clay creatures design nice and simple.
Many kids clay activities become frustrating because they’re overloaded with details. This one keeps everything manageable.
Step 6: Add Four Simple Legs and Tiny Tail
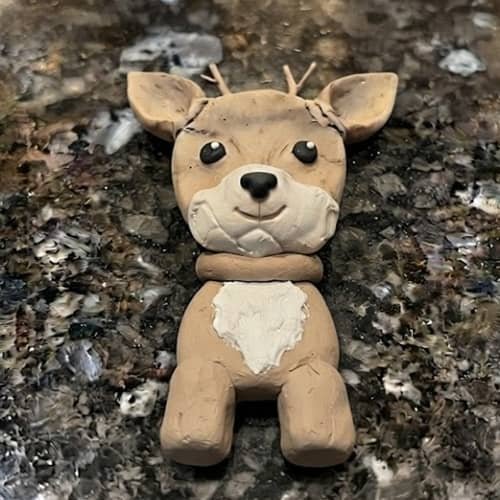
Roll four equal clay cylinders for the legs. Keep them slightly chunky because thin legs can crack while drying.
Attach two legs at the front and two at the back. Flatten the bottoms slightly so the deer stands on its own.
Roll one tiny ball for the tail and gently press it onto the back.
If your deer leans a little, place a folded tissue underneath while it dries for support.
My front legs wasn’t perfectly equal, but nobody noticed after everything dried.
Step 7: Smooth, Dry and Paint
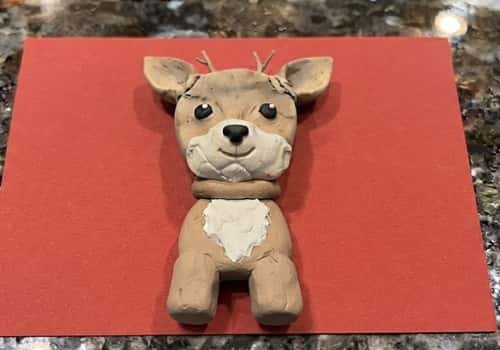
Leave the sculpture somewhere flat for 24 to 48 hours depending on thickness.
Once completely dry, lightly sand any rough spots if needed.
Paint the body light brown, the chest white, the nose black, and lightly shade the antlers with darker brown.
A tiny touch of pink inside the ears adds warmth without making it look cartoonish.
Finish with a thin coat of matte varnish if you’d like extra protection.
Final Thoughts
One thing I’ve learned after making plenty of air dry clay projects is that simple shapes almost always produce better results than chasing perfection.
Children naturally focus on building confidence before mastering tiny details, and this project encourages exactly that.
After finishing one deer, try making a sleeping fawn, a standing buck, or even a playful woodland family beside a squirrel or fox.
Small collections teach consistency while keeping every DIY project enjoyable.
That’s one reason air dry clay crafts continue to be such a favorite activity at home.
The finished deer may not look store bought, and honestly, that’s exactly where its charm lives.





