There is something magical about watching a pile of paper slowly turn into a friendly woodland animal.
That’s exactly why this paper deer craft has become one of my favorite rainy-day activities with kids.
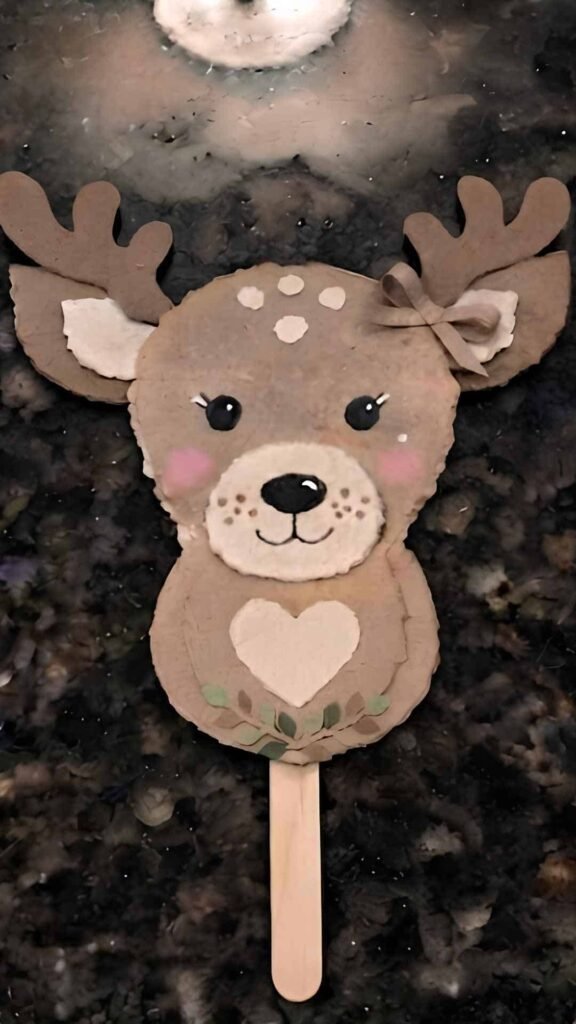
Sounds more fun, doesn’t it? By the end, you’ll even have your own reusable craft template based on the finished project.
Whether you’re looking for a reindeer craft, a classroom activity, or a quiet afternoon kids craft, this project keeps things simple while still looking incredibly adorable.
Materials Needed To Make Paper Deer Craft
- Brown construction paper or cardstock
- Light beige cardstock
- White cardstock
- Black cardstock
- Pink cardstock (optional)
- Pencil
- Scissors
- Glue stick
- Black marker
- White gel pen (optional)
- Ruler (optional)
You May Also Like: Air Dry Clay Deer Craft (Simple Clay KIDS Craft)
Download the Template If You Need Help With Shapes
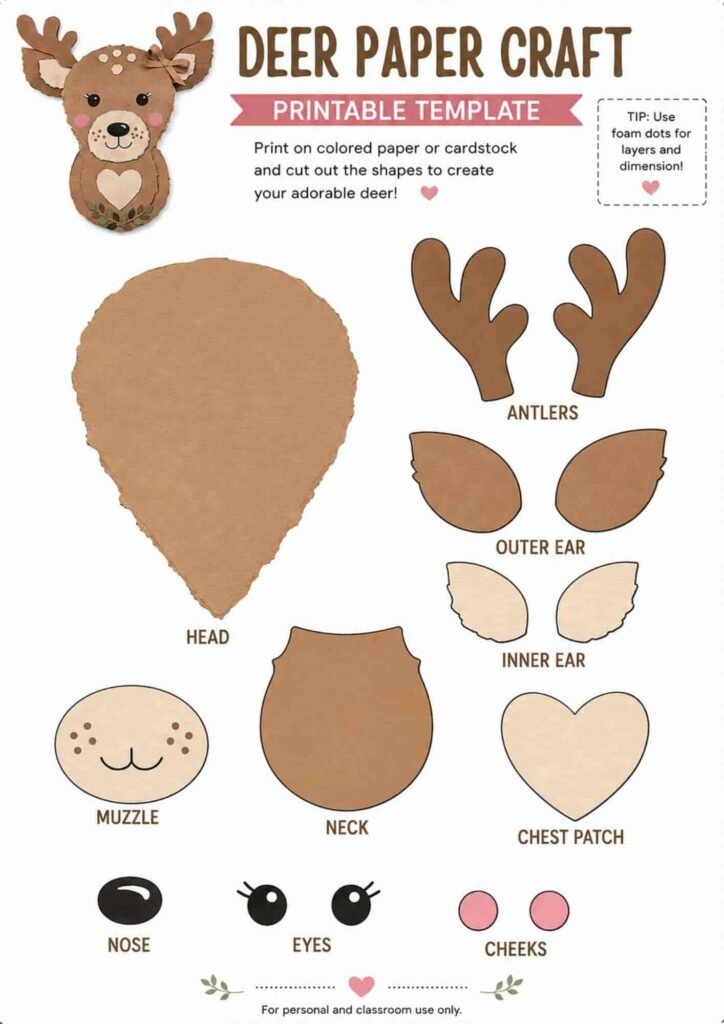
Click here to download the free PDF template
Step 1: Create the Deer’s Head
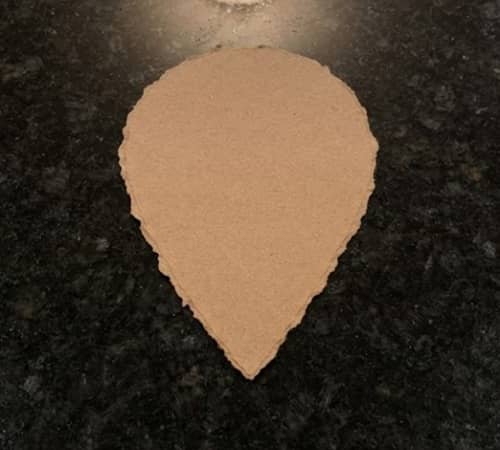
Forget complicated patterns. Start with one large shape.
Fold a sheet of brown paper in half. Near the folded edge, lightly sketch a large upside-down teardrop.
Make the bottom slightly rounded instead of pointed because softer curves give the deer a friendlier appearance.
Cut through both layers if you’d like a perfectly symmetrical head, although one layer works just fine too.
Place the shape on your table. Right now it honestly looks more like a giant pear than a deer. That’s completely normal.
Before moving on, trim any rough edges with small snips instead of one long cut.
Those tiny adjustments make the finished paper craft look surprisingly neat.
Step 2: Bring the Face to Life
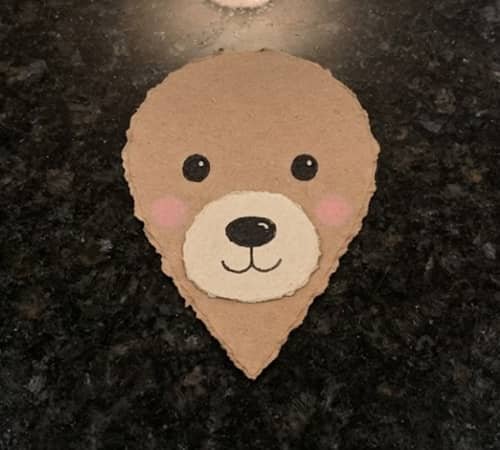
Now comes the exciting part.
Cut one large cream oval for the muzzle.
Keep it wide enough to fill almost the lower third of the head. Glue it slightly above the bottom edge.
Next, cut two tiny black circles for eyes and a small black oval for the nose.
Glue the nose near the top of the muzzle before adding a curved smile underneath with your marker.
Tiny curved eyebrows instantly make the deer look curious instead of surprised.
Want an even sweeter expression? Add two soft pink paper circles for cheeks.
Suddenly the paper has personality. Funny how a few circles can completely changes everything.
Step 3: Give Your Deer Some Ears
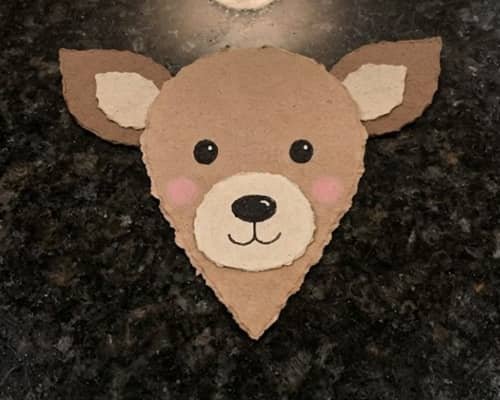
Without ears, it still feels unfinished.
Cut two large leaf-shaped ears from brown paper.
They should be almost the length of the muzzle.
Next, cut two slightly smaller leaf shapes from cream paper and glue them inside each ear.
Slide the ears behind the top corners of the head instead of placing them directly on top.
Angle them outward slightly. This tiny adjustment makes the deer appear alert and playful.
Pause for a second and look at it from a distance. Isn’t it already starting to resemble a woodland friend?
These oversized pieces also make this one of my favorite deer crafts for toddlers because little hands can glue them easily.
Step 4: Add the Antlers
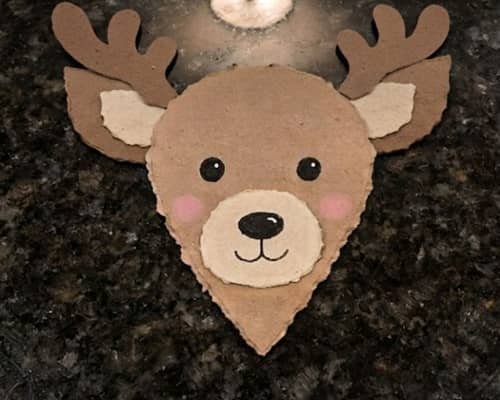
This is usually everyone’s favorite step.
Draw two rounded antlers that branch into three soft points each.
Avoid sharp tips because rounded antlers are easier for children to cut and look much friendlier.
Cut them from brown paper and glue them behind the head between the ears.
Try to keep both antlers similar in height, but don’t stress over making them identical. Real antlers rarely match perfectly anyway.
The transformation is instant.
Five minutes ago this looked like random paper shapes.
Now it unmistakably looks like a cheerful deer. That never gets old.
This straightforward design is also a great option for a simple deer project in preschool settings.
Step 5: Build the Neck and Upper Body
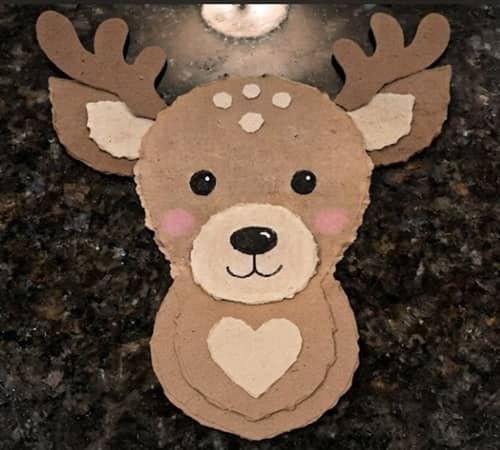
Let’s stop the deer from becoming a floating head.
Cut one wide rectangle with rounded corners from brown cardstock.
This becomes the neck and upper chest.
Glue it behind the bottom of the head so only the upper section remains visible.
Now cut one cream oval that’s slightly longer than the muzzle.
Glue it vertically onto the neck to represent lighter chest fur.
For extra charm, add three or four tiny white paper spots near the forehead and use your marker to draw a few gentle fur lines across the chest.
It don’t need many details to look adorable.
At this stage, your forest animal craft already looks complete enough to display.
Step 6: Add the Final Details
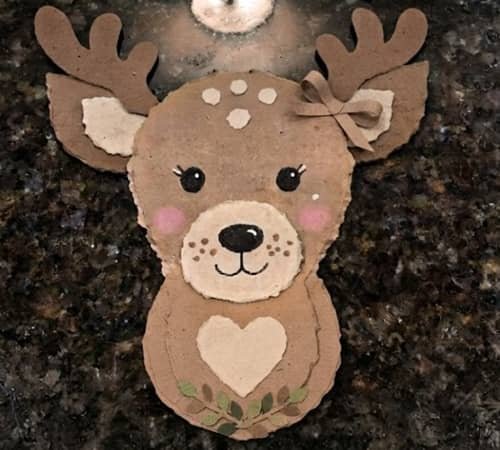
Small details quietly make the biggest difference.
Use a white gel pen to add tiny highlights inside each eye.
Draw a few freckles across the muzzle with your black marker. If you’d like, glue a tiny paper bow, scarf, or flower beneath one ear.
Older children might even cut a few paper leaves and glue them near the bottom of the neck to create a woodland scene.
Younger children usually prefer leaving the deer simple, and that’s perfectly okay.
There isn’t really a wrong version here. Every finished deer ends up having its own personality.
That’s one reason this project fits perfectly as a toddler craft, preschool crafts, and other creative kid activities of almost all ages.
Step 7: Turn It Into Something Even More Fun
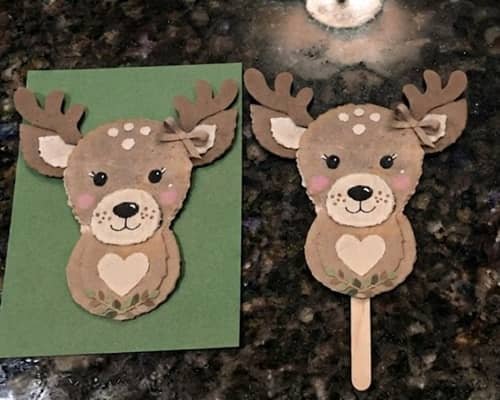
Instead of stopping here, let’s make the deer interactive.
Glue the finished deer onto colorful cardstock to create greeting cards, bulletin board decorations, scrapbook pages, or seasonal classroom displays.
Another fun option is gluing a large craft stick behind the neck. Instantly you’ve made a puppet for storytelling.
Want something children can wear? Simply remove the neck section, glue the head onto a wider strip of cardstock with eye holes, and you’ve created a beginner-friendly paper deer mask.
One craft. Several activities.
That keeps kids engaged much longer than making a single decoration and calling it done.
Final Thoughts
A simple paper project can teach far more than cutting and gluing.
As children build this deer one piece at a time, they naturally practice sequencing, spatial awareness, symmetry, fine motor control, and creative decision-making without feeling like they’re doing a lesson.
That’s one reason crafts like this continue to work so well in homes and classrooms.
Next time, challenge kids to keep the same basic shapes but change the ears, antlers, or facial expression to invent a completely different woodland character.
They quickly discover that creativity isn’t about starting over… it’s about seeing familiar shapes in brand-new ways.





