Want to make a tiny woodland animal without needing advanced sculpting skills? This air dry clay Squirrel craft is a simple clay project that turns a few basic clay shapes into a cute little Squirrel.
I kept the design intentionally simple, so kids can actually make it instead of trying to copy a perfect clay sculpture from a professional artist.
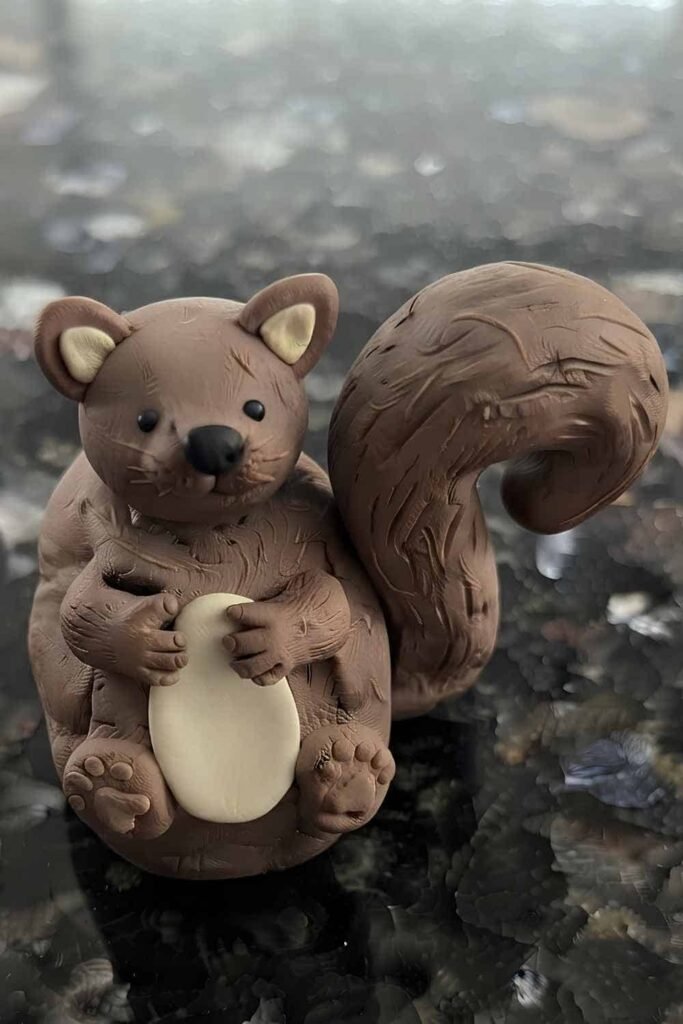
The slightly chunky body, oversized tail, and tiny ears give this squirrel plenty of character.
It also works nicely as a kids craft, classroom activity, or weekend DIY project.
Ready to learn how to make a Squirrel using clay with shapes you can roll, pinch, and press?
Disclaimer: This craft is meant for beginners and kids working with air dry clay, this is not intended to be a professional looking craft. Therefore, the shapes may not be professional looking.
Materials Needed To Make Air Dry Clay Squirrel Craft
- Air-dry clay
- Brown or tan air-dry clay
- A tiny amount of black clay
- A tiny amount of cream, beige, or white clay
- Toothpick or wooden skewer
- Small blunt craft knife or clay tool
- Flat working surface
- Small cup of water
- Scrap paper or parchment for resting the finished squirrel
Tip: You don’t need many colors. Brown clay with a little cream and black is enough. If your clay is white, you can paint the finished squirrel after it dries.
How To Make An Air Dry Clay Squirrel
Step 1: Make the Main Squirrel Body
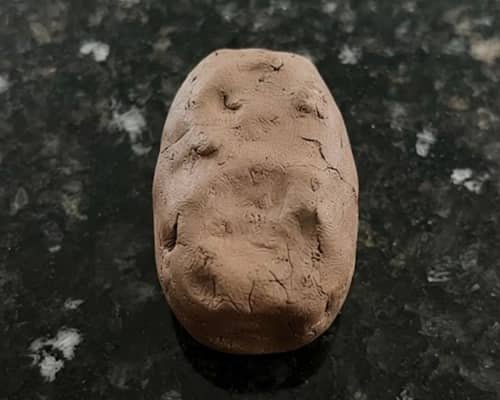
Start with a piece of brown air-dry clay about the size of a small walnut.
Knead it between your fingers for a minute so it becomes soft and easier to shape.
Roll it gently into a short oval.
Now press one end slightly narrower than the other.
The wider end will become the squirrel’s back, while the narrower end will eventually connect to the head.
Don’t make the body perfectly smooth.
A few fingerprints are totally fine and actually make this air dry clay Squirrel feel handmade.
Place the oval on your work surface and flatten the bottom very slightly so the finished animal can sit without rolling away.
Step 2: Shape the Squirrel’s Head
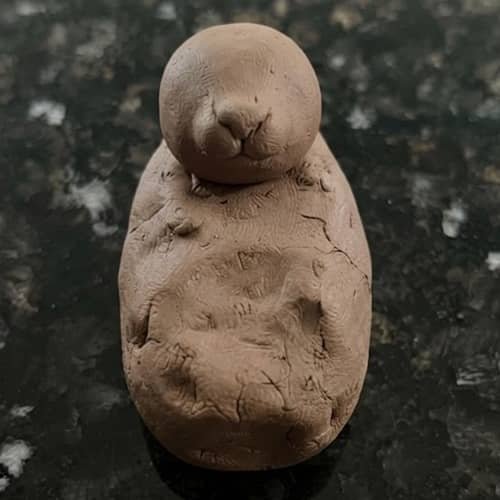
Take another smaller piece of brown clay, roughly half the size of the body.
Roll it into a ball first. Then gently pinch the front portion to create a tiny muzzle.
Attach the head to the narrower end of the body.
Press the two pieces together gently with your fingers so they don’t separate when the clay dries.
Use your thumb to smooth the join, but don’t spend too much time trying to make it flawless.
Tilt the head slightly upward. That small change makes the squirrel look more alert instead of looking like a simple brown blob.
Could it be a little uneven? Yes. Mine usually would be, and that is part of the fun.
Step 3: Add Two Tiny Ears
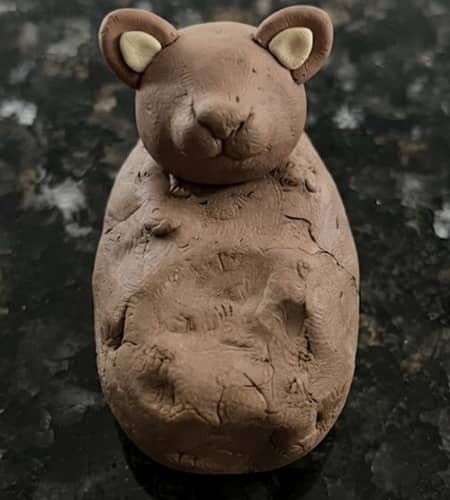
For the ears, take two very small pieces of brown clay.
Roll each piece into a tiny ball, then flatten it slightly between your fingertips. Pinch the top edge of each piece into a soft point.
Don’t make the ears sharp like rabbit ears. Squirrel ears are small and rounded, so keep them short.
Place one ear on each side of the top of the head. Press each one down gently where it meets the head.
For a little extra detail, add a smaller piece of cream or beige clay inside each ear.
Flatten the pieces first so they don’t make the ears too bulky.
The ears should look slightly different from one another. Perfect symmetry isn’t necessary for this kid’s craft.
Step 4: Build the Big Squirrel Tail
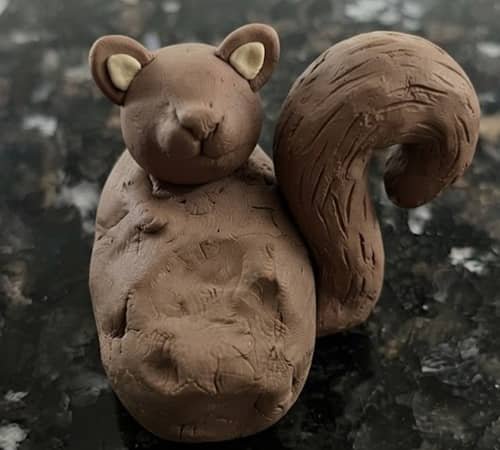
Now comes the part that makes the animal instantly recognizable.
Take a larger piece of brown clay, about the same amount you used for the body. Form it into a long, thick sausage by rolling it between your palms.
Taper one end by rolling it a little more.
Then gently bend the clay into a large curved tail. Think of a loose question mark rather than a tightly curled spiral.
Attach the thicker end of the tail to the back of the squirrel. Press firmly but carefully at the connection point.
If the tail keeps falling over, flatten the bottom of the tail slightly where it touches the granite.
You can also let the tail rest against the body while you work.
The tail doesn’t need complicated texture. A few shallow lines made with a toothpick are enough.
Step 5: Give the Squirrel Four Little Feet
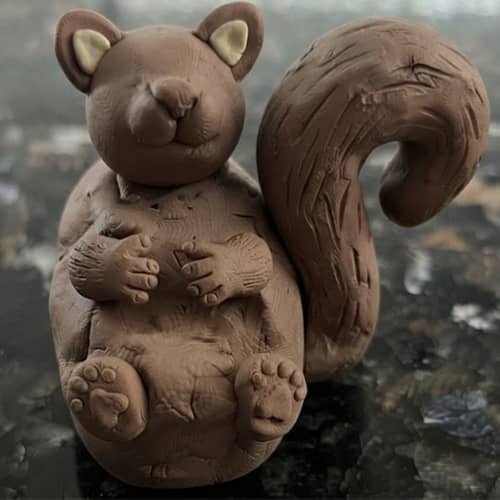
Let’s make the squirrel easier to recognize from the top.
Take four tiny pieces of brown clay and roll each one into a short stubby oval. These don’t need to look like realistic paws.
Place two toward the front underside of the body and two closer to the back.
Because we’re working from a simple design, only tiny portions of the feet need to stick out from the body.
Press each foot firmly against the body. If the clay is soft enough, a gentle push with your fingertip should blend the joint.
Use the tip of a toothpick to make two or three tiny marks on each visible paw.
Kids may make the feet different sizes. That’s okay. A squirrel with wonky little feet still looks like a squirrel!
Step 6: Add the Face
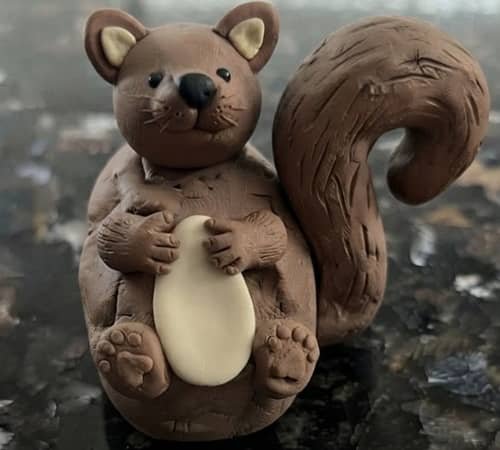
Now give your little clay animal some personality.
Take two tiny balls of black clay and press them gently onto the face for the eyes.
Keep them small. Large cartoon eyes will change the simple woodland look we’re going for.
For the nose, use one even smaller black clay ball and place it at the end of the muzzle.
Next, take a thin piece of cream clay and flatten it into a tiny oval.
Place it on the chest area just below the head. This gives the squirrel a subtle lighter belly patch.
Use a toothpick to make three very short lines on each side of the muzzle for whiskers. Don’t push too deeply.
At this point, you should clearly see the squirrel coming together.
Step 7: Add Simple Fur Details
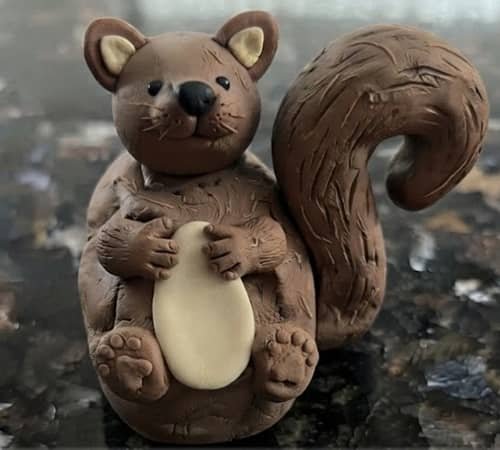
You don’t need to carve hundreds of fur lines. That would make this Squirrel craft for preschoolers unnecessarily difficult.
Instead, use the pointed end of a toothpick to make a few short strokes along the tail.
Follow the curve of the tail rather than cutting straight across it.
Add several small strokes around the chest and sides of the body too.
Keep the marks shallow.
If you accidentally make too many lines, simply smooth that section with your fingertip and try again. Air-dry clay is forgiving while it is still soft.
For an extra handmade touch, lightly press the toothpick around the edges of the ears.
This creates a subtle fuzzy texture without complicated sculpting.
Your squirrel should still look like something a child could make a Squirrel craft from basic shapes.
Step 8: Let It Dry and Finish Carefully
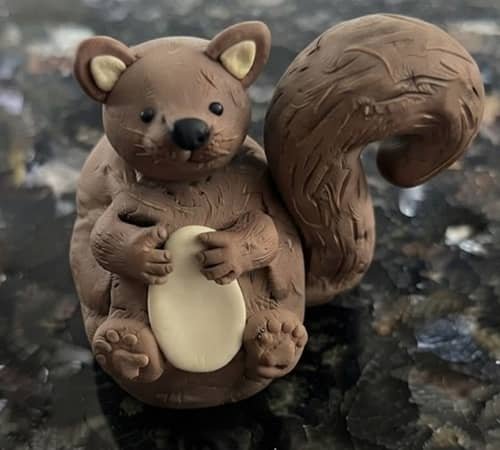
Before moving the squirrel, check every connection.
Push the ears, feet and tail gently once more if anything feels loose.
Place the finished squirrel on a piece of parchment or another non-stick surface.
Allow it to dry according to the instructions on your clay package.
Most air-dry clay needs roughly 24 to 72 hours depending on thickness, humidity and the brand.
Don’t rush this part. The outside may feel hard while the thicker center is still damp.
Once completely dry, you can leave the natural clay finish or paint it with acrylic paint.
A little dark brown along the tail and back can create extra depth, while beige on the belly keeps the look soft.
If you’re making this with younger children, let an adult handle sharp tools and supervise the drying and painting stage.
Also Read: Paper Plate Squirrel Craft For KIDS
Final Thoughts
The interesting thing about an air dry clay Squirrel craft is that you don’t need realistic sculpting skills to make the animal believable.
The silhouette does most of the work.
A rounded body, pointed little ears, tiny muzzle and oversized bushy tail are enough for our brains to recognize a squirrel almost instantly.
That same idea works for a chipmunk, mouse, fox or other simple woodland animals too.
If you’re planning prek Squirrel crafts, simplify the face even further and let children focus on rolling, pinching and joining shapes.
And remember, small imperfections aren’t mistakes here. They are what make a beginner clay sculpture look handmade rather than factory-made.





