Want to turn one ordinary paper plate into a cute woodland animal? This paper plate Squirrel craft is a simple paper plate craft that kids can make with basic supplies and a little help with cutting.
I’ve kept the squirrel shape deliberately simple, so it doesn’t look like something that needs expert crafting skills.
The body, ears, tail, and face are all made from easy paper shapes.
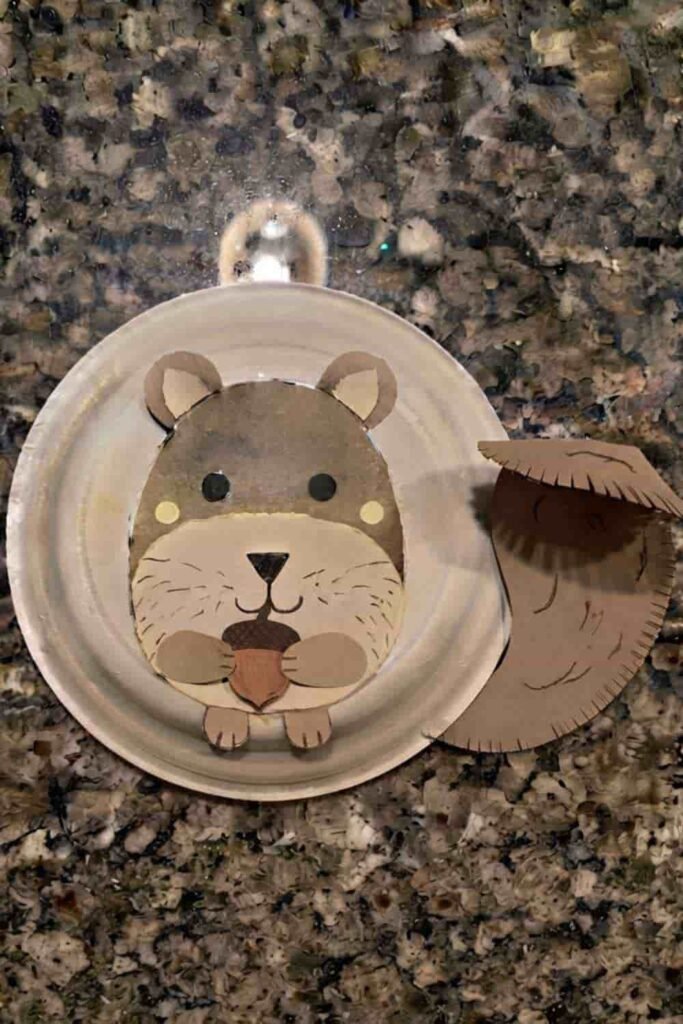
You could even change the colors slightly and turn your squirrel into a chipmunk.
It makes a fun animal craft for a rainy afternoon, preschool activity, classroom project, or just a quick DIY project when the kids says, “I’m bored!”
You May Also Like: Air Dry Clay Squirrel Craft For KIDS
Materials Needed To Make Paper Plate Squirrel Craft
- 1 plain white paper plate
- Brown construction paper
- Light tan or beige paper
- Black marker
- White paper
- Pink or brown crayon
- Child-safe scissors
- Glue stick or white craft glue
- Pencil
- Ruler
- Small piece of cardboard or scrap paper
- Optional: brown crayons or washable paint
Steps To Make A Paper Plate Squirrel
Step 1: Prepare the Paper Plate
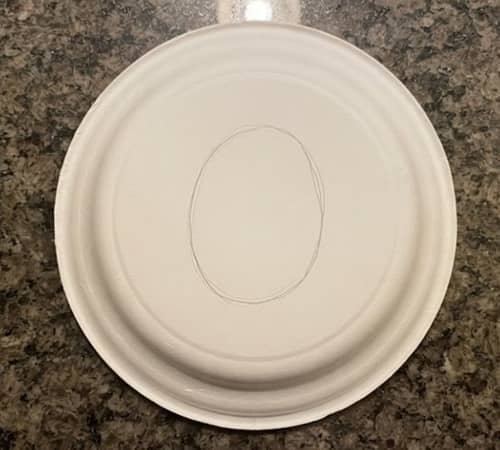
Start with one clean, plain paper plate.
A medium-sized plate works best because it gives you enough room for the squirrel’s body without making the finished craft too large.
Place the plate face down on your work surface.
The slightly raised back of the plate will become the front of the squirrel, giving the body a tiny bit of shape.
Now lightly sketch a large oval in the middle of the plate with a pencil. Don’t worry about making it perfect. This is only a guide for the body.
We’ll need the outside edge for the squirrel’s head and tail later, so leave a tiny margin around it.
Step 2: Add The Brown Squirrel Body
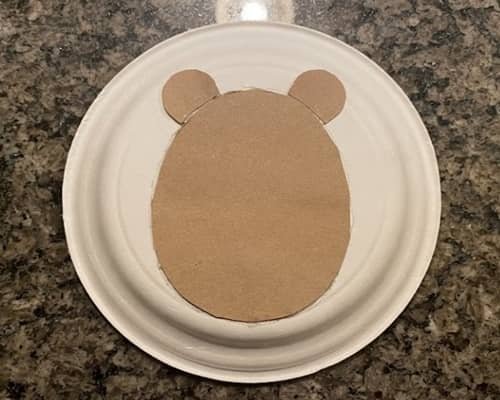
Cut a large brown oval from construction paper.
Make it slightly smaller than the pencil oval on your plate so a thin white border remains visible around it.
Apply glue to the back of the brown oval and carefully place it in the center of the plate.
Press around the edges with your fingers so it sticks flat.
Next, cut two small rounded ear shapes from the same brown paper.
They don’t need to be identical. In fact, tiny differences make this kids craft look much more handmade.
Glue the ears near the top of the brown body, leaving enough space underneath for the face.
Step 3: Make The Squirrel’s Face
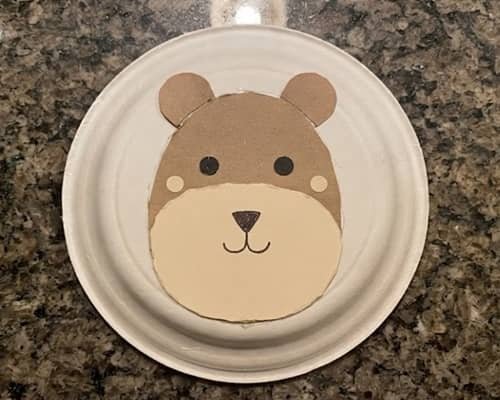
Now let’s give our little paper plate animal some personality.
Cut a smaller beige or light-tan oval for the muzzle.
Glue it near the upper-middle section of the brown body, just below the ears.
For the cheeks, cut two tiny beige circles and place them side by side on the muzzle.
You can skip these if your child is very young and wants to keep the craft even easier.
Cut two small black circles for the eyes. Glue them above the muzzle.
Then use a black marker to draw a tiny triangular nose and a short curved mouth.
Keep the face simple. A few bold lines work better than trying to draw every little detail.
Step 4: Cut The Big Fluffy Tail
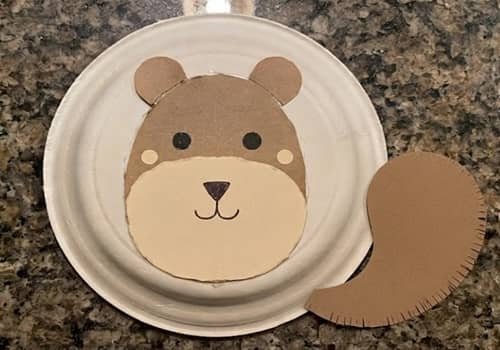
Here comes the part that makes this paper plate Squirrel craft look different.
Take another sheet of brown construction paper and draw a large curved tail.
Think of a long comma or a soft question mark rather than trying to draw a complicated squirrel tail.
Make the bottom of the tail wider and the tip slightly narrower. Cut it out carefully.
Make a few little shallow snips around the outside curving edge to create a fluffy look. Don’t cut too deeply or the tail may become weak and floppy.
That being said, check that it starts near the lower side of the body and curves upward behind the head.
Step 5: Attach The Tail
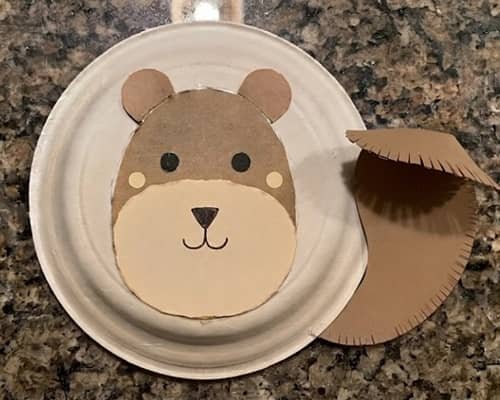
Happy with the tail shape? Glue it down.
Apply glue only to the lower section of the tail where it overlaps the paper plate. Leave the upper curved section unglued.
This small trick gives the tail a slight raised look instead of making it completely flat.
Position the tail so it curves upward along one side of the squirrel’s body.
You can place it on the right or left depending on which direction you want your squirrel facing.
Press the glued section firmly for a few seconds.
If the paper curls slightly, that is completely fine. A handmade squirrel should not look factory-made anyway.
Step 6: Add The Inner Ears And Chest
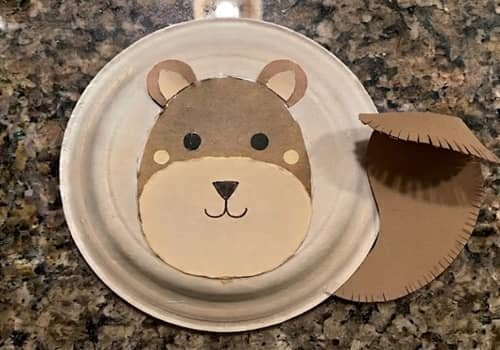
Let’s add just a little contrast without making this craft complicated.
For the inside of the ears, cut two little spherical shapes out of beige paper. Glue one inside each brown ear.
Then cut one small beige or light-brown oval for the squirrel’s chest.
Place it underneath the face, roughly in the upper-middle part of the body.
Don’t make the chest patch too large. We still want plenty of the brown paper body showing around it.
Use your finger to smooth everything down. If one ear is slightly higher than the other, leave it.
That little mistake makes the squirrel craft for preschoolers feel genuinely handmade.
Step 7: Give Your Squirrel Tiny Details
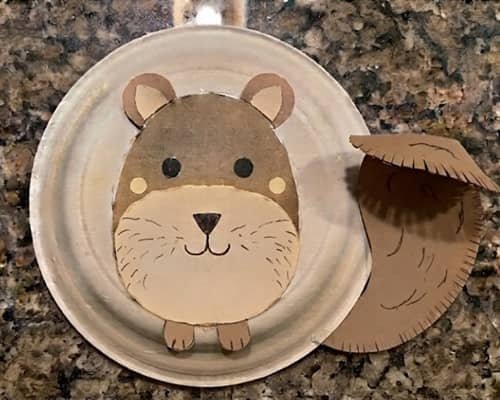
The basic squirrel is finished, but a few tiny details can bring it to life.
Use a black marker to add three short curved lines on each cheek. These act like little whisker marks.
Draw a few simple curved strokes on the tail using a brown crayon or darker marker.
Keep the lines loose and uneven rather than filling the whole tail with detail.
For an extra woodland touch, cut a tiny acorn shape from brown paper.
Add a small beige cap and glue the acorn near one of the squirrel’s paws.
You can also draw two tiny front paws using the black marker. Keep them as simple curved lines.
Now your make a Squirrel craft project has its own little character.
Step 8: Make It Stand Out
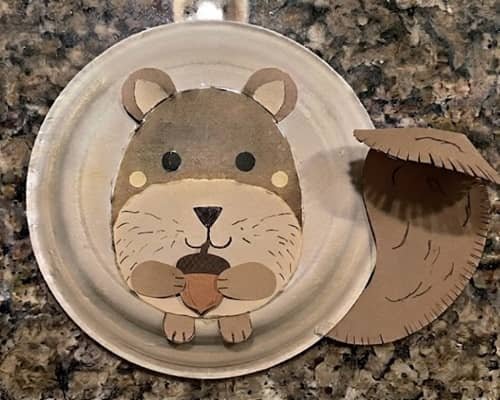
Here is my favorite little twist.
Instead of covering the plate with paint or adding lots of decorations, leave some of the white paper plate edge visible.
It creates a simple border around the squirrel and makes the brown body stand out.
If you want to turn this into one of your prek Squirrel crafts, let the child choose the facial expression.
A happy mouth, surprised mouth, or even sleepy eyes can completely change the personality.
You can also make a second version using slightly lighter brown paper and call it a chipmunk.
Add two pale stripes down the back and you’ve got a different woodland animal using almost the same technique.
Let the glue dry completely before picking it up.
Final Thoughts
What I like about this paper plate Squirrel is that it doesn’t depend on perfect cutting or expensive craft supplies.
The slightly uneven ears, hand-drawn face, and crooked tail are actually useful because kids learn that a craft doesn’t have to look perfect to look good.
You can also use the same basic body shape for other Squirrel crafts for kids, woodland animals, or a whole paper plate animal collection.
If you’re making this with preschoolers, let them handle the gluing, choosing colors, and decorating while an adult handles the tricky cutting.
And if your squirrel turns out looking a little more like a chipmunk, that’s okay too… it just means your little artist invented a new woodland friend.





