Janmashtami always makes me want to create something handmade instead of buying decorations.
This Air dry clay baby Krishna craft is one of my favorite projects because it looks adorable without needing advanced sculpting skills.
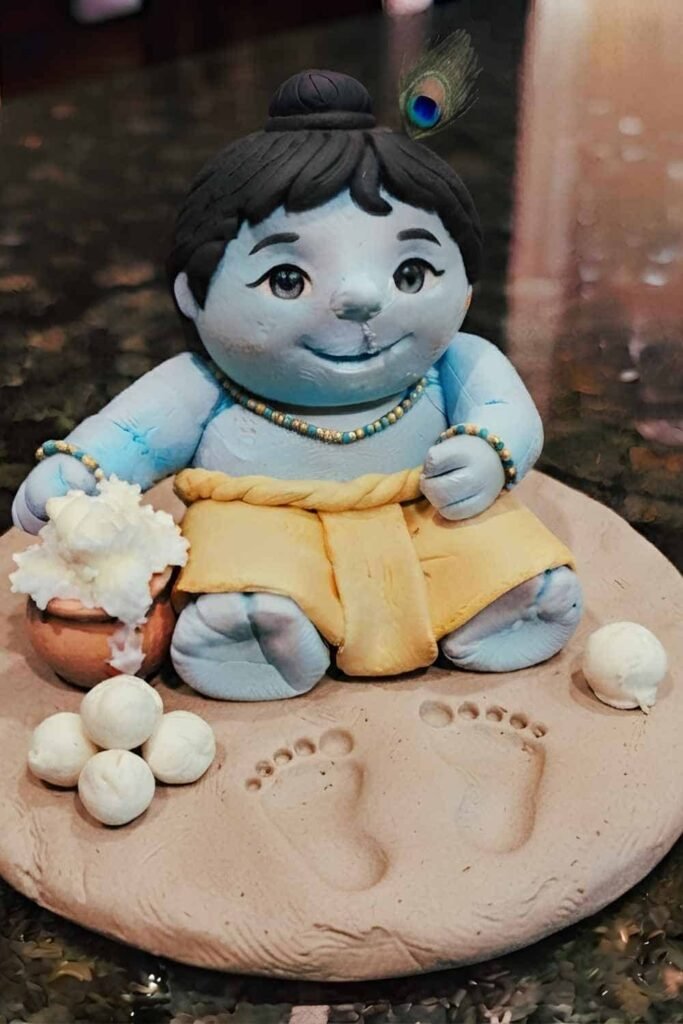
If you’re searching for a simple clay craft that children can help with, this little Makhan Chor is a wonderful choice.
The best part? Every piece is made using basic balls, coils, and flattened shapes, so even complete beginners can follow along.
Whether you’re preparing for Krishna Janmashtami, decorating your pooja corner, or planning a fun kids craft, this project keeps things easy while still looking charming.
Choose Your Air Dry Clay Type
Regular Air Dry Clay | Cornstarch Clay | Homemade Clay
Affiliate Disclaimer: Some of the links in this post may be affiliate links, which means I may earn a small commission if you choose to make a purchase through them – at no extra cost to you. I only share products that genuinely fit this project and can help make your ceramic mug clay craft process easier and smoother. Your support helps keep ideas like this coming.
Materials Needed To Make Air Dry Clay Baby Krishna For Janmashtami
- Air dry clay (light blue, white, yellow, orange, brown, black or acrylic paints)
- Clay sculpting tool or butter knife
- Toothpick
- Small paintbrush
- Acrylic paints (if using white clay)
- Craft glue (optional)
- Small bowl of water
- Soft cloth
- Clear matte varnish (optional)
You May Also Like: Paper Plate Baby Krishna Craft
Step 1: Build the Sitting Body
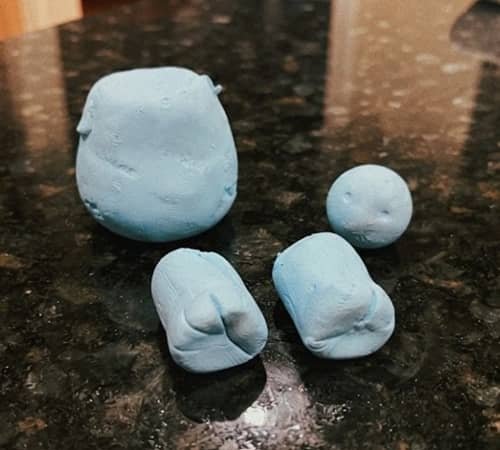
Start by rolling one medium-sized ball for Baby Krishna’s body.
Gently flatten the bottom so it sits without wobbling.
Roll a smaller ball for the head but don’t attach it yet.
Now roll two short thick cylinders for folded legs and press them against the lower front of the body, making a relaxed sitting pose.
Keep the proportions slightly chubby because babies naturally have softer features.
Don’t chase perfection here. Tiny dents actually make handmade crafts look more believable.
I always leave fingerprints until the very end because smoothing too early makes the clay harder to shape.
Step 2: Add the Head and Shape the Face
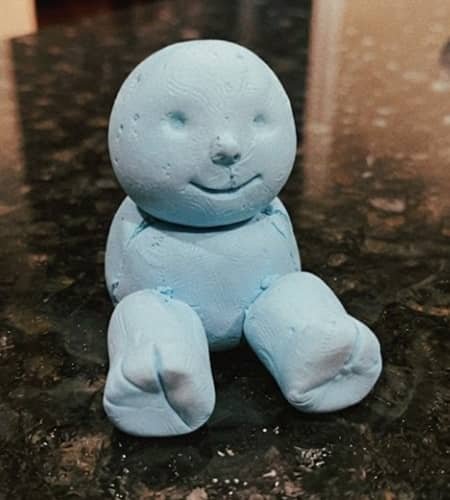
Attach the head using half a toothpick for strength. Blend the neck gently with your fingers.
Press two tiny indentations for the eyes.
Add a tiny round nose and a small smiling mouth using a sculpting tool.
Don’t overwork the face. A simple expression often looks sweeter than an overly detailed one.
Roll two tiny flattened circles for cheeks if you want a more playful baby look.
It don’t have to look perfectly symmetrical because handmade crafts rarely do.
Step 3: Make the Arms and Butter Pot
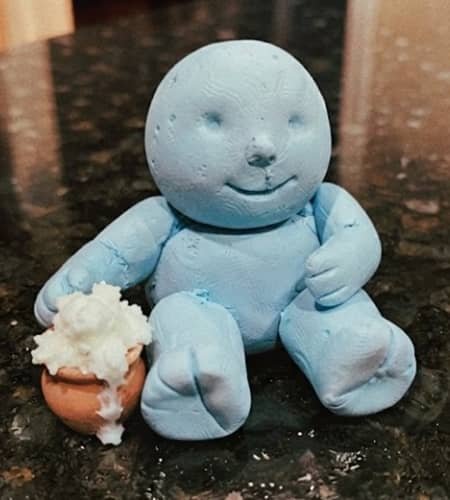
Roll two short clay cylinders for the arms.
Attach one hand resting beside the body while the other reaches toward a tiny butter pot.
Make the pot using a small clay ball with the center pressed inward.
Add little overflowing butter by placing uneven white clay blobs around the rim.
This tiny detail instantly tells the Makhan Chor story without making the project complicated.
Kids usually enjoy making the butter more than anything else, and thats always fun to watch.
Step 4: Dress Baby Krishna
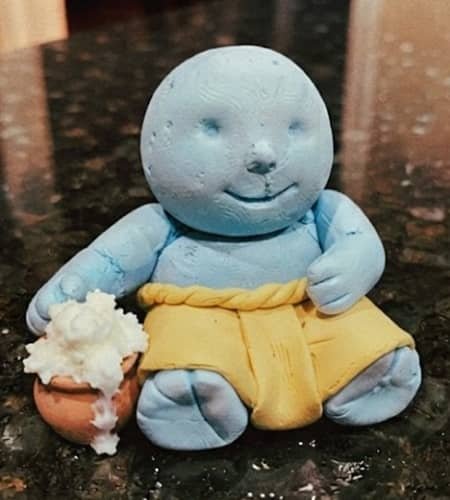
Flatten a small yellow clay sheet and wrap it around the waist to create a simple dhoti.
Trim the edges with a clay tool. Roll a thin coil and wrap it as a waistband.
Add tiny folds using the back of your sculpting tool instead of making complicated fabric textures.
Less detail actually helps this easy DIY Krishna craft remain achievable for beginners.
If you’re exploring clay modelling ideas for kids, this clothing method is much easier than sculpting separate garments.
Step 5: Add Hair, Peacock Feather, Face Personality and Jewelry
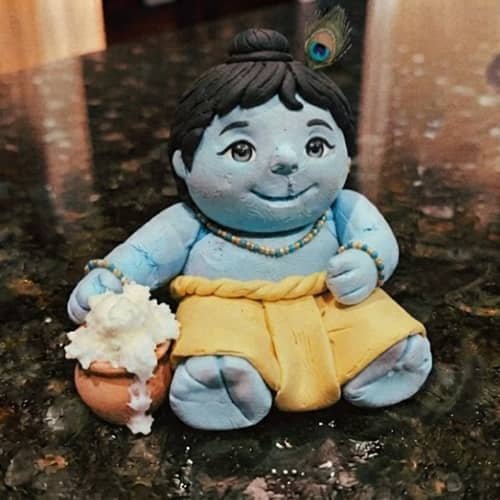
Cover the top of the head with thin black clay to make soft curly hair. Create a tiny bun on top.
Add one simple peacock feather using green and blue clay.
Don’t make it oversized. Roll tiny clay beads for a necklace and bracelets.
Baby Krishna doesn’t need elaborate ornaments to be instantly recognizable.
A few carefully placed details is enough.
If you’re creating a handmade Janmashtami clay craft, these small additions give personality without overwhelming the sculpture.
Also, make sure that you give personality to the face, so it looks like baby krishna (but its totally OK if you cannot give the right structure, as its meant for kids and it is a kid centric craft).
Step 6: Paint and Finish the Details
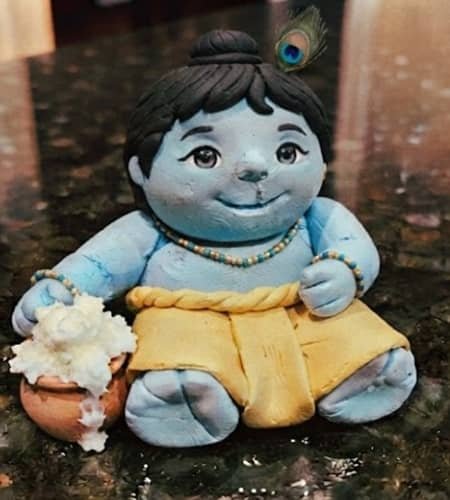
Allow the sculpture to dry completely according to your clay manufacturer’s instructions before painting if you used white clay.
Paint the skin light blue, the dhoti bright yellow, jewelry golden, butter pot brown and feather blue-green.
Use a fine brush to add tiny black eyes with a small white highlight.
Finish with pink cheeks for a softer expression.
Let everything dry fully before sealing with a matte varnish if desired.
I usually skip glossy varnish because Baby Krishna looks softer with a natural finish.
Step 7: Create a Simple Janmashtami Display
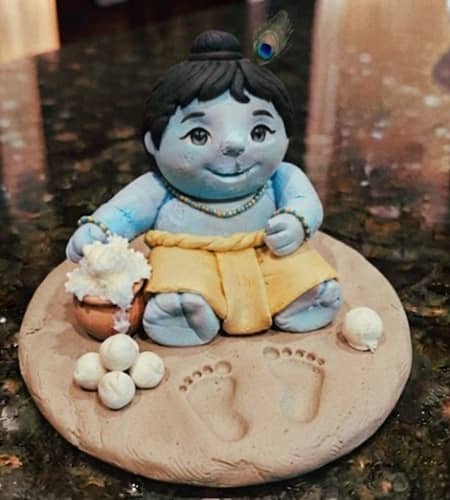
Place the finished Baby Krishna on a small round clay base.
Add two tiny white butter balls beside the pot and scatter three miniature footprints leading toward Krishna.
This simple display turns the sculpture into a festive centerpiece without adding unnecessary complexity.
If you’re looking for clay art ideas for school project, this base makes the presentation much more complete.
It can also inspire a future clay Krishna on swing craft, DIY Kanha jhula craft, or other modelling clay ideas for kids once you’re comfortable working with air dry clay.
Final Thoughts
One thing I’ve learned after making many festive models is that simple shapes almost always age better than overly complicated ones.
A handmade Baby Krishna with tiny fingerprints, uneven edges, and a slightly crooked smile often carries far more warmth than a perfectly polished sculpture.
That’s what makes an air dry clay Baby Krishna craft memorable.
Once you’ve finished this version, try changing only one element next time… a different pose, a little flute, or even a tiny swing instead of the butter pot.
Small changes help build confidence, and before long you’ll naturally start creating your own diy project ideas instead of copying someone else’s clay craft.
That creative freedom is what makes every Krishna Janmashtami craft feel personal.





