Janmashtami always reminds me that the simplest craft can become the most meaningful one.
This Paper Plate Baby Krishna Craft is designed for families, classrooms, and anyone who enjoys an easy paper plate craft without needing fancy supplies.
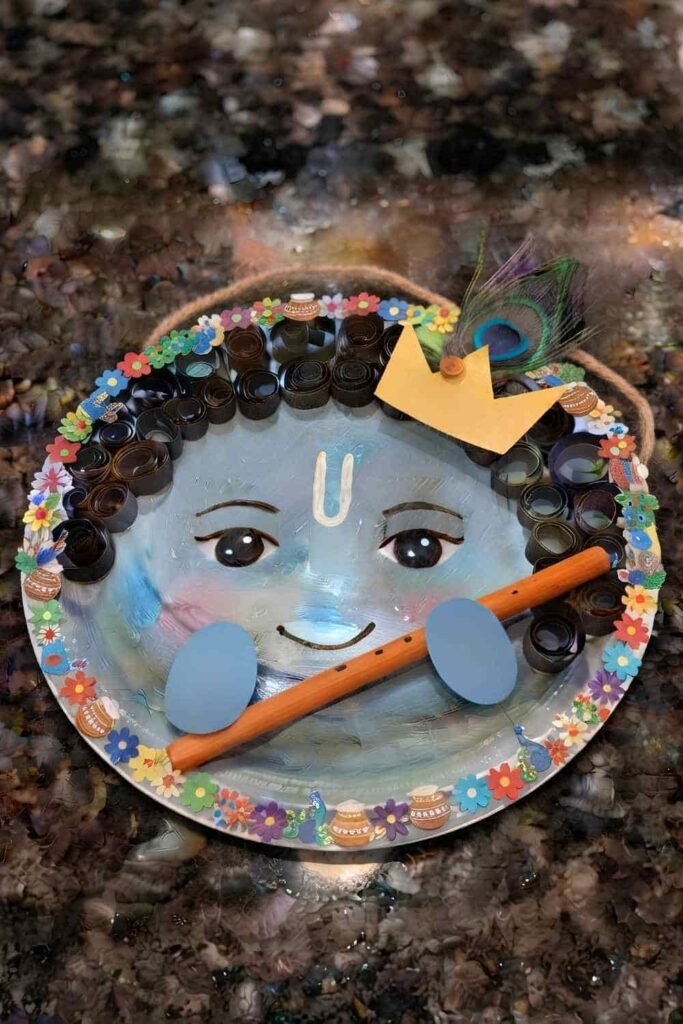
If you are looking for a fun way to celebrate Krishna Janmashtami, this project is perfect because every shape is beginner friendly and easy to cut.
Even if you have never tried making a Krishna-themed craft before, don’t worry.
By the end, you’ll have an adorable little Krishna made from a single paper plate that feels handmade, cheerful, and full of festive charm.
Materials Needed To Make Paper Plate Baby Krishna Craft
- 1 plain white paper plate (7 to 9 inch)
- Blue acrylic or poster paint
- Paintbrush
- Yellow craft paper
- Dark blue or black craft paper
- Pink craft paper
- White craft paper
- Orange craft paper
- Green craft paper
- Small peacock feather (or paper version)
- Black marker
- White gel pen (optional)
- Child-safe scissors
- Glue stick
- Pencil
- Cotton swab (optional for cheeks)
You May Also Like: DIY Air Dry Clay Baby Krishna For Janmashtami (Makhan Chor)
Step 1: Paint The Paper Plate Face
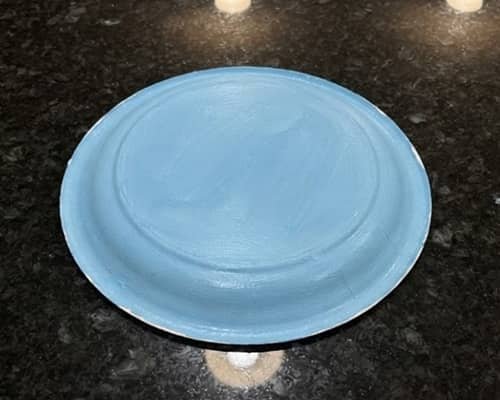
Lay the paper plate upside down so the smooth rounded side becomes Krishna’s face.
Paint the entire plate with a light sky-blue color instead of using a dark shade.
A thin coat works better than a thick one because it dries quicker and keeps the plate from becoming soggy.
Leave it aside for around 20 minutes until completely dry.
Don’t rush this part, it will only make things messy. I once touched mine too early and the fingerprints were everywhere.
Step 2: Make Baby Krishna’s Hair And Crown
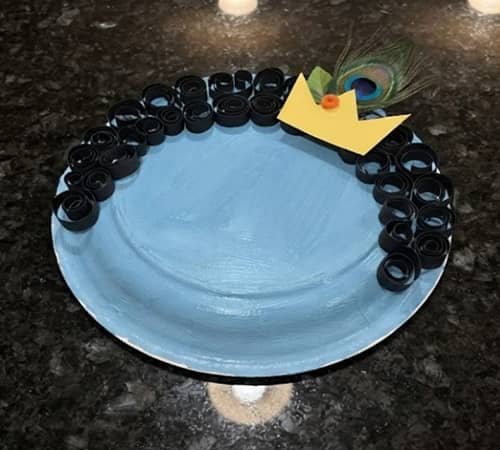
While the paint dries, cut simple rounded strips from dark blue or black paper to make fluffy curls.
Next, cut a wide yellow crown shaped like a soft half-circle with three gentle points.
Glue the hair along the upper edge of the plate first, then stick the crown slightly overlapping the curls.
Add one small green paper leaf and a tiny orange teardrop shape before attaching a miniature peacock feather in the center.
Already it starts looking like a sweet paper plate Krishna, not just another school craft.
Step 3: Create The Face
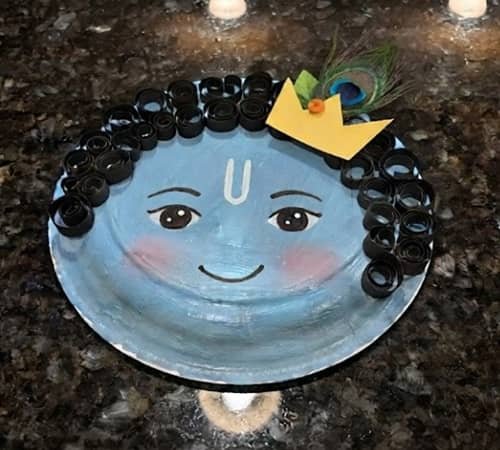
Now comes the fun part. Cut two white circles for the eyes and glue smaller black circles inside them.
Draw curved eyebrows with a marker instead of making them perfectly straight because softer lines make Baby Krishna look gentler.
Add a tiny curved nose and a smiling mouth. Cut two pink circles for rosy cheeks and glue them just below the eyes.
Finish with a small white tilak in the middle of the forehead.
It doesn’t have to be perfectly symmetrical, handmade crafts always carry more personality.
Step 4: Add The Flute
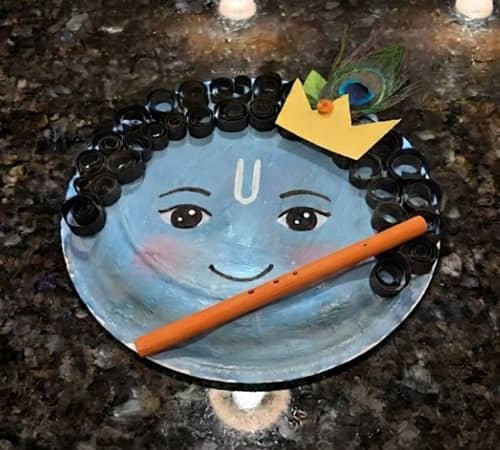
Cut one thin orange strip from craft paper to make Krishna’s flute.
Draw tiny black rings across it using a marker.
Glue it diagonally across the lower part of the face so it looks like Baby Krishna is gently holding it near the smile.
This small detail changes the whole appearance without making the craft complicated.
If you’re searching for an easy DIY Krishna craft, this trick keeps the design recognizable while remaining simple enough for young children.
Step 5: Make Tiny Hands
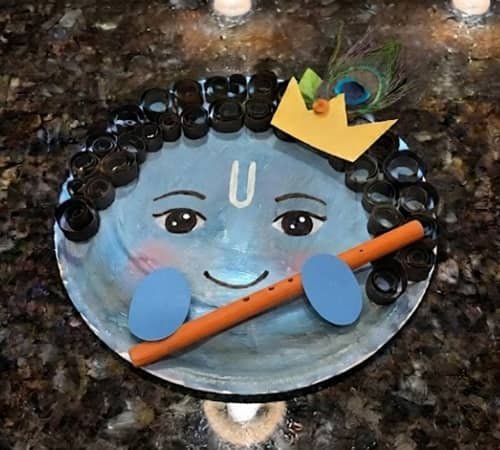
Cut two simple blue oval shapes for hands and glue one on each side of the flute so they appear to be holding it.
Don’t worry about making detailed fingers. Small rounded hands actually suit a baby version much better.
Sometimes simpler shapes creates a more charming result than complicated templates.
This idea also works nicely as one of those paper plate art ideas for school project activities because younger children can cut these pieces themselves with minimal help.
Step 6: Decorate The Border
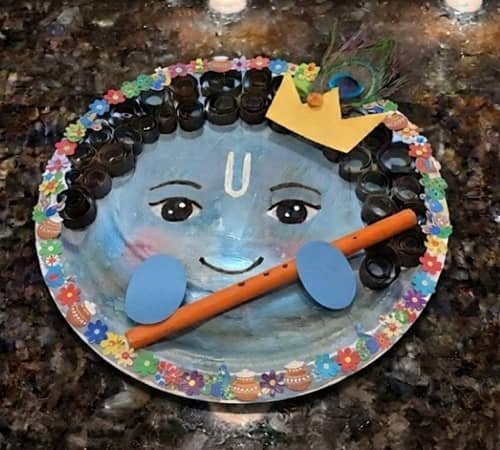
Use small paper circles, tiny flowers, or simple teardrop shapes to decorate around the rim of the plate.
Alternate pink, yellow, and green colors to create a festive border inspired by Janmashtami celebrations.
Keep the decorations evenly spaced but don’t stress over perfection.
Handmade crafts are supposed to have little differences, that’s what makes them feel warm.
This is also a lovely place to personalize your handmade paper plate craft for Janmashtami by adding glitter only if you enjoy a little sparkle.
Step 7: Make A Simple Hanging Loop
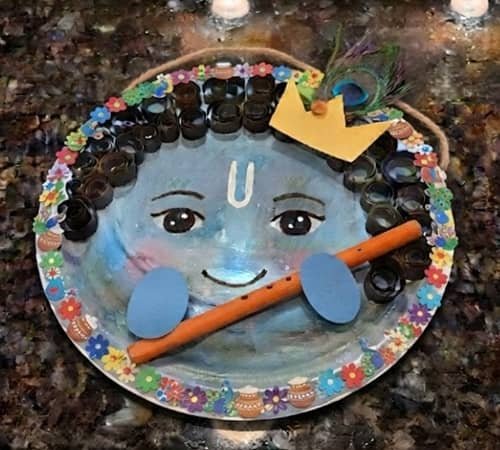
Turn the craft over and tape a short loop of ribbon or yarn onto the back so it can hang on a wall or classroom display.
If you prefer, glue it onto colored chart paper instead.
Pairing it beside a DIY Kanha Jhula craft makes a beautiful Janmashtami decoration without spending much money.
You could even let each child decorate their border differently. Every finished Krishna ends up looking unique, and that’s honestly my favorite part.
Final Thoughts
One thing I genuinely enjoy about this project is how it balances creativity with tradition.
Instead of copying complicated designs, children learn that simple circles, ovals, and paper shapes can become something meaningful.
That confidence often inspires them to explore more paper plate craft ideas for kids, seasonal decorations, or even festive diy projects at home.
You might also experiment with different expressions, crown styles, or colorful borders every year so no two Krishnas ever look alike.
The finished craft becomes more than decoration.
It quietly captures memories of cutting, laughing, and creating together, which is probably the nicest Janmashtami tradition anyone could start.





