Nothing says autumn quite like a colorful paper plate turkey craft sitting proudly on the table.
It looks cheerful, feels simple enough for beginners, and gives kids plenty of room to be creative without worrying about perfection.
That’s exactly why I keep coming back to this project every fall. Infact, I have made a clay version of this turkey craft here.
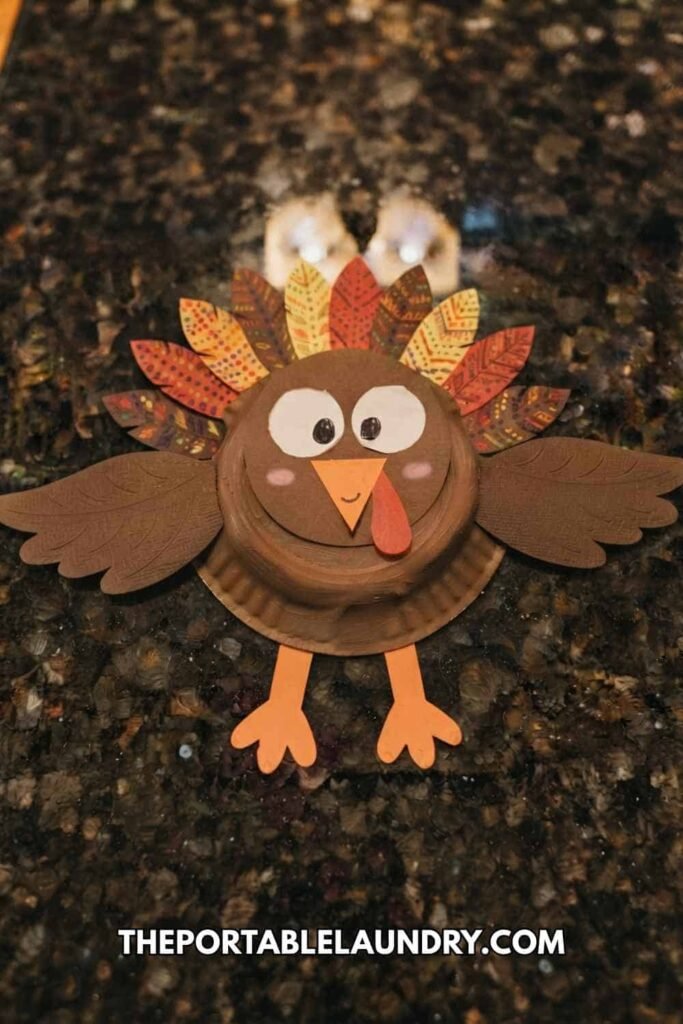
Whether you’re planning a quiet afternoon at home, looking for Thanksgiving crafts for toddlers, or adding another idea to your preschool fall activities, this easy kids craft fits almost every age.
Ready to turn an ordinary paper plate into a turkey with loads of personality? Let’s make one together.
Why You’ll Love This Paper Plate Turkey Craft
This isn’t just another paper plate craft.
Instead of gluing random feathers everywhere, we’ll build the turkey layer by layer so every step naturally leads into the next.
The finished bird has fluffy feathers, expressive eyes, textured wings, sturdy legs, and plenty of handmade charm.
It’s also perfect for:
- Preschool Thanksgiving crafts
- Thanksgiving crafts for toddlers (with adult assistance)
- Harvest craft displays
- November craft sessions
- Classroom bulletin boards
- Family craft afternoons
- Fall craft weekends
Supplies Needed To Make Paper Plate Turkey
You’ll need:
- 1 white paper plate (9-inch works great)
- Brown acrylic paint
- Paintbrush
- Colored cardstock (red, orange, yellow, dark brown)
- Brown construction paper
- Craft glue
- Glue stick
- Child-safe scissors
- Black marker
- White and black paper scraps (or googly eyes)
- Pencil
- Cotton ball (optional for soft paint texture)
- Small ruler (optional)
Step 1: Paint The Turkey’s Body
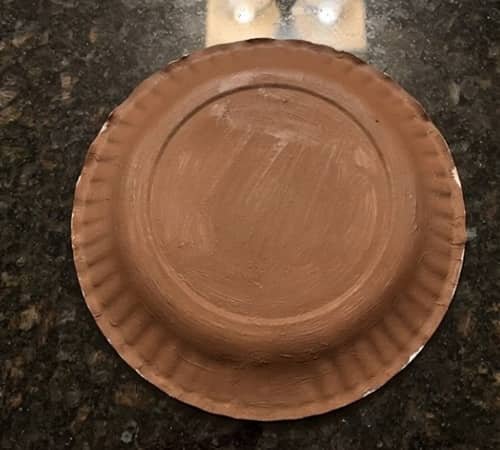
Lay the paper plate face down so the rounded back becomes the turkey’s body.
This naturally gives the turkey a nice dome shape without needing extra pieces.
Paint the entire surface with brown acrylic paint using long brush strokes from top to bottom.
Don’t stress if the paint isn’t perfectly smooth because little streaks actually make feathers look more realistic.
Let it dry completely before moving on.
It don’t need to be flawless at all. If the paint feels slightly tacky, give it another few minutes.
Step 2: Create A Layered Feather Fan
Now comes the part that really gives the turkey its personality.
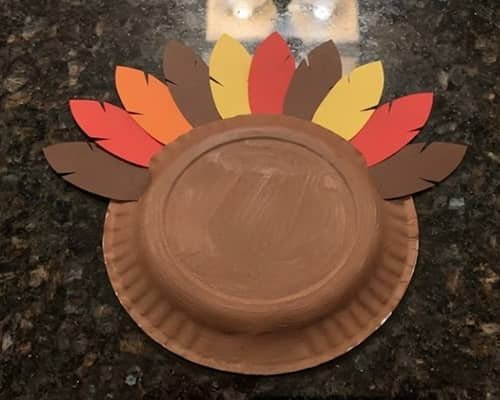
Cut large teardrop-shaped feathers from red, orange, yellow and dark brown cardstock.
Make them different heights instead of identical because real feathers aren’t perfectly matched anyway.
Arrange them behind the paper plate before gluing.
Start with the tallest feathers in the middle, then gradually work outward using slightly shorter ones.
This creates a balanced fan shape that feels full without looking crowded.
You are probably going to adjust them several times, and that’s completely normal.
Glue only after you’re happy with the arrangement.
Step 3: Build The Turkey’s Face
Can a turkey really have personality? Absolutely.
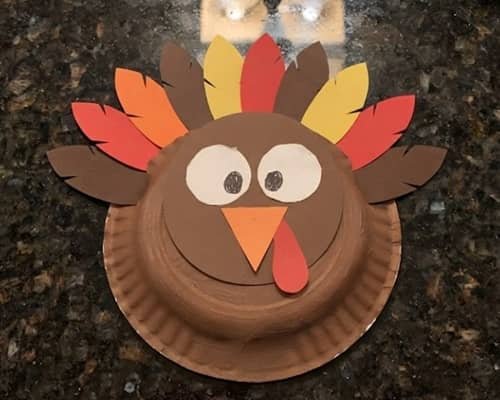
Cut a small brown circle for the head and glue it slightly overlapping the top center of the plate.
Add two large white paper circles for eyes with smaller black pupils.
Instead of perfectly centering the pupils, move them slightly toward one side. Suddenly the turkey looks curious instead of stiff.
Cut a small orange triangle for the beak.
Then add the famous red wattle underneath.
Make it slightly curved rather than straight. That tiny detail changes everything.
Outline the eyes lightly with black marker if you’d like extra definition.
Step 4: Give The Wings Some Texture
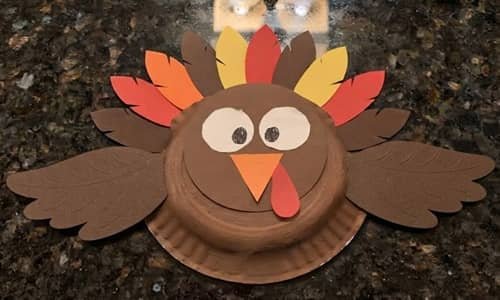
Right now the turkey still looks pretty flat.
Let’s fix that.
Cut two large wing shapes from dark brown construction paper.
Before gluing them down, gently score a few curved feather lines using the back of your scissors or a pencil.
The paper bends slightly, creating subtle texture without complicated techniques.
Glue one wing on each side so they angle outward just a little.
Why keep everything perfectly symmetrical? Tiny differences make handmade projects feel alive.
Mine always ends up slightly uneven, and honestly, I like it better that way.
Step 5: Add Legs And Feet
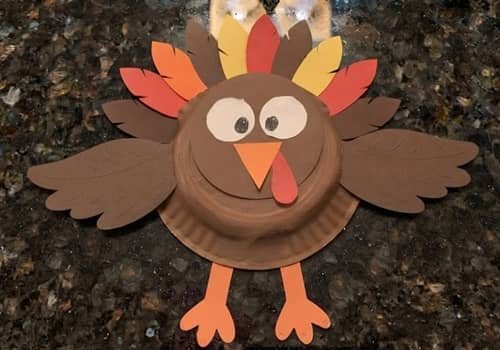
Your turkey needs somewhere to stand.
Cut two narrow orange strips for the legs.
Glue them underneath the paper plate with enough spacing between them so they appear balanced.
Next, cut two three-toed turkey feet and attach them at the bottom of each leg.
Use a black marker to draw tiny lines across each toe for extra detail.
It’s amazing how such a small addition suddenly makes the turkey look complete.
Kids usually giggle once the feet go on because the bird finally looks ready to walk.
Step 6: Decorate The Feathers
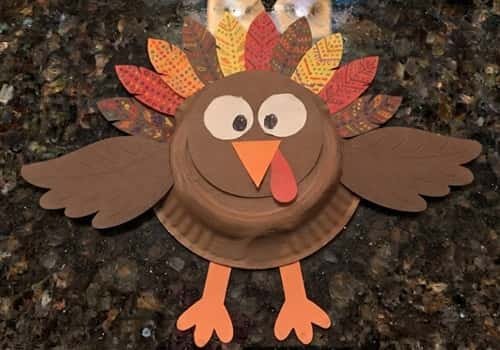
This is where every child can make their turkey completely different.
Draw simple patterns across the feathers using markers.
Try dots.
Little zigzags.
Short dashed lines.
Tiny hearts.
Or even miniature leaves.
Mixing patterns gives the turkey far more character than using solid colors alone.
You don’t has to decorate every feather the same way either.
If younger children are making this kids DIY project, letting them invent their own patterns becomes part of the fun instead of another instruction to follow.
Step 7: Add Final Details
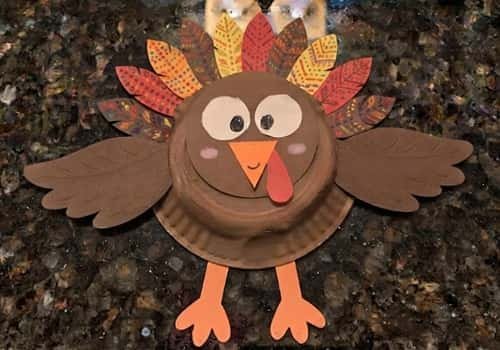
Pause for a moment.
Does your turkey need eyebrows?
Rosy cheeks?
Tiny feather lines?
Maybe a cheerful smile?
Small finishing touches help transform the project from “cute” into memorable.
Add gentle marker details around the wings and body to suggest fluffy feathers.
If you’d like a softer look, lightly dab a dry cotton ball over parts of the painted plate.
This slightly softens the brown paint texture without hiding it.
Take a step back and observe it from the other side of the room.
You’ll notice the layered feathers and expressive face immediately pull your eyes toward the center.
That’s exactly what makes this paper plate turkey craft feel polished while still looking wonderfully homemade.
Easy Ways To Personalize Your Paper Plate Turkey
Every turkey can tell a different story.
Here are a few fun variations:
- Paint the body using a sponge instead of a brush.
- Use scrapbook paper for patterned feathers.
- Add the child’s name across one feather.
- Glue small tissue paper pieces onto each feather for extra texture.
- Turn the turkey into a thankful turkey by writing something you’re grateful for on every feather.
- Attach a craft stick to create a puppet.
- Make miniature versions using dessert-sized paper plates.
These ideas also work beautifully as preschool Thanksgiving crafts, classroom november craft projects, or larger harvest craft displays.
Helpful Tips For This Paper Plate Craft Project
- Let paint dry fully before gluing paper pieces.
- Arrange feathers first before adding glue.
- Use thicker cardstock so feathers stay upright.
- Keep the head slightly above the plate instead of centered.
- Encourage kids to embrace imperfections because handmade crafts always have more personality than perfectly cut pieces.
- Younger children may need help cutting while older kids can complete nearly every step independently.
Final Thoughts
One reason this paper plate turkey craft stays popular year after year isn’t because it’s complicated.
It’s because every finished turkey somehow reflects the child who made it.
One bird might have giant googly eyes while another ends up covered in silly feather patterns, yet both feel equally special.
That’s the quiet magic behind simple paper craft projects.
They encourage decision-making, improve fine motor skills, and spark conversations without children even realizing they’re learning.
As a fall craft, it fits naturally into family traditions, classroom celebrations, and cozy afternoons where creativity matters far more than getting every feather perfectly straight.





