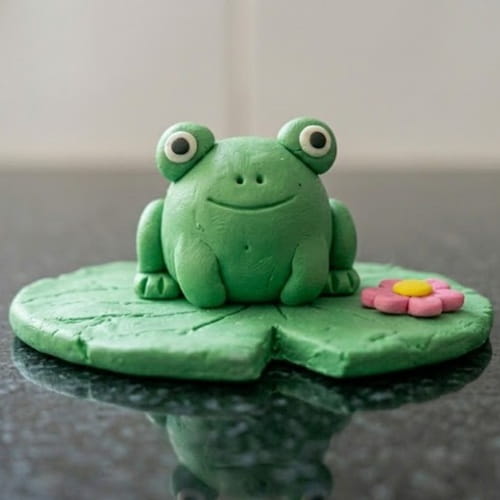
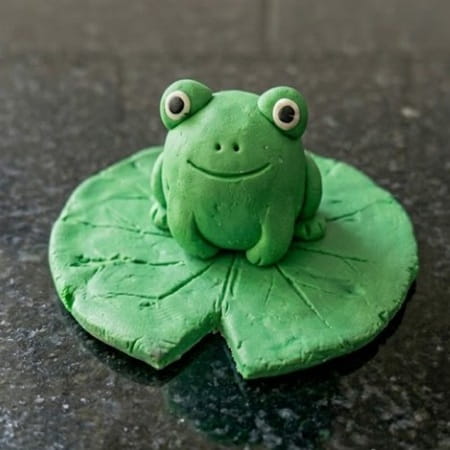
I wanted a clay frog that felt handmade, cheerful, and a little quirky instead of looking perfectly sculpted.
So I added a tiny twist: the frog sits on a lily pad with a small flower and has one eye tilted slightly higher than the other.
That uneven look makes it feel more alive. This project works as a summer clay craft because the bright green colors, lily pad, and flower all give a playful pond vibe.
Whether you’re using air-dry clay, sculpey clay, or another modeling clay, the steps are simple enough for beginners and fun for older kids too.
What You’ll Need
- Green clay for the frog and lily pad
- White clay for the eyes
- Black clay or black paint for pupils
- Pink and yellow clay for the flower
- Toothpick or clay tool for details
- Rolling pin or smooth bottle
- Scissors or craft knife (optional, for trimming the lily pad)
- Small amount of water if you’re using air-dry clay
Why this project works
One frog, one lily pad, one flower
This is one of those clay designs for beginners where the parts are simple shapes.
You don’t need advanced sculpting skills, and the little imperfections actually make the frog cuter. My first frog looked lopsided, and honestly it ended up being my favorite.
Step 1: Make the Lily Pad Base
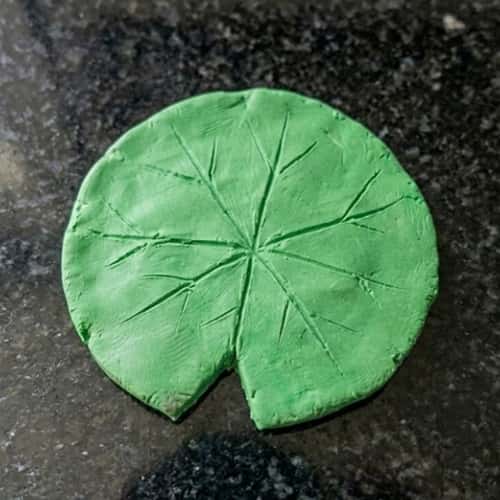
- Take a ball of green clay about the size of a golf ball.
- Flatten it into a circle roughly 4 to 5 inches wide.
- Trim a small wedge from the front edge so it looks like a real lily pad.
- Use a toothpick to draw vein lines from the center outward.
- Don’t press too hard. Real lily pads have soft grooves, not deep cuts.
Mine was a little uneven around the edges. That actually helped it look more natural.
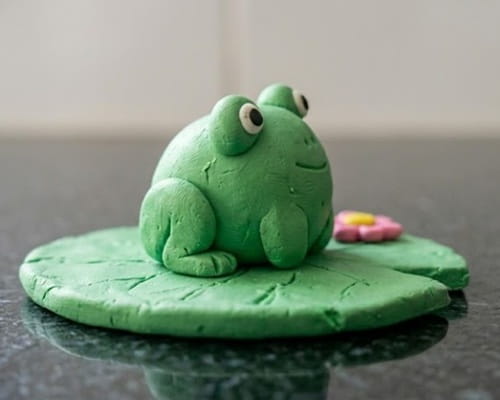
Step 2: Shape the Frog’s Body
- Roll a larger green ball for the body.
- Gently pinch the bottom so it sits flat on the lily pad.
- Keep the top rounded and smooth.
Note: A slightly chunky body makes it look more adorable. It dont need to be perfectly round.
Step 1: Add the Eyes (The Secret Twist)
This is where the frog gets personality.
- Roll two white balls for the eyes.
- Flatten them slightly.
- Place them on top of the head.
- Make one eye sit a little higher than the other.
- Add small black pupils.
That tiny asymmetry makes the frog feel curious and playful. Perfect symmetry often looks factory-made. Handmade crafts should have a little character.
Step 2: Make the Arms
- Roll two short green cylinders.
- Bend them slightly.
- Attach them to the sides of the body so they curve upward.
I like the raised-arm pose because it makes the frog look excited. Press gently where the arms meet the body so they stick well.
Step 3: Create the Feet
- Roll two tiny green logs.
- Flatten them a little.
- Use a toothpick to separate the toes.
- Attach them at the front base of the body.
Don’t worry if the toes aren’t identical. Mine never are.
Step 4: Add the Smile
- Use a toothpick or sculpting tool.
- Draw a shallow curved line across the front of the face.
- Keep it simple.
A tiny smile works better than a deep carved grin. If you press too hard, smooth it with a damp finger and try again.
Step 3: Make the Flower Accent
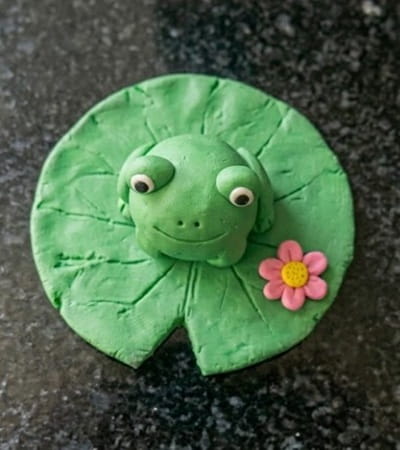
- Roll five tiny pink balls.
- Flatten them into petals.
- Arrange them in a flower shape on the lily pad.
- Add a small yellow center.
This little flower is what turns the project into a cheerful summer clay craft. Bright colors make the frog pop in photos and on display shelves.
Step 8: Final Assembly and Drying
- Press the frog firmly onto the lily pad.
- Check that all parts are attached securely.
- Let it dry according to your clay’s instructions.
Air-dry clay usually needs 24 to 48 hours. Polymer clay follows the package baking instructions. I left mine near a sunny window, but not in direct harsh heat.
Beginner Tips That Actually Help
- Work in stages.
Make the lily pad first, then the body, then details. Trying to sculpt everything at once gets messy. - Keep your hands slightly clean.
Dark lint and dust show up quickly on green clay. - Use water sparingly.
A tiny damp fingertip can smooth air-dry clay. Too much water makes it sticky. - Embrace imperfections.
These are handmade cute clay crafts for kids and adults. A crooked eye often looks more charming than a perfect one.
Creative ideas
Variations to try later
- Add tiny rosy cheeks with pink clay.
- Make a baby frog beside the main frog.
- Turn the lily pad into a magnet by gluing a magnet on the back.
- Use glitter varnish on the flower center for a subtle sparkle.
- Create a whole pond scene with several frogs and lily pads.
These ideas work well for clay modelling kids activities, classroom projects, or a simple frog art lesson.
Why This Frog Stands Out
Most air dry clay frog tutorials focus on perfect symmetry. This version intentionally keeps the handmade character.
The slightly uneven eyes, visible finger marks, and soft organic shapes make it feel like something created at a kitchen table rather than a factory. That’s what gives it personality.
If you’re searching for things to make with dry clay, this project hits a nice balance between easy and impressive.
It’s simple enough for beginners, but detailed enough to display on a desk, shelf, or gift package.
Final Thoughts
One thing I’ve learned from making small clay projects is that viewers remember personality more than perfection.
A perfectly smooth frog might look technically impressive, but a frog with a slightly tilted eye and a quirky smile usually gets the bigger reaction.
That’s especially true for summer clay crafts because people are drawn to bright colors and playful details.
If you enjoy this project, try making a series of tiny pond creatures next.
A frog, snail, dragonfly, and lily pad collection can become a surprisingly charming miniature scene, and it’s a great way to practice basic sculpting skills without needing advanced tools.