If you’re anything like me, you’ve probably set your glasses down on a table, walked away, and spent five minutes trying to remember where they went.
That’s exactly why I started experimenting with air dry clay glasses holders.
Unlike decorative projects that end up collecting dust, this one earns its place on a desk, nightstand, or entry table every single day. It combines the charm of handmade clay crafts with real-world usefulness.
The best part? You don’t need pottery tools, a kiln, or years of experience.
This project falls somewhere between beginner clay ideas and functional clay crafts, making it perfect for anyone interested in making things with air dry clay.
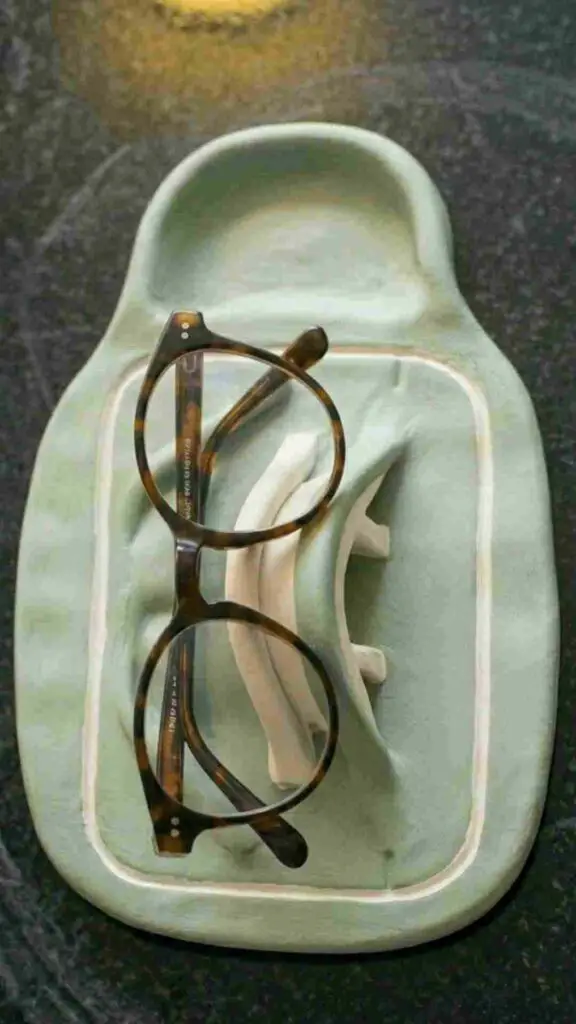
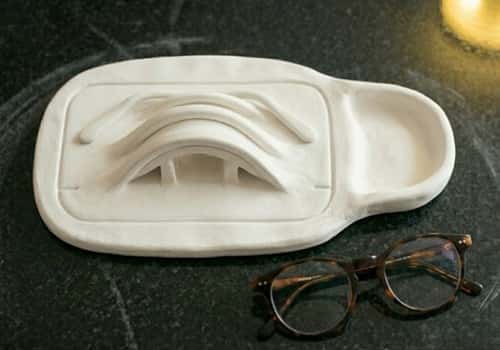
The design I’m sharing today isn’t the usual face-shaped stand you see everywhere. Instead, we’re creating a sculptural glasses rest inspired by smooth river stones and organic shapes.
It looks modern, stores glasses safely, and feels unique enough to gift as one of those thoughtful clay ideas for friends.
Why This Air Dry Clay Glasses Holders Design Stands Out
Most air dry clay glasses holders rely on a nose-shaped structure. They work, sure. But they all kinda look the same.
This version uses a gently sloped cradle that supports glasses naturally. The frame sits securely while the lenses stay elevated. Less pressure. Fewer scratches. Better balance.
And honestly, it looks more like a designer desk accessory than a craft project.
Materials Needed To Make Air Dry Clay Glasses Holders
- 500 tp 700 grams air dry clay
- Rolling pin or smooth bottle
- Craft knife
- Small bowl of water
- Fine sandpaper (220 to 400 grit)
- Pencil
- Cardboard sheet
- Plastic wrap
- Acrylic paint (optional)
- Clear matte sealer (optional)
- Ruler
- Spoon for smoothing
Before starting, wipe your workspace clean. Tiny crumbs have a way of getting trapped in clay. Ask me how I know.
Step 1: Create a Simple Template
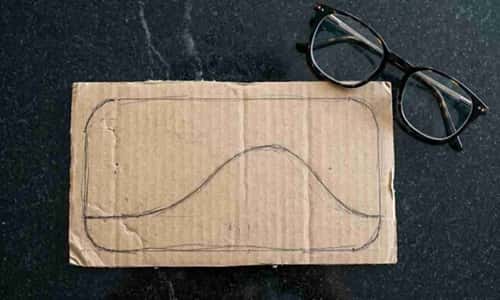
Start with a piece of cardboard.
Draw a rounded rectangle measuring approximately 7 inches long and 5 inches wide. This will become the base shape for the holder.
Now sketch a gentle hill-like curve rising from one side. Think of a smooth wave rather than a sharp peak. The highest point should be around 3 inches tall.
Not perfect? Good.
Handmade projects look more interesting when they have tiny variations. A ruler helps, but don’t obsess over symmetry.
Cut out the template carefully. Place your eyeglasses next to it occasionally to check proportions.
The goal is supporting the frame without overwhelming it.
Step 2: Roll and Prepare the Clay Slab
Open the clay package and knead it for about five minutes.
Don’t skip this.
Cold clay can crack later, and that is annoying.
Press, fold, rotate, repeat.
Once the clay feels soft and consistent, place it between two sheets of plastic wrap. Roll it until it’s roughly ½ inch thick.
Check several spots with your ruler.
Some sections may be thicker. Others thinner. Thats completely normal at this stage.
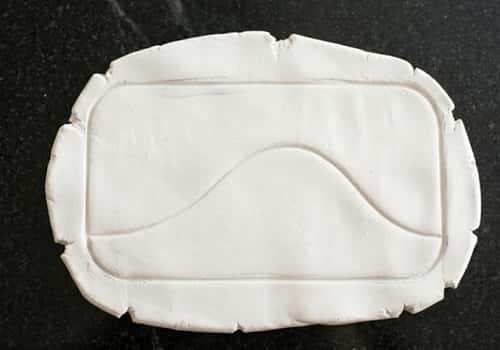
Lay your cardboard template on top and lightly trace around it using a pencil.
Remove the template and cut along the outline with a craft knife.
Take your time.
Rushing here usually creates uneven edges that require extra work later.
Step 3: Build the Glasses Cradle Shape
Now the fun part starts.
Gently lift one side of the clay slab.
Use small rolled towels, crumpled paper covered with plastic wrap, or folded cardboard underneath to create a smooth raised curve.
Imagine forming a miniature landscape.
One side remains lower. The center gradually rises. The opposite side slopes back down.
Avoid sharp angles.
Eyeglasses prefer gentle support points rather than dramatic peaks.
Place your glasses on the structure every few minutes to test the shape. The frame should sit comfortably without wobbling.
If something feels off, adjust it now while the clay is still soft.
This stage looks weird before it looks good. Trust the process.
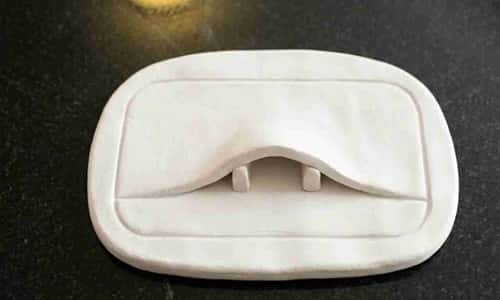
Step 4: Add the Stone-Inspired Support Ridges
This is where our design separates itself from many other air dry clay glasses holders.
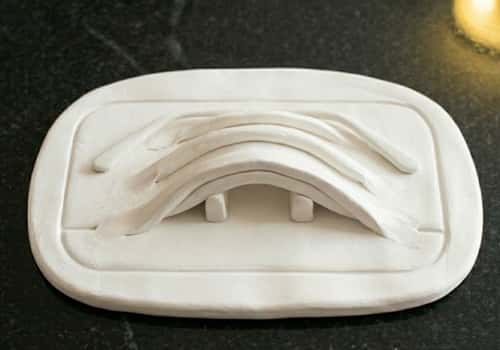
Roll three small clay cylinders about the thickness of your thumb.
Attach them across the top slope where the glasses will rest.
Instead of straight lines, curve them slightly like naturally stacked river stones.
These ridges create soft contact points that keep glasses from sliding around.
Use a little water as glue.
Not too much though.
Excess water turns clay mushy faster than you’d expect.
Blend the edges of each ridge into the base using your fingers or the back of a spoon.
Run your glasses across the surface.
Notice how they settle naturally?
That’s the goal.
Step 5: Refine Every Edge Before Drying
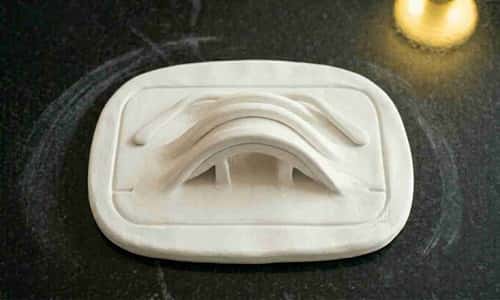
At this point, the overall shape is finished, but the details probably need attention.
Look closely at the perimeter.
See those tiny bumps?
Those little rough spots become much more noticeable once the clay dries. I learned that the hard way after skipping this step on an earlier project.
Dip a fingertip into water and lightly smooth the edges. Then use the back of a spoon to compress the surface. Compression helps strengthen air dry clay and can reduce small cracks later.
Work slowly around the entire holder.
Turn it.
Check it again.
Then check it one more time from a different angle.
Sometimes what looks smooth from one side looks completely different from another.
If you’d like a slightly more artistic appearance, press very shallow fingerprints into selected areas. Not deep enough to affect function, just enough to create subtle texture. It gives the project a handmade personality that mass-produced items never seem to have.
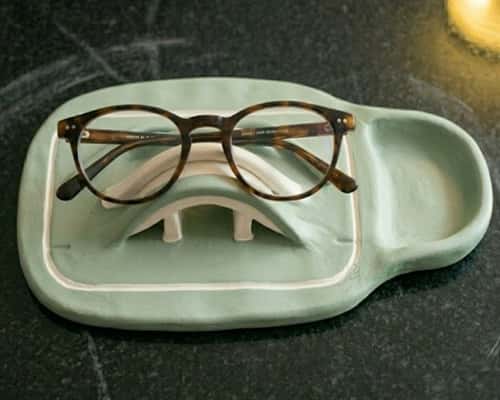
Step 6: Create a Small Catch-All Section
Want to make this project more useful?
Let’s add something unexpected.
Many people place their glasses next to rings, earrings, coins, or a watch. So why not give the holder a built-in storage area?
Using your thumb, gently press a shallow dish into one side of the base.
Think jewelry tray rather than cereal bowl.
The depression only needs to be about ¼ inch deep.
Keep the edges rounded and smooth.
Now your project functions as both a glasses stand and a mini organizer.
This little addition pushes the design beyond typical air dry clay glasses holders and into the territory of functional clay crafts that solve multiple problems at once.
It also makes an excellent handmade gift.
Who wouldn’t appreciate a place for both glasses and jewelry?
Step 7: Let It Dry Properly
Now comes the hardest step.
Waiting.
Seriously.
Move the holder onto a flat surface lined with parchment paper or plastic.
Leave it undisturbed for at least 24 hours.
Depending on your clay brand and room humidity, drying may take 48 to 72 hours.
Halfway through drying, carefully flip the holder.
Don’t rush this.
I know it feels dry on the outside. It probably isn’t.
Air dry clay often tricks people because the surface hardens long before the interior finishes drying.
If you move it too much, warping can happen.
And nobody wants a crooked glasses holder.
Small hairline cracks may appear. That’s okay. Tiny imperfections are normal in making things with air dry clay.
Step 8: Sand for a More Professional Finish
Once fully dry, grab fine sandpaper.
Start with 220 grit.
Then move to 400 grit.
Use gentle circular motions.
The goal isn’t removing material. You’re simply refining the surface.
Pay extra attention to:
- Ridge transitions
- Outer edges
- Tray section
- Glasses support points
You may notice tiny rough spots you missed earlier.
That happen sometimes.
Sand them carefully until everything feels smooth to the touch.
Run your fingers across the holder.
The surface should feel almost stone-like.
This stage dramatically changes how the finished piece looks.
A few minutes of sanding can make an amateur project feel surprisingly polished.
Step 9: Paint or Keep It Natural
Here’s where your personality enters the project.
Option one?
Leave it unpainted.
Natural clay has a soft, earthy appearance that works beautifully in modern spaces.
Option two?
Paint it.
Some color combinations that work especially well include:
- Matte terracotta with cream ridges
- Soft sage green with ivory accents
- Charcoal gray with speckled details
- Warm beige with black linework
- Dusty blue with subtle white texture
Avoid heavy glossy finishes on support surfaces.
Glasses can slide more easily on slick paint.
For a unique twist, use a dry brush technique to create a weathered stone appearance. The ridges will catch extra paint while recessed areas remain darker.
It creates depth without requiring advanced artistic skills.
Even beginners can achieve impressive results.
Which is exactly why this project fits so well among beginner clay ideas and fun clay projects.
Step 10: Seal and Put It to Work
After paint dries, apply a thin coat of matte sealer.
A matte finish tends to look more sophisticated than high gloss for this particular project.
Allow the sealer to cure completely according to manufacturer instructions.
Then finally place your glasses on the holder.
Take a step back.
Admire it.
You started with a lump of clay and ended up with something genuinely useful.
Not every craft can say that.
The support ridges cradle the frame.
The catch-all section stores daily essentials.
The organic shape feels intentional rather than decorative clutter.
That’s what makes this project different.
It blends practical storage with handmade character.
Common Problems and Easy Fixes
My Clay Cracked
Small cracks are common.
Mix a little clay with water until it resembles thick yogurt.
Press the mixture into the crack and smooth it with a damp finger.
Allow it to dry completely before sanding.
My Holder Wobbles
Place sandpaper on a flat surface.
Rub the bottom gently in circular motions.
Usually a few passes fixes the issue.
My Glasses Slide Off
The support ridges may be too smooth.
Add a thin layer of matte sealer mixed with fine texture powder or create slightly more pronounced ridges on future versions.
My Holder Looks Too Plain
Add carved lines.
Stamp subtle patterns.
Create tiny pebble textures.
Or personalize it with initials before drying.
Creative Variations
Once you’ve made one, try experimenting.
Create a mountain-inspired version.
Make a wave-shaped coastal design.
Build a mushroom-themed holder.
Add celestial textures.
Turn the tray into a moon shape.
Some people even create matching desk accessories so the glasses holder coordinates with pen cups and organizers.
These kinds of cute ceramics ideas translate surprisingly well to air dry clay, even without a kiln.
And because each version is handmade, no two pieces ever look exactly alike.
That uniqueness is part of the appeal.
Final Thoughts
The most interesting handmade projects aren’t always the fanciest ones.
Sometimes the best creations solve tiny everyday frustrations. That’s why air dry clay glasses holders are worth making.
They sit at the intersection of creativity and usefulness, which is a rare combination in the craft world.
While many clay crafts exist purely for decoration, this project becomes part of a daily routine.
It also teaches an important design principle i.e. objects feel more valuable when they serve more than one purpose.
Whether you’re exploring easy air clay ideas, searching for thoughtful clay ideas for friends, or simply enjoying making things with air dry clay, creating something functional often ends up being the most rewarding project of all.