Have you ever made a shark from clay and ended up with something that looked more like a potato with fins? I definitely have.
That is exactly why I wanted this air dry clay shark craft to be simple, realistic enough to recognize instantly, and beginner-friendly from start to finish.
The best part? You don’t need fancy sculpting tools or years of experience making clay crafts.
Just a few basic supplies, some patience, and a little imagination.
Whether you’re looking for shark craft ideas for kids, a fun weekend project, or simply want to learn how to make a shark out of clay, this detailed guide walks through every single step so you can create your own ocean predator with confidence.
Why This Air Dry Clay Shark Craft Is Different
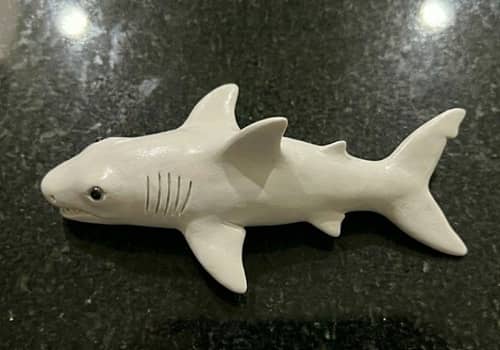
Instead of making a flat shark ornament or a cartoon shark face, we’re creating a small standing shark figure with a rounded body, defined fins, and realistic proportions.
It still stays easy enough for beginners. The project teaches basic sculpting techniques while keeping the process fun and approachable.
Materials Needed To Make Air Dry Clay Shark
- Air dry clay (gray preferred)
- Small amount of white air dry clay
- Small amount of black clay or black acrylic paint
- Plastic sculpting tool, butter knife, or popsicle stick
- Toothpick
- Small bowl of water
- Soft paintbrush
- Acrylic paints (optional)
- Protective work surface
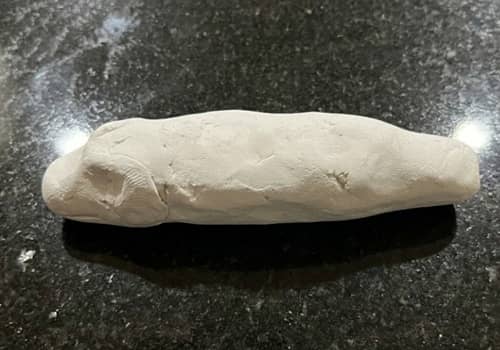
Step 1: Create the Main Shark Body

Start with a lump of gray air dry clay about the size of a large egg.
Roll it between your palms until smooth. Next, gently taper one end so it becomes narrower than the other. The wider end will become the shark’s head and the narrow end will become the tail section.
Look at the shape from above. Does it resemble a chunky torpedo? Good. That’s exactly what you want.
Don’t try making it perfect. Real sharks aren’t perfectly symmetrical anyway and honestly, slight imperfections makes handmade crafts feel more charming.
Place the body on your work surface and lightly flatten the bottom so it can sit without rolling away.
Step 2: Shape the Shark Head
Now let’s turn that clay blob into something unmistakably shark-like.
Using your fingers, gently pinch and smooth the wider end. Create a rounded snout that gradually slopes downward.
A common mistake is making the nose too pointy. Sharks usually have smoother head shapes than people realize.
Turn the clay around several times while shaping. If one side looks larger than the other, adjust it before moving on.
At this stage your shark may look a little weird. That’s normal. Mine always does.
Step 3: Build the Tail
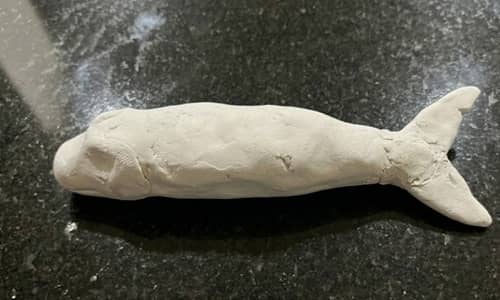
Take two small pieces of gray clay.
Attach one piece to each side of the narrow end to form the shark’s tail fin. Think of a fish tail shape, except slightly sharper and more angular.
Press firmly where the pieces meet the body. Then blend the seams using a damp fingertip.
If the tail feels floppy, don’t panic. Let it sit for five minutes before continuing.
The tail should now be the widest part of the shark when viewed from above.
Step 4: Add the Dorsal Fin
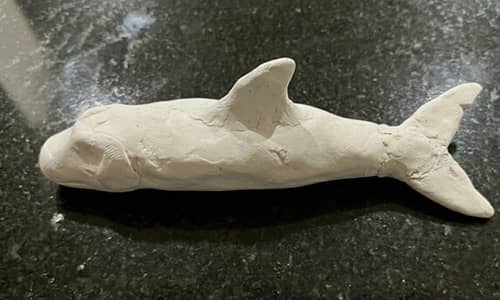
This is the iconic shark fin everybody recognizes.
Roll a small ball of clay and flatten it into a triangle.
Attach it to the center of the shark’s back. Position it slightly closer to the head than the tail.
Press the base gently into the body and smooth the edges so it appears naturally connected.
Suddenly it starts looking like a shark, doesn’t it?
That transformation always feels satisfying.
Step 5: Create Side Fins

Sharks need pectoral fins to really come alive.
Roll two equal clay pieces and flatten them into small teardrop shapes.
Attach one fin to each side of the body slightly behind the head.
Angle them downward slightly. This small detail gives the shark a more natural swimming posture.
Take your time here because uneven fins can make the shark look off balance.
Mine was leaning funny the first time I tried this, so I had to reposition one fin twice.
Step 6: Define the Mouth and Gill Lines
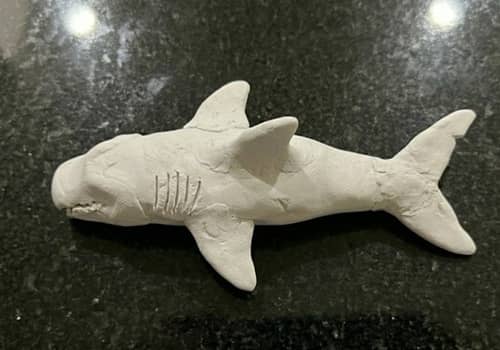
This step adds personality.
Using a toothpick, lightly draw a curved line across the front portion of the head to create the mouth.
Don’t carve too deep.
Next, add three shallow gill lines behind each side fin.
These tiny details change everything. The shark suddenly begins looking intentional rather than just shaped clay.
There are many clay shark craft designs online, but small details like this often separate a decent sculpture from a memorable one.
Step 7: Add Eyes
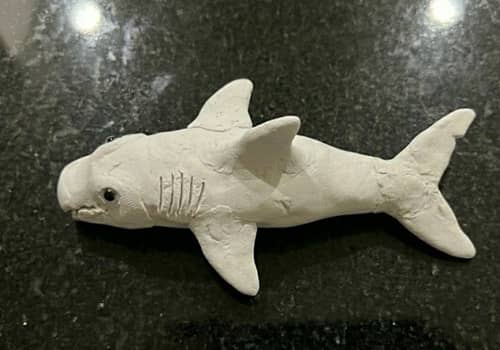
Roll two tiny balls of white clay.
Place one on each side of the head.
Then add even smaller black dots in the center.
Tiny eyes work best. Oversized eyes can make the shark look cartoonish unless that’s your goal.
A lot of people learning how to make a clay shark accidentally make the eyes too large. Keep them subtle.
The shark is really starting to come together now.
Step 8: Smooth and Refine Everything
Dip a paintbrush lightly in water.
Use it to smooth rough areas, fingerprints, and uneven transitions between fins and body.
Don’t soak the clay.
Too much water can weaken details and make edges mushy. Nobody wants a melted-looking shark.
Move slowly around the entire sculpture.
This step often takes longer than shaping itself, but it’s worth every minute.
Step 9: Let the Shark Dry Completely
Put the shark in a secure location and don’t disturb it.
Depending on clay thickness, drying may take 24 to 48 hours.
Resist the urge to keep touching it.
I know it’s tempting. Really tempting.
Turn the shark carefully after the first day if the bottom still feels damp.
Once fully dry, it should feel firm and lightweight.
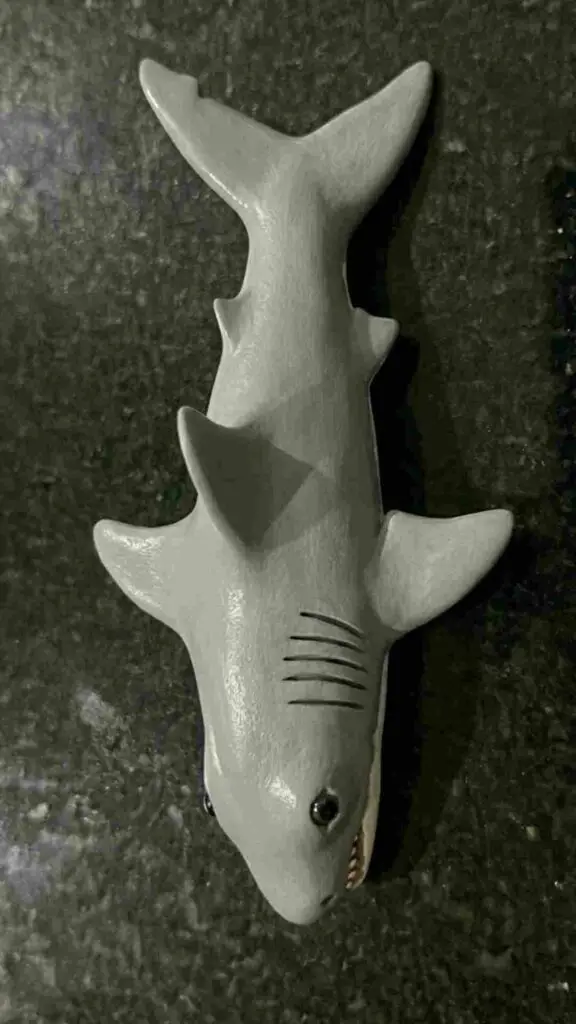
Step 10: Paint and Finish

Paint the upper body medium gray.
Use lighter gray or white underneath to mimic a real shark’s coloration.
Add subtle shading around the fins and gills if desired.
A glossy clear sealer can be applied after the paint dries, although it isn’t required.
And there you have it. Your very own easy air dry clay shark ready for display.
Final Thoughts
One thing I love about sculpting sea creatures is how much they teach observation.
Most people think they know what a shark looks like until they actually try building one from scratch.
Suddenly you notice fin placement, body proportions, and subtle details you’d normally overlook.
That’s where projects like this become more than simple crafts. They train your eye to see shapes differently.
So the next time you’re exploring new shark craft ideas for kids or looking for a fresh clay shark tutorial, challenge yourself to study the real animal first. You’ll be surprised how much better every future creation turns out.