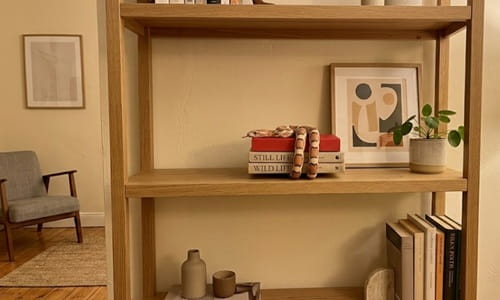
If your shelves are starting to feel a little predictable, air dry clay might be exactly what they need.
I love how a simple block of clay can turn into something that looks personal, slightly imperfect, and full of character.
Unlike store-bought decorations, these air dry clay shelf decor ideas have tiny flaws, fingerprints, and handmade charm that make them feel alive.
Some of these projects borrow inspiration from air dry clay shelf ideas, western clay projects, and even unusual things to sculpt that rarely show up on Pinterest. The best part? You don’t need special tools or pottery experience. Just clay, patience, and a bit of curiosity.
1. Moon Window Shelf Tile
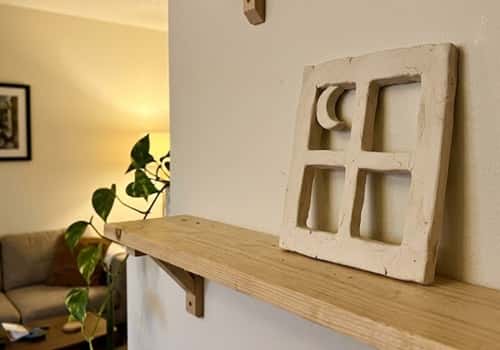
This piece looks like a tiny old window someone discovered in an abandoned cottage. It sits against books, frames, or small plants and instantly adds texture.
Start by rolling a slab of air dry clay about ¼ inch thick. Don’t worry if the edges ain’t perfectly straight because that actually helps the handmade look.
Cut a rectangle roughly 5 inches tall and 4 inches wide.
Using a ruler, lightly score a vertical line down the center and a horizontal line across the middle to create four window panes.
Now create a crescent moon. Flatten a tiny ball of clay after rolling it. Use a bottle cap to cut a circle, then overlap another smaller circle to remove part of it.
Attach the moon inside one pane using a little water.
Take a toothpick and add tiny cracks around the frame. These make it feel aged.
Press a rough sponge gently across the surface to create subtle texture.
With all that said, i’d say give it about 24 to 48 hours to dry flat.
Once fully dry, paint it with a warm stone color. Dry brush a little white over raised areas.
Lean it directly on a shelf or place it behind stacked books.
2. Desert Horseshoe Trinket Plaque
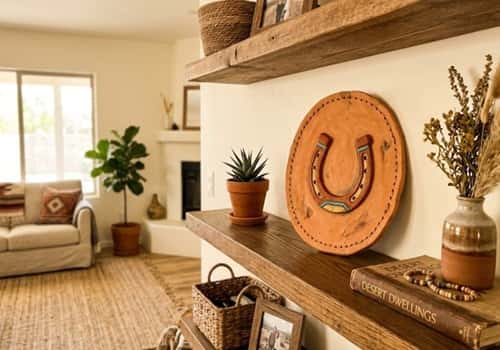
For anyone who enjoys western clay ideas, this one feels different without being difficult.
Roll clay into an oval about 6 inches long.
Smooth the surface with slightly damp fingers.
Sketch a horseshoe shape in the center using a pencil. Don’t press too hard.
Using a craft knife, carefully cut along the outline.
Roll several tiny clay ropes and cut them into short sections.
Arrange these around the horseshoe to create a stitched leather effect.
Want extra detail? Press a small screwdriver tip repeatedly around the edge.
The pattern starts looking really nice once it dries.
Leave the plaque flat until completely hardened.
Paint with muted terracotta, sand, or dusty brown shades inspired by old western clay projects.
A little dark wax rubbed into the grooves makes every detail stand out.
Display it upright on a mini easel or tuck it between books.
3. Coiled Snake Book Nook Accent
Most people never think about snake shelf decor, which is exactly why this stands out.
Roll a thick clay rope around 12 inches long.
One end becomes the tail.
Gently taper the opposite end into a snake head.
Curve the body into loose coils that can wrap partially around books.
This project works especially well if you’re looking for unique mould it clay art ideas.
Use a toothpick to create shallow scale impressions. You don’t need thousands of scales. A few rows already create texture.
Pinch tiny eye sockets.
Add a forked tongue if you want extra personality.
For corn snake decor inspiration, carve diamond patterns along the back.
Allow the snake to dry while supported by rolled towels so the curves stay in place.
Once hardened, paint using earthy browns, muted orange, cream, and soft charcoal details.
The finished piece almost looks like rustic ceramic snake decor from a boutique store.
It look surprisingly expensive when displayed beside vintage books.
4. Wildflower Fossil Shelf Stones
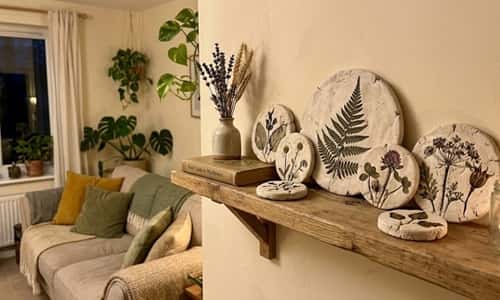
This project feels like something collected during a countryside walk rather than something made at a kitchen table.
Roll your air dry clay into a slab about ⅜ inch thick.
Using a drinking glass, cut several circles between 3 and 4 inches wide.
Now comes the fun part.
Gather small flowers, fern leaves, tiny weeds, or dried stems from your yard. Place one gently on top of the clay.
Use a rolling pin and slowly roll over the plant material.
Lift it away carefully.
You should see every little vein and petal pressed into the surface.
If the imprint seems faint, don’t panic. Once paint gets added later, those details suddenly become visible.
Create three or four fossil stones instead of just one. A small grouping always looks more intentional on a shelf.
On a level surface, let them dry completely.
Paint with chalky beige, pale stone gray, or weathered ivory.
Wipe darker paint into the impressions and immediately remove excess with a paper towel.
The contrast highlights every tiny botanical detail.
These work beautifully as air dry clay shelf decor beside small plants, candles, or framed photographs.
5. Hanging Cottage Key Shelf Charm
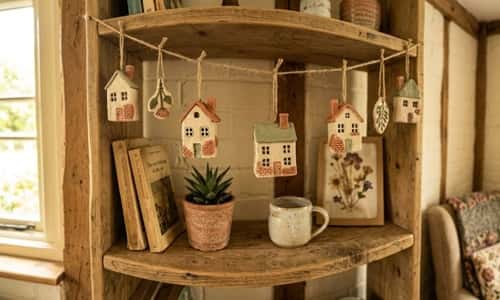
Sometimes the smallest shelf decorations become the first thing people notice.
Start by rolling a clay slab about ¼ inch thick.
Draw a simple cottage silhouette around 5 inches tall.
Cut it out carefully with a craft knife.
Smooth rough edges with damp fingers.
Next, roll tiny clay ropes.
Use them to create a miniature front door, roof trim, and little window frames.
The details don’t need to be perfect. In fact, if they’re slightly crooked, the cottage ends up feeling more charming.
Using a skewer, poke a hole near the roof peak.
This will allow you to thread twine through later.
For extra character, press the tip of a pencil into the walls to create subtle stone textures.
Let everything dry completely.
Paint in soft cream, faded sage green, dusty blue, or muted white.
Thread natural jute twine through the top.
Hang it from a shelf bracket, basket handle, or decorative hook.
This clay home decor diy project adds height and breaks up flat shelf arrangements.
6. Driftwood Inspired Shelf Totems
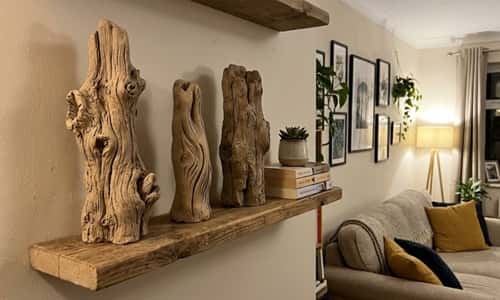
If you’re looking for unusual things to sculpt, this one rarely appears in typical air dry clay shelf ideas.
Instead of creating an object, you’ll mimic pieces of weathered driftwood.
Roll three cylinders of clay in different sizes.
One should be around 6 inches tall, another 4 inches, and the smallest around 3 inches.
Now gently flatten random sides.
Twist each piece slightly.
Press your fingers into sections to create dents and irregularities.
Real driftwood is never symmetrical.
Use a toothpick and drag long lines from top to bottom.
Vary the depth.
Some grooves should barely show while others can be deeper.
Scrunch aluminum foil into a ball and press it lightly across the surface.
This adds organic texture very quickly.
Leave the pieces standing upright while drying.
You may need to support them with cups for the first few hours.
Once dry, paint with layered shades of gray, beige, weathered brown, and pale cream.
Dry brushing works especially well here.
Arrange the finished totems in groups of three.
There is something oddly calming about them, almost like miniature sculptures from a modern art gallery.
They looks complicated, but they’re actually beginner friendly.
7. Tiny Prairie Arch Village
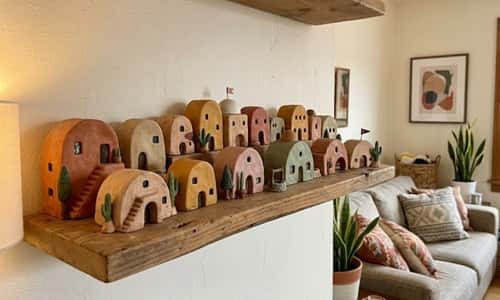
This one takes inspiration from western clay ideas but avoids the usual horses and cowboy themes.
You’ll create a collection of miniature arch-shaped buildings that look like a quiet desert village sitting on your shelf.
Roll air dry clay into a slab about ¼ inch thick.
Using a craft knife, cut three to five arch shapes ranging from 2 to 5 inches tall.
Keep the shapes slightly different. Uniform pieces can feel a bit too manufactured.
On each arch, carve tiny doors, windows, and simple roof lines.
A toothpick works perfectly for this.
Press small dents around the buildings to imitate aged adobe walls.
For extra texture, dab the surface with a damp sponge.
Let all the pieces dry flat.
Once hardened, paint using warm clay tones like sand, terracotta, faded peach, and dusty cream.
Lightly dry brush white over the raised areas.
Arrange the buildings in layers across a shelf so some sit slightly behind others.
The result feels like a tiny handcrafted landscape rather than ordinary air dry clay shelf decor.
8. Mushroom Lantern Shelf Sculpture
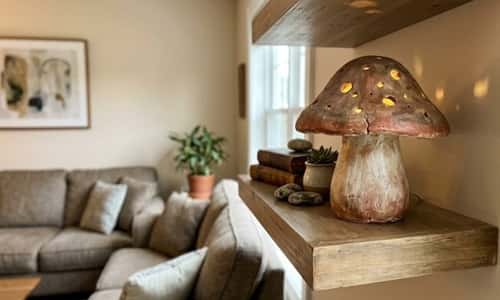
Most mushroom crafts are cute. This one aims for something moodier and more decorative.
Start by rolling a clay ball about the size of a golf ball.
Shape it into a thick mushroom cap.
Next, roll a short cylinder for the stem.
Attach both pieces using a little water and gentle blending.
Now create several tiny holes through the cap using a straw or wooden skewer.
Space them randomly.
The holes will resemble lantern openings once painted.
Press subtle vertical lines into the stem.
If you want extra woodland character, add a few tiny bumps around the cap edge.
Allow the sculpture to dry completely.
Paint the stem in soft cream or mushroom beige.
For the cap, use earthy browns, muted rust, or faded olive shades.
Apply darker paint inside the lantern holes to create depth.
Place it beside books, plants, or candles.
When light hits the openings, shadows form naturally and the piece looks far more detailed than the effort required.
It don’t require advanced sculpting skills, which makes it perfect for beginners.
9. Rustic Ceramic Snake Wall Leaner
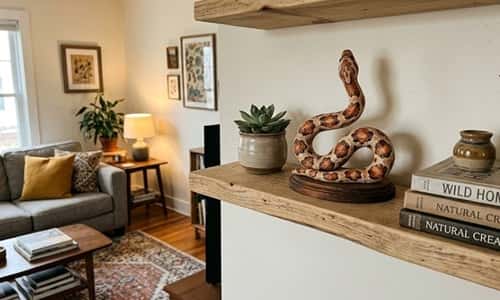
This project combines snake shelf decor and rustic ceramic snake decor influences into something surprisingly elegant.
Roll a thick clay rope approximately 15 inches long.
Taper both ends slightly.
One end becomes the tail.
Shape the opposite end into a simple snake head.
Now curve the snake into a large flowing S-shape.
Instead of creating a freestanding figure, keep the design relatively flat.
This allows it to lean securely against books or wall decor on a shelf.
Using a toothpick, create rows of gentle scale marks.
Avoid making every scale identical.
Nature isn’t perfect, and your sculpture shouldn’t be either.
For a corn snake decor inspired appearance, carve repeating diamonds along the center of the body.
Add small eye impressions with a pencil tip.
Leave the sculpture on parchment paper to dry.
Flip it carefully after 24 hours to prevent warping.
Paint with warm clay browns, muted copper, charcoal accents, and soft cream highlights.
A dry-brushed finish helps mimic aged ceramic.
The finished piece feels artistic rather than spooky, making it one of those things to sculpt that immediately sparks conversation.
10. Vintage Quilt Pattern Shelf Tile
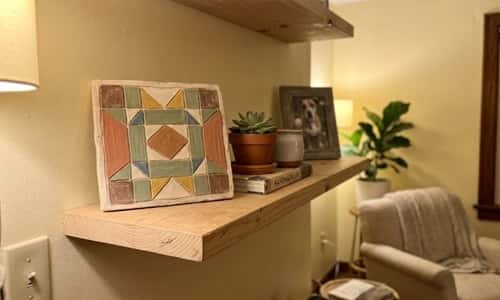
Some of the best air dry clay shelf decor pieces borrow inspiration from unexpected places. This one takes cues from old patchwork quilts and transforms them into a decorative clay tile.
Roll out a slab of air dry clay about ¼ inch thick.
Cut a square measuring roughly 5 x 5 inches.
Using a ruler, lightly score the surface into smaller squares and triangles. Think of it like drawing a simple quilt block pattern.
Now use a pencil, toothpick, and the edge of a butter knife to create different textures inside each section.
One square might have dots.
Another might have diagonal lines.
A third could have tiny flower impressions.
The contrast is what makes the piece interesting.
Press lightly. If you carve too deep, some sections can become fragile after drying.
Allow the tile to dry completely on a flat surface.
Paint each section using muted farmhouse shades like dusty blue, faded cream, weathered sage, and soft terracotta.
Once dry, lightly brush white paint across the surface to soften the colors.
Lean the finished tile behind books or small frames.
It feels handmade, nostalgic, and unlike most clay home decor diy projects people usually make.
11. River Stone Stack Illusion Sculpture
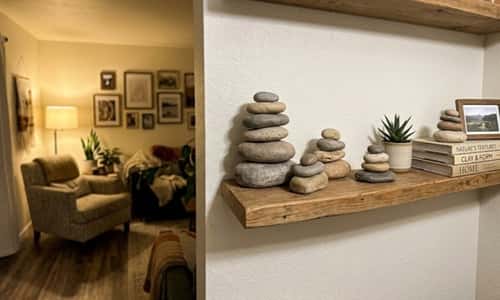
Here’s one that fools people every time.
At first glance it looks like a stack of smooth river stones. Then they realize it’s made entirely from clay.
Roll several clay balls in different sizes.
Flatten them slightly to create pebble-like shapes.
Do not make perfect circles. Natural stones are oddly shaped.
Use your fingers to soften every edge.
Stack the pieces temporarily while the clay is still soft.
Once you like the arrangement, separate them again.
Scratch connecting areas lightly and add a tiny amount of water before reattaching.
This helps everything bond securely.
Now texture the surface using a damp sponge.
The tiny marks mimic natural stone surprisingly well.
Allow the sculpture to dry upright.
Support it if needed during the first day.
After drying, paint each “stone” with slightly different shades of gray, cream, taupe, and pale brown.
Blend colors while still wet.
The result looks much more realistic that most people expects.
Place it near plants, candles, or woven baskets for a natural shelf display.
12. Crescent Snake Moon Shelf Accent
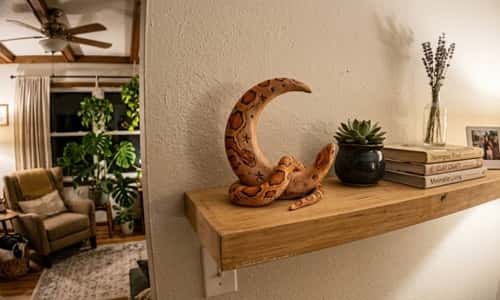
For the final project, let’s combine snake shelf decor, corn snake decor inspiration, and celestial design into one statement piece.
Roll a thick clay rope about 14 inches long.
Gradually taper both ends.
Shape one end into a small snake head.
Now curve the entire body into a crescent moon shape.
Take your time here.
The smoother the curve, the more elegant the finished piece feels.
Using a toothpick, add scale texture across portions of the body.
Don’t cover every inch. Leaving some smooth areas creates visual contrast.
Along the center of the snake, carve repeating diamond shapes inspired by corn snake markings.
Use a pencil tip to add eyes and subtle facial details.
Want something extra?
Press tiny star shapes around the inner curve of the moon using a small cutter or carefully carved stamp.
Allow the sculpture to dry completely on a flat surface.
Paint with earthy browns, soft charcoal, warm cream, or even weathered bronze tones.
Apply darker paint into the carved details and wipe away excess.
This highlights the textures beautifully.
The finished piece blends rustic ceramic snake decor aesthetics with modern shelf styling, making it one of the more unusual mould it clay art ideas you’ll find.
Its the kind of decor that gets noticed immediately without being loud.
Final Thoughts
One thing I’ve noticed while experimenting with air dry clay shelf ideas is that the projects people remember most are rarely the perfect ones.
Tiny fingerprints, slightly uneven edges, and unexpected textures often create more character than flawless symmetry. That’s why many professional-looking displays still borrow ideas from handmade objects.
Whether you’re exploring western clay projects, sculpting unusual creatures, or creating miniature architectural pieces, try thinking beyond decorations and start thinking about storytelling.
A shelf becomes much more interesting when every object feels like it has a little history behind it. That’s where truly memorable air dry clay shelf decor begins.