Halloween crafts don’t always have to be pumpkins, ghosts, and bats stuck onto paper.
I love taking those familiar characters and shrinking them into something wearable.
That is exactly where these Clay Ear cuff craft ideas for Halloween get interesting.
These little clay projects are colorful, playful, and surprisingly easy to personalize.
You can make them with air-dry clay for a no-oven activity, or use polymer clay if an adult is available to handle baking.
Ready to make something that actually feels different? Grab a few clay colors, keep the shapes chunky and simple, and let’s turn ordinary clay activities into tiny Halloween accessories.
Choose Your Air Dry Clay Type
Regular Air Dry Clay | Cornstarch Clay | Homemade Clay
Affiliate Disclaimer: Some of the links in this post may be affiliate links, which means I may earn a small commission if you choose to make a purchase through them – at no extra cost to you. I only share products that genuinely fit this project and can help make your ceramic mug clay craft process easier and smoother. Your support helps keep ideas like this coming.
A Quick Note Before You Start
For children, I recommend air-dry clay because it avoids oven handling.
Use a soft, lightweight clay and keep the finished pieces small.
A simple reusable silicone ear-cuff base is also a good option because the clay becomes the decorative part rather than the entire mechanism.
For polymer clay versions, children can shape the clay, but an adult should handle the oven, baking tray, and hot finished pieces.
You will need:
- Lightweight air-dry clay or polymer clay
- A silicone or soft plastic ear-cuff base
- Acrylic paint if using plain air-dry clay
- Small paintbrush
- Toothpick for details
- Rolling pin or smooth bottle
- Craft glue, used by an adult
- Baking paper for polymer clay
- Clear sealer if desired
Don’t make the clay piece too thin. A slightly chunky design is easier for little fingers and less likely to crack.
1. Tiny Pumpkin Ear Cuff
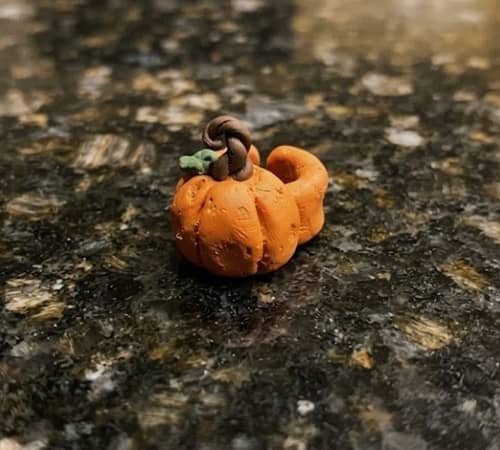
Start with a small orange ball of clay.
Flatten it slightly between your fingers, then gently pinch the sides to create a pumpkin shape.
Use a toothpick to make three or four shallow vertical lines.
Add a tiny green stem on top.
Now comes the fun part. Make the pumpkin slightly crooked instead of perfectly symmetrical. That handmade wobble actually makes it look cuter.
Allow air-dry clay to dry completely. For polymer clay, an adult can bake it according to the manufacturer’s instructions.
Attach the finished pumpkin to the upper portion of a soft ear-cuff base with suitable craft adhesive.
2. Friendly Ghost Ear Cuff
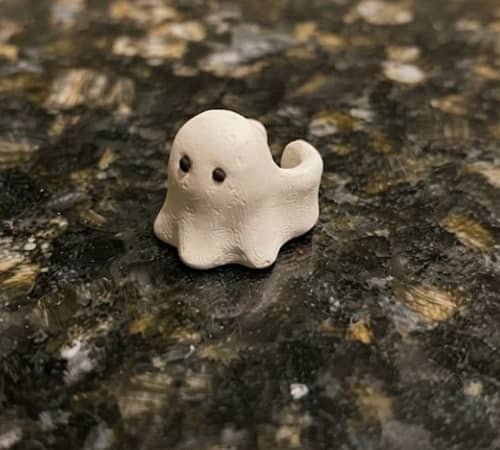
White clay makes this one ridiculously simple.
Roll a small piece into a rounded ghost body. Flatten the bottom slightly and gently pull two tiny points outward to create a floating-sheet shape.
Use a toothpick to make two small eye holes. Add a tiny open mouth if you want your ghost to look surprised.
Here’s a little trick: don’t make the ghost perfectly smooth. A few soft wrinkles around the bottom make it look like fabric floating in the air.
Let it dry before attaching it to your cuff base.
This also works beautifully as a beginner clay cuff earrings for Halloween project because the design doesn’t require complicated shapes.
3. Black Cat Moon Cuff
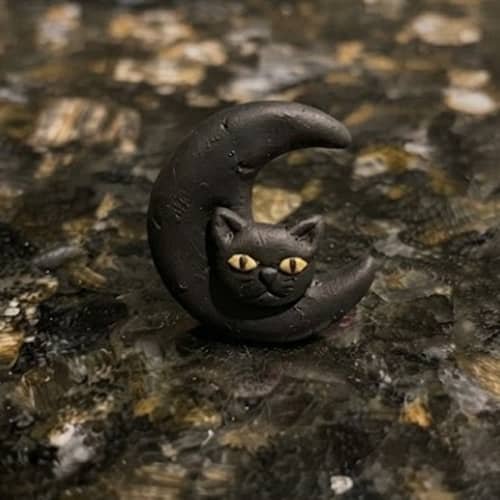
Want something a little more mysterious?
Shape black clay into a small crescent moon. Then make a tiny cat head with two pointed ears and place it in front of the moon.
Keep the details very basic. Two tiny yellow eyes are enough.
For younger children, skip the tiny eyes and paint them on after the clay dries. That is much easier for little fingers.
The black-and-yellow combination is one of my favorite clay color combos for Halloween because it immediately feels spooky without needing lots of decoration.
4. Purple Bat Ear Cuff
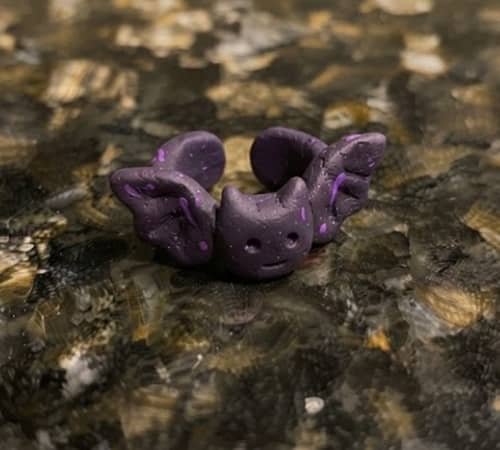
Roll purple clay into a tiny oval body. Flatten two larger pieces of clay and cut or shape them into simple bat wings.
Don’t worry about making both wings identical.
Press the wings gently against the body and add two tiny ears. A little black or white paint can create the eyes after drying.
If you want something brighter, this is a perfect place to experiment with Sculpey neon colors. Neon purple or pink can make the bat look more playful for children.
5. Mini Frankenstein Cuff
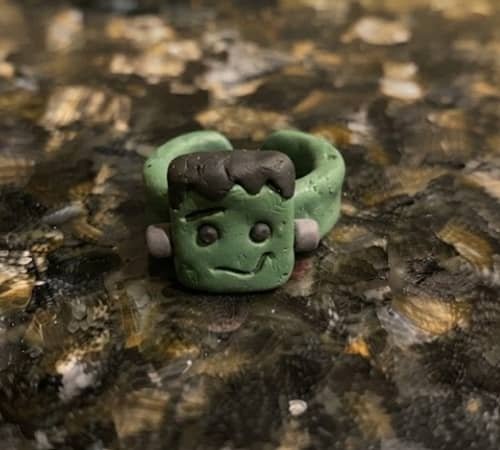
Make a small green rectangular head from clay.
Round the corners slightly so there are no sharp edges. Add black hair across the top and two tiny dark eyes.
For Frankenstein’s classic neck bolts, use two very small gray clay dots rather than anything metallic or pointed.
Add a crooked black smile.
This one is especially good for beginners because it is basically made from simple shapes.
It also works as one of those polymer clay jewelry ideas that looks much harder than it actually is.
6. Candy Corn Ear Cuff
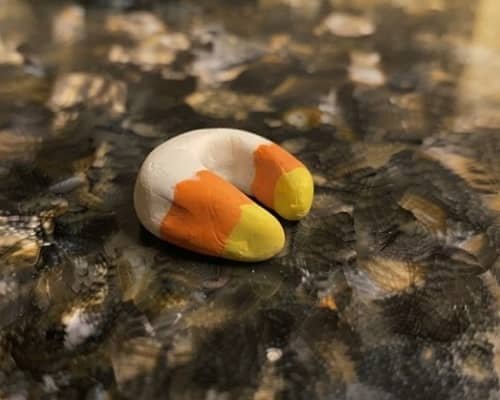
This design is almost like making a tiny clay snack.
Form white, orange, and yellow clay into three small sections. Stack them carefully and shape the combined piece into a rounded triangle.
Don’t make it razor sharp. A softly rounded candy-corn shape is safer and much easier to handle.
You can also change the traditional colors. Try lavender, pink, and white for a modern Halloween version.
That makes this a fun opportunity to explore different polymer clay color combinations without adding complicated details.
7. Little Witch Hat Cuff
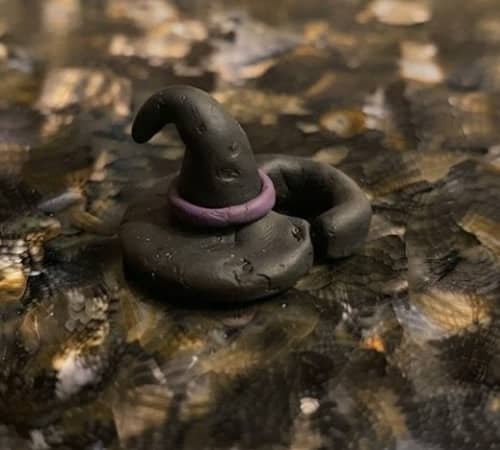
Create a small cone from black clay.
Bend the tip slightly to one side.
Now flatten a tiny black circle and place the cone on it. Add a narrow purple or orange clay band around the hat.
That’s basically it.
The slightly bent hat is what gives this piece personality. A perfectly straight miniature witch hat can look manufactured, while an uneven one looks like a child actually made it.
This is also a cute starting point for DIY clay projects during a Halloween craft afternoon.
8. Eyeball Ear Cuff
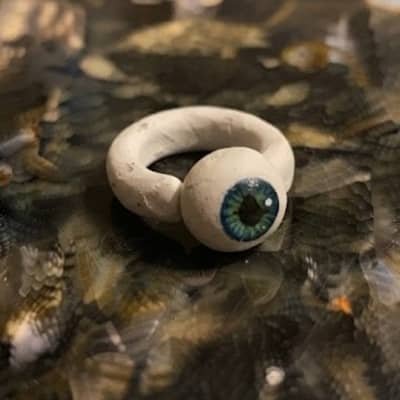
Make a tiny white clay ball and flatten it slightly.
Add a blue, green, or purple iris in the center. Finish with a small black pupil.
For a silly monster effect, make the pupil slightly off-center.
This is one of the easiest designs in this collection and could be made during a quick clay activity when you don’t want a long project.
If you are using polymer clay, remember that all tiny pieces must be securely pressed together before an adult handles baking.
9. Tiny Mummy Cuff
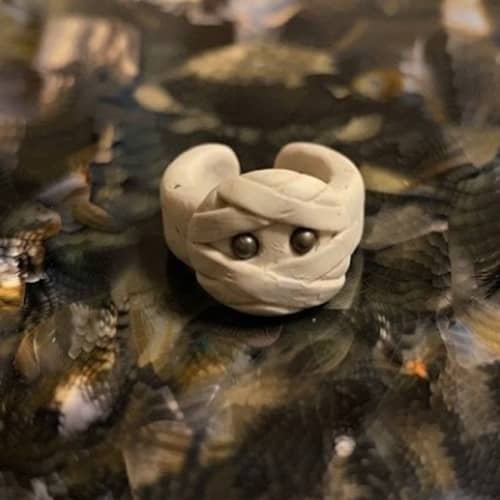
Start with a small oval piece of white or cream clay.
Instead of sculpting a complicated face, make thin raised clay strips across the front to imitate mummy wrapping.
Leave two tiny gaps for the eyes.
Black eyes peeking through the bandages instantly make the design recognizable.
Keep the strips thick enough that they don’t break while you’re shaping them.
This is where beginners sometimes make the mistake of trying to create details that are way too tiny.
10. Poison Potion Bottle Cuff
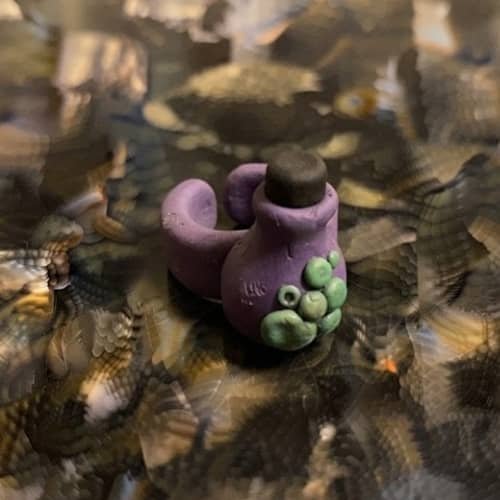
Make a tiny rounded bottle from purple clay.
Flatten the bottom so it can sit upright while drying. Add a tiny black clay cap and a small green clay drop or bubble on the front.
You don’t need a realistic bottle. In fact, a slightly lopsided potion bottle makes the design more charming.
Purple, green, and black make a strong Halloween palette.
This could also inspire a larger collection of polymer clay jewelry with potion bottles, spell books, moons, and tiny witch accessories.
11. Spider Web Cuff
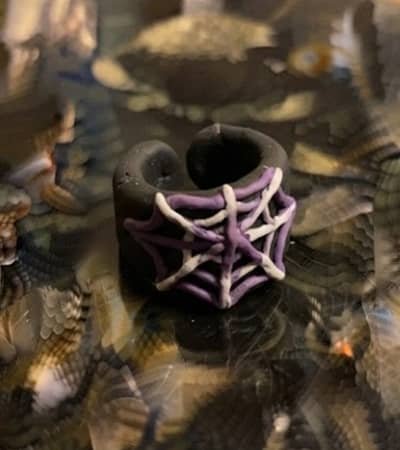
For this design, use a small round black clay base.
Flatten it gently. Then add thin white or purple clay lines radiating from the center and connect them with curved lines.
Don’t make the web too delicate.
A chunky, slightly uneven web is much easier for kids to create and has more handmade character.
If the lines become difficult to handle, simply paint the web after the clay dries. That’s honestly easier.
12. Cute Vampire Bat Fang Cuff
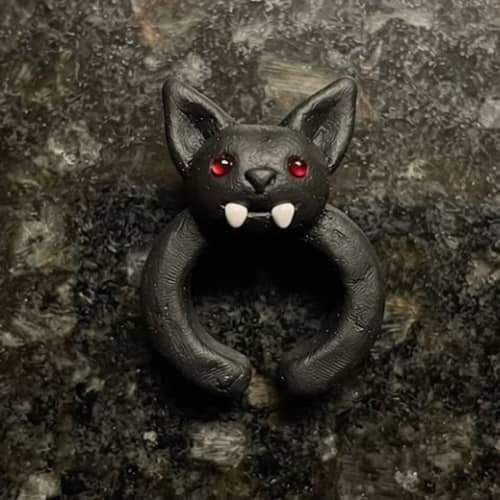
Make a tiny oval black bat head with two pointed ears.
Add two small white clay fangs, but keep them rounded rather than needle-like. You can also paint the fangs instead, which is a better choice for younger children.
Add two tiny red eyes.
The contrast makes this one pop immediately.
If you’re building a collection of clay cuff earrings for Halloween, this design pairs especially well with the pumpkin, ghost, and witch-hat versions.
13. Bonus: Melting Monster Cuff
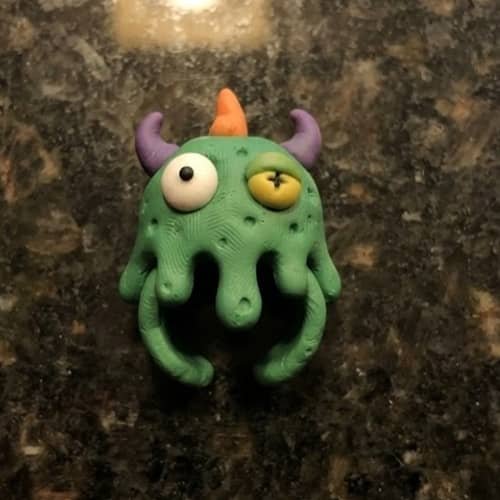
I couldn’t resist adding one more.
Take a bright green piece of clay and shape it into a small monster head. Instead of giving it a normal bottom edge, create three uneven drips as though the monster is melting.
Add two mismatched eyes.
Maybe one is larger than the other?
That’s exactly the point.
For a more unusual finish, combine lime green with purple, orange, or black.
These unusual clay color combos can make the finished piece look much more contemporary than traditional Halloween jewelry.
How to Finish the Clay Ear Cuffs Safely?
Once the clay pieces are completely dry, check every edge with your fingertip. If anything feels sharp or brittle, smooth it before wearing.
For children, I prefer attaching the clay decoration to a soft silicone ear-cuff base rather than asking them to bend metal wire into an ear cuff. It is simpler, more comfortable, and avoids sharp ends.
An adult should handle the adhesive step. Give the finished piece plenty of time to cure before trying it on.
Also, make one test piece first. Why? Because clay behaves differently depending on thickness, brand, humidity, and drying time.
If you’re using polymer clay, follow the exact temperature and baking time printed by the clay manufacturer. Never guess the oven temperature.
And remember, these are decorative craft pieces. Don’t sleep in them, and remove them immediately if they feel uncomfortable.
Final Thoughts
What makes these Clay Ear cuff crafts ideas for Halloween interesting isn’t really the ear cuff itself.
It is the idea of shrinking an entire Halloween character into one tiny handmade object.
That forces you to think about shape, color, and which details actually matter.
A pumpkin only needs its ridges and stem. A ghost needs eyes and an expressive silhouette. A bat needs recognizable wings.
That’s a useful clay-making lesson too.
When working with children, I would encourage them to change one feature instead of copying every example exactly.
Make the ghost grumpy. Give the bat mismatched wings. Use unexpected colors.
Those little imperfections are what turn a basic clay craft into something genuinely their own.
Also Read:





