I have always loved tiny clay projects because they let kids make something that feels genuinely special without needing a huge craft table.
This clay ear cuff craft takes that idea one step further. Instead of making ordinary earrings, we are shaping little pieces of clay into wearable-looking sculptures that sit around the outer ear.
And honestly, they can look surprisingly cool!
For this list, I’m focusing on simple air-dry clay, easy shapes, fun clay color combos, and designs little hands can manage.
Ready to make something that looks like it came from a tiny handmade jewelry shop? Let’s get started.
Kid-safety note: These ideas use air-dry clay rather than oven-baked polymer clay. Children should be supervised, especially when fitting anything around the ear. Never push a cuff into the ear canal or make it tight. For very young children, use the finished pieces as pretend-play or craft decorations rather than wearable jewelry.
Choose Your Air Dry Clay Type
Regular Air Dry Clay | Cornstarch Clay | Homemade Clay
Affiliate Disclaimer: Some of the links in this post may be affiliate links, which means I may earn a small commission if you choose to make a purchase through them – at no extra cost to you. I only share products that genuinely fit this project and can help make your ceramic mug clay craft process easier and smoother. Your support helps keep ideas like this coming.
1. Rainbow Sprinkle Clay Ear Cuff
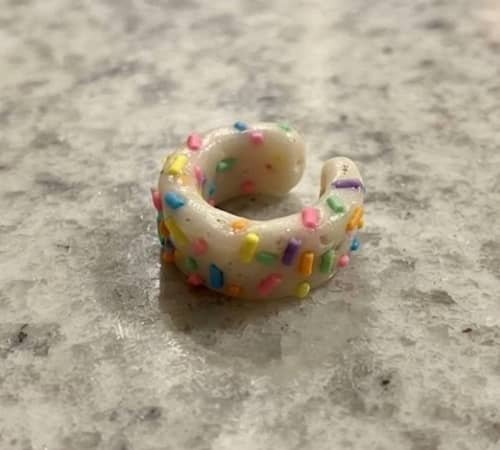
This one is almost impossible to mess up.
Roll a small piece of air-dry clay into a thin sausage. Gently bend it into a shallow C shape that could sit around the outside edge of the ear. Don’t make the curve too tight.
Now flatten tiny balls of pink, yellow, blue, orange and purple clay. Press these little dots onto the main cuff.
The trick is to keep the decorations very small and light.
A giant rainbow may look adorable on the table but it can become uncomfortable when worn.
Leave the cuff flat while it dries. Once completely dry, you can add tiny painted dots if you want more color.
Why kids love it: It feels like making a miniature rainbow bracelet for your ear.
2. Tiny Flower Clay Cuff
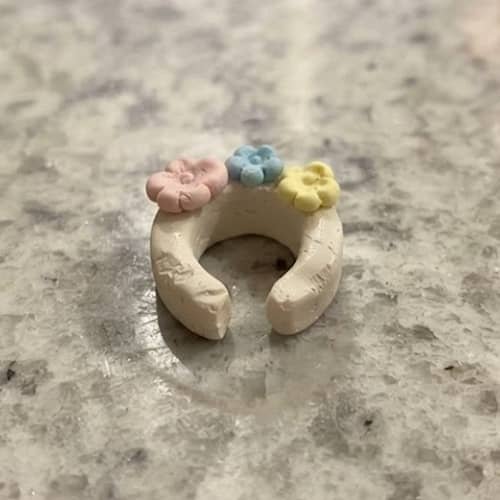
Flowers work beautifully because the decoration can stay lightweight.
Make a simple curved clay strip first. Then create three or four tiny flowers separately.
For each flower, roll five microscopic clay balls. Place them in a circle after slightly flattening them.. Add an even smaller ball in the middle.
Press the flowers gently onto one side of the cuff.
I like leaving the flowers slightly imperfect. Perfect petals actually make the project look more manufactured, while uneven petals give it that charming homemade polymer clay jewelry look.
Let everything dry completely before handling.
Quick idea: Try yellow flowers on a white cuff, pink flowers on green, or purple flowers on pale blue.
3. Mini Mushroom Clay Ear Cuff
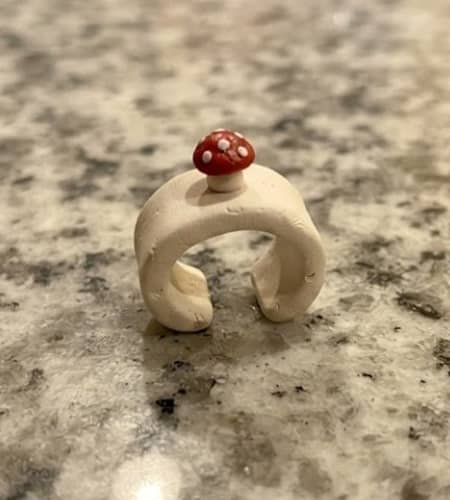
Want something a little more unusual?
Make a tiny curved cuff from red or cream air-dry clay. Then shape one miniature mushroom.
The mushroom needs only two parts: a little rounded cap and a short stem. Flatten the cap slightly and add two or three tiny white dots.
Attach the mushroom near one end of the cuff.
Don’t make the mushroom tall. A low profile is much more comfortable and much less likely to snap.
This is one of my favorite diy clay projects because the entire design looks like a tiny woodland scene.
4. Smiley Face Clay Cuff
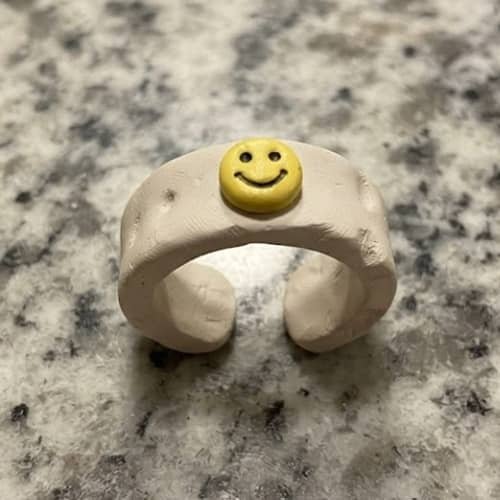
Of all the ideas on the list, this one is arguably the simplest.
Make a yellow clay cuff and gently flatten it.
Add one tiny yellow circle to the outer section. Use a blunt rounded craft tool or a clay-safe household object to make two tiny eyes and a curved smile.
Keep the face shallow rather than adding thick pieces.
Kids can experiment with different expressions too. Happy, sleepy, surprised or even a slightly confused face.
That makes every cuff feel different.
5. Strawberry Clay Ear Cuff
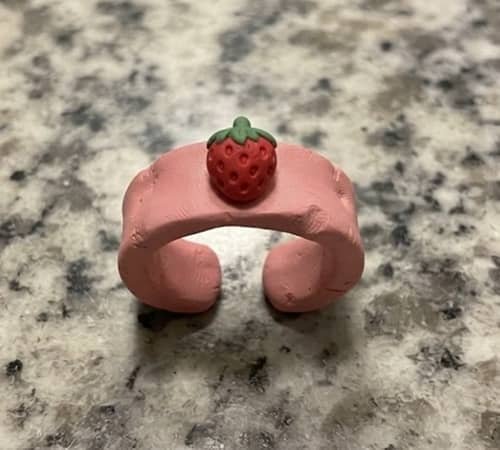
Make the cuff green or pink.
For the strawberry, form a tiny red oval and pinch one end slightly to create the berry shape. Add a few tiny yellow or cream dots.
For the leafy top, flatten a small piece of green clay and make three tiny points with your fingers.
Place the strawberry on the cuff while both pieces are still soft.
This gives you a cute little fruit-themed accessory without complicated shaping.
And yes, it makes a great addition to a collection of polymer clay jewelry designs even though we’re using easier air-dry clay here.
6. Starry Night Clay Cuff
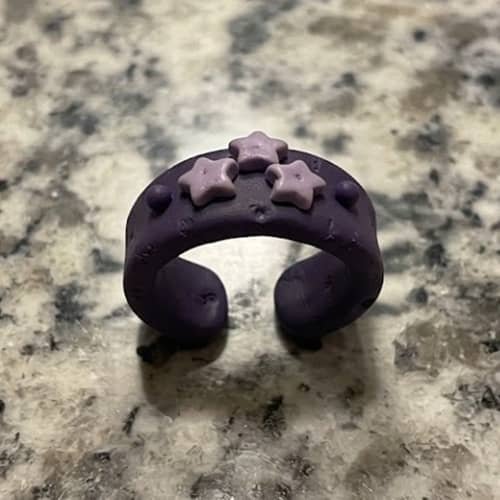
Start with a dark blue or purple cuff.
Make three tiny stars by flattening little balls and pinching five points around each one. They don’t need to be perfect.
Add one or two tiny round clay dots beside them.
For fun clay color combos, try navy with yellow stars, purple with white stars, or dark green with pale pink stars.
The smaller the decorations, the cleaner the finished design looks.
7. Tiny Butterfly Cuff
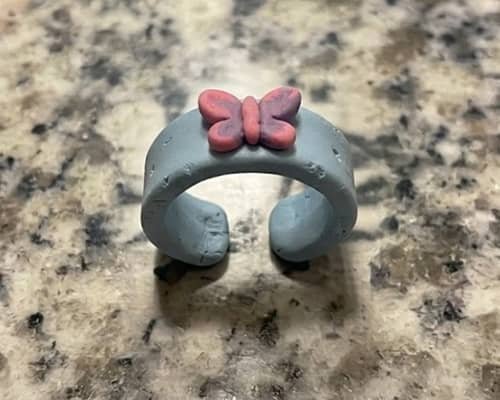
A butterfly sounds complicated, but it really isn’t.
Make two tiny flattened teardrop shapes for the wings. Make another two smaller ones. Place the larger wings above the smaller wings.
Put a fairly thin body of clay through the middle.
Press everything together gently.
Use contrasting colors for the wings. Pink and orange look playful, while blue and purple feel more dreamy.
This is a lovely clay activity for kids because they can practice making matching shapes without needing exact measurements.
8. Little Leaf Clay Cuff
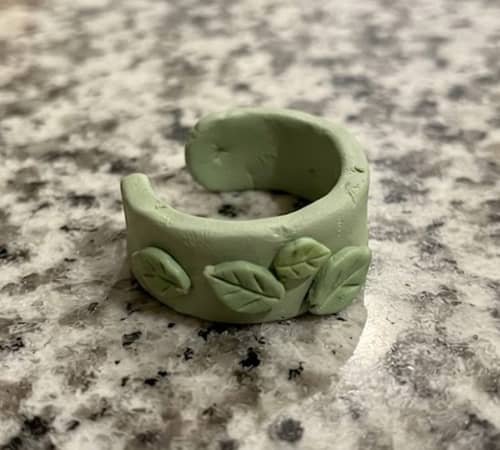
This design is super simple and looks surprisingly grown-up.
Roll a small green clay piece into an oval. Flatten it. Pinch both ends to create a leaf.
Then use a blunt clay tool to make one shallow line down the center.
Make two or three leaves and place them along one side of the cuff.
For younger children, skip the detailed veins. The basic leaf shape is enough.
It also works beautifully as one of those simple polymer clay craft ideas that can later be recreated with oven-bake clay by an adult.
9. Candy Dot Clay Cuff
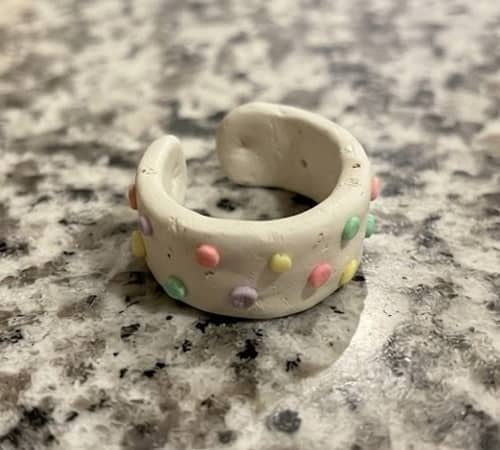
Think tiny candy buttons.
Create a white or pastel cuff. Then roll extremely small balls of different colored clay.
Flatten each ball slightly and arrange them along the cuff.
Use only three or four colors so the design doesn’t become visually messy.
Try pink, mint, yellow and lavender together. These clay color combos give the cuff a soft candy-shop feeling.
The finished piece should look playful rather than perfectly symmetrical.
10. Mini Moon Clay Cuff
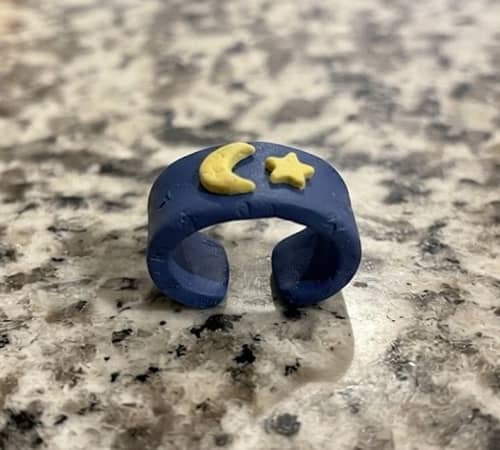
Roll a tiny piece of yellow clay into a ball and flatten it.
Use a rounded blunt object to press out a crescent shape. Don’t worry if one side is slightly thicker.
Make a simple purple or midnight-blue cuff and attach the little moon.
You could add one tiny star beside it.
This is one of those polymer clay jewelry ideas where simplicity actually makes the finished piece more attractive.
11. Mini Rainbow Arch Cuff
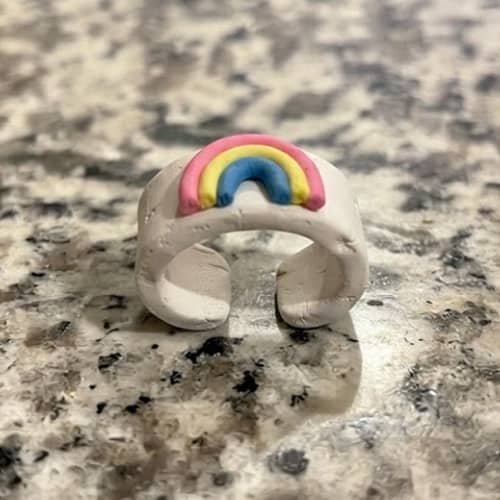
Instead of making a rainbow decoration separately, create a tiny rainbow arch.
Roll three very thin clay ropes in different colors. Place them beside each other and gently press them together.
Curve the joined strips into a small arch.
Attach the arch to a simple white or blue cuff.
Keep the rainbow shallow and lightweight. That’s important.
You could even experiment with sculpey neon colors if you’re eventually recreating the idea using polymer clay with adult help and proper baking equipment. For this kid-safe version, air-dry clay is the easier choice.
12. Tiny Heart Chain Cuff
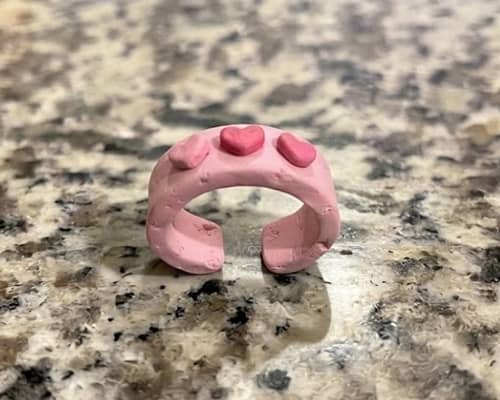
Make a basic pink cuff.
Then create three tiny hearts by shaping small clay balls into simple heart forms. They don’t need sharp points.
Place the hearts along one side, with each heart slightly smaller than the previous one.
This creates the illusion of a tiny decorative chain without actually needing metal chains or jewelry findings.
And that’s exactly why I like making these clay ear cuff craft projects with kids. The clay itself does almost all the work.
13. Cute Little Cat Cuff
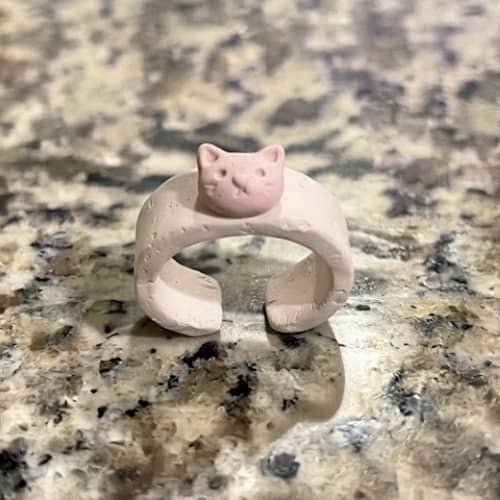
Why stop at flowers and hearts?
Make a tiny cat face from air-dry clay. Start with a small flattened oval. Pinch the top twice to create two ears.
Add two tiny eyes and a small nose.
Attach it to a simple pastel cuff.
Don’t add whiskers using wire or other sharp materials. For a kid-friendly version, simply press three tiny dots on each side of the face.
The result is cute without introducing unnecessary materials.
How To Make Any Clay Ear Cuff Fit Better?
The most important part isn’t actually the decoration. It’s the curve.
Start with a thin clay strip about the length of the outer part of your ear. Make it slightly longer than you think you need.
Place it beside the ear rather than immediately pressing it onto the ear. Gently curve it so it follows the general shape of the outer ear.
Do not make the cuff tight.
A good decorative cuff should sit loosely enough that it isn’t pinching, squeezing or causing discomfort. Since air-dry clay can crack when bent after drying, always shape the final curve while the clay is soft.
For children, I recommend making the cuff as a pretend-play or supervised wearable craft rather than something they keep on for hours. If it feels uncomfortable, take it off.
Also, avoid making the decoration bulky. A cute tiny mushroom is much better than a giant mushroom hanging from the side of the ear!
Note: The opening should be just wide enough to gently slide the cuff over the outer edge of the ear. Once positioned on the cartilage, it should rest comfortably without pinching or slipping off easily. If the gap is too wide, the cuff may not stay in place, so it is better to adjust the opening while the clay is still soft rather than bending the dried cuff.
Can Kids Sell These Clay Ear Cuffs?
Potentially, yes – but I would treat that as a supervised craft-business activity rather than letting young children handle sales themselves.
A child could make small collections such as “Rainbow,” “Woodland,” “Sweet Hearts” or “Night Sky.”
Parents can photograph the pieces, create simple packaging and handle online orders.
If you want to sell crafts, consistency becomes important. Make several versions of the same design and keep decorations lightweight.
Buyers are much more likely to appreciate a small handmade collection than twenty completely random designs.
Final Thoughts
The fun part of these clay ear cuff ideas isn’t trying to make every piece look perfect.
In fact, tiny fingerprints, uneven flowers and slightly wonky stars are what tell me that a real person made them.
That handmade character is valuable. It also teaches kids something bigger than clay shaping: repetition, patience, color matching and creative decision-making.
Start with one simple cuff, then make another using a completely different theme. Before long, you have a tiny collection of wearable-looking sculptures.
Just remember, comfort and safe supervised use always matter more than making the cuff look fancy.
The best clay ear cuff craft is the one that is fun to create and easy to enjoy.
Also Read:





