If you’ve been looking for a clay pokemon craft that’s actually easy to follow, you’re in the right place.
I wanted something that looked handmade instead of factory perfect, so this tutorial uses air dry clay and simple shaping techniques that almost anyone can do at home.
No expensive tools. No confusing sculpting tricks.
Just slow, beginner-friendly steps that build one piece at a time.
Even if you’ve only made a few clay craft projects before, don’t worry. You’ll be surprised how quickly the little character starts looking familiar.
Materials Needed To Make Clay Pokemon Craft
Keep everything within arm’s reach before you begin.
- White air dry clay
- Yellow acrylic paint
- Black acrylic paint
- Red acrylic paint
- Brown acrylic paint
- Small paintbrush
- Clay sculpting tool or butter knife
- Toothpick
- Small bowl of water
- Soft paintbrush for dusting
- Matte or satin varnish (optional)
- Shiny granite countertop or tile for working
- Tissue paper for wiping fingers
Before You Touch The Clay
One thing I learned after making several cute little clay things is this… rushing almost always leaves fingerprints everywhere.
Instead of making the whole figure at once, build it like stacking tiny puzzle pieces. Let each section settle for five to ten minutes before adding heavier parts. That tiny pause makes a surprisingly big difference.
People often compare projects like this with playdoh ideas, but air dry clay behaves differently.
It keeps its shape much better, although it also dries while you’re working. If the surface begins feeling chalky, lightly dampen your fingertip instead of soaking the clay.
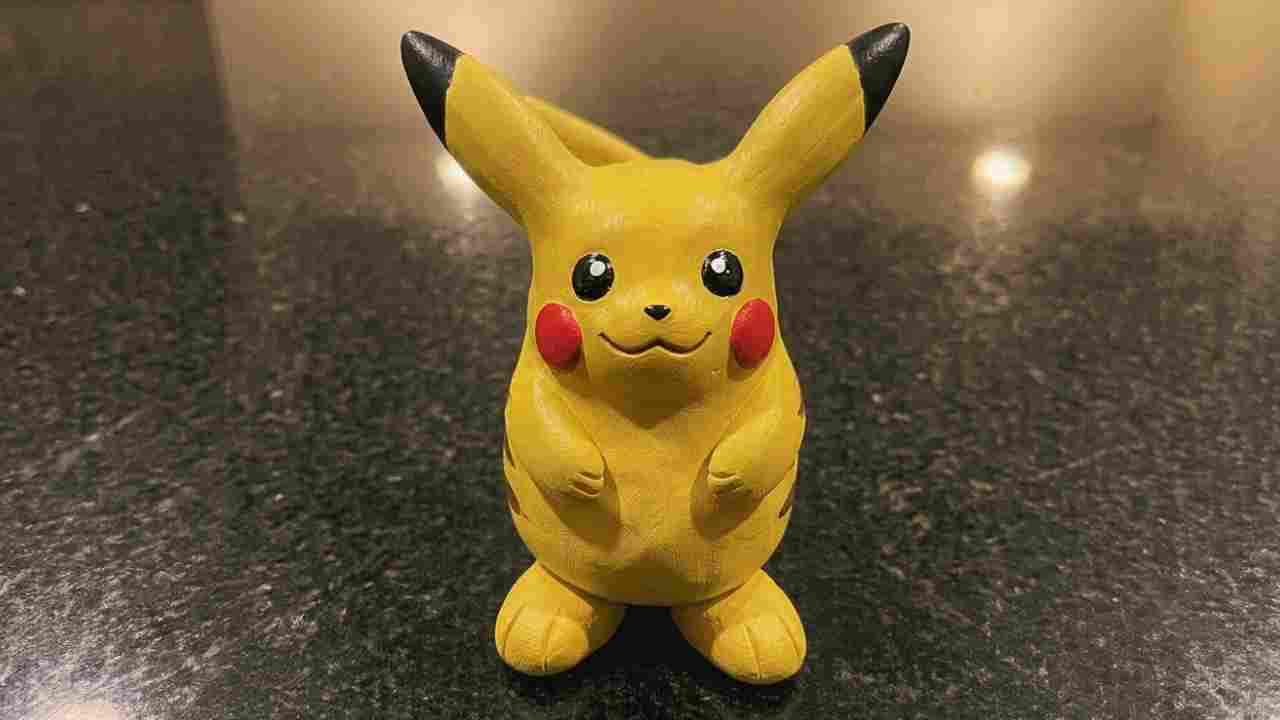
Alright…let’s make our little Pikachu.
Step 1: Create the Main Body
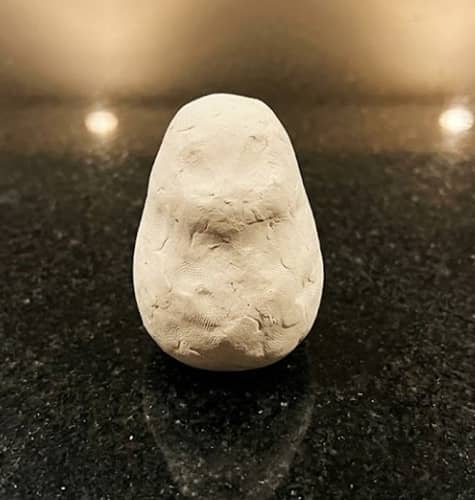
Take a chunk of air dry clay about the size of a golf ball.
Roll it between both palms until it becomes smooth. Don’t squeeze too hard. Gentle pressure makes a cleaner surface.
Now begin turning that ball into a soft rounded teardrop. The wider end becomes Pikachu’s belly while the narrower end becomes the head.
Unlike many tutorials, don’t separate the head and body. Keeping them together makes this clay pokemon craft much sturdier.
Stand it upright.
Look at it from every side.
Does it lean?
If yes, gently flatten the bottom against your granite surface until it stands without support.
Mine wasn’t standing first try either.
Smooth every fingerprint using a fingertip that’s barely damp.
Don’t chase perfection. Tiny bumps actually help it look handmade.
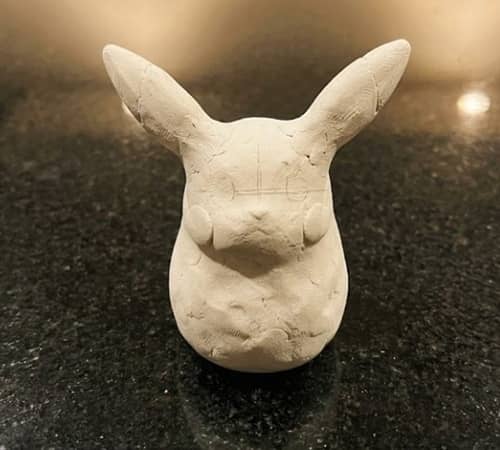
Step 2: Shape the Face
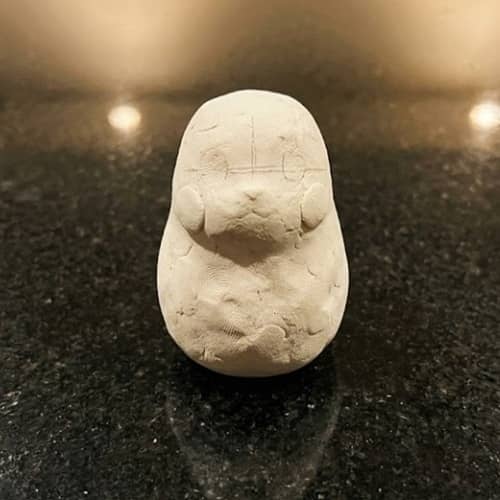
This is where the character suddenly starts looking alive.
Using your thumbs, gently press the upper front portion inward just a little. You’re creating the beginning of cheeks rather than eye sockets.
Now smooth the forehead upward with your fingers.
The front should stay round.
Avoid making a pointy nose.
Many beginners accidentally do that.
Take your sculpting tool and lightly mark a tiny horizontal guide where the eyes will eventually sit. Don’t carve deeply. This line is only there to help keep everything level later.
Turn the model around every few seconds.
Seriously.
A sculpture that looks balanced from the front can look completely crooked from the side.
It happens more than you’d think.
If one cheek becomes larger than the other, gently massage the clay back into shape instead of adding extra clay.
That usually fixes it quicker.
Step 3: Make the Ears
Roll two equal pieces of clay into short cylinders.
Now pinch one end of each cylinder until it becomes a long triangle with rounded edges.
Not too skinny.
Pikachu’s ears are surprisingly thick near the base.
Lay both ears beside each other before attaching them.
Ask yourself something.
Do they really look identical?
If one ear is taller, trim a tiny amount off before moving ahead.
Score the bottom of each ear using a toothpick.
Also scratch two matching spots on top of Pikachu’s head.
Brush on a tiny bit of water.
Now press each ear firmly into place.
Hold them for around twenty seconds.
Don’t let go too early because they can slowly lean outward.
Mine almost fell off because I got impatient.
Blend the clay around each ear using your fingertip until the joint disappears.
There is no need to add extra clay if everything was pressed together properly.
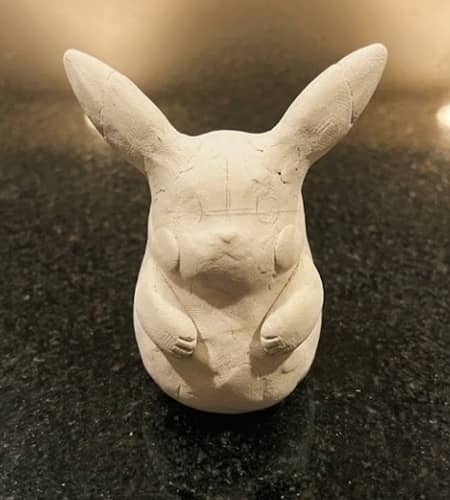
Step 4: Add the Arms
Roll two tiny clay logs about the thickness of your little finger.
Round one end.
Slightly flatten the opposite end.
The rounded ends become Pikachu’s little paws.
Press each arm gently against the upper belly.
Instead of pointing them straight downward, angle them slightly inward so they look relaxed.
Small changes like this makes the whole figure feel more expressive.
Use your sculpting tool to gently define tiny paw separations.
Only shallow lines are needed.
Deep cuts usually crack once the clay dries.
Step back.
Look again.
Does one arm sit higher?
Fix it now rather than after drying.
Trust me, it’s much easier.
If the clay becomes sticky, wait three minutes before touching it again.
Patience is doing half the work here.
Step 5: Create the Feet

The feet may look tiny, but they completely change the balance.
Roll two marble-sized balls.
Flatten them gently into rounded ovals.
Don’t make pancakes.
Leave them thick enough to support the figure.
Scratch both attachment points underneath the belly.
Add a tiny amount of water.
Press each foot underneath so part of the oval sticks out in front.
The character should now stand confidently without wobbling.
Check the balance from every angle.
If it rocks even slightly, gently press the feet against the granite until everything becomes stable.
Now use a sculpting tool to make two tiny toe marks on each foot.
Nothing dramatic.
Subtle details usually look far more realistic after painting.
At this stage, your project finally resembles one of those cute pokemon toys you might spot in a collector’s display, except this one has your own handmade personality.
It’s also a nice reminder that many easy air dry clay ideas for kids become just as enjoyable for adults.
Step 6: Build the Tail (The Signature Piece)
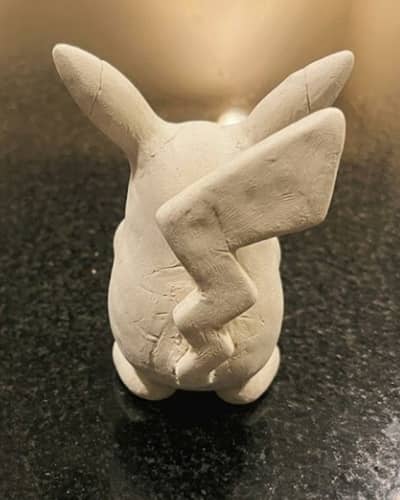
This is the part most people look forward to. Funny enough, it’s also the piece that breaks most often if it’s made too thin.
Pinch off a piece of air dry clay about the size of a large grape. Roll it into a short log first instead of jumping straight into the lightning shape.
Now lay the log flat on your granite countertop.
Using your fingers, gently flatten it until it’s around 5 to 6 mm thick. Keep the thickness even from one end to the other.
Grab your clay tool or a butter knife and carefully trim the familiar zig-zag lightning bolt shape. You don’t have to rush this bit. Slow cuts usually look cleaner.
Round every sharp edge with your fingertip. Real clay always softens slightly, and those tiny rounded edges make the finished figure look much more natural.
Hold the tail behind Pikachu before attaching it.
Too big?
Trim it.
Too tiny?
Stretch it slightly with your fingers.
You’re looking for a tail that’s roughly the same height as the body.
Scratch the bottom of the tail and the lower back of Pikachu with a toothpick. Add the smallest dab of water, then press the tail firmly into place.
Support it with one finger for about 30 seconds. Gravity is not your friend here.
If the tail still leans backward, roll a tiny snake of clay and blend it into the base as extra support. Nobody will notice it after painting.
One thing I always remind myself is this… a sturdy tail looks better than a delicate one that snaps tomorrow.
Step 7: Add the Eyes, Nose and Mouth
Don’t underestimate this step.
A difference of just one millimeter can completely change Pikachu’s expression.
Roll two tiny balls of clay, each about the size of a peppercorn. Flatten them ever so slightly and place them on the guideline you created earlier.
Leave enough space between them.
Crowded eyes make the face look awkward.
Next, roll an incredibly tiny ball for the nose. Seriously, it should be tiny.
Press it gently into the center of the face just below the eyes.
Now take a toothpick and lightly draw a soft smiling mouth. Don’t carve deep grooves. You’re only creating a guide that will catch a little paint later.
Tilt the figure sideways.
Then upside down.
It sounds strange, but looking from unusual angles makes uneven eyes much easier to spot.
Mine looked perfect until I turned it around.
Oops…one eye was clearly higher.
Thankfully it was easy to fix before the clay dried.
Once everything feels balanced, lightly smooth around the eyes with a damp fingertip.
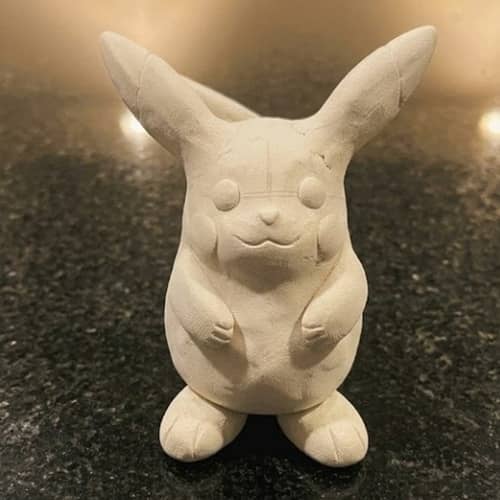
Step 8: Sculpt the Cheeks and Final Details
Without those famous cheeks, it just doesn’t feel like Pikachu.
Roll two tiny clay balls, each slightly smaller than a pea.
Flatten them gently.
Attach one on each side of the smile.
These become the raised cheek circles that will later be painted bright red.
Now inspect the entire sculpture.
Run your fingertip along every joint.
Can you still see where the ears were attached?
Blend them a little more.
How about the arms?
Smooth those too.
This quiet stage is where the figure starts looking polished instead of assembled.
Use the rounded end of a sculpting tool to gently press shallow curves above each eye. Not enough to create eyebrows, just enough to suggest a softer face.
If you accidentally flatten the cheeks, don’t panic. Roll them back into shape with gentle circular movements.
The sculpture is starting to look adorable now, isn’t it?
I always enjoy this stage because every tiny adjustment suddenly becomes noticeable.
Projects like this remind me why clay diy easy tutorials are so relaxing.
Even if you’ve searched for oven bake clay ideas easy, this version with air dry clay is much more forgiving for beginners since there’s no baking involved.
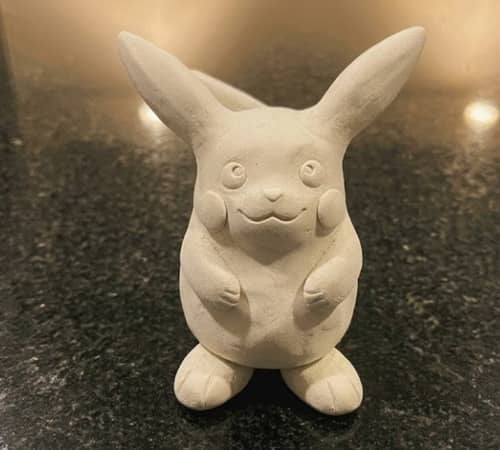
Step 9: Let Everything Dry Properly
This might be the least exciting step.
It’s also one of the most important.
Place your finished sculpture somewhere flat where nobody will accidentally bump into it.
Don’t dry it near a sunny window.
Avoid heaters too.
Fast drying often causes cracks.
Instead, let the figure dry naturally for around 24 to 48 hours, depending on your clay brand and room temperature.
After the first 12 hours, carefully rotate Pikachu onto one side so the underside can dry evenly.
Be gentle.
Very gentle.
The tail and ears are still fragile at this stage.
If you notice a tiny crack forming, dampen your fingertip with a little water and gently massage the crack closed before it becomes larger.
Not every crack can be prevented, but most small ones can be fixed early.
Waiting isn’t very exciting, but your future self will appreciate it.
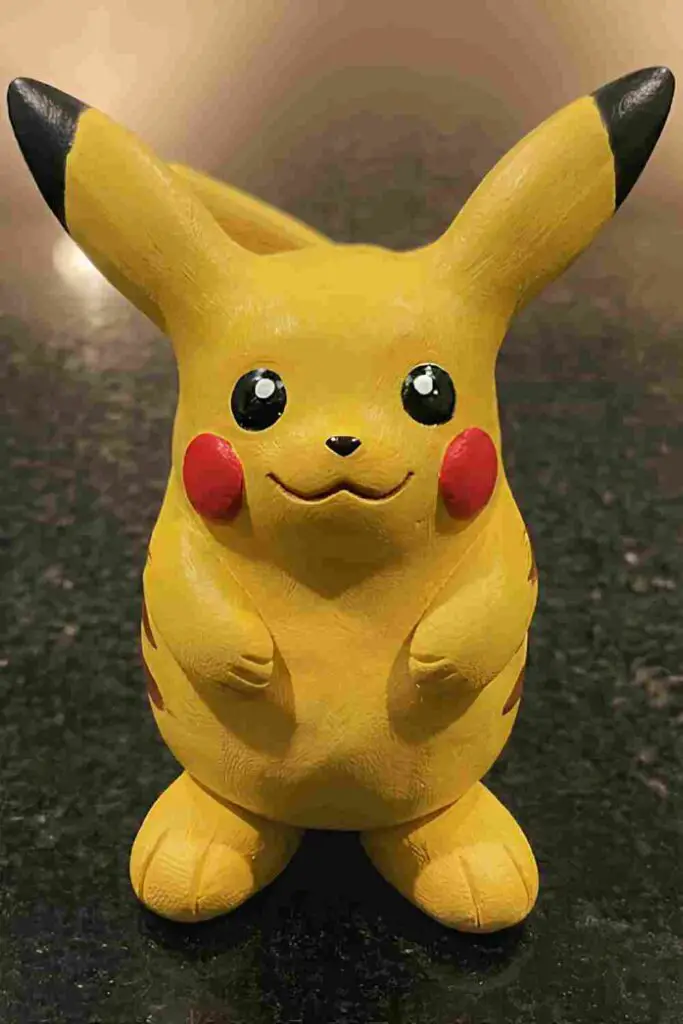
Step 10: Paint Your Pikachu
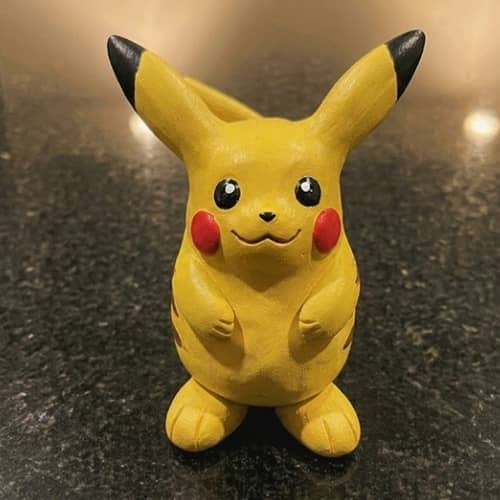
Now comes the transformation.
Start with a thin coat of yellow acrylic paint over the entire figure.
Don’t try covering everything at once.
Thin layers always dry smoother.
Allow the first coat to dry completely before adding a second.
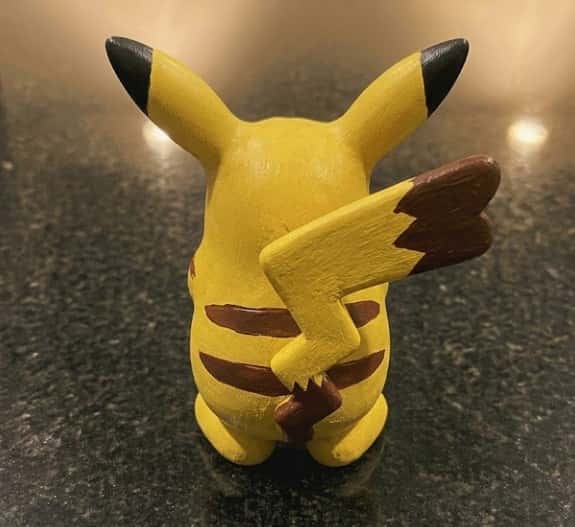
Next, paint the ear tips black.
Use brown paint to create the stripes across the back.
Then paint the cheeks bright red.
Finally, add black to the eyes and a tiny touch of white in each eye for the highlight.
That tiny white dot changes everything.
Suddenly the figure feels alive.
Paint the mouth carefully using a fine brush.
If your brush slips a little, wait until the paint dries before correcting it.
Trying to wipe wet paint usually makes a bigger mess.
Once the paint has dried for several hours, brush on a thin layer of matte or satin varnish if you’d like extra protection.
Don’t make it too shiny.
A subtle finish usually looks much closer to official Pikachu figures while still keeping the charm of handmade art.
This same process can easily inspire charmander clay art or even your own collection of different Pokémon characters later.
Common Beginner Mistakes (And Easy Fixes)
Almost everybody runs into one of these. I definitely did.
The ears keep falling off: The connection probably wasn’t scored deeply enough. Scratch both surfaces with a toothpick before adding a tiny amount of water. Press firmly, then leave it alone for at least thirty seconds.
The figure won’t stand up: Look underneath. One foot is usually thicker than the other. Place the sculpture on your granite surface and gently press until both feet touch evenly.
My clay has cracks: Don’t panic. Hairline cracks are surprisingly common with air dry clay. Dip one fingertip in water and gently rub across the crack using tiny circular motions. If the crack is larger, mix a little clay with water into a paste and press it into the gap before smoothing it.
My fingerprints are everywhere: This happens more often than people admit. Instead of adding water immediately, wait a minute or two. As the clay firms up slightly, fingerprints become much easier to smooth away.
The paint looks streaky: Yellow acrylic paint often needs two or three thin coats. Trying to cover everything in one thick coat usually leaves brush marks. Slow layers win every time.
Why I Prefer Air Dry Clay for Pokémon Crafts
I’ve experimented with several types of clay over the years, and I keep reaching for air dry clay whenever I want a relaxed afternoon project.
There’s no oven to preheat.
No guessing whether something has baked long enough.
And if I notice one ear looks crooked? I still have time to fix it before everything hardens.
People often search for oven bake clay ideas easy, and those projects certainly have their place. But for beginners, air dry clay removes one extra thing to worry about.
That makes the whole experience feel less stressful.
I also like how small imperfections stay visible.
A tiny fingerprint.
A slightly uneven cheek.
A smile that’s just a little off-center.
Those details give handmade crafts personality. Perfect isn’t always interesting, you know?
Final Thoughts
The nicest part about making a clay pokemon craft isn’t ending up with a perfect Pikachu.
It’s learning how tiny shapes slowly become a recognizable character using nothing more than your hands and a little patience.
Every project teaches something new, even if it’s simply how much pressure your fingers should use.
The funny thing are, those little imperfections often become my favorite part once the paint dries.
So don’t judge your first attempt too quickly. Finish it, display it, then make another. You’ll be amazed how much your sculpting improves without even realizing it.