Fall decorating does not need expensive store-bought pieces.
Some of my favorite seasonal displays started with a simple batch of homemade clay and a little curiosity.
If you enjoy creating things with your hands, these cornstarch clay fall decor ideas can turn plain shelves, mantels, and coffee tables into cozy autumn spaces without spending much money.
The best part? Most of these diy cornstarch clay projects use supplies you probably already have.
From tiny pumpkins to woodland-inspired accents, these beginner-friendly creations are detailed enough for first-timers yet unique enough to stand out from the usual fall craft ideas using cornstarch clay you see everywhere online.
1. Sweater Texture Pumpkin Bowl Cluster

This project combines decorative pumpkins with a functional bowl shape. It looks surprisingly expensive when finished.
Start by making a batch of cornstarch clay and knead it until smooth. If it feels sticky, add a tiny amount of cornstarch… just add a drop or two of water if it cracks.
Divide the clay into three portions. Roll each portion into a ball. There should be three sizes: large, medium, and small.
Take the largest ball and gently press your thumb into the center. Slowly pinch outward while rotating the clay to create a shallow bowl shape. Don’t rush here. The slower you work, the smoother it gets.
Use a knitting needle, fork, or toothpick to press sweater-like lines around the outside surface. Work in different directions so it resembles a knitted pumpkin.
For the medium and small pumpkins, flatten the top and bottom slightly. Use a butter knife to create pumpkin ridges all around.
Press a small real twig into the center of each pumpkin before drying.
Leave everything to dry for 24 to 48 hours. Mine usually takes a little longer if the weather are humid.
Paint the pumpkins soft cream, muted sage, and dusty beige. Dry brush white paint over the textured areas to highlight details.
Arrange the bowl in the middle with the pumpkins around it. Fill the bowl with acorns, dried orange slices, or cinnamon sticks.
This doubles as a beautiful centerpiece and a conversation starter.
2. Hanging Leaf Lantern Discs
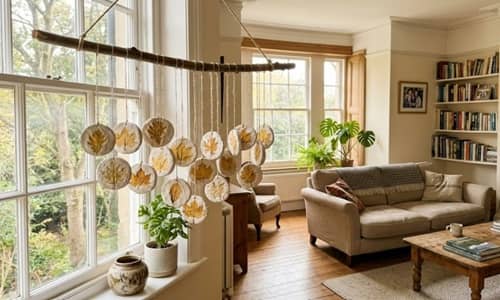
Want something different from typical pumpkin decor? This one catches afternoon sunlight beautifully.
Roll cornstarch clay to about 1/4 inch thickness on parchment paper.
Collect real fall leaves from outside. Look for maple, oak, or any leaf with noticeable veins.
Press the leaves firmly into the clay. Roll gently over them with a rolling pin.
Carefully remove the leaves. You should now see detailed vein impressions.
Use a drinking glass to cut circles around the leaf patterns.
Poke two small holes near the top of each circle using a straw.
Allow the discs to dry completely.
After drying, lightly sand rough edges.
Paint the circles translucent-looking colors such as warm amber, golden yellow, and rusty orange. Watered-down acrylic paint works surprisingly well.
Thread jute twine through the holes.
Hang several discs near a window or from a decorative branch placed in a vase.
When sunlight passes through, the leaf details become much more visible. It almost looks like stained glass, except it isn’t.
This project fits perfectly alongside cornstarch clay fall crafts and even subtle halloween decoration ideas.
3. Storybook Cottage Pumpkin Village
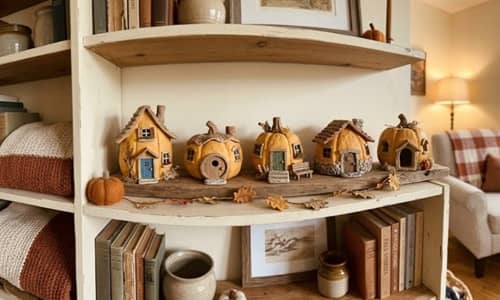
If you love whimsical decor, this one feels like something from a tiny autumn fairytale.
Start by creating five small pumpkins from cornstarch clay.
Roll separate clay balls ranging from golf-ball size to walnut size.
Shape each into pumpkins by gently flattening top and bottom. Use a sculpting tool or butter knife to create grooves.
Now comes the fun part.
Carve tiny cottage doors into the front of each pumpkin. Add miniature windows beside the doors.
Roll tiny snakes of clay and place them around the doors to create raised trim.
Make miniature chimneys from small clay cylinders.
Attach all pieces using a little water as glue.
Leave everything to dry fully.
Paint the pumpkins muted cream, soft orange, pale sage, and mushroom brown.
Paint the doors dark brown and lightly highlight edges with cream paint.
For extra charm, brush a tiny amount of moss-colored paint around the bases.
Arrange the pumpkin cottages across a mantel, bookshelf, or tray display. Add a few acorns and pinecones between them.
Many people search for how to make clay pumpkins, but turning them into little cottages instantly makes them feel more unique than traditional pumpkin displays.
4. Antique Seed Packet Clay Tags

This is one of those projects that people often mistake for vintage flea market finds.
Begin by rolling your cornstarch clay into a thin sheet, about the thickness of a coin.
Draw simple seed packet shapes on paper first. Think old-fashioned garden packets with slightly rounded corners.
Place the template on the clay and cut around it using a craft knife.
Lightly press a border around each tag using a ruler. Do not cut through the clay. You only want an impression.
Now add tiny details. Press the end of a pencil into the clay to make decorative dots around the border. A toothpick works too.
Before drying, stamp words like “Pumpkin Patch,” “Harvest Seeds,” “Autumn Bloom,” or “Maple Grove” into the clay using letter stamps. If you don’t have stamps, carefully scratch the letters by hand.
Punch a hole at the top using a straw.
Allow the tags to dry completely.
Paint them in aged cream, faded tan, and soft ivory shades. Once dry, lightly brush diluted brown paint into the recessed areas and wipe away excess. This creates an antique paper effect.
Thread twine through the holes.
Hang them from baskets, lanterns, wreaths, or decorative crocks.
What I like most is that no two ever turn out exactly the same. That imperfections actually makes them better.
These fit beautifully into diy cornstarch clay projects because they use very little material while creating a big visual impact.
5. Woodland Mushroom Book Stack Accents

This one works especially well if you decorate bookshelves for fall.
Start by making several mushroom caps from small clay balls.
Press the tops gently with your thumb to create rounded caps.
Roll small cylinders for stems.
Attach the stems underneath using a dab of water.
Next, create tiny woodland elements. Make acorns, miniature leaves, and small pinecones using leftover clay scraps.
Use a needle tool or toothpick to add texture to the pinecones.
Allow everything to dry for at least 24 hours.
Paint the mushrooms warm cream, cinnamon brown, muted rust, and soft ivory. Avoid bright colors. Nature rarely uses them.
Gather three old hardcover books and stack them horizontally.
Arrange the mushrooms and woodland pieces across the top book. Secure them with removable adhesive if needed.
The display looks like a tiny forest scene sitting right inside your living room.
You know what surprises people? The mushrooms don’t have to be perfect. Real mushrooms looks weird sometimes anyway.
This idea feels fresh compared to many common cornstarch clay fall crafts that focus only on pumpkins.
6. Pumpkin Spice Recipe Plaque Collection
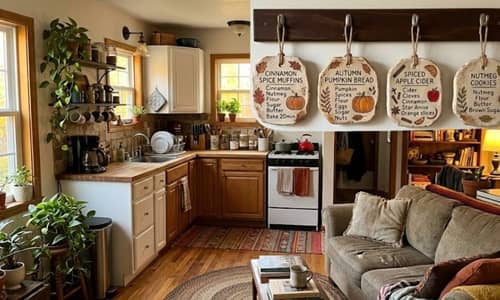
If you enjoy kitchen-inspired decor, this project adds personality without looking overly seasonal.
Roll cornstarch clay into several rectangular plaques approximately postcard size.
Smooth the edges with damp fingers.
Before drying, lightly sketch handwritten-style recipes directly into the clay.
You do not need full recipes. Write simple ingredient lists such as:
Pumpkin Spice Blend
- 2 tbsp cinnamon
- 1 tsp nutmeg
- 1 tsp ginger
- 1/2 tsp cloves
Or create mini cider recipes and autumn baking notes.
Use a toothpick to deepen the lettering.
Create two small holes at the top of each plaque.
Allow them to dry fully.
Paint the plaques soft cream or antique white.
Lightly rub brown paint into the engraved writing and wipe away excess. This makes the text stand out naturally.
Thread twine through the holes and hang them on decorative hooks, tiered trays, or kitchen shelving.
These plaques also work as subtle halloween decoration ideas if you create themed recipes like caramel apple spice mix or harvest punch recipes.
The finished pieces feel personal because they tell a story rather than simply filling empty space.
7. Fallen Oak Leaf Mantel Cascade
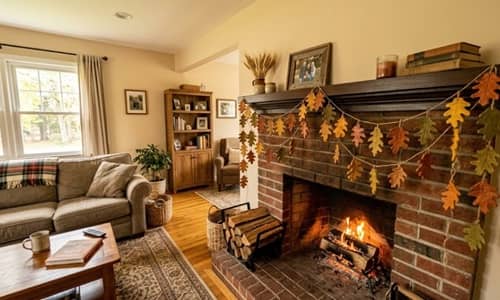
Most fall garlands run horizontally. This one flows downward like leaves drifting from a tree, which makes it feel a little unexpected.
Start by rolling your cornstarch clay into a thin sheet about 1/8 inch thick.
Print or draw several oak leaf templates in different sizes. Trace them onto the clay and carefully cut them out.
Use a toothpick to press detailed veins into each leaf. Work from the center outward. Tiny details matter here.
Gently bend some leaf edges upward before drying. This creates natural movement later.
Make at least 20 to 30 leaves. It sounds like a lot, but they dry surprisingly fast.
Allow all leaves to dry completely.
Paint them in layers. Use mustard yellow, burnt orange, deep rust, faded green, and warm brown. Nature rarely colors every leaf the same.
Once dry, seal them with a matte sealer if desired.
Punch a tiny hole into each leaf.
Thread fishing line or clear jewelry cord through the holes, varying the lengths from 12 inches to 36 inches.
Attach several strands to one section of a mantel, shelf, or wall hook.
The finished display looks like leaves frozen in midair. Guests usually look twice because they can’t quite figure out what they’re made from.
This project works beautifully alongside other fall craft ideas using cornstarch clay because it fills vertical space instead of table surfaces.
8. Mini Pumpkin Crate Market Display
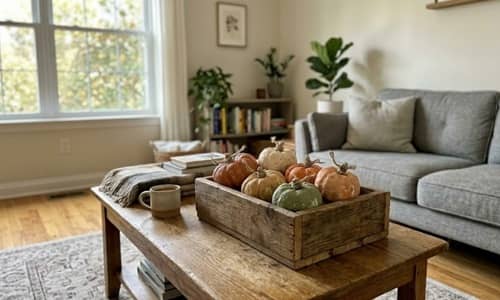
This is my favorite twist on the classic cornstarch clay pumpkin tutorial because it creates an entire scene rather than a single decoration.
Begin by making 12 to 15 miniature pumpkins.
Roll clay into small balls ranging from marble size to golf-ball size.
Flatten the tops and bottoms slightly.
Use a butter knife to press grooves around each pumpkin.
Create variety. Some should be squat and wide. Others can be taller. Real pumpkins aren’t perfectly identical.
Press tiny twig stems into each pumpkin before drying.
Allow them to dry fully.
Paint them in traditional orange, muted cream, sage green, dusty blue, and pale peach.
Now find a small unfinished wooden crate from a craft store.
Lightly sand it if needed.
Add a dry-brushed coat of brown paint for an aged farmhouse appearance.
Fill the crate with raffia, dried moss, or shredded kraft paper.
Arrange the pumpkins inside as if they were just brought home from a pumpkin market.
You can even create a tiny hand-painted sign reading “Harvest Day” or “Pumpkin Stand.”
People searching how to make clay pumpkins often stop at making one or two. Creating a whole miniature market display makes the idea feel far more custom.
There is something charming about tiny things. I don’t know why, but there just is.
9. Pressed Wildflower Harvest Wall Medallions

This project combines fall flowers with clay in a way that feels elegant but still beginner-friendly.
Roll your cornstarch clay into a smooth sheet about 1/4 inch thick.
Use a bowl or large cookie cutter to cut several circles measuring 4 to 6 inches across.
Collect dried flowers, ornamental grass pieces, small fern fragments, or delicate fall foliage.
Arrange them directly on top of the clay.
Gently press everything into the surface using a rolling pin.
Carefully remove the plant material.
The impressions left behind become the design.
Before drying, use a straw to create a hanging hole near the top.
Allow the medallions to dry completely.
Paint them soft ivory or warm cream.
Once dry, lightly brush antique gold, beige, or soft bronze paint over the raised areas. The flower details will suddenly pop.
Thread jute twine through the holes.
Hang them in a group of three or five on a living room wall, entryway nook, or above a console table.
The effect feels almost botanical museum-inspired while still fitting within budget-friendly cornstarch clay fall decor.
One medallion looks nice. Five together looks way more dramatic.
10. Harvest Moon Shelf Discs
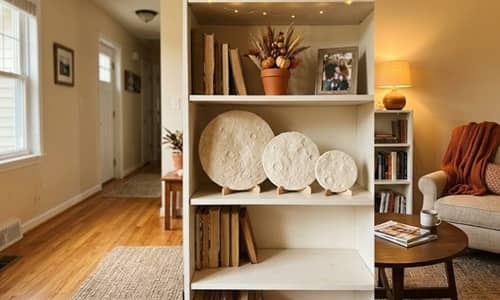
Most fall decorations focus on pumpkins, leaves, and acorns. This one takes inspiration from autumn skies instead.
Start by rolling cornstarch clay to about 1/4 inch thickness.
Use bowls, cups, or large cookie cutters to create circles in several sizes. Make one large moon and several smaller companion moons.
While the clay is still soft, crumple a sheet of aluminum foil into a loose ball and gently press it against the surface. This creates realistic moon-like texture.
Don’t overdo it though. A little texture goes a long way.
Allow the circles to partially firm up for about 30 minutes.
Use a toothpick to carve subtle crater shapes around the surface.
Leave everything to dry completely.
Paint the moons warm ivory, soft stone gray, and pale cream. Avoid bright white because it can look unnatural indoors.
After the paint dries, lightly dry-brush beige and taupe across the raised texture.
Arrange the moons leaning against books on a shelf, layered behind pumpkins, or displayed on a mantel.
For extra character, place a tiny clay leaf or acorn beside one moon.
This project feels modern yet cozy, making it stand out from many traditional cornstarch clay fall crafts.
Sometimes fall decor doesn’t need another pumpkin. Sometimes a moon does the job better.
11. Acorn Cap Treasure Bowls

These tiny bowls look adorable on coffee tables and entryway consoles.
Begin by collecting a few large acorn caps from outside. Clean them thoroughly and allow them to dry.
Now roll several golf-ball-sized portions of cornstarch clay.
Flatten each ball slightly and gently press it into a shallow bowl shape.
Place an acorn cap upside down in the center of each bowl while the clay is still soft.
The cap becomes both decoration and a natural focal point.
Use your fingers to smooth the edges.
Want extra texture? Press burlap fabric lightly against the outside surface before drying.
Leave the bowls to dry for 24 to 48 hours.
Paint them in earthy shades such as oatmeal, mushroom beige, warm brown, or muted sage.
Once dry, lightly rub antique wax or diluted brown paint into creases for depth.
These bowls can hold rings, keys, wrapped candies, dried cloves, or tiny pinecones.
I made one years ago and somehow ended up making six more. They multiply fast.
For people looking for diy cornstarch clay projects that are practical as well as decorative, this one checks both boxes.
12. Storybook Pumpkin Lantern Neighborhood

Let’s finish with something that feels truly unique.
This idea combines elements from a cornstarch clay pumpkin tutorial, miniature village displays, and soft autumn lighting.
Start by making six to eight medium-sized pumpkins from cornstarch clay.
Shape them carefully and create pumpkin grooves around the sides.
Allow the pumpkins to firm slightly for about an hour.
Using a craft knife, carefully cut tiny windows and doors into each pumpkin.
Think little cottages rather than jack-o’-lanterns.
Create window shutters, tiny roof details, and miniature pathways from extra clay scraps.
Let all pieces dry completely.
Paint the pumpkins in soft autumn shades such as cream, dusty orange, pale sage, muted gold, and warm beige.
Highlight the windows and doors with darker accent colors.
Arrange the pumpkins together on a wooden tray.
Place a battery-operated fairy light strand behind and between them.
When illuminated, the tiny windows glow and create the appearance of a miniature autumn village.
This can even double as one of those subtle halloween decoration ideas that works all season rather than just one holiday.
The tiny houses don’t have to be perfect. In fact, the slightly crooked windows often look more charming than perfectly straight ones.
It kind of feels like a tiny neighborhood where woodland creatures might secretly live.
Final Thoughts
One thing that makes cornstarch clay fall decor different from many store-bought decorations is the personality built into every piece.
Tiny fingerprints, slightly uneven edges, and unexpected textures often become the details people notice most.
That’s why handmade decor tends to feel warmer than factory-made items.
As you experiment with more fall craft ideas using cornstarch clay, try combining natural materials like acorns, twigs, seed pods, dried flowers, and pressed leaves.
These additions cost almost nothing but add depth and realism.
The most memorable seasonal displays are rarely the most expensive ones – they’re usually the ones that tell a story, even if that story starts with a bowl of homemade clay and an afternoon of curiosity.