Every fall craft table seems to have pumpkins. Some are glossy. Some are perfectly shaped. Most look store-bought.
This cottagecore clay pumpkin goes in a completely different direction.
Instead of aiming for perfection, we’re creating something that feels like it belongs on a weathered farmhouse shelf beside dried flowers and old storybooks.
If you’re searching for fall craft ideas that feel cozy, timeless, and genuinely handmade, this cottagecore clay pumpkin project is one you’ll probably keep displayed long after autumn ends.
It works beautifully as seasonal décor, table centerpieces, shelf styling, and even as part of halloween decoration ideas that lean more charming than spooky.
The best part? You don’t need advanced sculpting skills to make it.
Supplies Needed To Make Cottagecore Clay Pumpkin
- Air-dry clay or polymer clay
- Clay sculpting tool
- Toothpick
- Small rolling pin or glass jar
- Dried tiny flowers
- Dried fern pieces
- Acrylic paint (cream, sage green, dusty beige)
- Matte varnish (optional)
- Fine sandpaper
- Small paintbrush
- Brown floral wire
- Hot glue gun
- Piece of natural jute twine
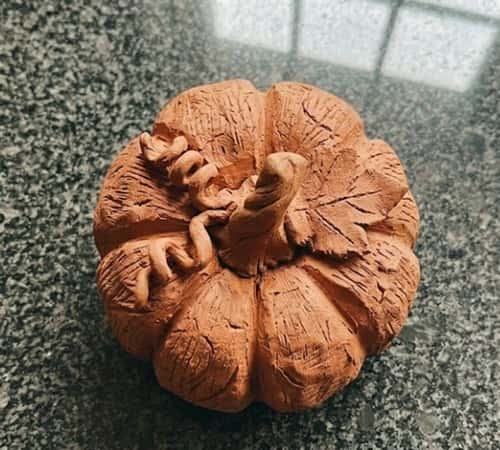
Step 1: Create the Main Pumpkin Shape
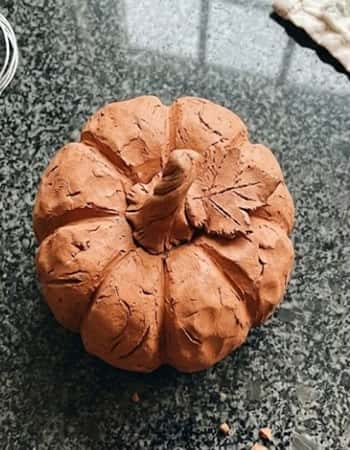
Start with a huge orange-sized lump of clay.
Roll it gently between your palms until mostly smooth. Don’t obsess over perfection here. A few bumps actually help create that cottagecore charm.
Place the clay ball on your work surface and press down slightly. The pumpkin should become a little wider than it is tall.
Now take a sculpting tool and create vertical grooves running from top to bottom.
Make some grooves deeper than others. Real pumpkins ain’t perfectly symmetrical and yours shouldn’t be either.
Turn the pumpkin as you work so the sections vary slightly in width.
You should already see a soft heirloom pumpkin shape emerging.
Step 2: Add Natural Pumpkin Texture
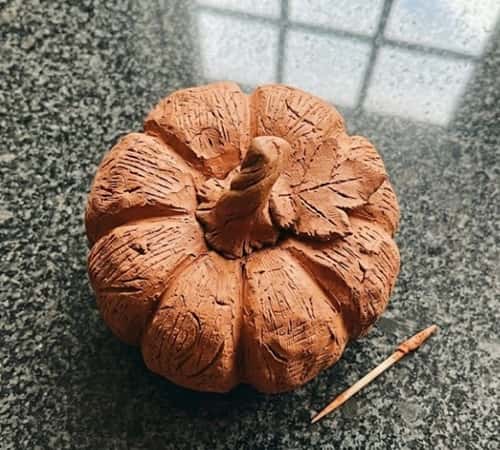
This is where the pumpkin starts looking special.
Using a toothpick, lightly scratch tiny curved lines following the grooves.
Don’t carve deeply.
You’re simply suggesting texture.
Next, gently press a crumpled piece of parchment paper against random areas of the clay. This creates subtle organic surface variation that mimics real pumpkin skin.
Some areas may look rougher than others. Thats exactly what you want.
Avoid making repeating patterns.
Nature rarely repeats itself perfectly.
Step 3: Build a Twisted Woodland Stem
Roll a thick piece of clay into a short cylinder.
Instead of attaching a straight stem, twist it slightly.
Bend it gently toward one side.
A crooked stem instantly makes the pumpkin feel more storybook-inspired.
Use your sculpting tool to create bark-like ridges all around the stem.
Attach it firmly to the center top.
Blend the connection point carefully.
At this stage, the pumpkin may look a little strange. Trust the process because the details comes together later.
Step 4: Create Tiny Cottagecore Vines
Roll very thin clay snakes.
Extra thin.
Wrap them around a pencil to create curls.
Let them sit for a minute before removing.
Attach two or three curly vines around the stem.
Keep them delicate.
One vine can trail down slightly along the pumpkin side for extra character.
This small detail completely changes the finished look.
Many diy polymer clay pumpkins skip this step, but it adds enormous visual interest.
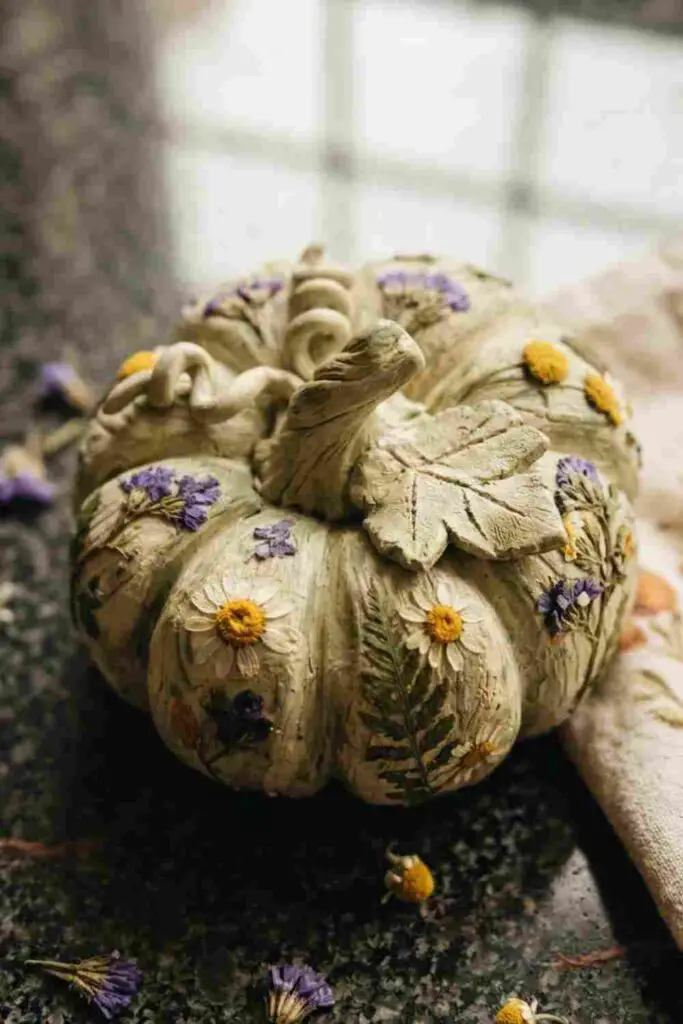
Step 5: Press Wild Botanical Details
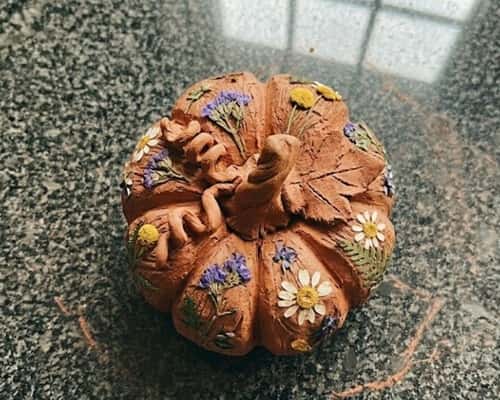
Here’s the signature twist.
Take tiny dried flowers and fern fragments.
Instead of gluing them later, gently press them into the clay while it’s still workable.
Focus on one side of the pumpkin.
Leave the opposite side mostly plain.
This creates a naturally gathered appearance rather than making every surface busy.
A little asymmetry goes a long way.
If a flower tears, don’t panic.
Some of the prettiest cottagecore projects happen because of accidental imperfections.
Step 6: Let the Pumpkin Cure Completely
If using air-dry clay, allow it to dry according to package directions.
This usually takes 24 to 48 hours.
Rotate it occasionally during drying.
For polymer clay, follow manufacturer baking instructions.
Don’t rush this part.
Seriously.
Many pumpkin clay projects develop cracks because people become impatient.
A fully cured pumpkin provides a much stronger foundation for painting and finishing.
Step 7: Sand and Refine
Once cured, lightly sand rough spots.
Keep some imperfections.
Remove only sharp edges or distracting bumps.
The goal isn’t factory perfection.
You are refining, not erasing personality.
Run your fingers across the surface.
If it feels pleasant to touch, you’re ready for paint.
Step 8: Create a Soft Cottagecore Paint Finish
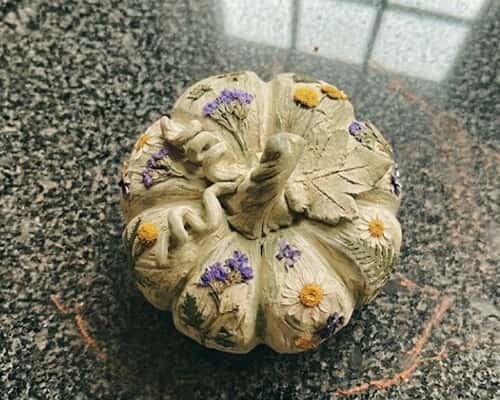
Mix cream, beige, and a tiny touch of sage green.
Paint the entire pumpkin.
Allow the first coat to dry.
Next, dry brush a slightly darker beige into the grooves.
Immediately wipe away excess.
This creates depth while preserving a soft muted appearance.
Avoid bright orange.
Traditional orange pumpkins are everywhere.
Muted earthy colors help this cottagecore clay pumpkin stand apart from typical fall clay crafts.
Step 9: Antique the Details
Mix a tiny amount of brown paint with water.
Brush it lightly over the stem, vines, and flower details.
Immediately wipe most of it away.
The remaining color settles into crevices.
This creates age and depth.
The pumpkin begins looking like a treasured seasonal keepsake rather than a newly crafted decoration.
Its honestly my favorite step because the transformation happens fast.
Step 10: Add the Final Cottagecore Touch
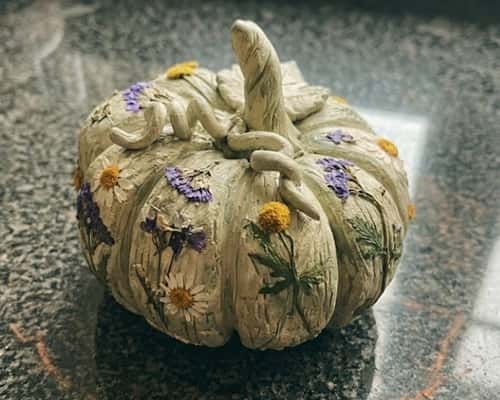
Tie a small piece of natural jute twine around the stem.
Keep it loose.
Add one tiny dried flower beneath the knot if desired.
Apply a matte sealant.
Avoid glossy finishes.
Gloss often removes the soft vintage feeling we’re trying to preserve.
The finished pumpkin should feel collected from a countryside cottage, not purchased from a retail display.
Final Thoughts
One thing I love about cottagecore-inspired crafting is how it quietly challenges the idea that handmade projects must look flawless.
Historically, many decorative harvest pieces were created from whatever materials were available nearby, which naturally produced variation, texture, and character. That same philosophy still works today.
When making a cottagecore clay pumpkin, the tiny dents, uneven grooves, and imperfect flowers often become the most memorable details.
If you’re exploring how to make clay pumpkins, try treating imperfections as design elements instead of mistakes.
Oddly enough, that’s usually what transforms a simple craft project into a piece people ask about every single fall season.