When I start planning samhain crafts, I don’t try to make everything look perfect.
I like projects that carry a little personality, even if the edges aren’t straight. That’s what makes handmade pieces memorable.
Looking for fresh spooky craft ideas that don’t feel copied from every Halloween blog? You’re in the right place.
This collection blends traditional inspiration with playful creativity, making each witchy craft beginner-friendly, meaningful, and surprisingly relaxing.
Grab a few basic supplies, clear a table, and lets make something that feels a little mysterious without becoming difficult.
1. Elemental Memory Lantern
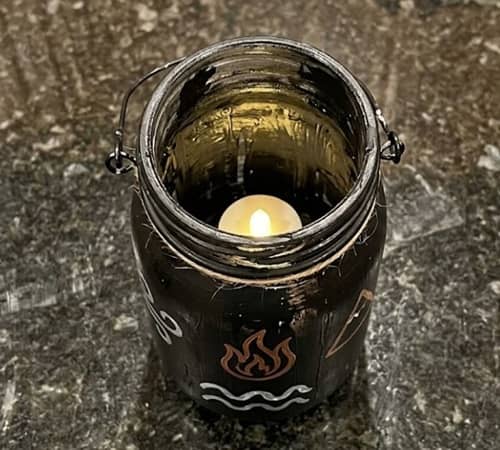
Instead of carving pumpkins, create a glowing lantern inspired by the four classical elements often associated with Samhain traditions.
Supplies
- Small glass jar
- Matte black acrylic paint
- Metallic gold paint marker
- White paint pen
- Battery-operated tea light
- Fine paintbrush
- Masking tape
- Small sponge
- Clear acrylic sealer (optional)
Instructions
Wash the jar with warm soapy water and dry it completely. Even tiny fingerprints can keep paint from sticking well.
Wrap masking tape around the rim so the top stays neat.
Dab matte black paint onto the outside using a sponge rather than brushing it. The slightly uneven texture actually makes the lantern look older.
Let the first coat dry for around 20 minutes. Apply a second coat if the glass still shows through.
Don’t rush this part because thick paint loves to peel later.
Now divide the jar into four invisible sections.
Draw a tiny flame for Fire.
Paint gentle wave lines for Water.
Add a swirling breeze symbol for Air.
Finish with small mountain shapes for Earth.
Use the gold marker to outline each symbol. They don’t need to be identical. Nature isn’t perfectly symmetrical anyway.
Around the symbols, scatter tiny white dots that resemble distant stars.
Slide the battery candle inside.
Switch off the room lights.
It suddenly feels far more magical than you expected.
Many people creating Samhain crafts pagan style also place these lanterns beside an altar during quiet reflection or a simple Samhain Ritual, although they work equally well as subtle autumn decor.
2. Pressed Autumn Herb Spell Frame
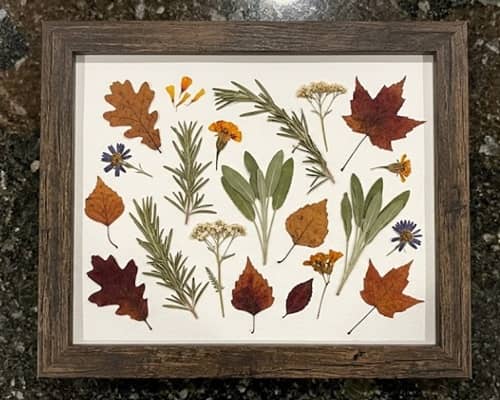
This project mixes dried herbs with autumn leaves to create artwork inspired by old botanical collections.
Supplies
- Floating picture frame
- Pressed maple leaves
- Rosemary
- Thyme
- Sage
- Small dried flowers
- Tweezers
- White cardstock
- Glue dots
Instructions
Lay the white cardstock flat before arranging anything.
Place the biggest leaf first.
Everything else becomes easier afterward.
Add rosemary stems so they gently curve instead of sitting stiff. Then tuck thyme and sage around the edges.
The natural overlap creates depth without making the frame look crowded.
Use tweezers to position tiny dried flowers between empty spaces.
Stand back every few minutes.
Seriously.
Looking from farther away helps you notice uneven spacing that isn’t obvious up close.
Attach everything using tiny glue dots rather than liquid glue.
Close the floating frame carefully.
Some leaves may shift and thats perfectly okay because the slightly imperfect arrangement feels more authentic.
This makes beautiful diy Samhain decorations, seasonal gifts, or calming wall décor throughout autumn instead of only Halloween.
3. Wax-Dipped Protection Pinecones
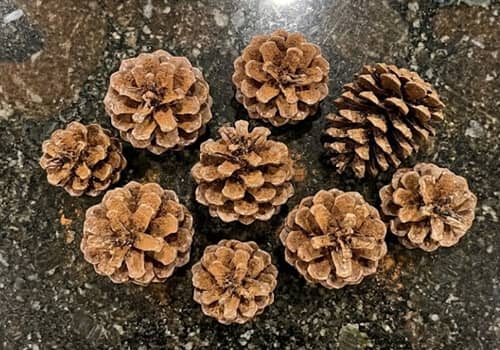
Nature already made the hard part.
Now you’re simply adding texture and warmth.
Supplies
- Large pinecones
- Soy wax
- Old saucepan
- Cinnamon powder
- Clove powder
- Cotton string
- Baking paper
- Heatproof bowl
Instructions
Melt soy wax slowly using a double boiler.
Never heat wax directly on high flame.
Mix a small pinch of cinnamon and clove into the melted wax. The fragrance stays subtle rather than overwhelming.
Tie cotton string around each pinecone before dipping.
Lower the pinecone into the wax using the string.
Lift it slowly.
Watch the wax settle between every tiny scale.
Lay it on baking paper until fully cooled.
If you’d like extra texture, sprinkle another light dusting of cinnamon while the wax is still tacky.
The finished pinecones work beautifully among traditional Samhain decorations, autumn centerpieces or simple woodland displays.
Some people even tuck them beside candles as symbolic reminders of seasonal change and elemental magic.
4. Moon Phase Twig Mobile
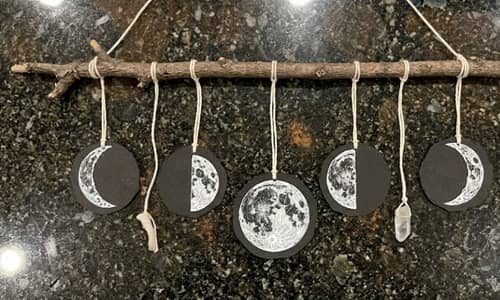
This project moves gently every time someone walks past.
That tiny movement makes it feel surprisingly alive.
Supplies
- Straight fallen twig
- Black cardstock
- White paint pen
- Cotton twine
- Hole punch
- Scissors
- Small wooden beads
Instructions
Choose a twig about 16 inches long.
Wipe away loose bark and dirt.
Cut eight moon circles from black cardstock.
Draw different moon phases using the white paint pen.
Full Moon.
Waxing Crescent.
Waning Gibbous.
Keep going until every phase is represented.
Punch tiny holes near the tops.
Cut different lengths of cotton twine so every moon hangs at a slightly different height.
Tie them onto the twig.
Slide wooden beads between some knots for added texture.
Hang the finished mobile where it catches gentle indoor airflow.
It don’t need expensive supplies to look charming.
This simple witchy craft works well in reading corners, meditation spaces or seasonal displays.
5. Black Salt Protection Bottles
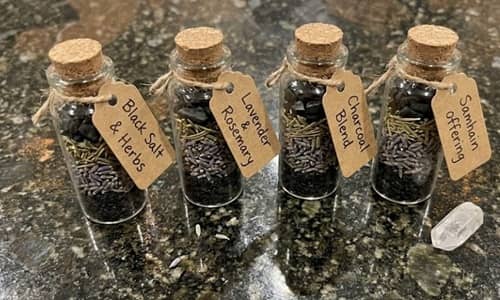
Tiny bottles can become surprisingly eye-catching.
Especially when every layer has a purpose.
Supplies
- Mini cork bottles
- Black salt
- Activated charcoal
- Dried lavender
- Rosemary
- Bay leaf pieces
- Small funnel
- Tiny label tags
Instructions
Start with a thin charcoal layer.
Next add black salt.
Sprinkle crushed rosemary.
Follow with lavender buds.
Break one dried bay leaf into smaller pieces before adding it.
Repeat the layers until the bottle is nearly full.
Press everything gently using the handle of a small spoon.
Seal with the cork.
Tie a handwritten label around the neck using twine.
Instead of complicated symbolism, think of this as a peaceful seasonal keepsake inspired by historic folk traditions.
Many people include bottles like these within October diy crafts collections or display them near an altar during autumn decorating.
6. Raven Feather Shadow Silhouette
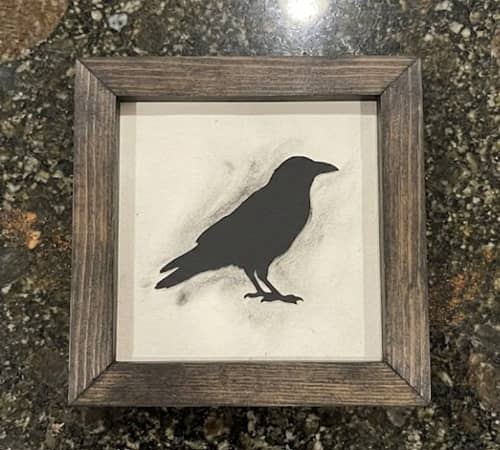
No real feathers required.
Paper works beautifully.
Supplies
- Black cardstock
- Heavy watercolor paper
- Soft charcoal pencil
- Craft knife
- Foam adhesive squares
- White frame
- Printable raven silhouette template
Instructions
Print or sketch a simple raven outline.
Cut it slowly with a craft knife.
Glue foam squares behind the silhouette.
Attach it onto watercolor paper.
Now lightly rub charcoal around the outside edges using your fingertip.
Keep the center clean.
This creates a soft shadow effect that makes the raven appear lifted from the page.
Frame the finished artwork.
Simple?
Very.
Boring?
Not even close.
This elegant project blends beautifully with witchy crafts, seasonal gallery walls, and understated diy Samhain decorations without becoming overly gothic.
7. Air-Dry Clay Harvest Talismans
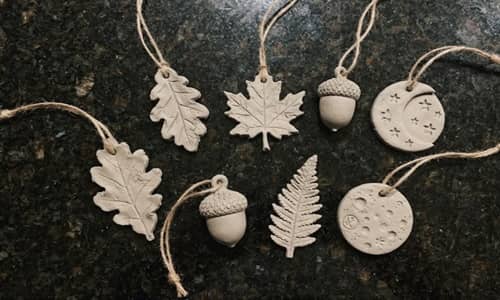
Tiny clay charms can hold a surprising amount of personality.
I like making a whole handful at once because no two ever comes out exactly alike. That’s honestly part of the fun.
Supplies
- White or terracotta air-dry clay
- Rolling pin
- Leaf-shaped cookie cutter (optional)
- Craft knife
- Wooden skewer
- Small sponge
- Black acrylic paint
- Metallic bronze paint
- Matte sealer
Instructions
Take a tennis-ball-sized piece of clay and knead it for about three minutes.
If it feels stiff, dampen your fingertips with a little water instead of soaking the clay.
Roll it until it’s roughly ¼ inch thick.
Now decide on your shapes.
Leaves work beautifully.
Acorns feel timeless.
Little moons and stars fit nicely too.
If you don’t have cutters, sketch the shape gently with a craft knife and trim around it.
Smooth every edge using a slightly damp sponge. This small step makes a huge difference.
Use the wooden skewer to draw veins into leaves, tiny bark lines onto acorns, or delicate moon craters.
Keep the pressure light because deep scratches can crack while drying.
Poke a small hole near the top if you want to hang them later.
Leave the clay on parchment paper for 24 to 48 hours, flipping each piece halfway through drying.
Paint the entire surface black once dry.
After the paint sets, lightly brush bronze paint only across the raised textures.
This dry-brushing trick highlights every little detail without covering the dark base.
Seal everything with matte varnish.
These charms make lovely gifts, seasonal ornaments, or decorative accents for an altar.
They also blend beautifully with handmade Samhain crafts inspired by woodland folklore.
8. Harvest Gratitude Branch Display
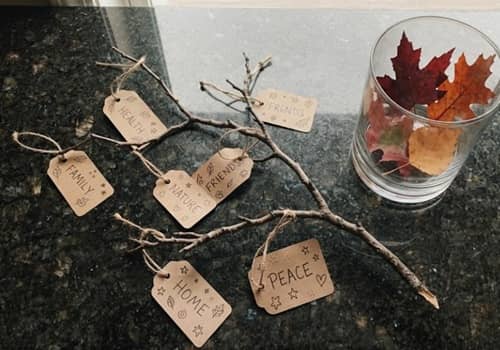
This project isn’t flashy.
It quietly becomes one of the most meaningful decorations in the room.
Supplies
- Small tree branch
- Glass vase
- Smooth pebbles
- Kraft paper
- Hole punch
- Twine
- Black marker
- Mini wooden clothespins
Instructions
Wash the branch and allow it to dry completely.
Place pebbles inside the vase before standing the branch upright. Test its balance from different angles.
Cut small tags from kraft paper.
Write one word on each.
Hope.
Family.
Health.
Kindness.
Fresh starts.
Or anything that matters to you this season.
Punch a hole through each tag and tie on short lengths of twine.
Clip them to the branches with miniature clothespins.
Invite children or guests to add their own tags during October.
Its amazing how quickly the display grows into something personal.
This idea pairs wonderfully with kids craft activities, encouraging conversations about gratitude while keeping the craft simple and meaningful.
9. Botanical Samhain Candle Holders
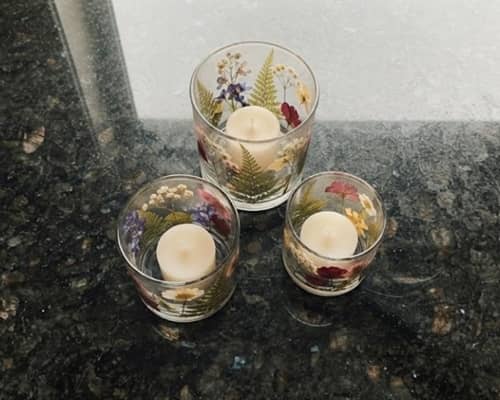
Pressed flowers completely change plain glass.
And it only takes a few minutes.
Supplies
- Clear glass tealight holders
- Pressed fern leaves
- Tiny dried flowers
- Mod Podge
- Foam brush
- Battery tea lights
- Matte sealer (optional)
Instructions
Clean the glass thoroughly using rubbing alcohol.
Brush a thin layer of Mod Podge onto one section.
Lay a pressed fern carefully against the glass.
Use your fingertips or a dry brush to smooth every edge.
Repeat with dried flowers until the holder feels balanced.
Avoid filling every inch.
Negative space makes the design look far more elegant.
Brush another thin coat over the top.
Allow it to dry completely before adding another protective layer.
Insert a battery candle.
The soft glow shining through dried plants creates a peaceful atmosphere that feels seasonal without looking like Halloween store décor.
10. Woodland Protection Wreath

Most wreaths look the same.
This one doesn’t.
Supplies
- Grapevine wreath base
- Moss
- Twigs
- Mini pinecones
- Dried orange slices
- Black ribbon
- Hot glue gun
- Artificial berries (optional)
Instructions
Start by gluing moss in uneven patches rather than covering the entire wreath.
Next, tuck small twigs between the vines.
Attach pinecones in groups of two or three.
Now place dried orange slices around the wreath, spacing them naturally.
Tie a large black ribbon at the bottom.
Step back.
Look again.
If one side feels heavier, shift a pinecone or add another twig instead of forcing symmetry.
The finished wreath captures woodland charm while staying elegant enough for the whole autumn season.
Many people enjoy including designs like this among their favorite October diy crafts because it transitions smoothly from harvest décor into late autumn.
11. Mini Harvest Offering Bowl
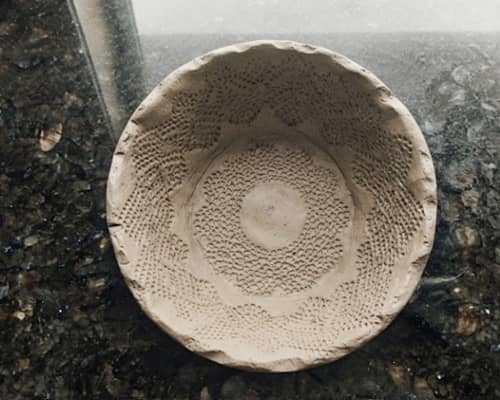
Sometimes the smallest projects become everyday favorites.
This one certainly did for me.
Supplies
- Air-dry clay
- Small bowl (for shaping)
- Lace fabric
- Acrylic paint
- Soft sponge
- Matte sealer
Instructions
Roll the clay into a circle about ¼ inch thick.
Lay the lace fabric over the clay.
Press gently with a rolling pin.
Lift the fabric away.
The beautiful texture stays behind.
Place the clay inside an upside-down bowl so it curves naturally while drying.
Leave it untouched for at least 24 hours.
Paint with earthy shades like charcoal, cream or warm brown.
Dry-brush the raised lace pattern using metallic bronze or antique gold.
Seal after the paint dries.
Use the bowl to hold acorns, dried herbs, crystals, pinecones, or handwritten seasonal intentions.
It works wonderfully alongside quiet Samhain Ritual traditions while remaining simply decorative for anyone who enjoys handcrafted autumn pieces.
12. Night Sky Wooden Coasters
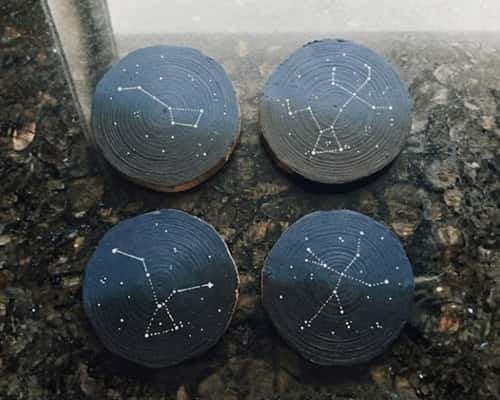
Functional crafts always earn a permanent place in my home.
These definitely have.
Supplies
- Plain wooden coasters
- Navy acrylic paint
- Black acrylic paint
- White paint pen
- Small sponge
- Matte varnish
Instructions
Paint each coaster with a mixture of navy and black acrylic paint.
Don’t worry about making every brushstroke perfect.
While the paint is still slightly damp, dab lightly using a sponge to create soft cloud-like texture.
Allow everything to dry.
Use the white paint pen to add tiny stars, simple constellations, crescent moons and scattered dots.
Keep each coaster slightly different.
That variety makes the set feel handmade instead of mass-produced.
Seal with two thin coats of matte varnish.
Besides protecting furniture, these coasters make thoughtful handmade gifts and fit naturally beside other witchy crafts or seasonal home décor.
Final Thoughts
The nicest thing about making samhain crafts isn’t filling shelves with decorations.
It’s slowing down long enough to notice the season changing around you.
Leaves disappear faster than we think, evenings become quieter, and little handmade projects somehow help us appreciate that shift.
Whether your inspiration comes from folklore, nature walks, family traditions, or simply wanting a cozy weekend activity, every craft can become part of your own autumn story.
Try mixing natural materials with simple techniques instead of chasing perfection.
Sometimes the slightly crooked leaf, uneven paint, or fingerprint left in the clay ends up giving a handmade piece the character that no machine could ever recreate.





