Halloween decorations don’t always need to be loud, spooky, or store-bought. Sometimes the most charming pieces are the slightly crooked ones you shape with your own hands.
This polymer clay Halloween gnome project quickly became one of my favorite little halloween clay craft ideas because it mixes cozy fall vibes with playful Halloween details.
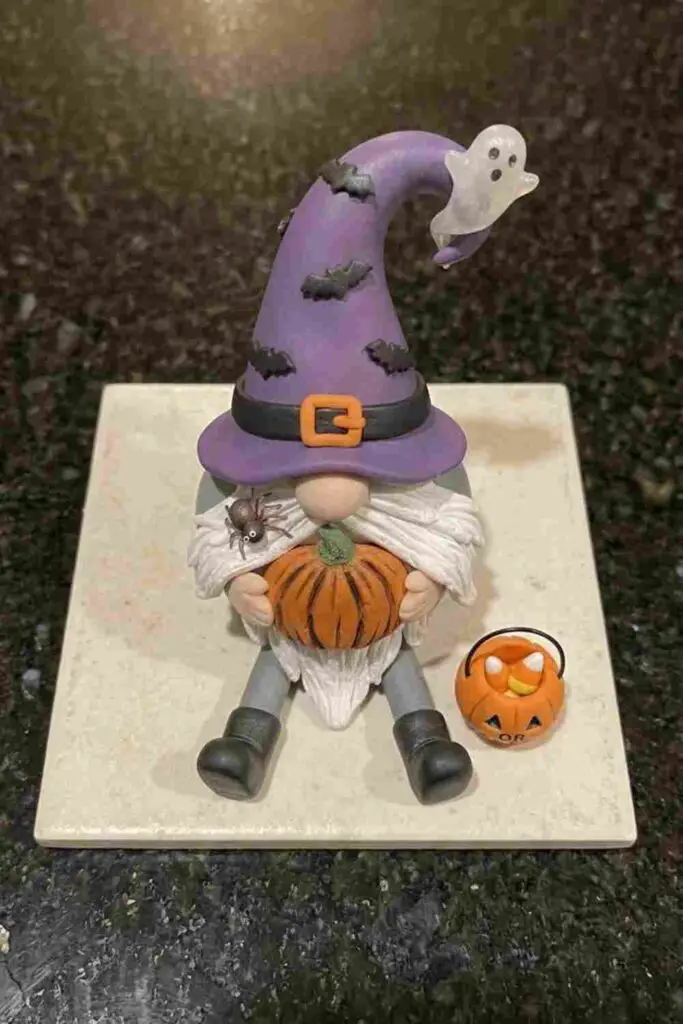
Don’t worry if you’ve never worked with polymer clay.
I’ll walk you through every tiny part, including the little tricks I wish someone told me earlier.
By the end, you’ll have a character that’s full of personality instead of looking factory perfect.
Choose Your Polymer Clay Type
→ Sculpey | FIMO Soft | Regular ←
Affiliate Disclaimer: Some of the links in this post may be affiliate links, which means I may earn a small commission if you choose to make a purchase through them – at no extra cost to you. I only share products that genuinely fit this project and can help make your ceramic mug clay craft process easier and smoother. Your support helps keep ideas like this coming.
Supplies Needed To Make Polymer Clay Halloween Gnome
Keep everything within arm’s reach before you begin.
- Polymer clay (white, black, orange, purple, green, gray, flesh color)
- Clay roller or acrylic rolling pin
- Precision craft blade OR anything that can cut with decent precision
- Ball stylus tool
- Needle tool or toothpick
- Silicone shaping tools (optional but helpful)
- Soft paintbrush
- Tile or ceramic baking surface
- Oven
- Fine grit sandpaper (optional)
- Matte or satin varnish (optional)
Before You Start
A quick thing that changes everything.
Don’t chase perfection.
Seriously.
Tiny fingerprints, uneven folds, and slightly crooked hats often make cute polymer clay gnomes feel much more alive.
I actually stopped fixing every little bump, and my projects started looking better. Funny how that works, isn’t it?
Step 1 – Build the Main Body
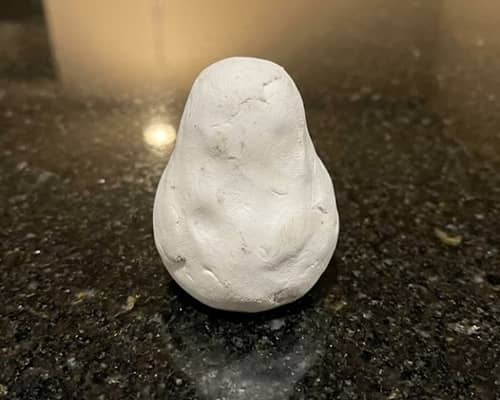
Everything starts with a solid foundation.
Roll a medium-sized piece of white polymer clay into a smooth egg shape around 6 cm tall.
This becomes the body. Stand it upright and gently flatten the bottom by pressing it onto your tile. The body should stand without wobbling.
Now slightly taper the upper section so the shoulders naturally narrow toward the neck.
Don’t create a neck yet. In any case, the most of it will be hidden by the cap and beard.
Next, lightly press both sides to give the body a soft pear-like silhouette instead of a perfect oval.
This tiny adjustment makes the finished polymer clay halloween gnome look much more natural.
If the clay becomes sticky, leave it alone for two or three minutes. I used to keep touching it, which honestly made everything worse.
Before moving on, check from every angle.
Is it leaning?
Fix it now rather than later.
Step 2 – Make the Boots, Hands and Signature Pumpkin Belly
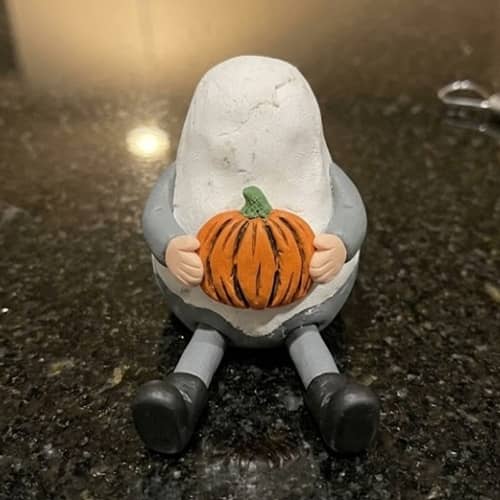
Here’s where this project gets its own personality.
Instead of making a plain gnome, we’ll create a little pumpkin belly that peeks from underneath the beard.
It’s inspired by the playful style often seen in pumpkin gnome W/dangling Legs decorations, but this version stays completely sculpted in polymer clay.
Roll two tiny black teardrops for boots.
Flatten one end slightly.
Attach them near the bottom front using gentle pressure. If needed, score both surfaces lightly with a needle before attaching.
Now roll two thin gray cylinders about 2 cm long.
These become dangling legs. Attach them underneath the body so the boots hang naturally. They shouldn’t touch the table completely.
For the pumpkin belly, roll an orange ball about 2.5 cm wide.
Flatten it slightly.
Using the needle tool, press shallow grooves from top to bottom, creating realistic pumpkin segments. Add a tiny green stem and one curled vine.
Attach the pumpkin to the center of the body.
Don’t worry if the pumpkin isn’t perfectly round. Mine wasn’t neither, and it honestly looked cuter because of it.
Finally, roll two tiny flesh-colored balls for hands and attach one on each side just above the pumpkin.
Step 3 – Sculpt the Nose and Layered Beard
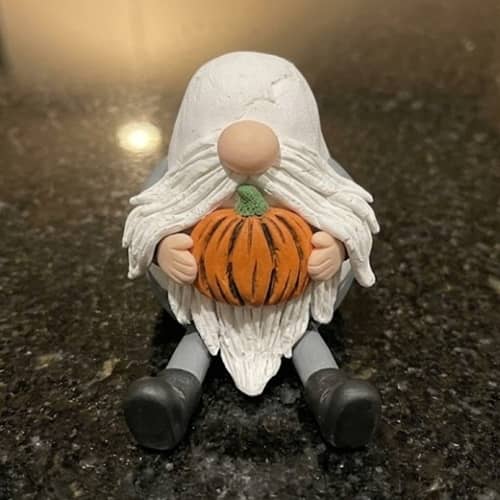
The beard hides lots of little imperfections.
Roll one flesh-colored ball around 1 cm.
Place it directly above the pumpkin.
Press gently until it becomes a rounded nose.
Now grab white clay.
Flatten it into a thin sheet roughly shaped like a rounded triangle.
Trim the bottom into gentle points.
Instead of leaving it flat, lift tiny sections using a needle tool to create flowing strands. Add another smaller beard layer over the first one so the beard has real depth.
Use your silicone tool to press shallow lines from top to bottom.
Not too many.
Less texture usually looks more convincing.
At this stage your gnome starts looking alive, and that’s always my favorite moment.
People often compare these styles to ceramic Halloween gnomes, but polymer clay lets you add much softer textures that ceramics simply don’t allow.
Also Read: 12 Viral Halloween Clay Figures That Look Too Real!
Step 4 – Create the Oversized Witch Hat
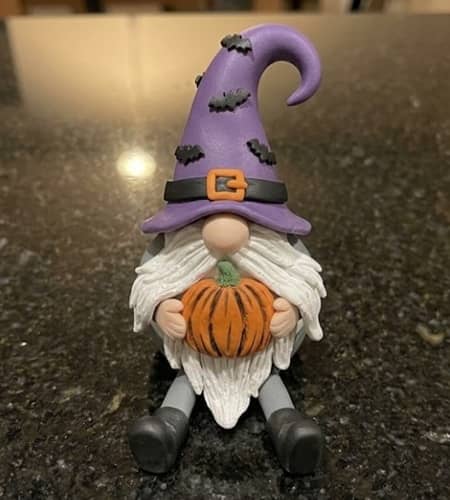
This is where Halloween finally arrives.
Roll purple polymer clay into a cone roughly 7 cm tall.
Curve the tip slightly.
Nobody likes a perfectly straight witch hat anyway.
Flatten the bottom opening so it fits comfortably over the beard and nose.
Place it without pressing too hard.
The nose should stick out while the eyes remain hidden beneath the brim.
Now decorate the hat.
Wrap a thin black clay strip around the base.
Add a tiny orange buckle.
Create several miniature stars, moons, or tiny bats from black clay.
Attach them randomly.
Don’t overdecorate.
Leaving little empty spaces actually helps every detail stand out.
This is one reason I keep coming back to polymer clay Halloween crafts instead of mass-produced decorations.
Step 5 – Add Halloween Details That Tell a Story
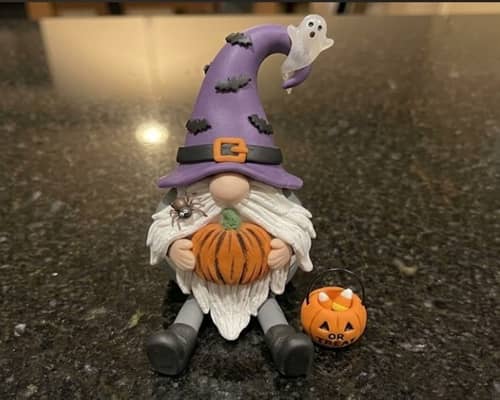
Now let’s make it unmistakably Halloween.
Create one tiny black spider.
Roll a microscopic ball for the body.
Attach eight thin legs.
Place it climbing onto the beard.
Make a tiny orange candy bucket sitting beside one dangling boot.
Roll a miniature ghost from white clay no taller than 1 cm.
Use a stylus to press two tiny eye holes.
Stick the ghost onto the side of the hat.
Tiny decorations like these separate ordinary polymer gnome designs from memorable ones.
You’ll notice many polymer clay gnome ideas online use oversized accessories. I prefer miniature storytelling instead because people discover new details every time they look.
Step 6 – Bake Without Stress
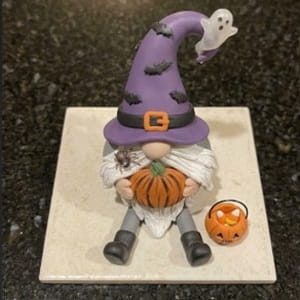
This step scares beginners more than it should.
Check your clay manufacturer’s baking instructions first.
Most polymer clay brands bake around 130°C (275°F), but always follow the package directions for your specific clay.
Place the gnome on a ceramic tile.
Bake for the recommended time according to its thickness.
Don’t guess.
Guessing usually ends with burnt hats.
After baking, leave everything untouched until completely cool.
It feels hard to wait, but warm polymer clay is still slightly flexible.
Mine once bent because I got impatient.
Lesson learned.
If desired, lightly sand rough edges after cooling and brush on a matte varnish.
That soft finish makes fimo clay gnomes and other handmade sculptures look beautifully finished without appearing plastic.
Step 7 – Personalize Your Gnome
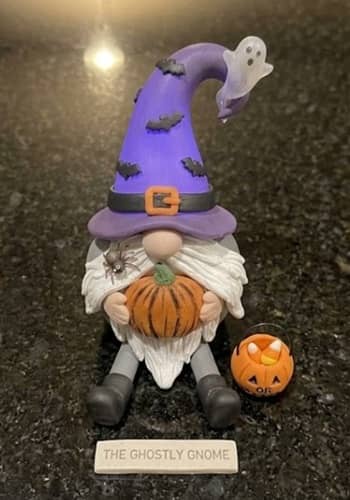
Here’s where your creativity quietly takes over.
Once cooled, you can leave your gnome exactly as it is or customize it.
Try adding tiny freckles to the nose.
Give the pumpkin metallic gold highlights.
Paint the hat with glow-in-the-dark details.
Glue a ribbon behind the hat if you want a hanging ornament.
These little changes also make wonderful fall-themed gnome ornaments for wreaths, shelves, tiered trays, or gift toppers.
Many people collect polymer clay Halloween gnomes, but making one that’s unmistakably yours always feels far more rewarding than buying one.
Better still, every new version teaches your hands something the last one didn’t.
Helpful Beginner Tips
- Condition your clay until it feels smooth before sculpting.
- Wash your hands between color changes to avoid smudges.
- Build from large shapes to tiny details.
- Chill soft clay for a few minutes if it becomes difficult to handle.
- Don’t press decorations too deeply or they’ll lose definition after baking.
- Photograph your progress before baking. It’s surprisingly useful for spotting crooked pieces.
Final Thoughts
One thing I’ve learned after making dozens of little clay characters is that personality almost always beats perfection.
The tiny thumbprint you forgot to smooth or the slightly tilted witch hat often becomes the detail people remember most.
That’s why I think handmade gnome clay crafts carry a warmth machines simply can’t imitate.
Once you’ve finished this polymer clay halloween gnome, try changing only one feature the next time – a mushroom hat, autumn leaves, or even a tiny raven companion.
Small experiments build real sculpting confidence, and before long you’ll naturally start creating original designs instead of copying tutorials. That’s when the craft becomes truly yours.
Also Learn To Make: Halloween Clay Frankenstein Using Polymer Clay





