Have you ever looked at a lump of air dry clay and wondered what you could actually make with it? This air dry clay chicken craft is one of my favorite beginner-friendly ideas because it doesn’t need a pottery wheel, kiln, or complicated sculpting tools.
We are going to turn a few simple clay shapes into a chunky little chicken with textured feathers, a funny comb, tiny feet, and layered wings.
The finished clay chicken looks handmade rather than factory-perfect, which is exactly what makes it charming.
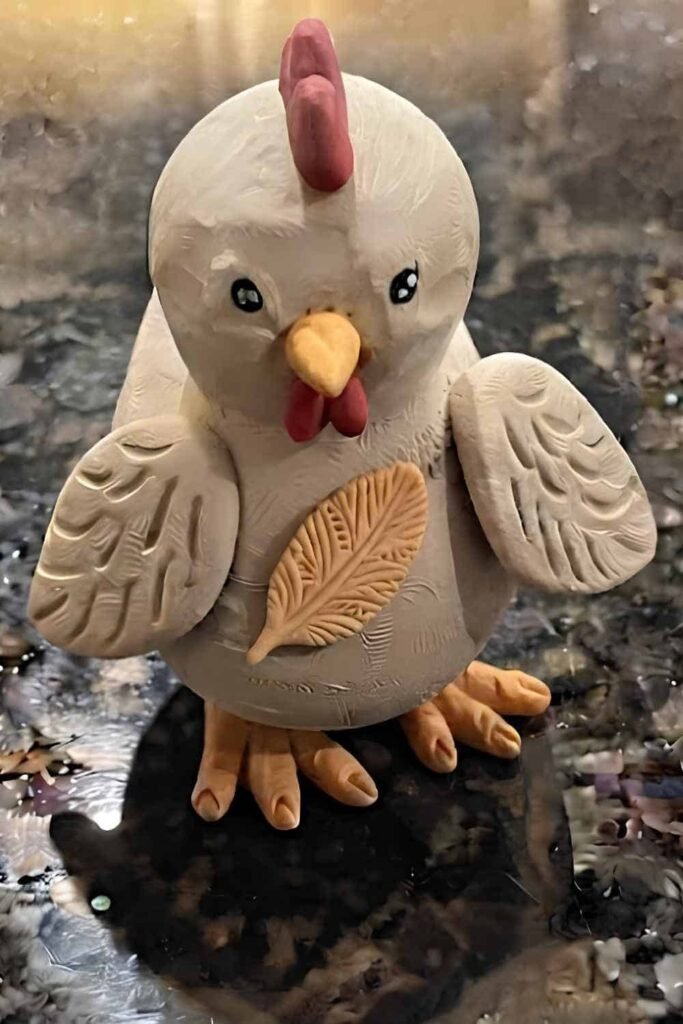
It also works beautifully as one of those air dry clay projects that kids and adults can make together.
What Makes This Air Dry Clay Chicken Craft Different?
I wanted this chicken to have some personality.
Instead of making a completely smooth bird, we will deliberately add small imperfections, feather marks and slightly uneven features. Why? Because a handmade chicken shouldn’t look like it came out of a machine.
The main body will be rounded and slightly plump.
The head will be a little larger than you might expect, giving it that cute, almost cartoon-like appearance.
The wings will sit on top of the body instead of being completely flat against it.
And there is one more little trick.
We’ll use a simple pointed tool to create feather grooves rather than trying to sculpt individual feathers.
It saves time and gives the surface much more visual interest.
This makes the project suitable for clay crafts for kids, preschool-style kid activities, classroom craft sessions, or a relaxed afternoon of clay art at home.
You May Also Like: Paper Plate Chicken Craft for Kids (Free Template)
Materials Needed To Make Air Dry Clay Chicken
You don’t need a giant box of sculpting equipment.
Basic materials
- Air dry clay
- Acrylic paint
- Small paintbrushes
- A toothpick or pointed wooden stick
- A blunt butter knife or clay tool
- A small cup of water
- Parchment paper or a smooth work surface
- Optional: clear acrylic sealer
- Optional: black fine-tip marker
- Optional: tiny rolling pin or smooth bottle
Suggested clay colors
For a classic chicken:
- White or cream for the body
- Red for the comb and wattle
- Orange or yellow for the beak and feet
- Black for the eyes
But don’t feel trapped by realistic chicken colors.
A pale pink chicken, soft blue chicken, yellow chick, or even a green fantasy bird can be adorable.
This is clay art, not a biology assignment.
How to Make an Air Dry Clay Chicken Craft
Step 1: Prepare and Condition the Air Dry Clay
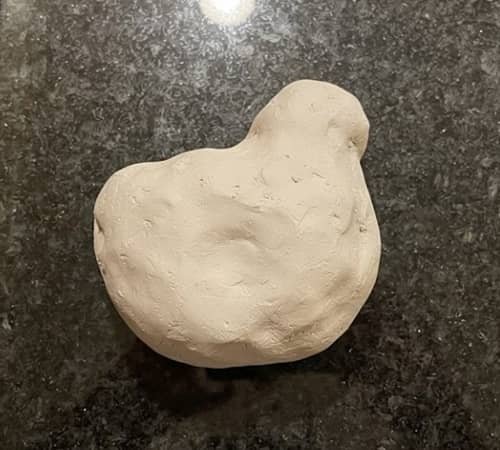
Start by taking a piece of air dry clay and kneading it between your palms.
Don’t rush this part.
Press the clay, fold it, roll it and squeeze it gently for about 2 to 3 minutes.
The goal is to make the clay flexible and remove any obvious cracks or hard areas.
If your clay feels extremely stiff, slightly dampen your fingertips and continue kneading.
Avoid adding lots of water directly onto the clay because too much moisture can make the surface sticky and difficult to shape.
For this chicken, divide your clay into several portions:
- One large portion for the body
- One medium portion for the head
- Two smaller portions for the wings
- Two tiny portions for the feet
- A very small portion for the beak
- A small portion for the comb
- Another tiny portion for the wattle
Keep the smaller pieces covered with a slightly damp cloth or plastic while you work so they don’t start drying prematurely.
Step 2: Shape the Chickens Body
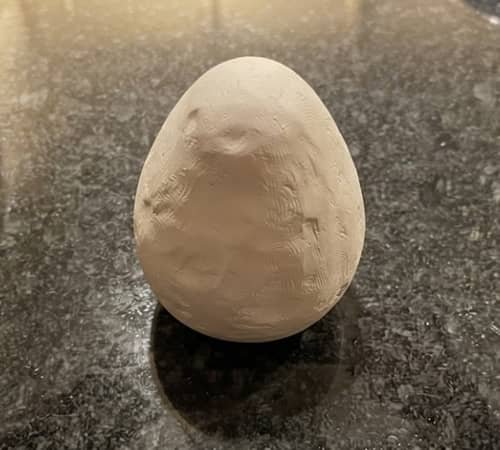
Take the largest piece of clay and roll it between your palms.
You want to create a rounded, slightly egg-shaped body.
Don’t make it perfectly symmetrical.
A tiny bit of unevenness will actually make the finished chicken look more handmade.
Now gently press the bottom against the granite so the chicken can eventually stand upright.
The body should be wider around the middle and slightly narrower toward the top.
Think of a small plump egg.
Once you’re happy with the basic shape, use your thumb to gently smooth obvious cracks.
Don’t overwork it though. A few tiny handmade marks are fine.
Check the body from the front and side.
Does it stand without falling?
If it keeps tipping over, flatten the bottom just a little more.
Step 3: Add the Oversized Chicken Head
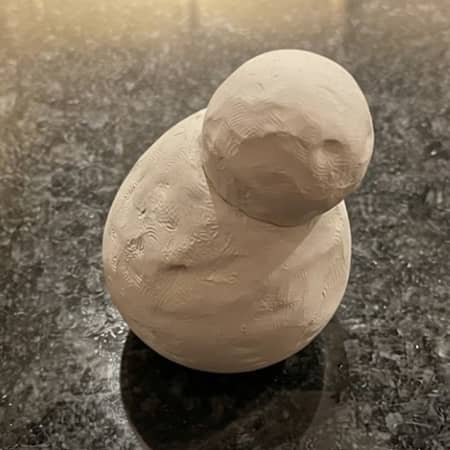
Now take the medium clay portion.
Roll it into a ball first.
Then gently press and rotate it until you have a rounded head that is slightly wider than the top of the body.
This is where our chicken starts getting its personality.
I like making the head a little oversized because it gives the finished animal craft a playful look.
It also makes the project easier for beginners because you don’t need to sculpt tiny realistic proportions.
Place the head on top of the body.
Don’t immediately glue it.
First, gently press the two pieces together where they meet.
Blend the seam with your fingertip until the head looks attached rather than simply sitting on top.
If a small crack appears around the neck, smooth it with a slightly damp fingertip.
The head should lean forward just a tiny bit. That gives the chicken a curious expression.
Step 4: Sculpt the Wings and Add Feather Texture
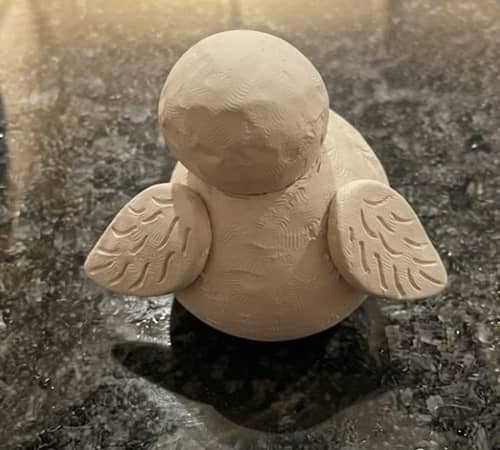
Take one small portion of clay and flatten it between your fingers.
Create a simple oval shape.
Now pinch one end slightly so it resembles a soft teardrop.
This is the first wing.
Repeat the process for the second wing.
Try to keep them similar, but don’t obsess over perfect symmetry.
Mine rarely come out exactly the same, and honestly, that is part of the charm.
Place the wings on either side of the body.
Press them gently into place.
Here’s the fun part.
Take a toothpick and draw short curved lines across each wing.
Start near the upper portion and work downward, following the direction of the wing.
Don’t carve dozens of lines.
About 5 to 7 feather grooves on each wing is enough.
You can also add two or three very shallow curved marks onto the body beneath the wings.
This creates the suggestion of feathers without making the chicken look overly busy.
This little texture trick is useful for lots of clay animals and other clay DIY projects too.
Step 5: Make the Comb, Beak and Wattle
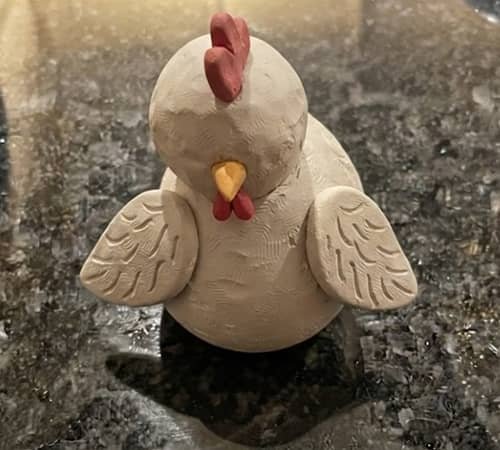
Now we give our chicken a face.
Take a tiny piece of red clay and flatten it.
Cut or pinch three small rounded points along the top edge to create the classic chicken comb.
It doesn’t have to be perfect.
In fact, a slightly wobbly comb makes the bird look much more handmade.
Attach it to the top of the head with gentle pressure.
For the beak, take a very small piece of orange or yellow clay and roll it into a tiny cone.
Flatten it slightly, then pinch the front into a point.
Attach it to the center of the face.
For the wattle, make two tiny red teardrop shapes and place them underneath the beak.
At this point, your clay chicken should actually start looking like a chicken.
Funny how three tiny pieces can change the entire sculpture, right?
Step 6: Add Tiny Chicken Feet
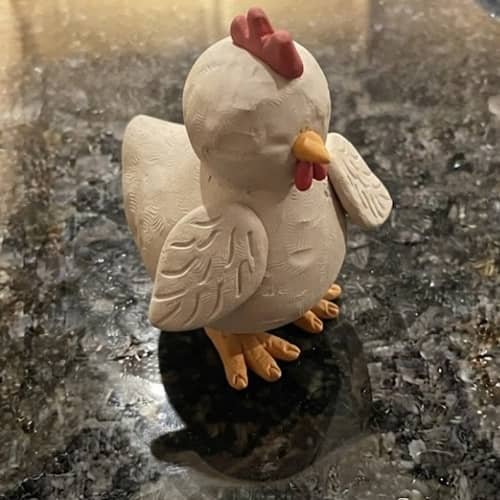
The feet are small, but they make a surprisingly big difference.
Take two tiny pieces of orange or yellow clay.
Roll each piece into a short cylinder.
Flatten one end slightly.
Then use your toothpick to separate the front into two or three tiny toes.
You don’t need realistic chicken feet. They are too tiny for that.
Instead, aim for simple little three-toed shapes.
Attach the feet underneath the body.
Press the back of each foot gently into the clay so it stays connected.
Now check whether your chicken stands upright.
If the feet are too small to support the body, flatten them slightly more. You can also make the toes wider.
The chicken should stand comfortably without leaning backward.
Step 7: Refine the Details Before Drying
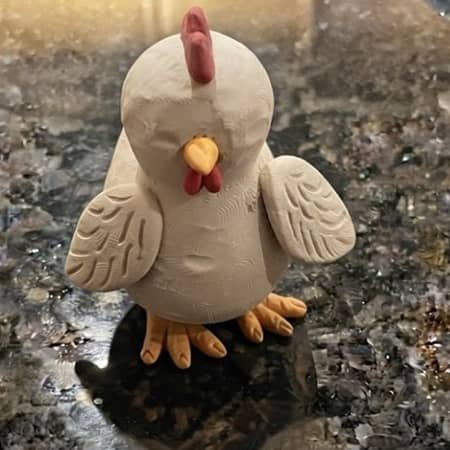
Before the clay begins drying, give your little chicken one final inspection.
Look at it from the front.
Then turn it sideways.
Does the head look securely attached?
Are the wings firmly pressed into the body?
Can the chicken stand on its own?
This is also the best moment to clean up unwanted fingerprints or deep cracks.
Use a barely damp fingertip to smooth rough areas.
But don’t try to make everything perfectly smooth.
Leave the feather texture.
Leave a little unevenness around the comb.
Those tiny imperfections are what give handmade cute clay projects their character.
If you want a more expressive bird, gently tilt the head to one side before leaving it to dry.
That tiny change can make the chicken look curious rather than simply standing there.
Step 8: Let the Air Dry Clay Chicken Dry Completely
This part requires patience.
Place the finished chicken somewhere dry and undisturbed.
Don’t put it directly under a fan or use a hairdryer to speed things up.
Rapid drying can sometimes cause cracks, especially in thicker sections like the body and head.
Depending on the size of your chicken, the clay may take anywhere from 24 hours to several days to become completely hard.
Check the underside too.
The outside can feel firm while the inside is still drying.
I usually prefer giving thicker sculptures extra drying time rather than painting them too soon.
If the clay manufacturer gives a specific drying time, follow that recommendation first.
Step 9: Paint Your Chicken
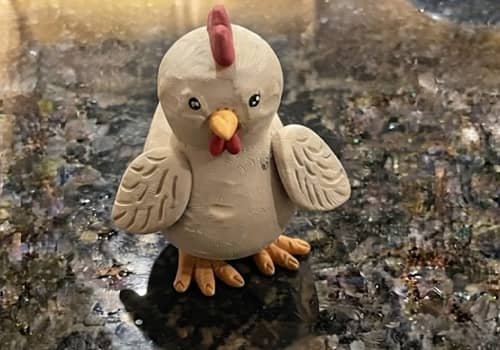
Once the sculpture is completely dry, it’s time for the transformation.
Start with the body.
I recommend using an off-white or creamy white rather than pure bright white. It gives the chicken a softer handmade appearance.
Apply thin coats instead of one thick coat.
Let the first coat dry before adding another.
Paint the comb and wattles red.
Use orange or yellow for the beak and feet.
For the eyes, you have two easy choices.
You can paint two tiny black dots, or use a fine-tip black marker after the paint has dried.
I prefer slightly uneven eyes for this project. They make the chicken look playful.
Want a more detailed finish?
Add a tiny white dot inside each black eye.
You can also lightly brush a pale gray or beige color around the wing edges to make the feather texture stand out.
Don’t cover the grooves completely.
The whole point of adding those lines earlier was to give the paint somewhere interesting to settle.
Step 10: Add One Small Handmade Finishing Detail
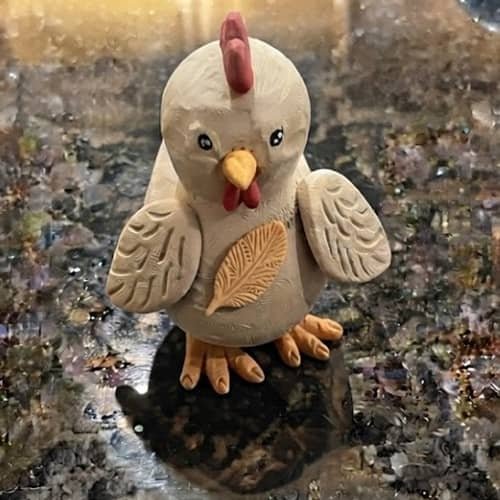
Here’s my favorite part.
Instead of covering the whole chicken with extra decoration, add just one small detail.
You could paint three tiny dots near the wing.
Or add a soft beige patch around the neck.
Or draw a few subtle feather marks along the chest (Which is what I did here).
For kids, I like letting them choose this part themselves.
Maybe their chicken gets blue wings.
Maybe it has a purple comb.
Maybe it’s not even a normal chicken anymore and becomes a tiny fantasy bird.
That’s completely fine.
If you’re making a group of chicken crafts, give every chicken a different expression or color. Suddenly you have a tiny clay farmyard.
If desired, finish the completely dry painted sculpture with a suitable water-based clear acrylic sealer.
Use it according to the manufacturer’s directions and let it cure fully.
Easy Variations for Your Clay Chicken
Once you’ve made one, it’s hard to stop at one.
Try making a clay rooster by giving the sculpture a slightly taller comb and a more upright tail.
You can also make a tiny chick by reducing the body size and using a softer yellow paint.
For younger children, skip the tiny feet and make simple flat clay feet instead.
Want to turn this into a classroom project?
Give every child the same basic body shape but let them customize the wings, colors, expressions and combs.
You’ll end up with a collection of completely different clay sculptures even though everyone started with the same instructions.
You can also build a small collection of clay animals around the chicken.
A Clay Pig, Clay Sheep, Clay Duck or little Clay Cat can become part of a homemade farm scene.
That turns one simple animal craft into a much bigger weekend project.
Final Thoughts
The interesting thing about an air dry clay chicken craft is that the finished chicken doesn’t need to be technically perfect to look good.
In fact, the slightly crooked comb, uneven wings and funny expression can become its best features.
That’s something I try to remember whenever I make handmade clay art. Texture also matters more than people think.
A few carefully placed feather grooves can create the illusion of detail without requiring advanced sculpting skills.
Once you understand that trick, you can apply the same idea to almost any small animal sculpture.
So don’t stop with one chicken. Change the colors, alter the expression, make a rooster, or build an entire little clay farmyard.
Also Read:





